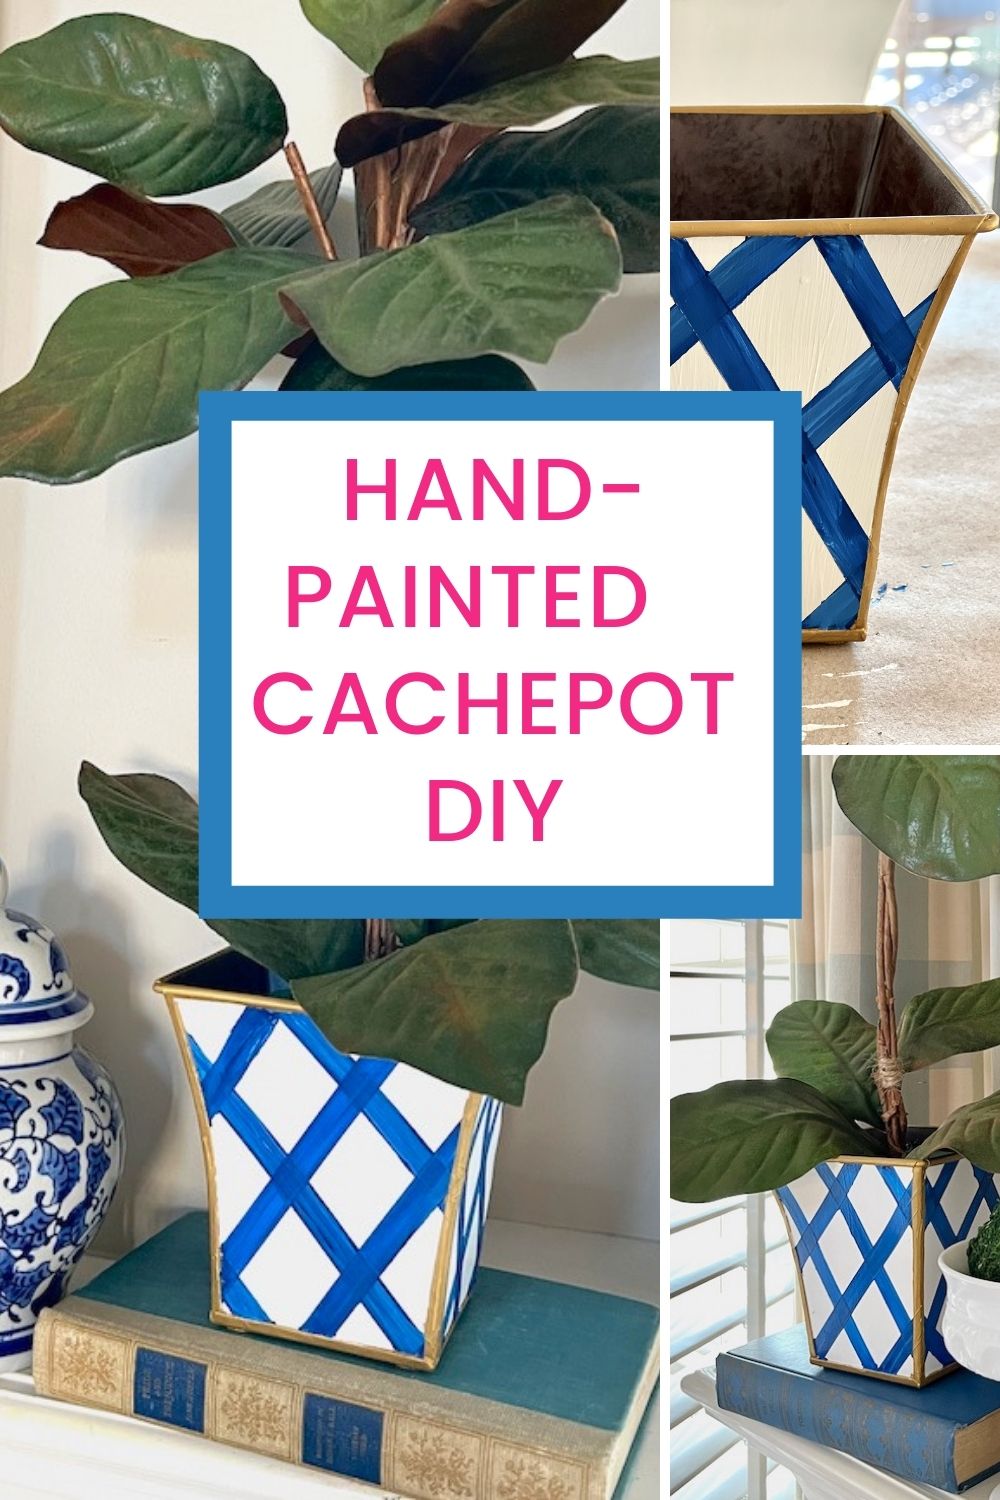
DIY Painted Pots: How to Transform a Simple Planter with Chinoiserie Style
Love DIY painted pots and adding a personal touch to your home decor? This hand-painted cachepot project is the perfect way to blend timeless Chinoiserie charm with your own creative style!
Whether you’re searching for fresh flower pot painting ideas or want to try your hand at creating painted pots that look high-end, this step-by-step tutorial will guide you through transforming an ordinary planter into a stunning decorative piece.
(This post contains affiliate links, so I may earn a small commission when you make a purchase through links on my site at no additional cost to you. As an Amazon Associate I earn from qualifying purchases.)
Sometimes you just need a fun little DIY project!
I’ve had my eye on cute little hand painted cachepot planters for a while now. I’m especially drawn to anything with a little Chinoiserie flair.
There are so many pretty flower pots to choose from, but I always love a good DIY!
It’s probably the little stubborn part of me that always thinks I can just do it or make it myself.
Sometimes my endeavors work out beautifully and other times not so much, but I always like the adventure of trying to figure it out for myself.
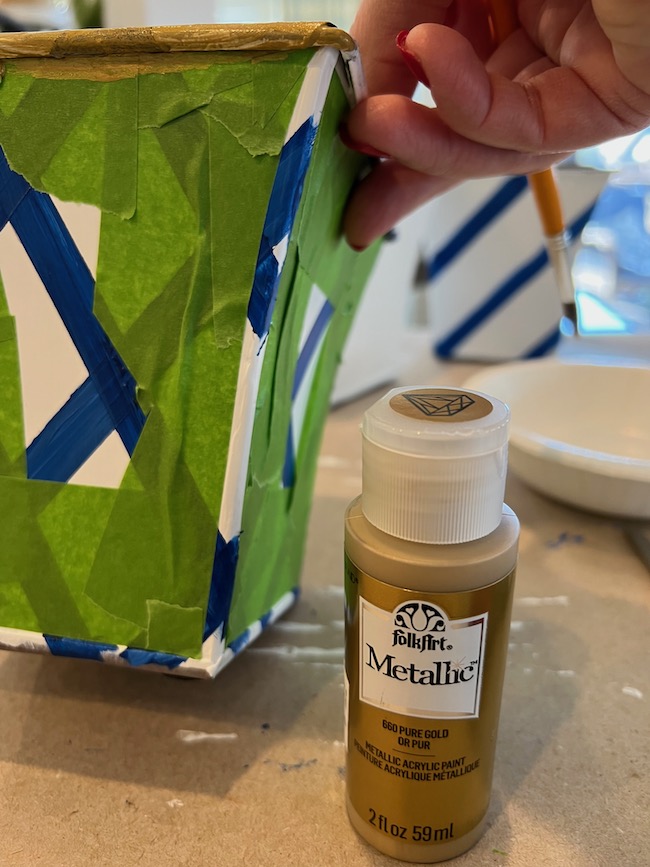
So in my best “I think I can” spirit, I gathered some small tin planters I had on hand, a little Frog Tape, and some blue and white and metallic gold acrylic paints and set to work on my DIY planter pots.
What is a cachepot?
Before we get started with this little cachepot DIY, here’s a little cachepot history and reasoning behind their use.
First of all, let’s talk about how to pronounce “cachepot”. Is it “cash pot” or “cash poe”? Here’s a fun little video from Ballard Designs to help with that answer.
So, just what is a cachepot? Cachepot is a French term, and cachepot decor originated in the late 1800s. It’s simply a decorative outer pot used for displaying your potted plants.
Decorative cachepots allow the small plants to remain in their original containers from the nursery (now, usually a plastic container with multiple drainage holes), and the nursery pot is placed in the decorative outer pot eliminating the need to repot the plant.
The decorative pot, or cachepot, hides the nursery container. As your plant grows, you can repot it into a larger plastic inner pot.
Benefits of Using Cachepots:
There are several benefits to using a cachepot with an inner nursery container instead of repotting your plant into a decorative pot.
- It’s easier to move the plants because you can easily separate the inner plant from the heavy decorative container.
- It affords better watering and drainage because you can remove the nursery container, set it in your sink, and let all of the water drain thoroughly before replacing in the cachepot.
- You can keep a better eye on the roots of your plants with the nursery container.
- It protects your furniture from drainage.
Plus, one of my personal favorites — you can easily change up your decor using different cachepots!! It’s the perfect combination of good indoor gardening practices and home decor styling! Win-Win!
How to Paint Your Own DIY Small Planter Cachepot: A Step-By-Step Tutorial
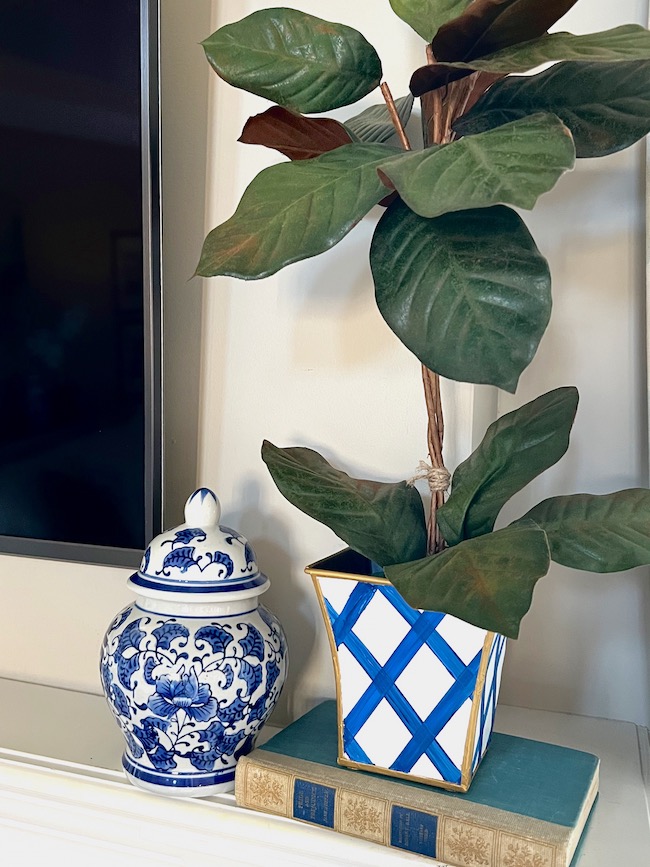
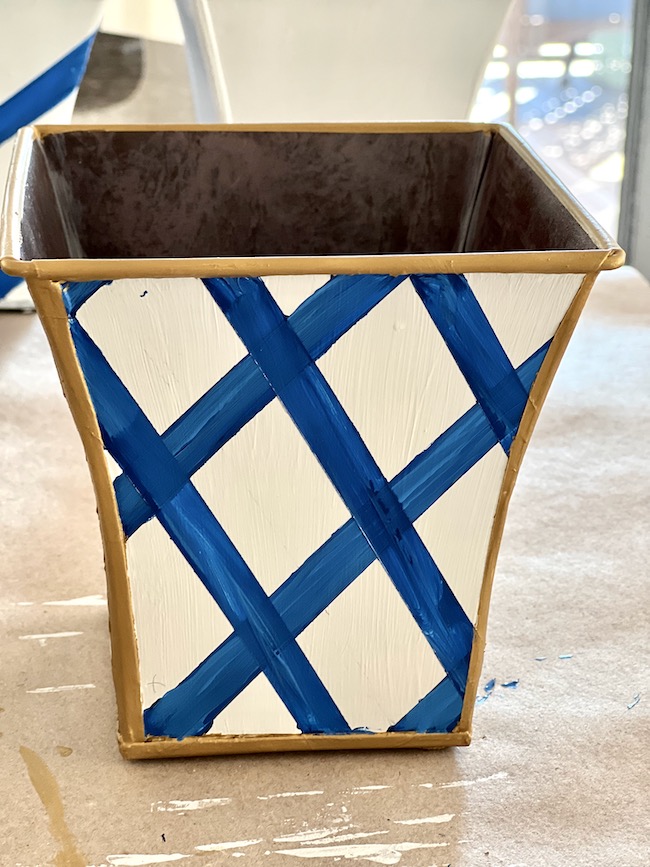
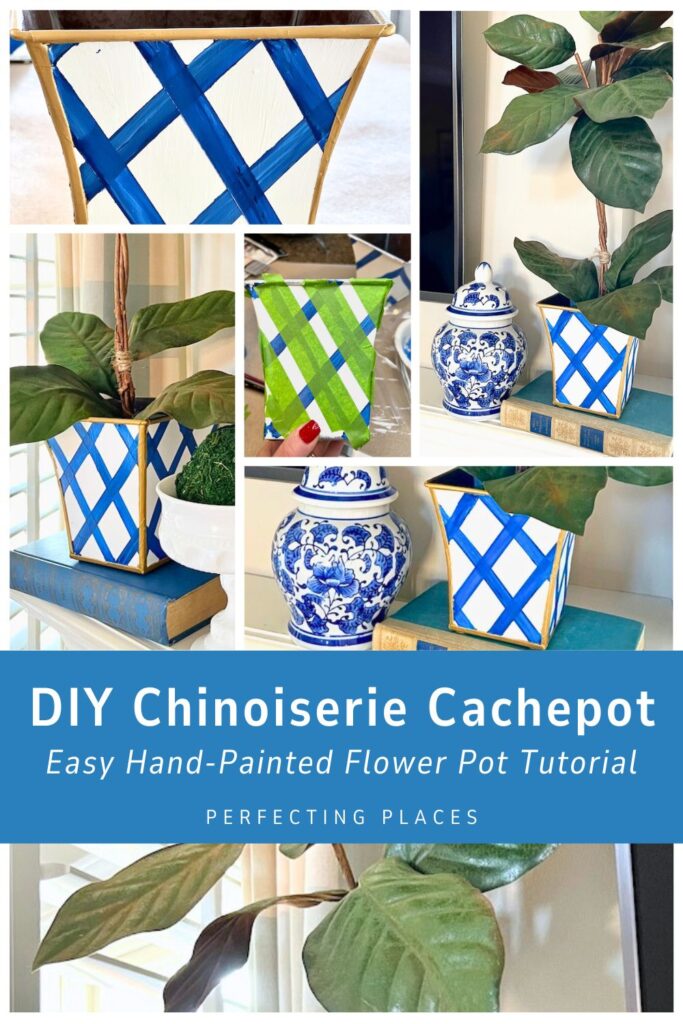
I love the timeless and elegant look of these small planters! I’m always drawn to classic blue and white Chinoiserie styling, and decided a trellis pattern would be perfect for my little indoor painted pots. I wanted an elevated look for the planters, so added a little gold trim around the edges for an elegant look.
Supplies for Your Hand Painted Flower Pots
- small metal containers (The pot I used is no longer available, but this set of small galvanized planters is similar in size.)
- acrylic craft paint, satin finish (I used white, two different shades of blue, and metallic gold.) You can certainly choose different colors if you prefer a different color scheme.
- small flat paint brush
- pencil
- Frog Tape
- a straight edge (I just used a folded sheet of paper for my straight edge.
Step-By-Step Tutorial for DIY Cachepots
1. Paint the containers white.
I applied a base coat of white acrylic paint to the entire pot with a paint brush, but you could certainly use white spray paint for this step. I found it easier to just use a paint brush for this small project. You will need to complete 2 – 3 coats of paint to fully cover your pots. Allow about an hour of dry time between each layer of paint. You could also use chalk paint for this step if you prefer.

2. Mark off your trellis lines.
After the coat of white paint has fully dried, it’s time to paint the trellis lines. I found it helpful to use a straight edge and pencil for this. You can go ahead and mark all of your criss-crossing lines (in both directions) to form the lattice pattern.

TIP: When I drew out the pattern on my first planter, I only drew one direction of lines first, then applied the painter’s tape and painted those. After those lines were dry I marked, taped, and painted on the criss-crossing lines. You don’t have to do it this way. Just go ahead and draw on all of your criss-crossing lines (in both directions) before you tape.
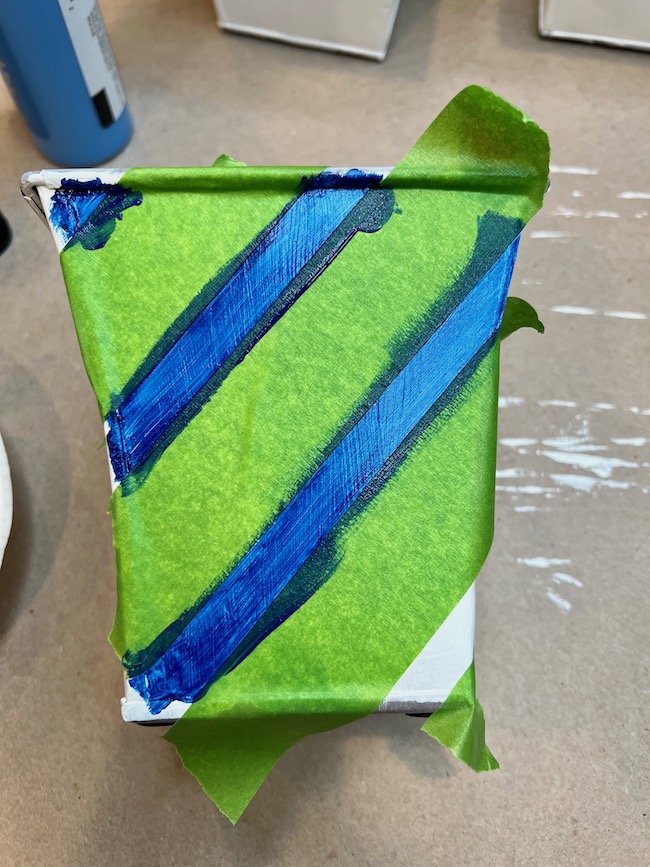
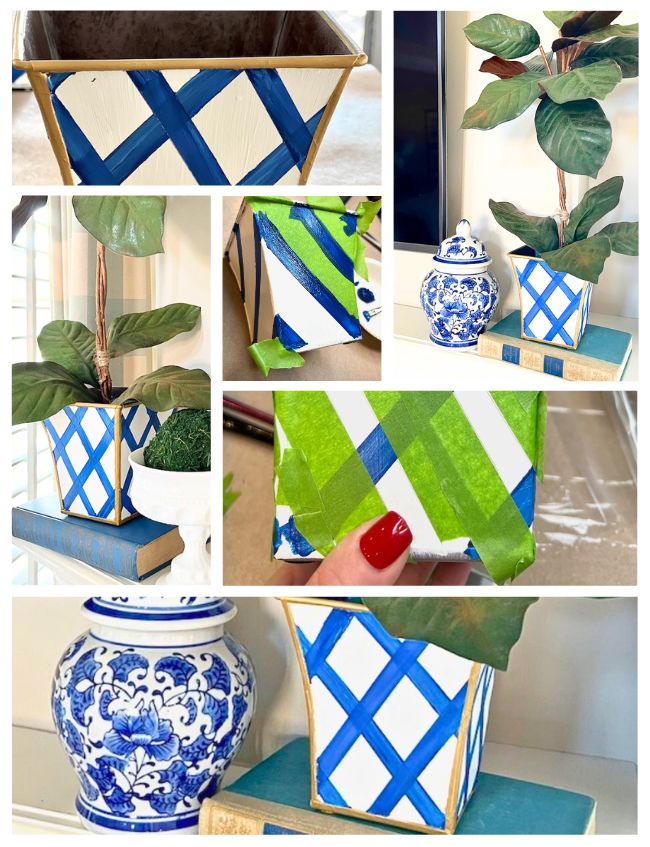
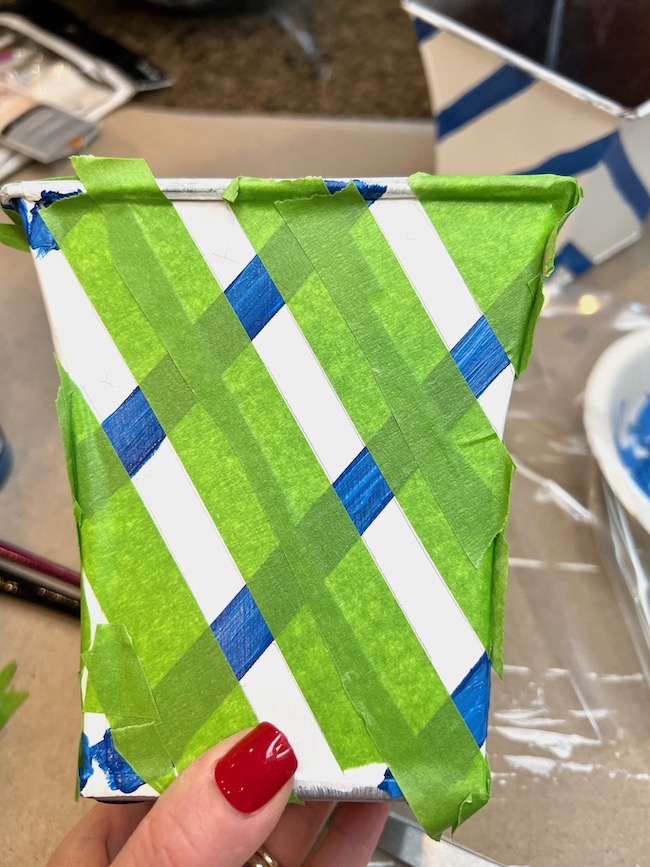
3. Tape off your lines on the small pot.
Even if you penciled in the lines in both directions, when it’s time to tape, only tape off your lines in one direction at a time. It’s a good idea to put a small x on the lines to help me remember which areas needed to be painted.
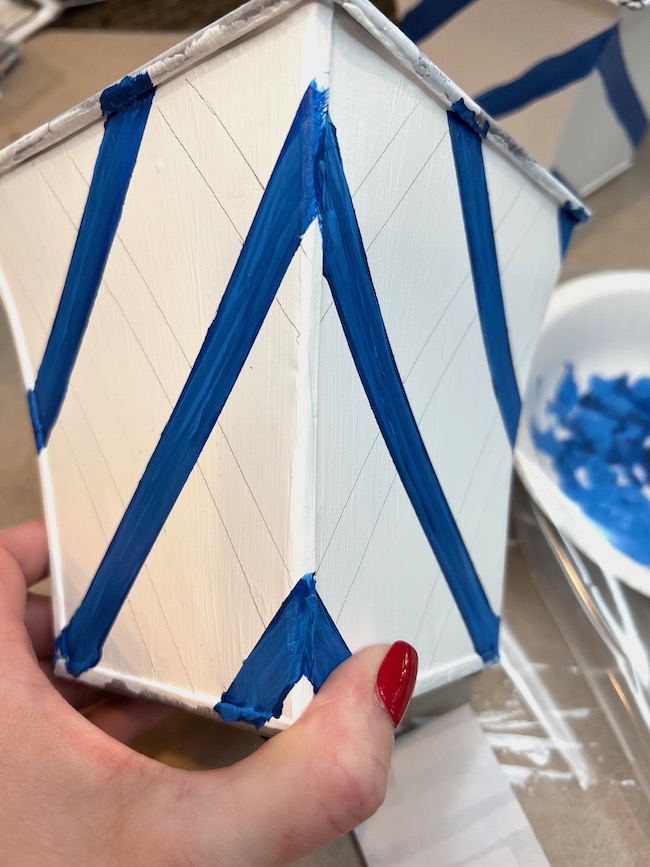
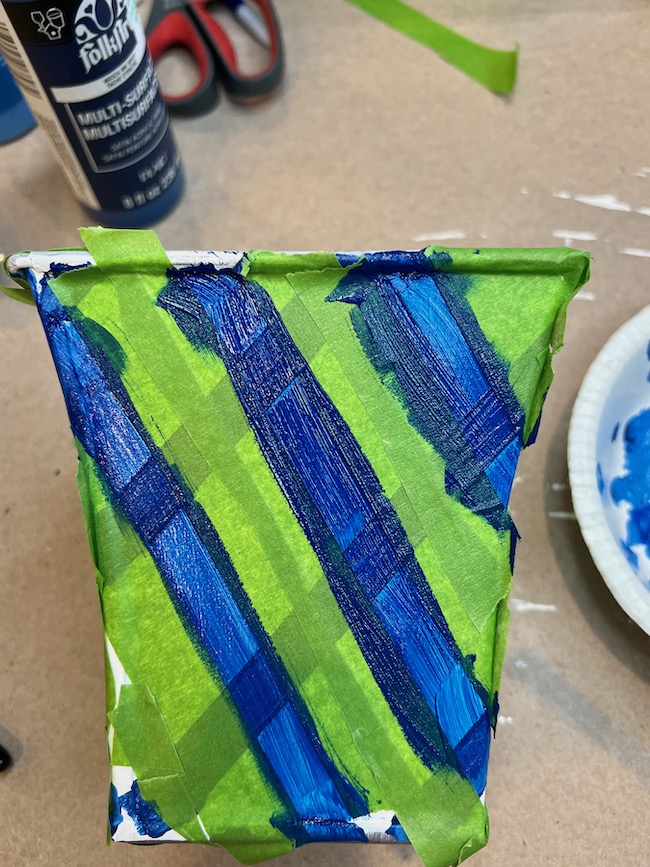
4. Paint your first direction of lines.
I used the small flat paintbrush to paint on the darker blue first. While the darker blue was still wet, I brushed in a little lighter blue paint as well to give the lines a little color variation and dimension. This additional blue color is optional. I just really like the variegated look created by the two colors.
5. Let your first set of lines dry completely.
It will take at least an hour for your first set of lines to completely dry.
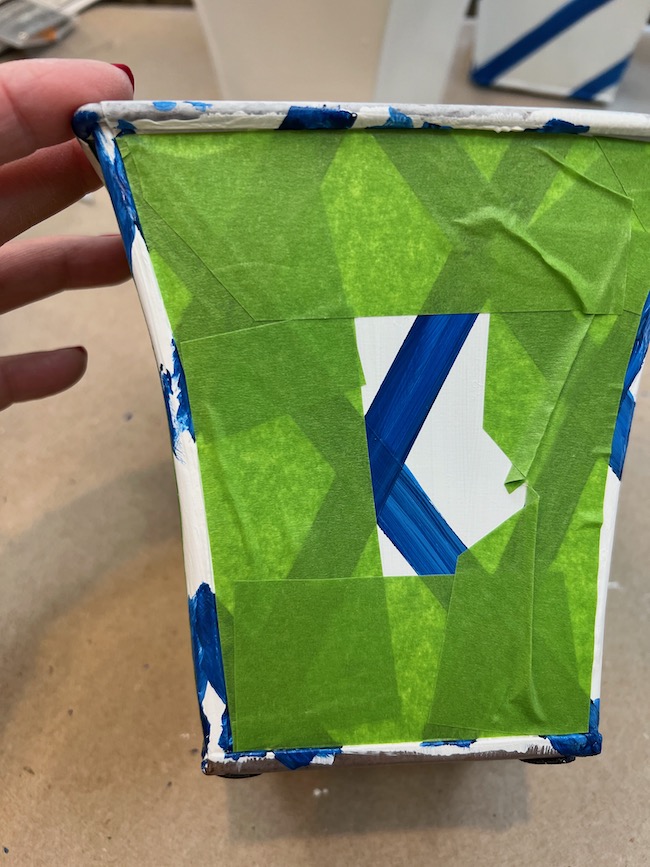
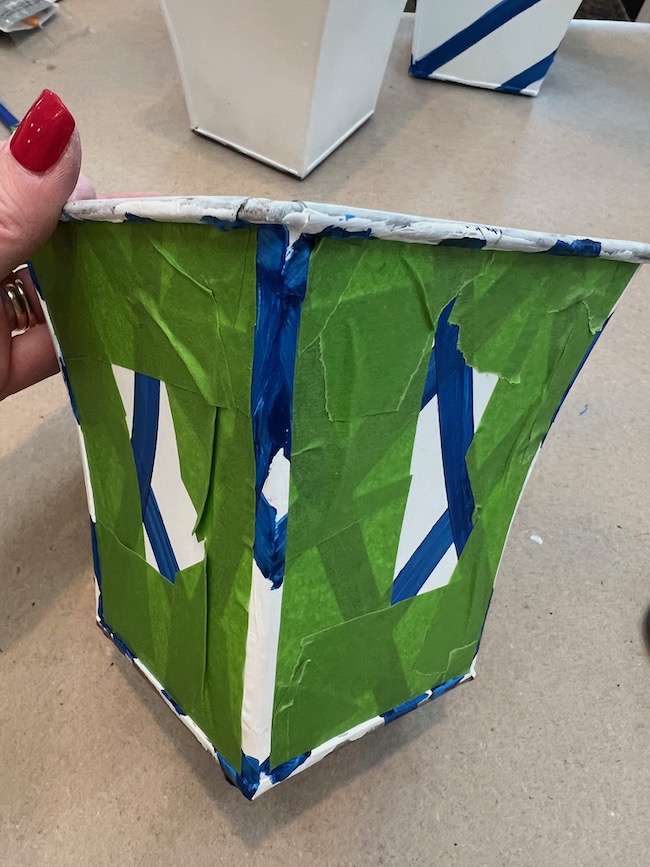
6. Remove the tape from your first set of lines, then tape off all of the lines in the opposite direction.
7. Repeat the same steps above for painting the two shades of blue lines in the opposite direction.
Once this second set of lines has dried, you can remove the Frog Tape to reveal the trellis pattern.
8. Tape off all of the edges to form the gold borders.
I love the look of gold trim on metal cachepots for an elevated look. I created gold borders at the rim of the cachepot, at the bottom of the pot, and along all of the corners. Since my pots had flat squared edges, I was able to paint the corner edges.
If you’re using a cachepot that has no side edges similar to this one with a round opening and bottom, you can just apply the gold paint to the top rim and the bottom edge.
Adding the gold trim is a great way to elevate the look of your pots.
9. Use a paint brush to paint on the gold metallic paint.
Let the first coat dry and then add a second coat. It will take two coats of the gold paint to fully cover and achieve the look you want.
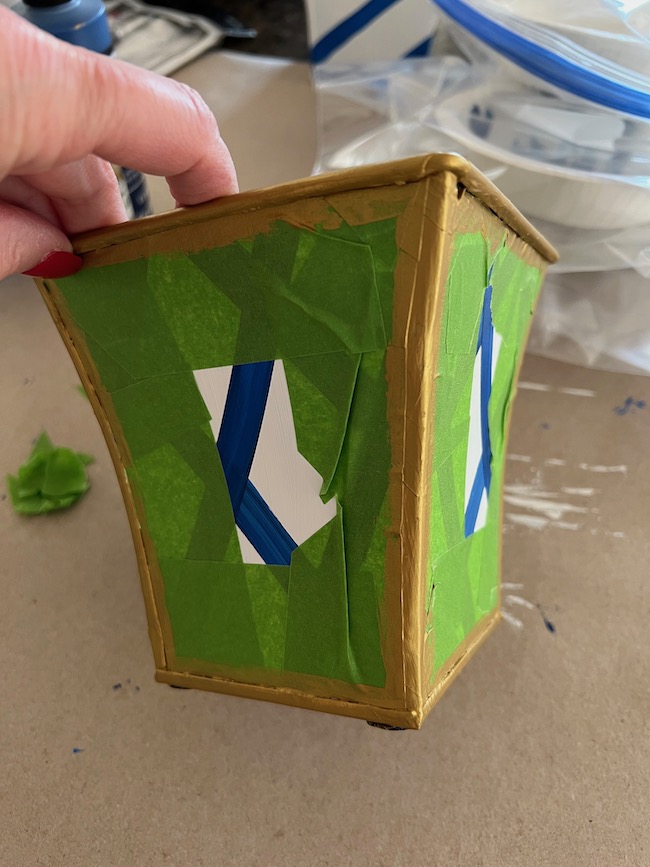
10. After the gold paint dries, remove the tape to see your beautiful hand painted tole cachepot!

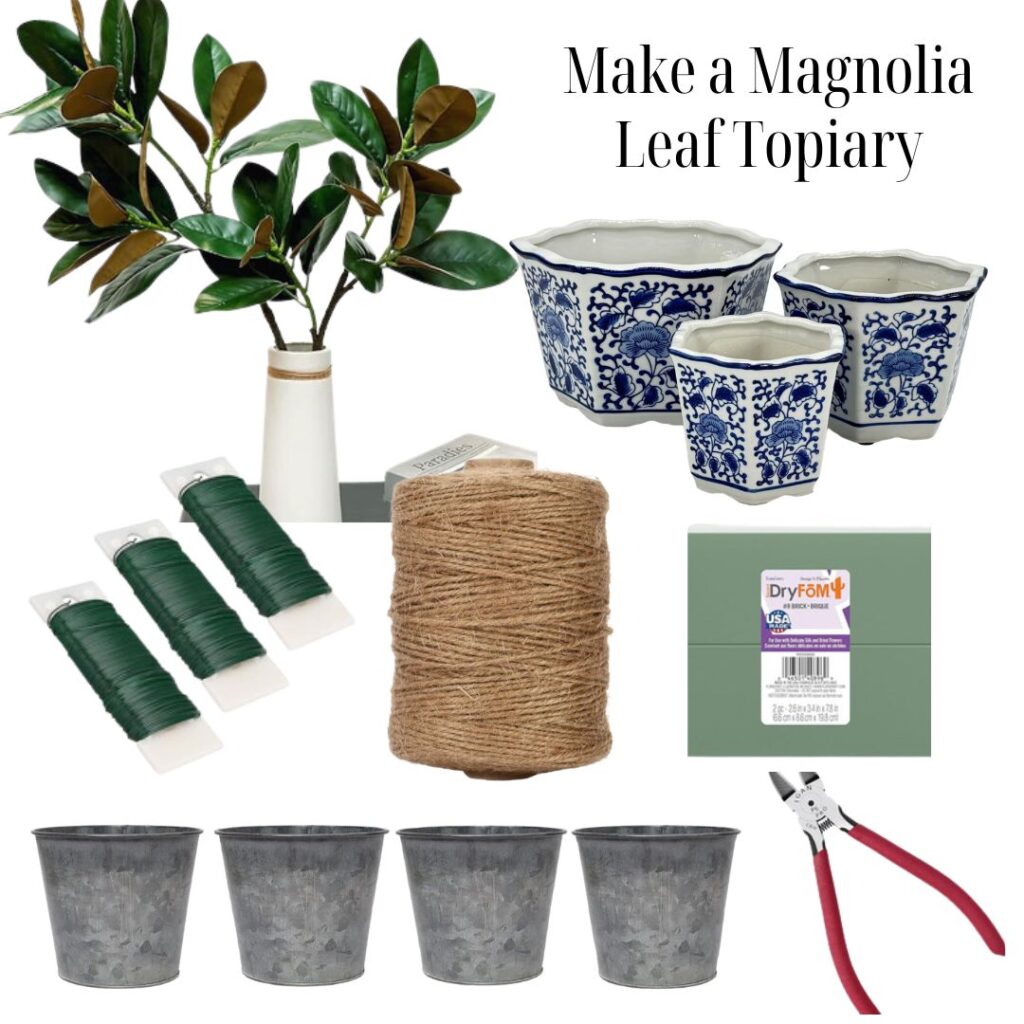
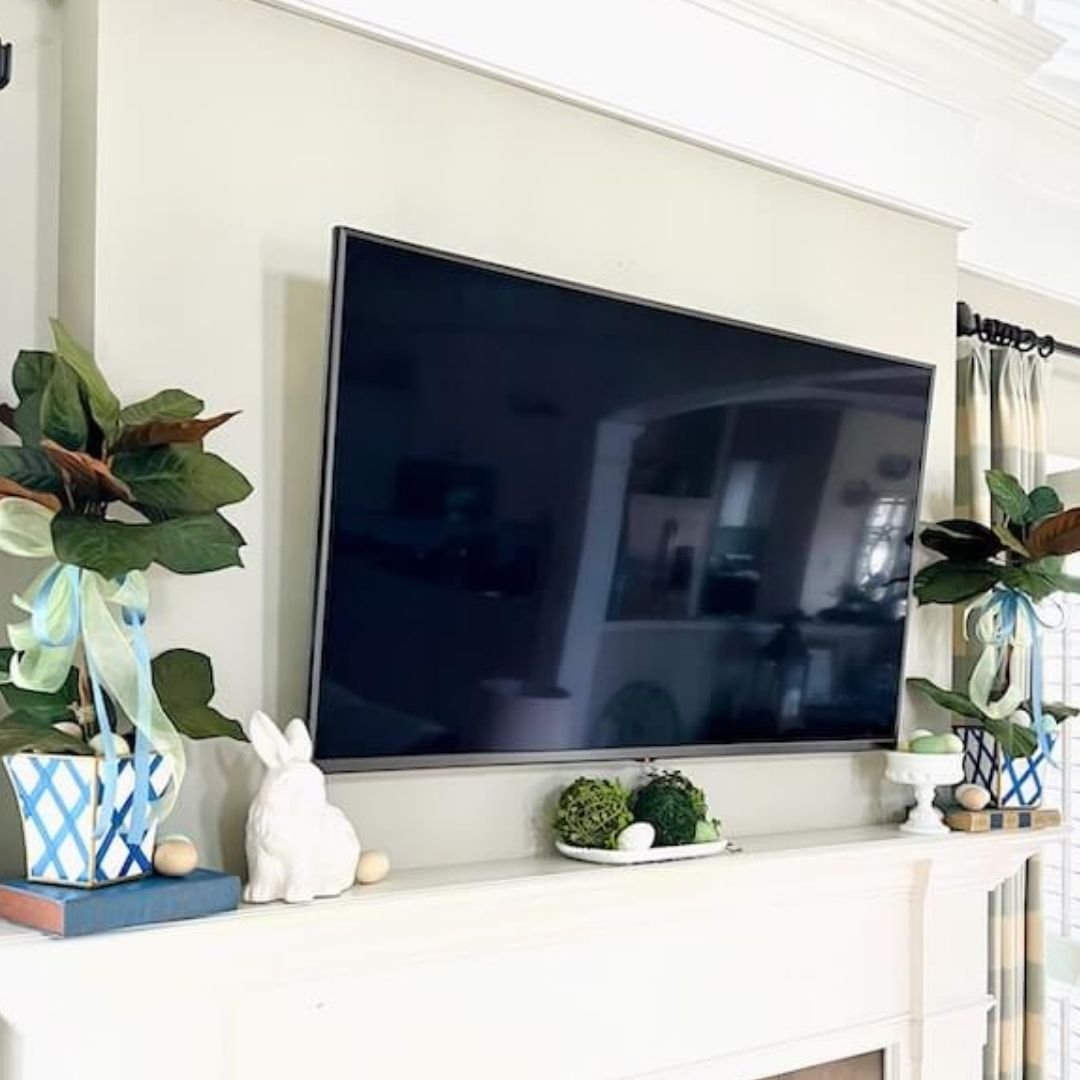
Make a Magnolia Branch Topiary for the Hand-Painted Flower Pots:
I decided to create some magnolia brach topiaries to use in my hand painted cachepots. I know techically, I should be using a potted live plant in it’s original nursery container inside my cachepots; however, I’m going a different route for now. If you’d like to use a live potted plant, a small orchid would be beautiful in the cachepot. You can read about more decorative ideas for displaying potted orchids in this post.
I saw this pretty magnolia leaf topiary on Instragam and it inspired me to create these. I had magnolia stems on hand so I got to work.
Supplies for the Magnolia Topiaries
- Faux magnolia branches
- Florist foam
- Wire cutters
- Florist wire or florist tape
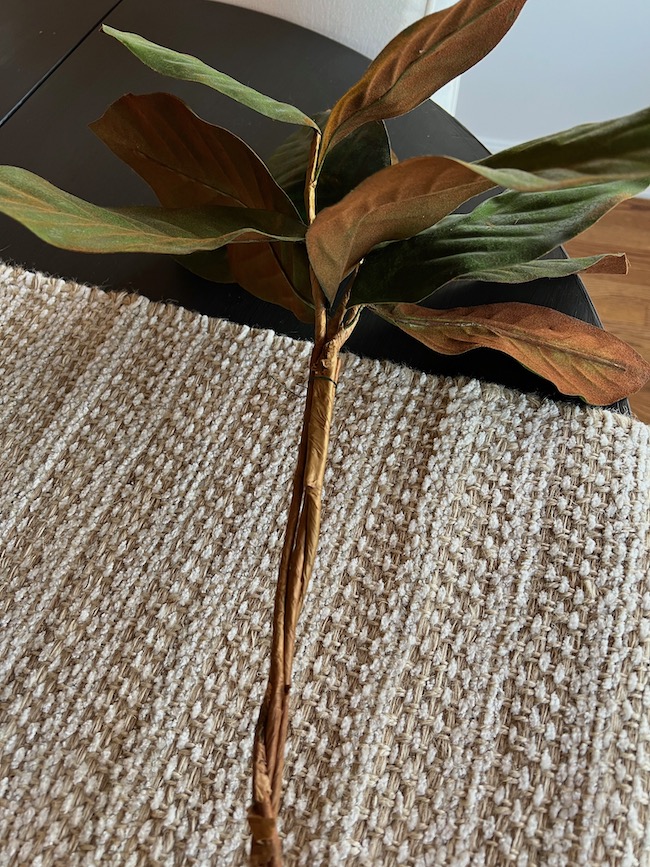
How to Make the Topiaries
- Remove some of the lower leaves on the branches, but used those as filler at the base of the topiaries.
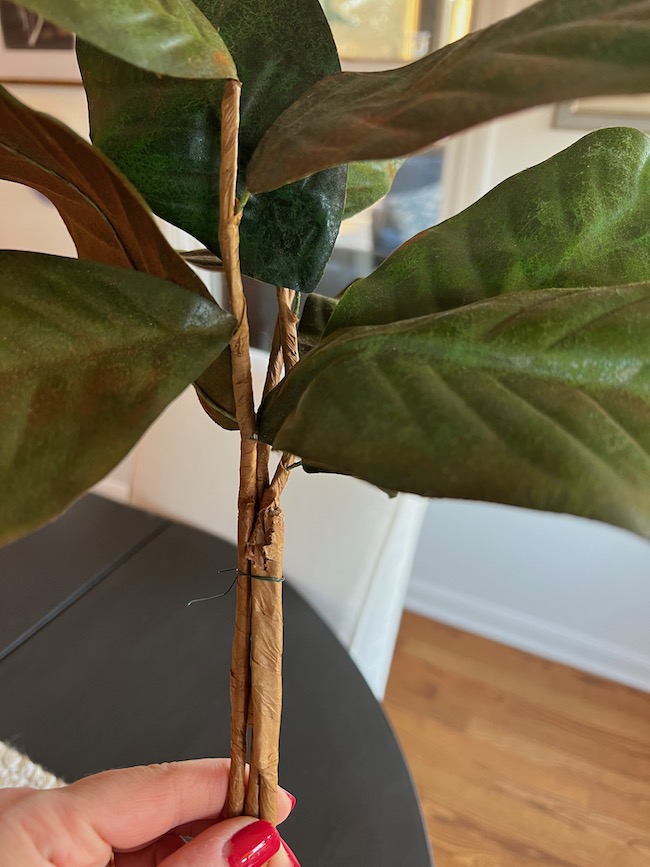
- Gather three branches and slightly twist the stems together.
- Use floral wire and jute string to tie the stems together in a couple of places.
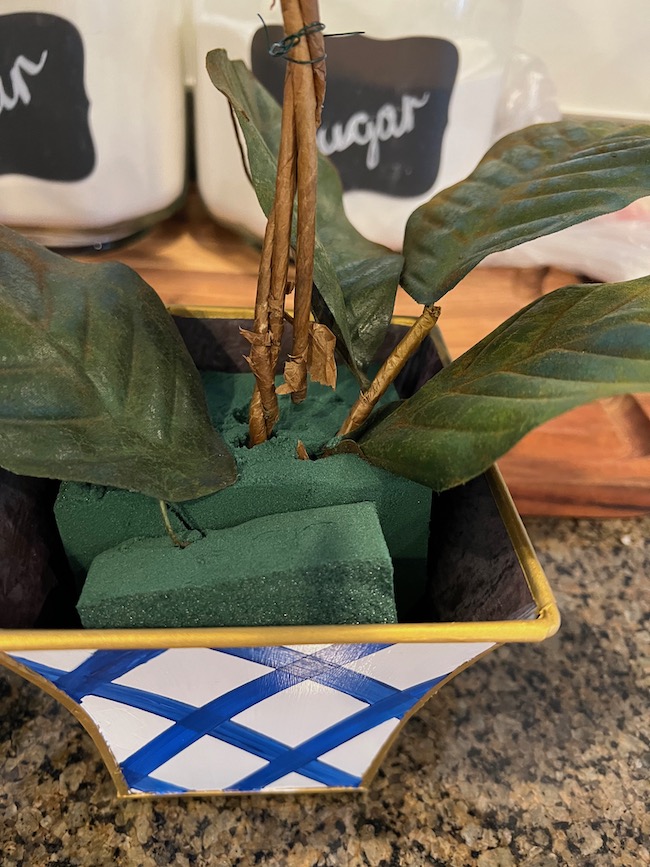
- Insert florist foam into the cachepots and then inserted my bound magnolia stems to the desired height.
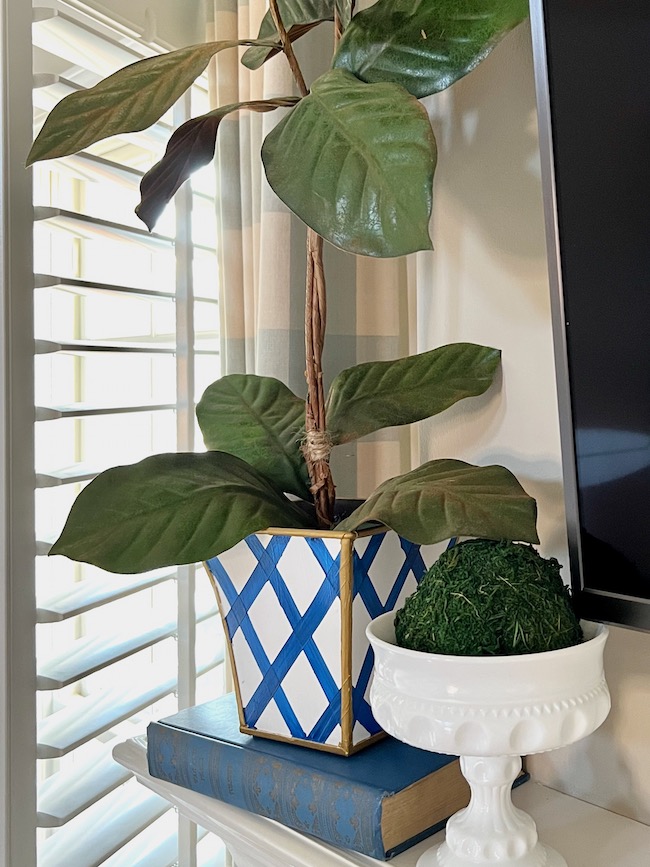
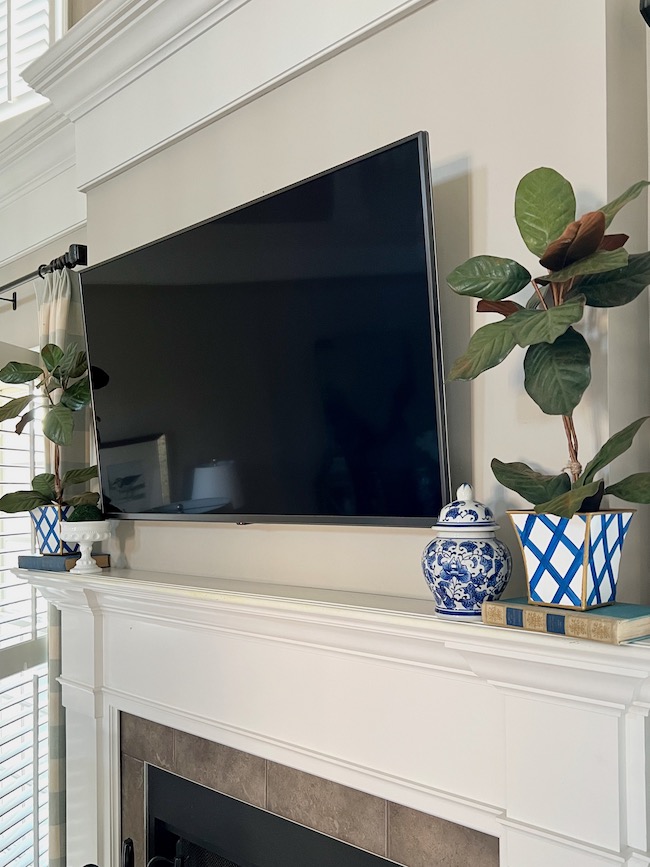
It was so easy to create these, and I love the way they look in the small planters on our mantel. They feel fresh and springy, and you can even add some pretty ribbon in seasonal colors to them. The small planters are the perfect size for our shallow mantel.
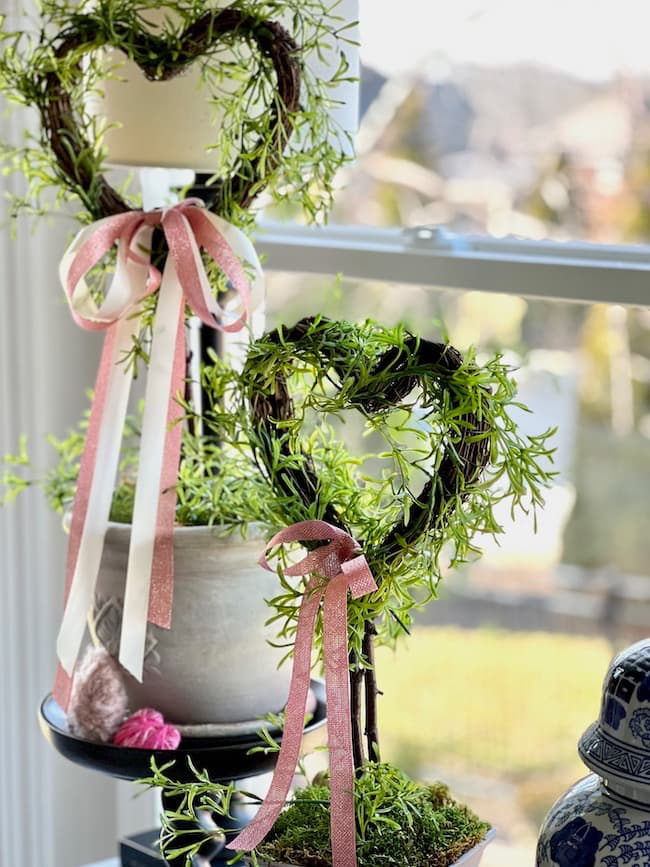
If you love making topiaries as much as I do, you might also enjoy this post about how to create easy DIY topiaries and style them in your home! Or, this DIY Heart Topiary post!!
Shop Supplies for Creating the Magnolia Topiaries


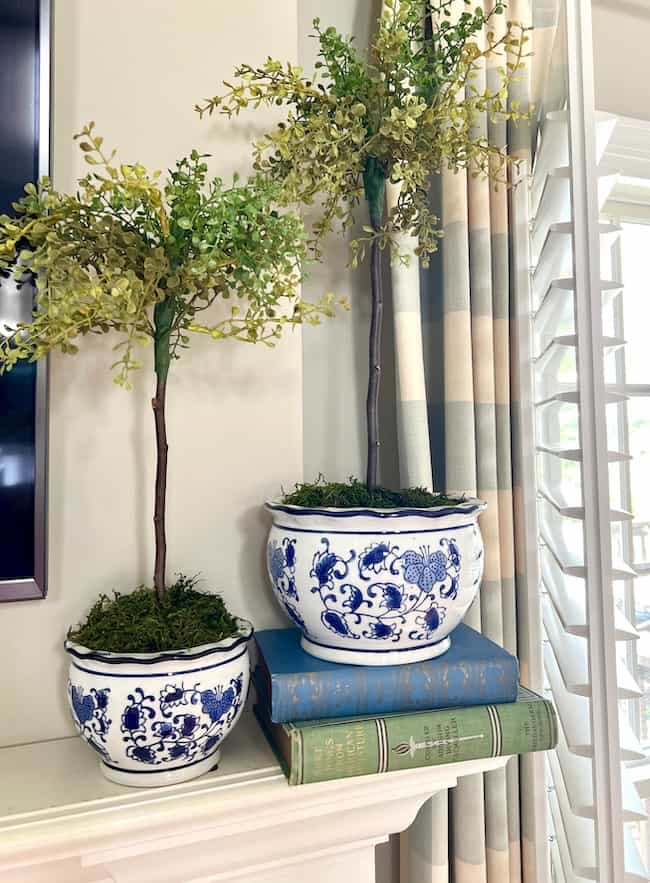
If you’ve rather buy than paint a pretty little Chinoiserie-style flower pot, I’ve included some really pretty options below! Just click the photo for the link to the cachepot.
I think I will use this little tole cachepot duo in many different ways around our home throughout all seasons! It’s such a great project to make and they make great gifts when filled with potted spring flowers.
Whether you follow these instruction and create your own, or purchase some already made, I hope this inspires you with some pretty spring decor inspiration!
Thanks so much for stopping by!

Love this project? Don’t forget to PIN it for later! Save this step-by-step guide to your favorite DIY or craft board so you can try it when you’re ready


These are beautiful, Kim I love the way they came together and how you can easily use them all over the house too. I definitely need to try this while I’m waiting on spring to arrive. They’re fabulous. Hope your weekend is a special one, CoCo
Oh, thank you so much, CoCo! They were fun to make, and I am pleased with the results. Thank you so much for your sweet compliment, and you have a wonderful weekend as well!
Your DIY cachepots look amazing! I love the gold details on the edges. They look so high-end and look beautiful in your home! Donna
Thank you so much, Donna! You are so sweet!
I love a cachepot and your project turned out beautifully! Thank you for this fantastic tutorial. I want to try this!
Thank you so much, Missy! Let me know how yours turns out!