How to Make Beautiful Framed DIY Botanical Wall Art
Elevate your wall decor with a touch of nature. Transform your home with this step-by-step DIY botanical wall art project.
Repurpose a pair of thrifted framed art pieces and add a personal touch to your decor by creating an original piece of art for your walls. This budget-friendly project combines the beauty of the outdoors with your personalized style for a lovely designer look.
Lately, I’ve been concocting ways to add more DIY art to our home, and today’s post fits that bill perfectly! Who doesn’t love pretty flowers and plants? There’s nothing quite like bringing a little natural beauty indoors to freshen and breathe life into a room.
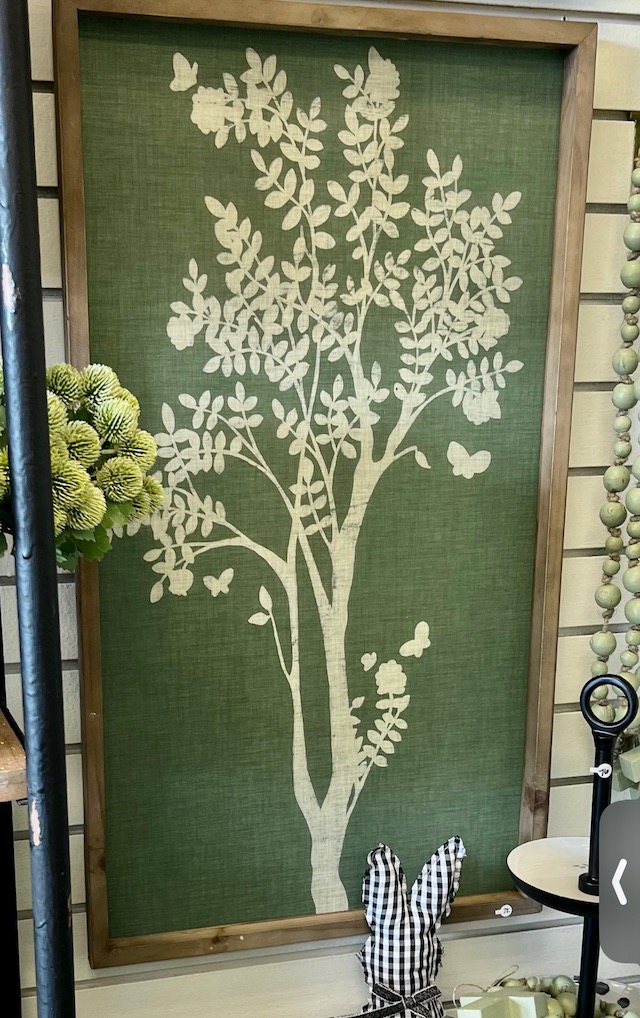
A few months ago, while shopping in one of my favorite local boutiques, I spotted this pretty green botanical art work. The wheels started spinning, and I thought I might me able to create something similar.
My next stop was a trip to Goodwill, where I spotted these two matching framed pieces of art. Perfect! Thrift stores are great sources for old frames for DIY art projects. Look for sizes and styles of frames you like and don’t worry about the artwork. If you don’t like the finish on the frames, you can easily change it with a little paint!
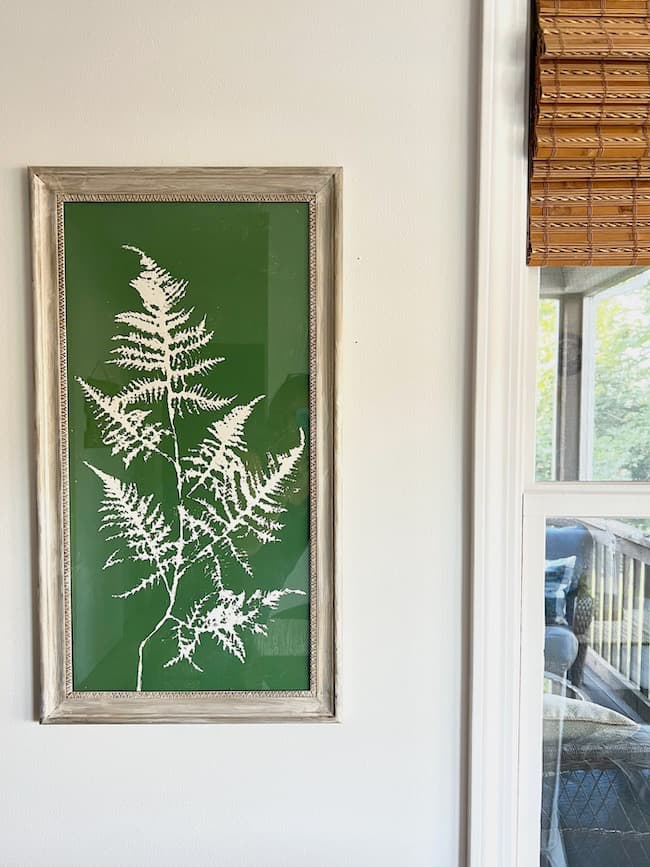
These two frames sat in our basement storage for a few months until just last week. I decided to tackle my green and white botanical print DIY, and today I’m showing you my technique.
Botanical prints are certainly popular right now. Styling your walls with botanical prints is a perfect way to bring a piece of nature into your home, making your room feel fresh and calming and creating an outdoor vibe without leaving your cozy space. Whether you’re into modern or classic looks, botanical prints fit right in and add a touch of relaxed sophistication.
Botanical artwork is a classic choice that complements a variety of design styles, from traditional to farmhouse to grand millennial. They add a sense of timeless elegance, bring in a touch of rustic charm and evoke a connection to nature and the countryside.
How I Made My DIY Botanical Prints:
Supplies Needed:
- 2 simple frames (thrifted)
- Backing board or heavy poster or foam board ( I used the back of my thrifted artwork.)
- Faux plant or fern stem (You can use different plants if you prefer.)
- Spray adhesive
- Paint brushes
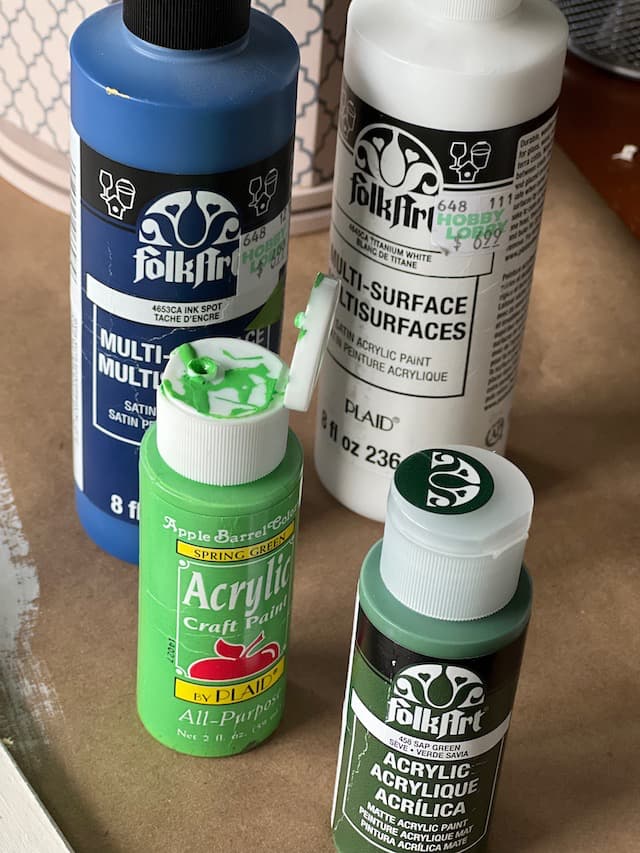
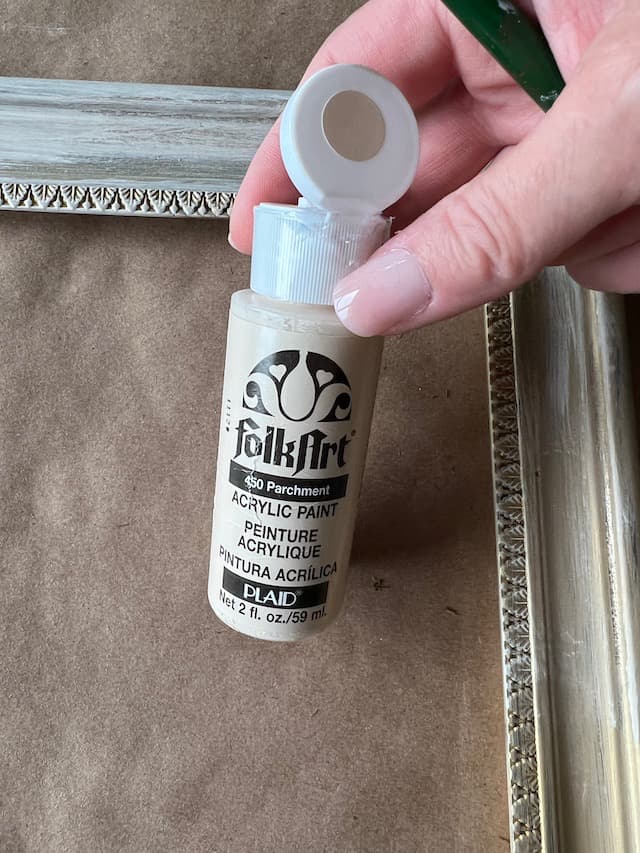
- Cream-colored paint
- Green paint (or the color of your choice for your artwork)
- Rubber gloves
- Acrylic paint for frame — beige, cream, gold
- Dark wax
- Clear wax
- Wax brush
- Paper towels
- Cloths

Detailed Instructions for Creating the Look of Vintage Botanical Prints:
The first thing to do is find a pair of framed artwork from a thrift store. You want tall and narrow frames for this project. After spotting the inspirational botanical art in our local gift shop, I headed straight to the nearby Goodwill. I spotted a pair of framed artwork and knew they would be perfect for this process.
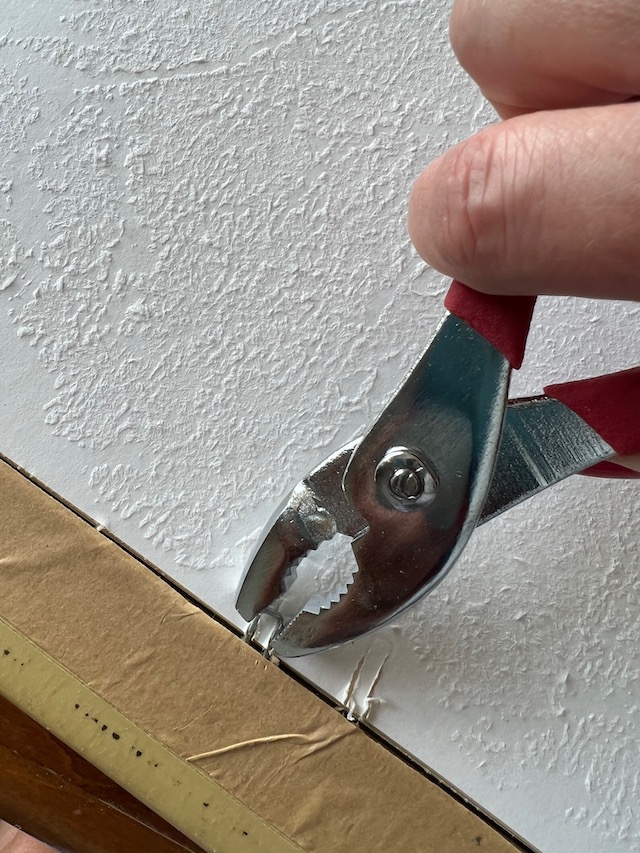
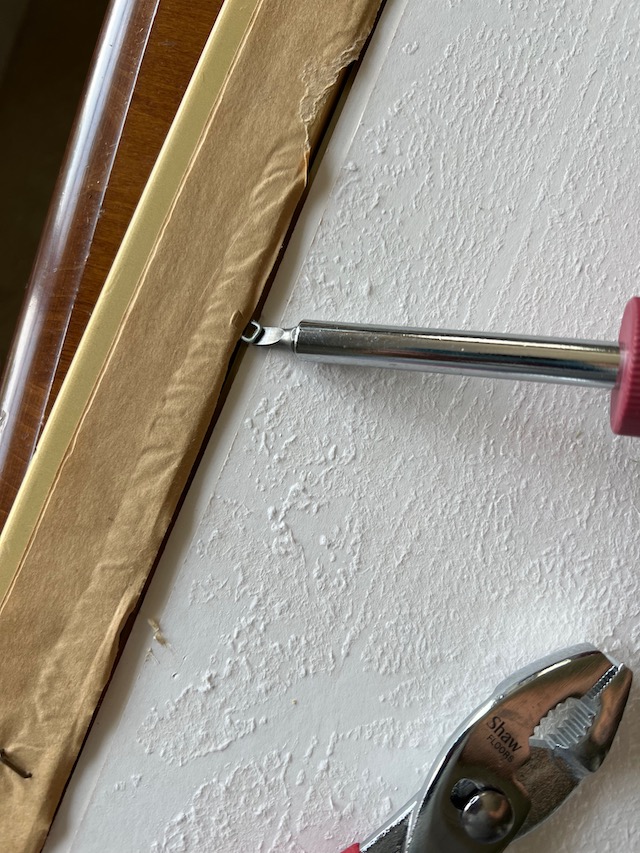
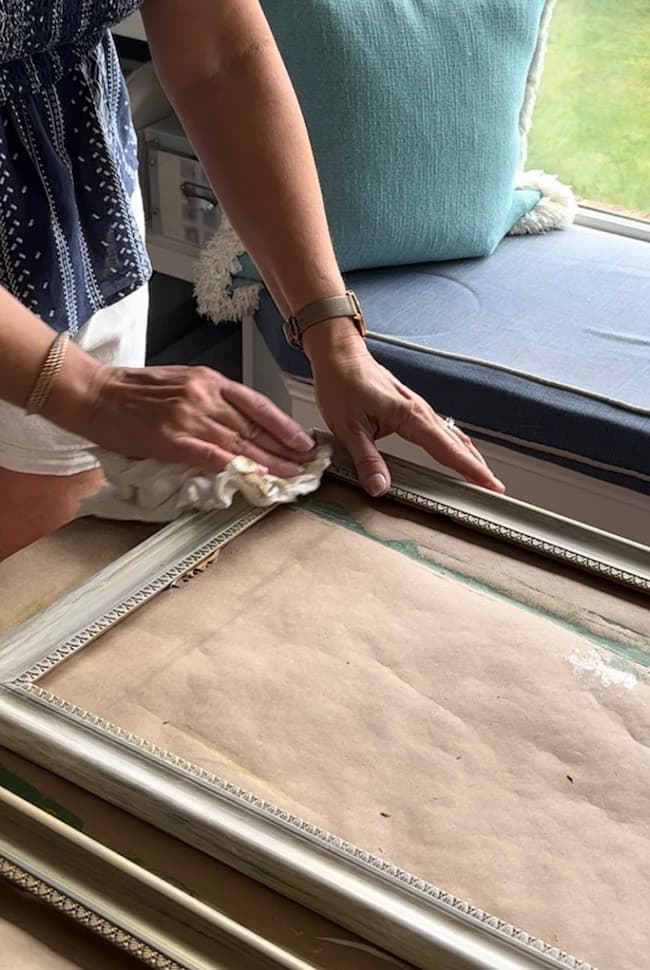
Disassemble the thrifted frame.
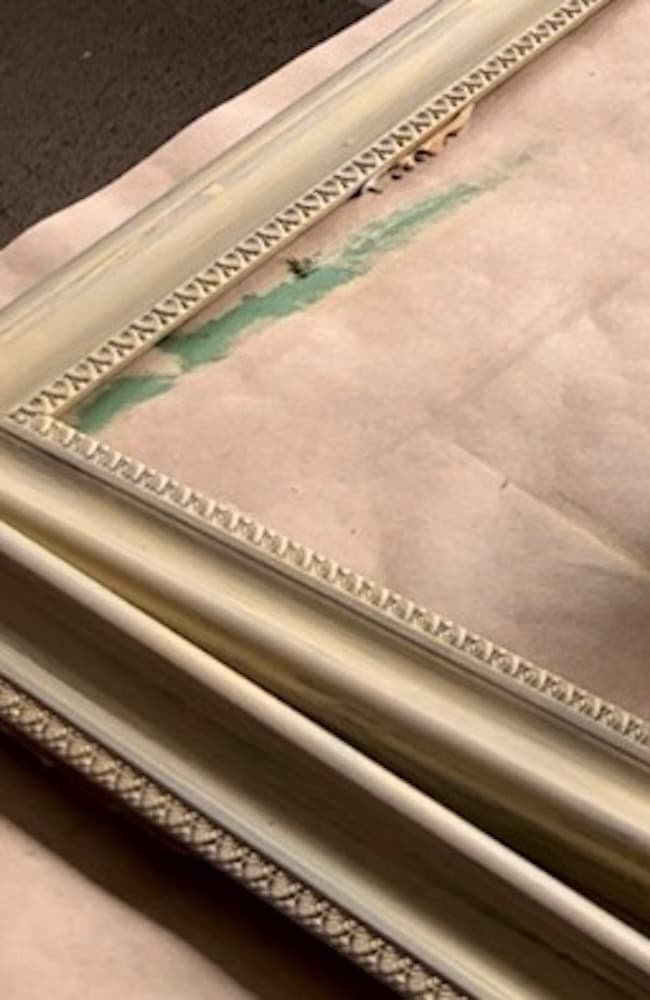
Cut the paper backing away from the back of the frame to remove the original artwork and mat. Remove the staples holding the artwork in place. I saved as many of these as possible to reuse.
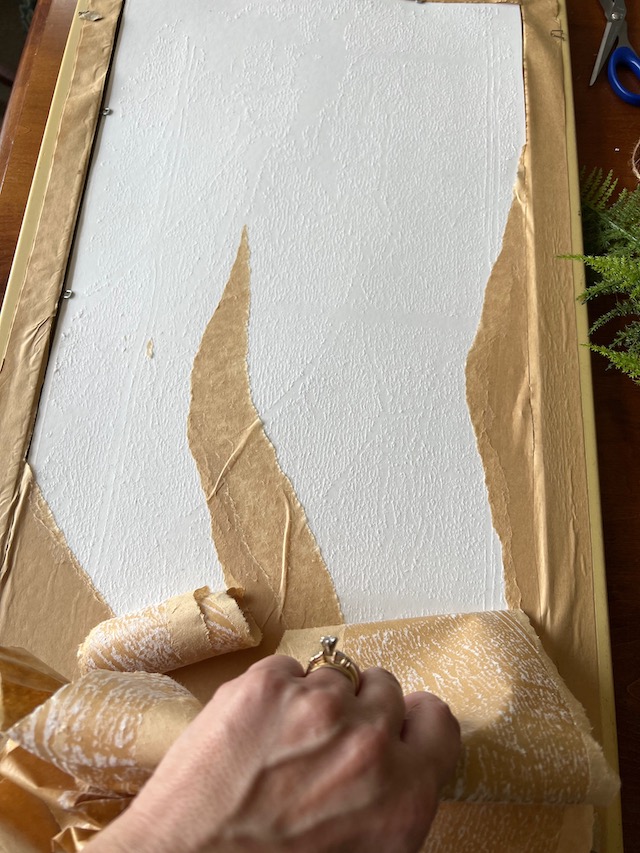
The paper backing was glued to the back of the mat board, and as I pulled the paper away from the board the glue reside actually left a little texture.
I liked the texture this added to the board so I didn’t worry about it.
For this project, I used the back of the original art and mat board to create my new piece of art.
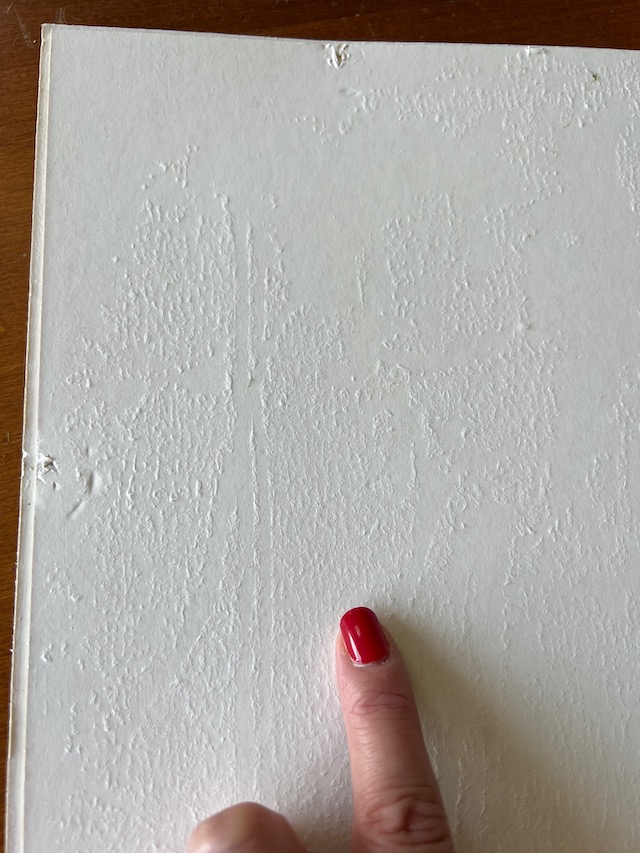
Paint the “under color”.
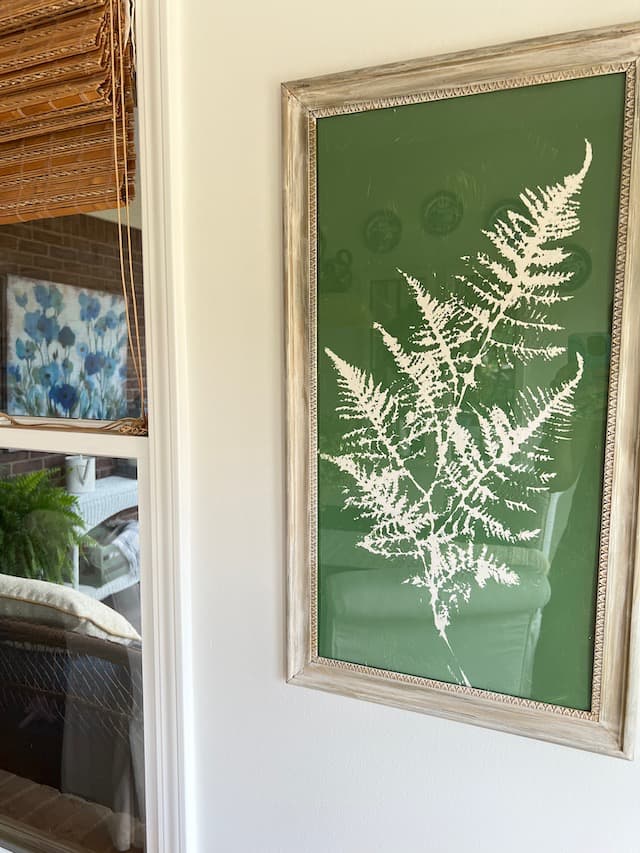
This is the color that you want your plant to be. For my botanical print, I wanted a green background with a creamy white silhouette of my fern.
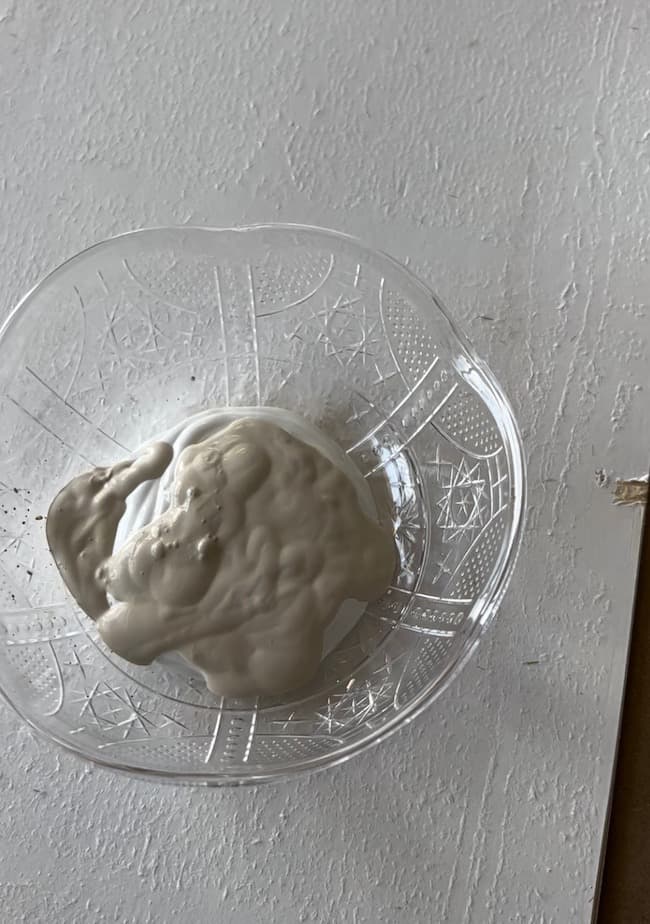

To create this effect, I first needed to start with a white background. I painted the entire surface of the board off-white using a mixture of Parchment and Titanium White. Allow this undercoat of paint to dry completely since you’ll be using a spray adhesive to temporarily adhere your faux fern stem to this white background.
You don’t want the adhesive to pull the white paint away when you remove the faux stem, so make sure to allow plenty of time for the paint to dry. I painted my undercoat the night before so it would be sure to dry completely.
Apply adhesive spray to the back side of your faux fern stem.
I advise doing this process outside due to the fumes from the adhesive as well as it’s sticky nature. You don’t want to coat any interior surfaces with a layer of adhesive!
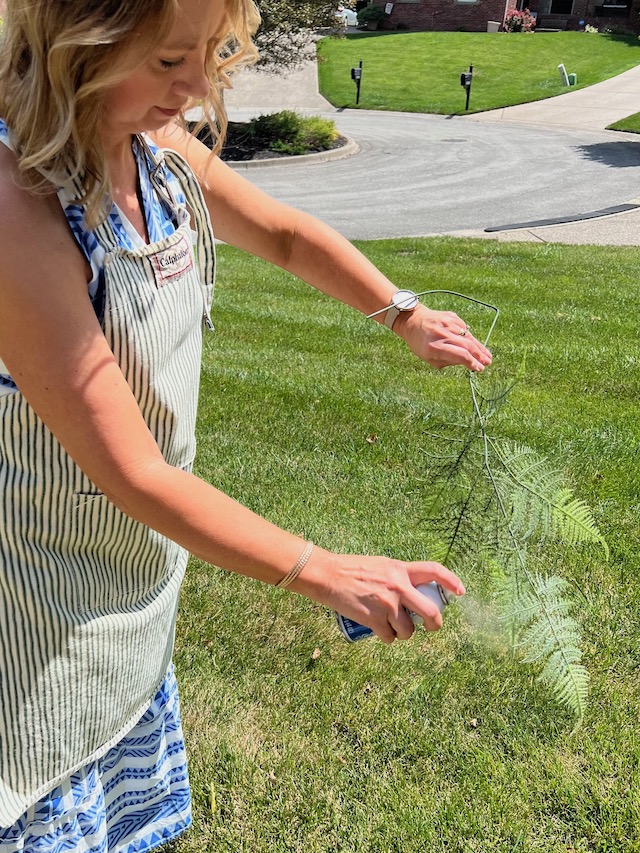
Be sure to cover the entire back side of the fern stem.
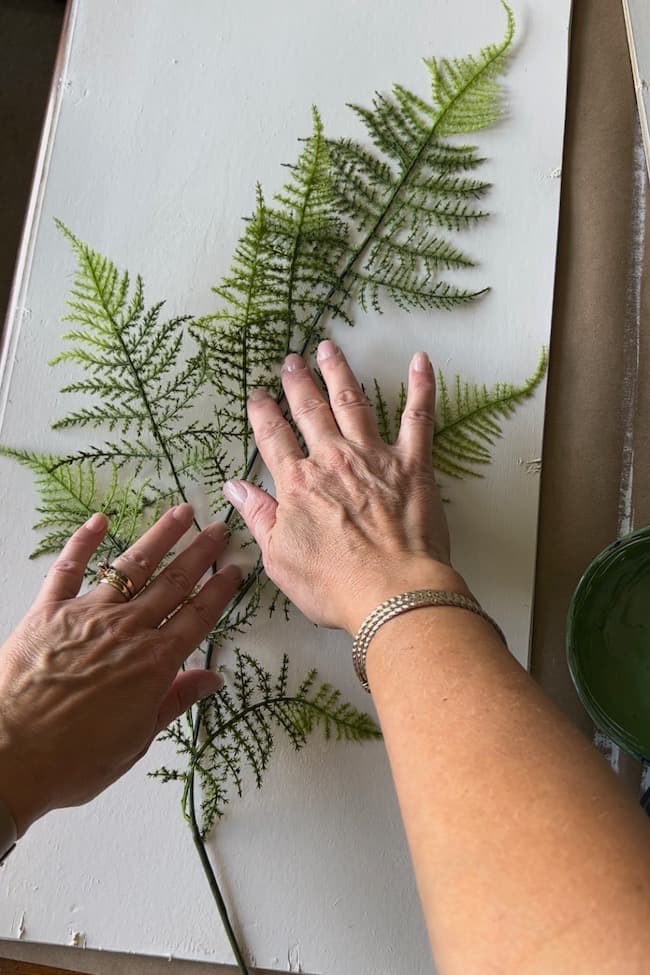
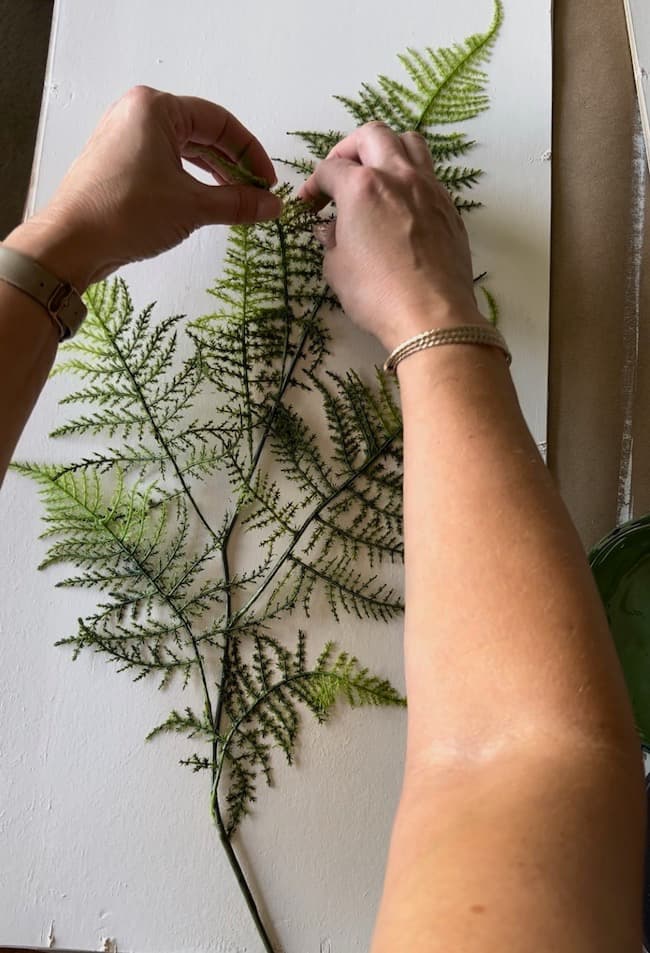
Arrange and Secure the Fern Stem to the Backing.
Take your time with this process. Press along every surface of the fern stem ensuring it sticks to the board before applying your paint. I wanted each print to be slightly different, so I arranged the fern pieces a little differently on each print.
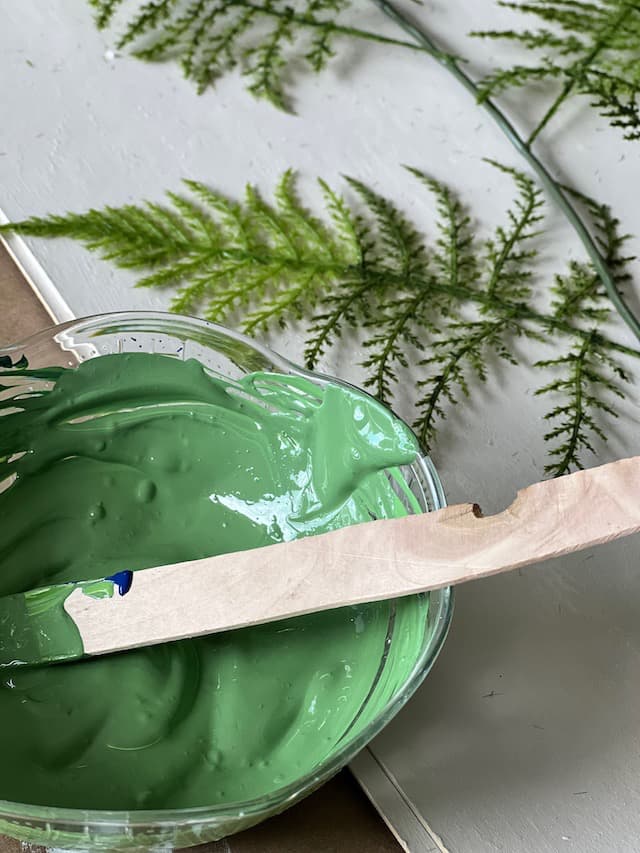
Paint the green top coat of paint.
Once the fern is secured, begin painting the entire surface of the board.
This shade of green was achieved by mixing a combination of green, blue, and white acrylic paints I had on hand.
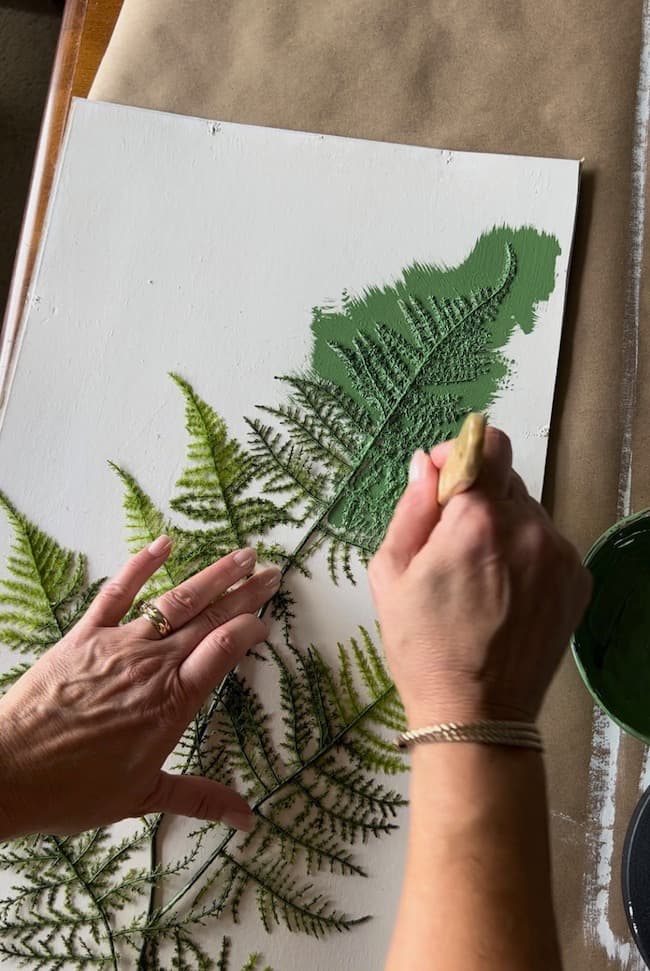
Cover every inch of the fern making sure to carefully get the paint into all crevices. The faux fern I used was very wispy, so I had to work extra hard to make sure every surface was covered with paint.
I used a small paint brush to brush and dab the acrylic paint on the board. Use a “tapping” stenciling brush technique to help get into all the crevices.
As an alternative you could also use spray paint if you have a color you like. I like mixing paints to achieve my desired color, so I preferred to brush on the paint.
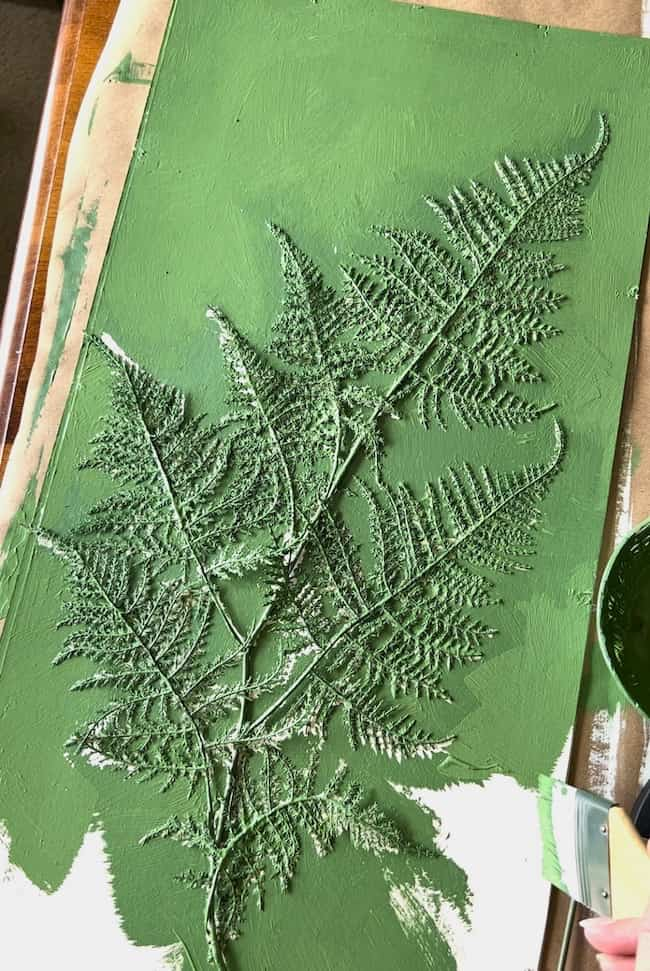
Remove the fern stems.
This is the fun part! Carefully pull the stems away to reveal the fern silhouette on your board.
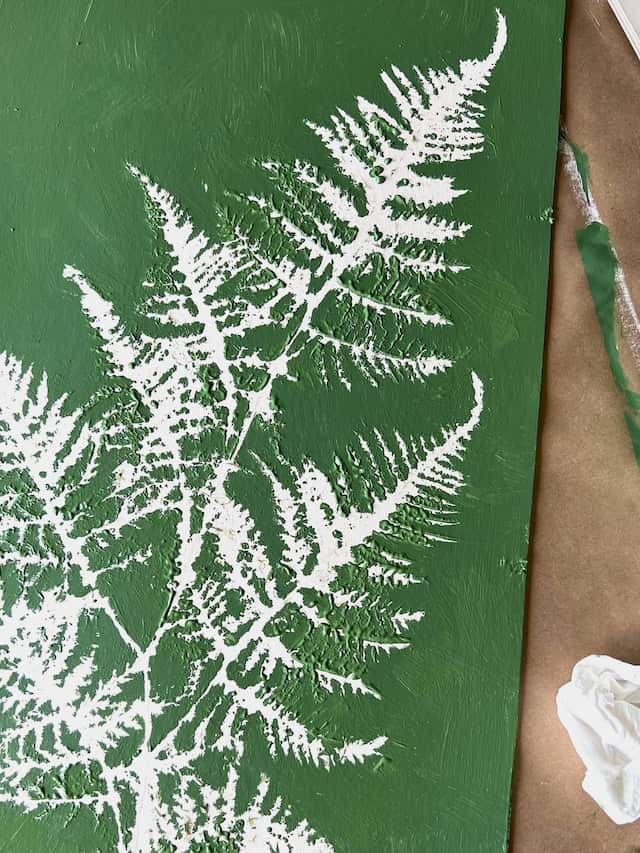
It’s so fun to see your pretty work or art come to life! Mine isn’t a completely perfect image of the plant, but I like the worn, vintage botanical art feel it creates.
Paint the frames.
My thrifted picture frames needed a little makeover. I didn’t want a white frame or a gold frame, but something in between with an aged feel — a lighter antiqued look with subtle gold accents.
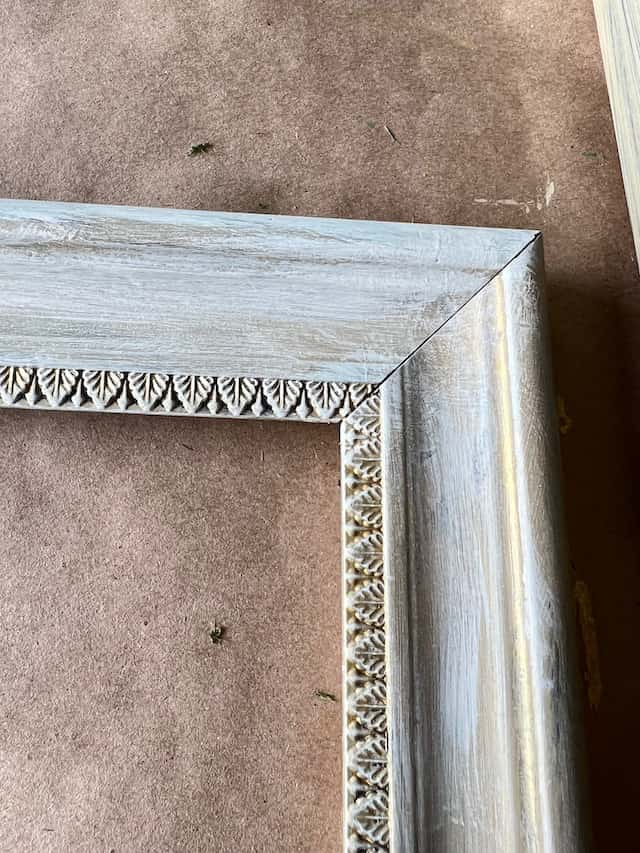
I started with a base of beige acrylic paint applied with a foam brush. I allowed some of the darker color to show through because I wanted the to mimic the look of a wood grain.

Once this coat dried completely, I applied a very thin, watered-down layer of gold acrylic paint in a random, haphazard fashion all over the frame.
I then decided that I wanted less of the gold to show, so I painted a quick, thin layer of cream over the gold, but quickly wiped away with a paper towel for a distressed look.

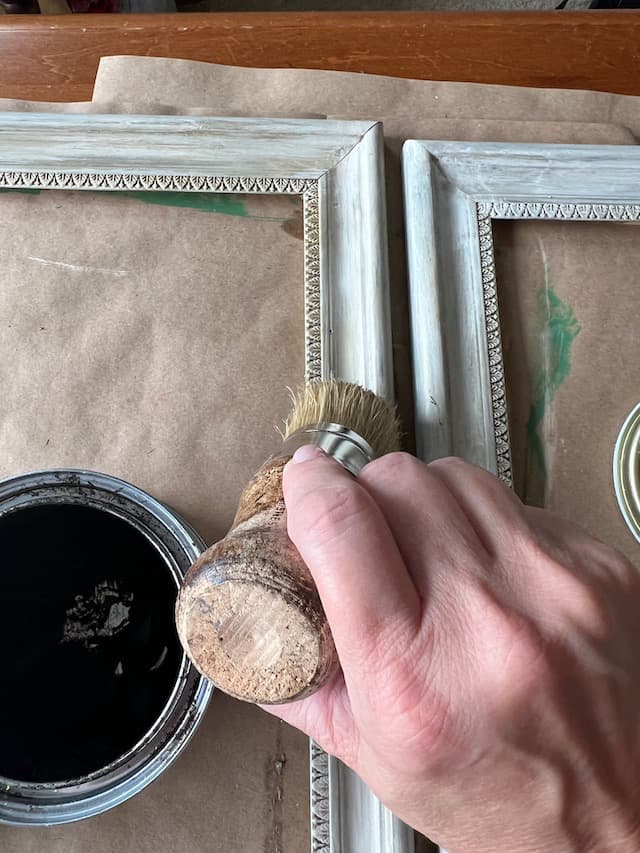
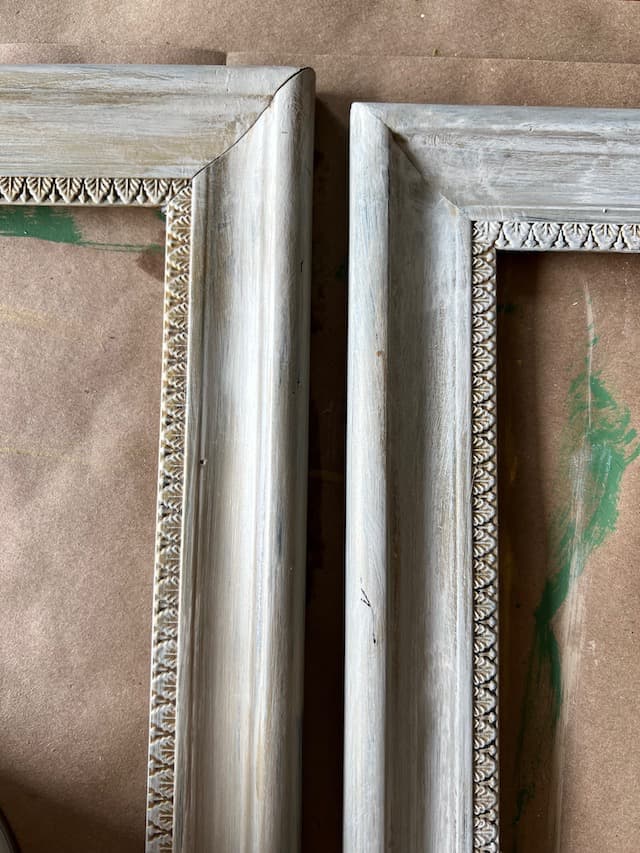
I finished off the frames by applying a little bit of dark wax to age the frame and define some of the detailing. I mixed the dark wax with a bit of clear wax to keep this layer light and avoid a heavy look with too much dark wax. Adding the dark wax to the frame helped to “age” it a bit, and mixing the dark with the clear wax makes the dark wax a little more forgiving and easier to spread.
Use a soft cloth to wipe away the excess wax.
Reassemble your new Botanical silhouette wall art.
Return your new artwork to the frame and reattach the fasteners. Since these were cheap composite frames, some of the original staple holes were compromised when I disassembled the frame backing. I was able to salvage enough of the staples to nail them back into their original holes to secure the artwork.
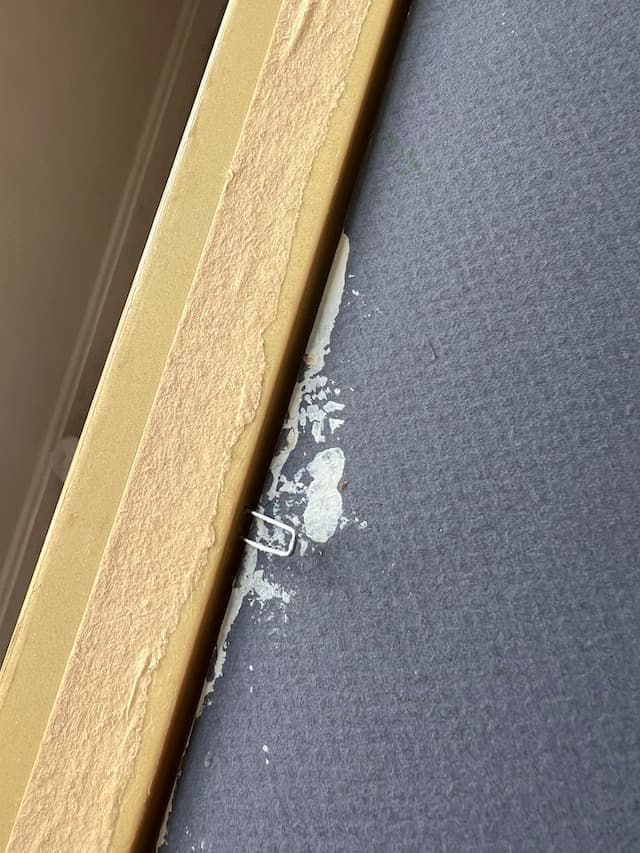

I did, however, employ the use of a little (or a lot) of duct tape to reinforced the staples. It’s not pretty, but it’s effective! You could use brown craft paper to cover the back of the frame and hide the duct tape if you would like. Simply cut the paper to size and hot glue to the frame.
Now my artwork is ready to hang!!
And there you have it — all the details for creating my painted botanical silhouette DIY adventure!
Hang Your Botanical Masterpiece!
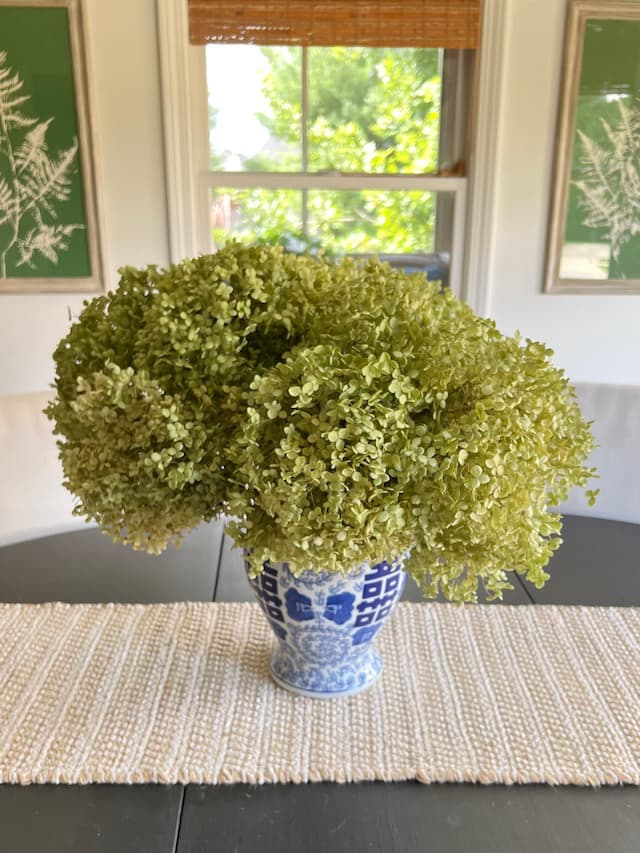
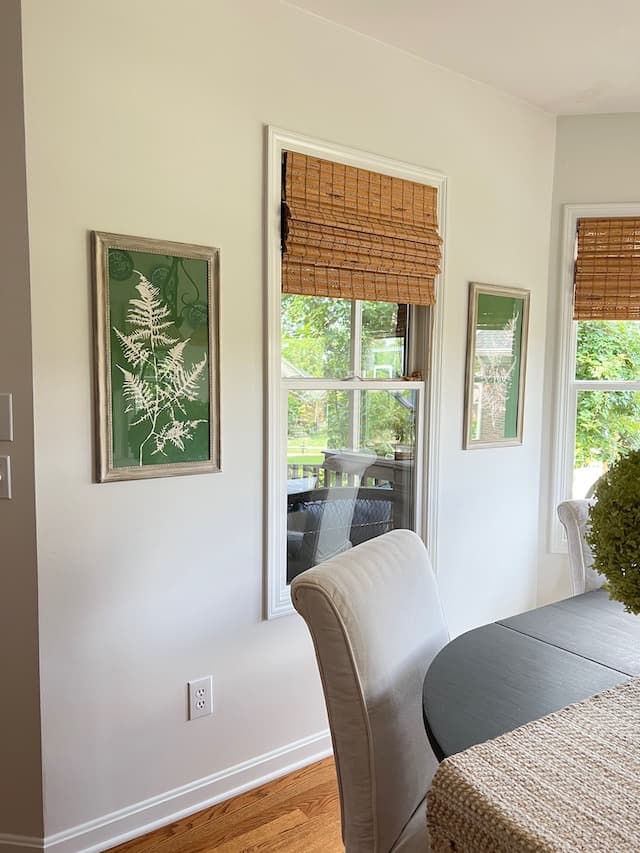
Our new botanical prints will work well in lots of places in our home, and I’m excited to experiment with them as I change up our decor. For now, I’m loving them in our breakfast area in our kitchen! The green and white prints look great against our white walls and really brighten up the space!
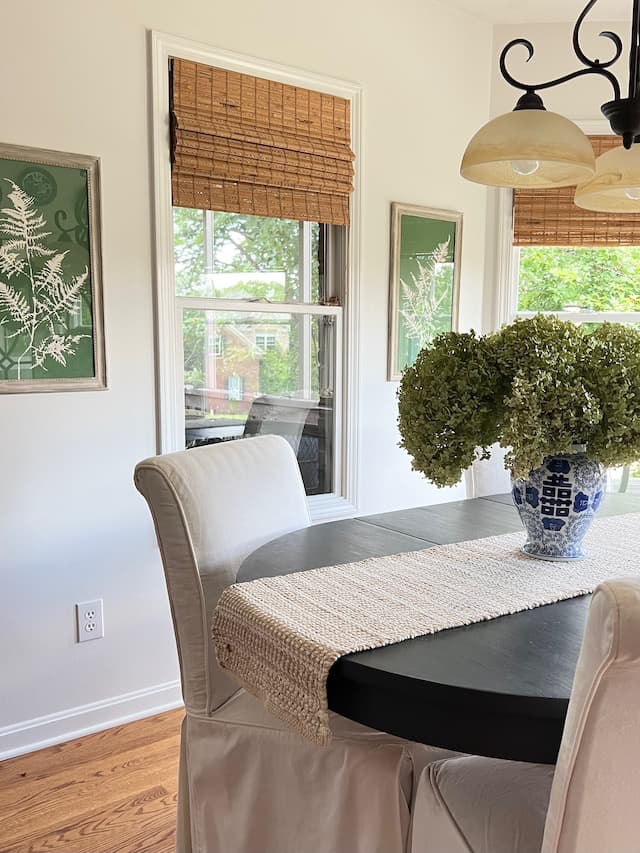
The green is fresh and vibrant and pairs beautifully with the blue and white accents in our kitchen.
There are so many ways to create your own botanical masterpieces!
Creating DIY botanical art opens up a world of creativity and endless possibilities. Here are some exciting ways to craft your own botanical masterpieces:
- Pressed Flower Art — Gather and press fresh flowers or leaves to create delicate botanical art. You can frame them between glass or arrange them on a canvas to capture their natural beauty. If you love the look of pressed flowers, check out this pretty DIY pressed flower votive holder project.
- Dried Floral Arrangements — Create stunning 3D botanical art by arranging dried flowers and foliage in shadow boxes or frames. The dried elements add a touch of rustic charm to your decor.
- Botanical Decoupage — Combine the beauty of your favorite botanical images from magazines or printed materials with decoupage techniques to decorate trays, vases, or wooden boards.
- Nature Rubbings — Go on a nature hunt and collect leaves and tree barks. Make rubbings using crayons or pencils to transfer their intricate textures onto paper, creating a unique and natural artwork.
- Botanical Stencils — Design or purchase botanical stencils and use them to create repeating patterns on walls, furniture, or fabric for a botanical-inspired decor theme. Check out how I used a botanical palm frond stencil to “wallpaper” our primary bathroom!
- Botanical Silhouettes — Trace the outlines of leaves or flowers on paper or fabric and fill them with paint, ink, or colorful patterns, resulting in captivating botanical silhouettes.
- Printable Botanicals — There are so many free images available to the public domain for printing. You can also find some lovely inexpensive botanical art prints on Etsy. Print them, frame theme, and create a gorgeous botanical gallery wall! This book of botanical prints is full of 45 ready-to-frame botanical prints to help you create a gorgeous gallery wall for your room!
Whichever method you choose, DIY botanical art allows you to showcase your love for nature and add a personal touch to your home decor, transforming it into a beautiful and inviting space. Try various techniques and create a beautiful collection of diy art for your family to enjoy.

I love the fresh look and feel of the green and white prints in our kitchen breakfast area. These prints are so versatile, and I’ll be able to use them in so many places around our home whenever the redecorating bug strikes!
The great thing about DIY art is how customized it can be for your own home decor.
I hope you try making your own botanical art! If you do, let me know how they turn out!
Happy Creating!


By the way, do you follow me on all the socials? If not, check out my Pinterest, Instagram, and Facebook and be sure to follow along so you don’t miss out on any of my decorating and DIY ideas.

These are beautiful Kim! What a great before and after 🙂
Thank you so much, Tanya! I appreciate your sweet words!
Love this! such a great idea. They really add the perfect pop of color on your wall.
Thanks so much, Wendy! I love how they turned out, and especially love the green!
Oh my goodness! These are beautiful. I love them.
Kim, I LOVE these!! Really cool project!!
I’m so in love with these! I have frames in the garage and ferns in the yard that need to meet. Thank you, always for sharing beautiful inspiration!
This is a great project and a fun way to add color and art to your home.
Thank you so much, Elizabeth! You are so sweet!