How to Use a Wall Stencil — ORC Week 4 Update
This week my focus has been on how to use a wall stencil in the bathroom. Today, I’m sharing my progress with the stenciling and wall stencil tips and tricks I’ve learned along the way. Overall, I’m very pleased with how well the stenciling process is working, but I have had one minor (well, maybe not so minor) setback in this whole process!
It’s Week 4 of the One Room Challenge, so we’re halfway through our primary bathroom makeover according to the calendar. I wish I could say the same thing for my progress in the bathroom!
(This post contains affiliate links, so I may earn a small commission when you make a purchase through links on my site at no additional cost to you. As
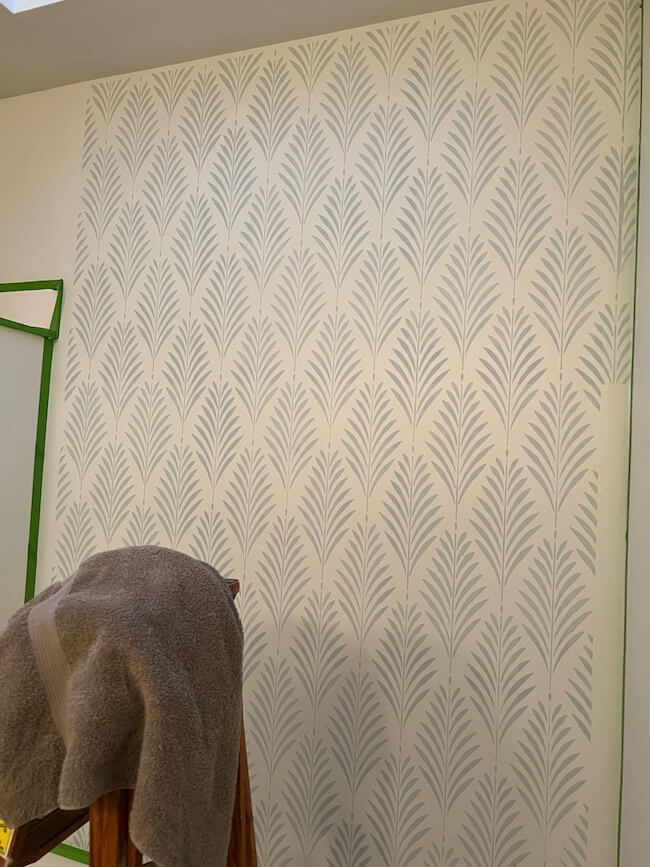
![]() This is the stencil I’m using. The size of this stencil is very large, 36″ x 24″, so it covers a good amount of the wall at one time. This makes the process go a little faster.
This is the stencil I’m using. The size of this stencil is very large, 36″ x 24″, so it covers a good amount of the wall at one time. This makes the process go a little faster.
It has a gorgeous repeating palm frond design. My bathroom walls are painted Sherwin-Williams Alabaster (SW 7008) and I am stenciling with SW Lullaby (SW 9136 ) to create a pretty, soft blue palm design.
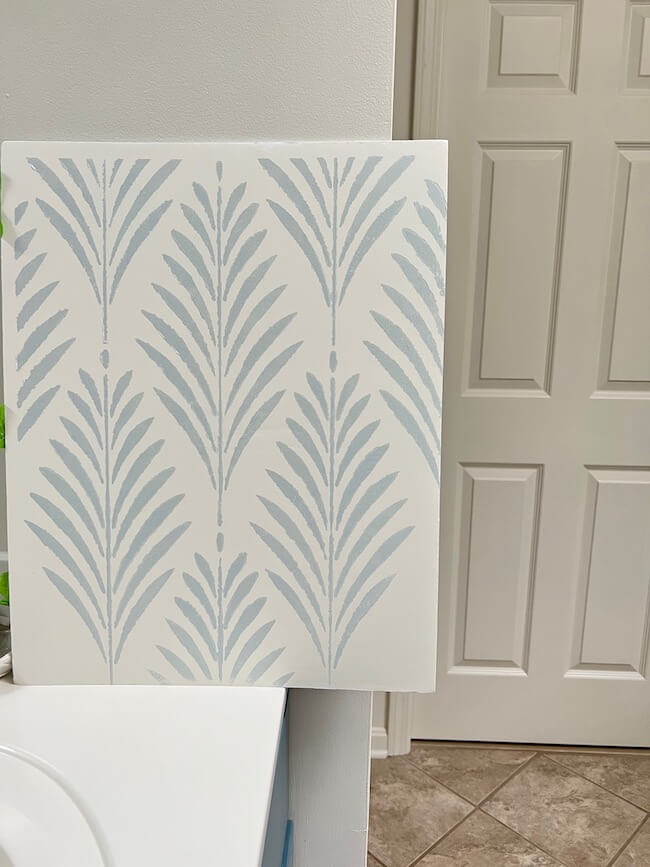
When I tested the stencil on a sample piece of foam board (which I highly recommend doing) I used a small stencil brush to create the design. I quickly learned that using a stencil brush was going to take forever to cover the entire bathroom, so I decided to use a dense foam roller to stencil with and it’s so much faster!!
It’s also extremely helpful to use a spray stencil adhesive on the back of your stencil. The adhesive allows you to get a clean edge to your design. You can reposition the stencil several times with one application. When I painted the board above, I did not use the adhesive. The pattern isn’t as crisp without the adhesive. The pattern applied to the wall is much more crisp and clean because I used the adhesive.
This is the repositionable stencil adhesive I’m using.
How to Use a Wall Stencil for a Wallpapered Look:
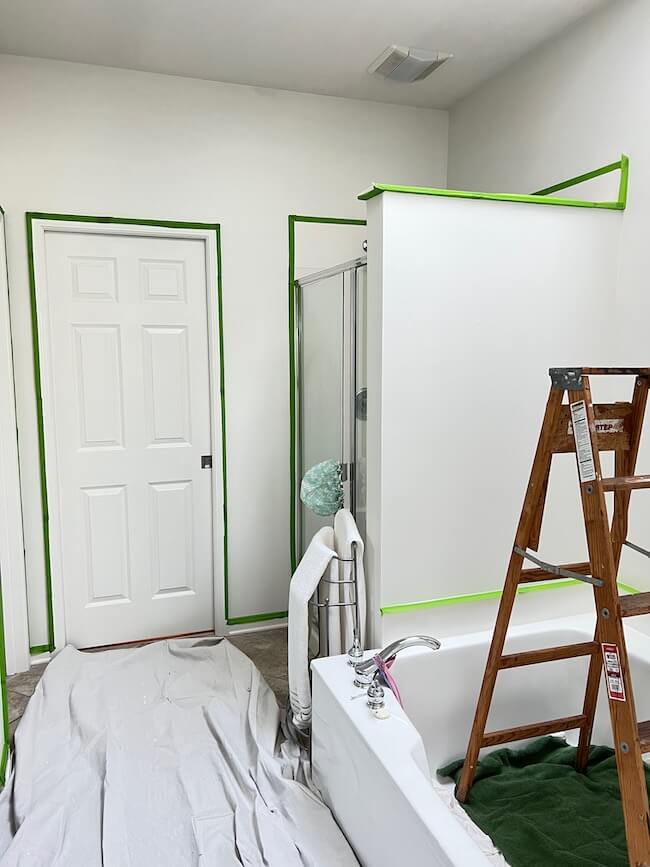
1. Use Frog Tape to tape off all of your baseboards. You will also need to tape opposing corners as you approaching them.
2. Use drop cloths to cover and protect surfaces.
3. Apply the stencil adhesive to the back of the stencil. I simply placed the stencil on top of the drop cloth on the floor to spray. The adhesive should be dry, but tacky when ready to apply. It only takes a minute or two for it to be ready.
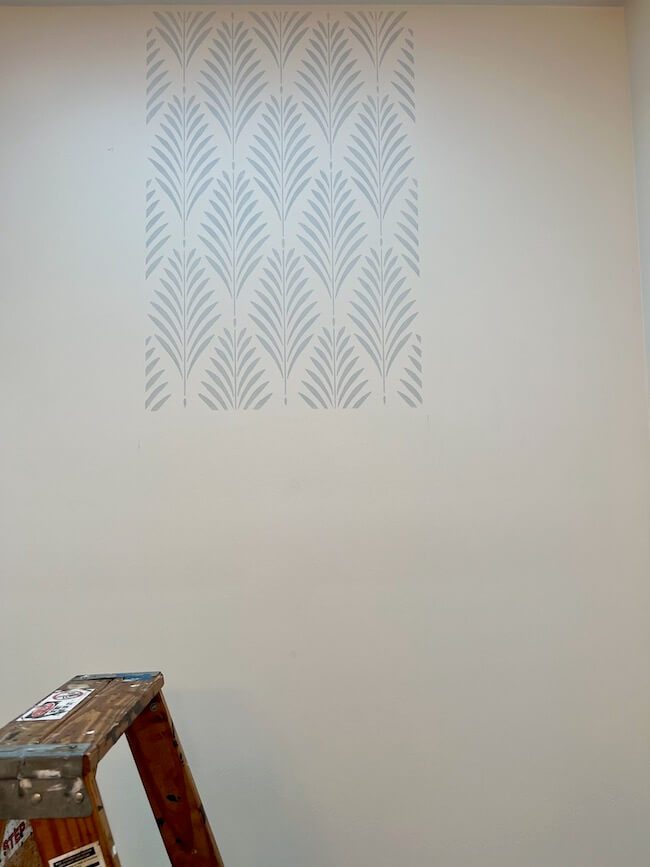
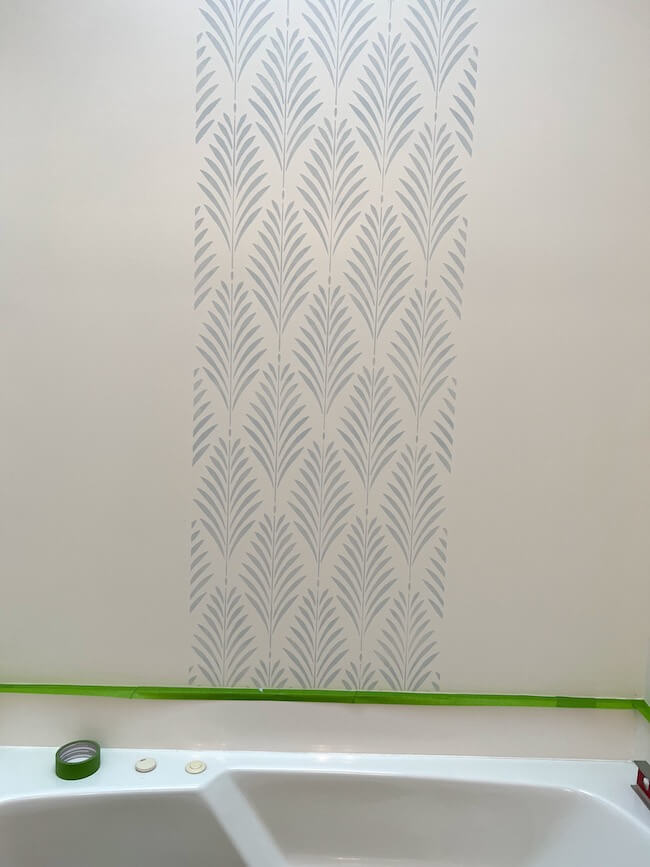
4. I started at the ceiling and worked down to the baseboard. I wanted my stencil to be centered over the tub. You need to determine your starting and stopping point of the stencil, just like wallpaper. Since I’m starting in the middle of the wall area over the tub I will work in both directions to reach this point. Pick an area that is the least obvious. I have three possibilities in our bathroom. Either the right-hand corner of the tub, the corner where the mirror meets the door wall, or the corner between the closet door and the door to the water closet. Since my stenciling project is currently on hold (more on that in a moment) I’m still trying to decide. I’m leaning toward the second option mentioned.
5. Position the stencil against the ceiling. Use the level to make sure your stencil is plumb. Then smooth the stencil all over, adhering it to the wall. Use a couple of pieces of Frog Tape to keep it in place.
6. Load your foam roller with paint. I used a paper plate to blot off the excess paint. You don’t want any extra paint on the roller, just a thin coat, but fully covered.
7. Start at the top and work down, making sure that you cover the entire area of the stencil. Use caution around the edges so that you don’t roll off the stencil.
8. When the entire area is covered remove the stencil immediately. I waited a minute or two before repositioning, but the paint dries very quickly.
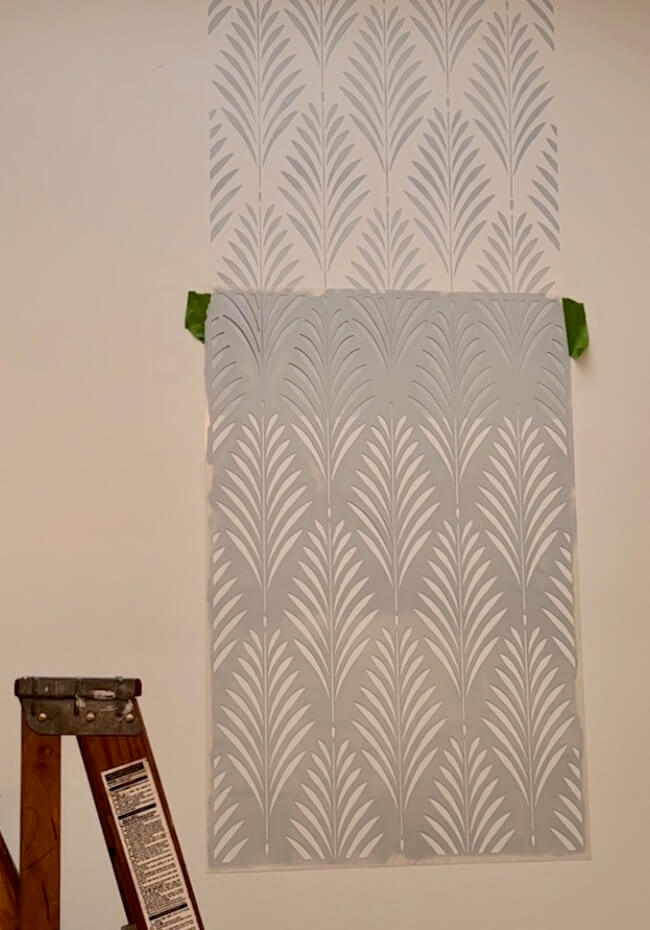
9. To begin the next section overlap the previously stenciled areas to match your pattern. Some stencils have marks to use for this purpose. The one I’m using does not have dedicated positioning mark, so I just matched up the patterns. I actually used the small dots at the bottoms of the frond stems for my matching points.
10. Secure the stencil to the wall, check to make sure it’s level, and repeat the process above.
11. Continuing working around your space to cover the area, matching patterns in both directions as you go.
12. At the bottom of the wall, I used a broad knife to hold the stencil in place to stencil up next to the baseboard. Use a small stencil brush for this area next to the baseboard and dab it in a downward motion to get as close as possible to the edge of the baseboard or tub. This is why it’s VERY IMPORTANT to use Frog Tape to mask off this area.
Supplies for Wall Stenciling


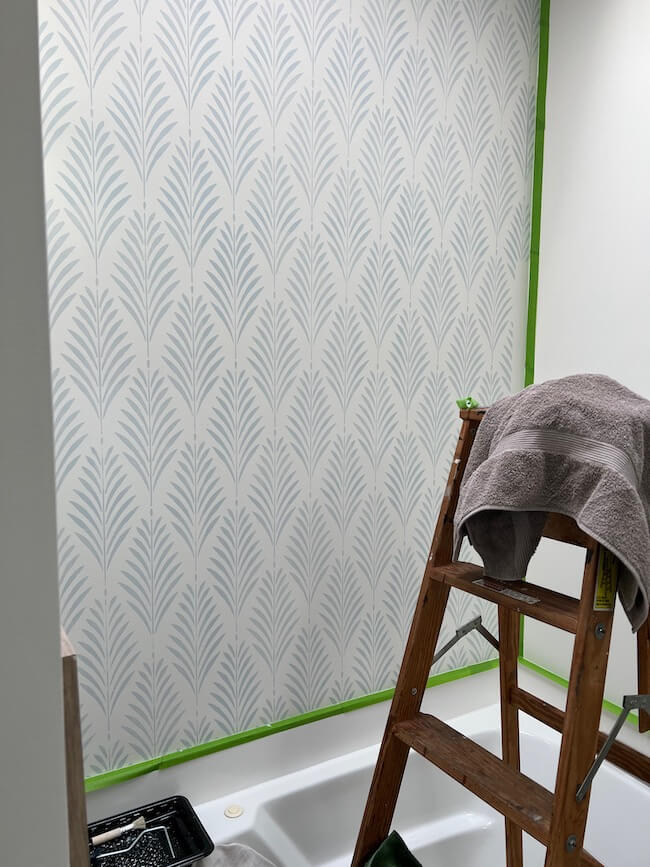
13. When you get to a corner, you will need to tape off the adjoining wall. I stenciled this corner trying the same technique with the broad knife technique described above. It didn’t work as well in the corner with this particular stencil. The pattern ended up looking distorted. So, I have ordered an additional stencil to cut into smaller sections to use at the corners.
This is as far as we got with the stenciling process because …
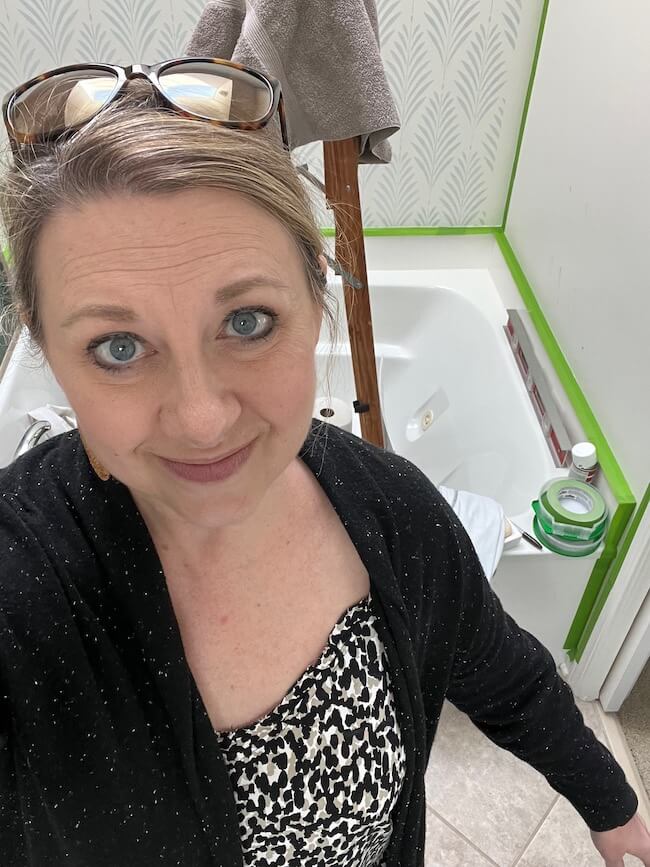
I had a little ladder mishap and injured my left shoulder. The jury is still out on the extent of the injury and how quickly I regain use of my left arm, but as of this post, I can’t raise my left arm any higher than this, and there’s a possibility of a torn rotator cuff.
So, needless to say, my wall stenciling is on hold for now!
In the meantime, since I can’t use my left arm, I’ll just shop!
My Bathroom Lighting and Hardware Selections:
I’m making some lighting and hardware decisions this week in hopes that this project can still be completed within the 8 weeks timeframe. And, if not, I will have them ready to install as soon as I can. I’m still in hopes that with a little help, ingenuity, and creative one-arm painting I can still pull this thing off, but we shall see!!
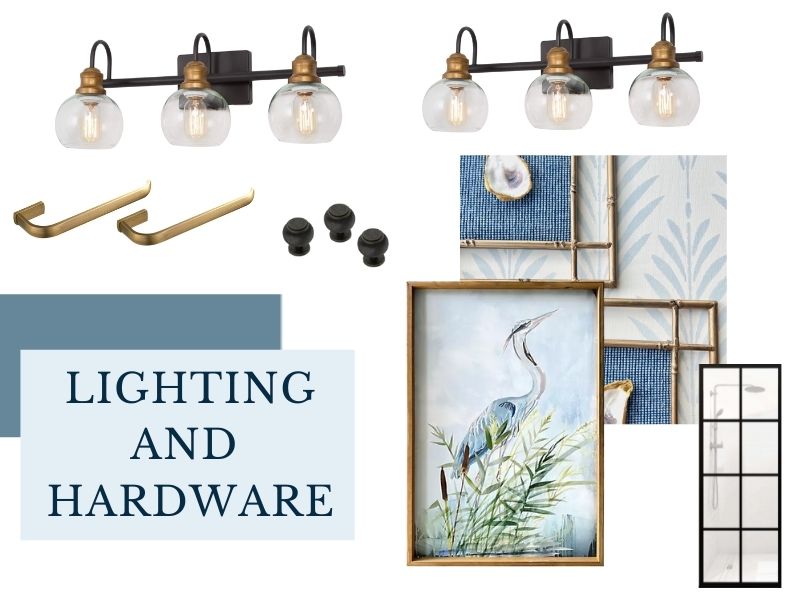
I’m planning to mix metals in this bathroom and use an antique brass and oil rubbed bronze combo in the finish on the light fixtures. The hardware on the cabinets has a rustic oil rubbed bronze finish, so I’ll repeat that in the lights. I also want to add some antique brass into the mix. The design board above is the look I’m shooting for. And I love this heron artwork I found this week! It’s definitely a possibility!
I haven’t yet decided whether or not I will paint our shower frame and try a little DIY window pane look. I have some ideas for how to accomplish it, but I don’t want it to look and feel too “DIYed”. We have a basic shower insert with a simple brushed nickel door frame. So, it may be best to leave well-enough alone on that. We’ll see!!
Tips for How to Use a Wall Stencil:
1. Use frog tape to tape off baseboards. You’ll also need to tape off opposing walls at each corner of the wall as you work the stencil design into the corner.
2. Use a dense foam roller to apply the paint.
3. Apply a spray stencil adhesive to the back of the stencil.
4. Purchase an additional stencil that you can cut into smaller more manageable pieces for corners and the ceiling.
5. Use a small amount of paint on the roller. You want it to be completely covered with paint, but not saturated.
6. Use a paper towel or paper plate to roll off any excess paint before applying it to the walls.
7. Use a stencil brush to apply the paint near the ceiling, along baseboards and in corners instead of the roller. The stencil brush will give you better control in these tight areas.
8. Use a level to check your stencil each time you apply it to keep your pattern level.
Pin for Later!
So, that’s all for this week. I hope that I have more updates to share with you next week for this One Room Challenge!
Be sure to check out all of the other One Room Challenge Guest Participant’s updates at this link!

Previous Spring 2022 One Room Challenge updates:
Thank you so much for stopping by this week and following along with our progress!!
Have a wonderful week!
Hey Kim! Your stenciled wall is looking fabulous! So sorry to hear about your accident! Prayers for a quick recovery! I am working on my first stencil project right now, as well! It’s much smaller and does not require a ladder, thank goodness! Take care, Donna
Thank you so much, Donna! What are you stenciling? I can’t wait to see it!
Hi Kim, Your ORC is looking beautiful.
I love that we have the same color scheme going on, i need your beautiful bathroom to go along with my bar area. Have a great week end.
Thank you so much, Wendy!
So nice design kim me n my wife love this design at India