How to Make Christmas Trees with Borax
Do you love the look of snowy flocked trees? Today, I’m sharing how to make Christmas trees with Borax for a perfect snowy look.
Would you like a unique centerpiece idea for your holiday table or a fun twist on a traditional Christmas tree? You can grow gorgeous Borax crystals overnight using a water and borax solution to make the most beautiful crystal Christmas trees for a holiday tablescape, vignette, or countertop display. It makes a lovely tabletop decoration, and it’s a really fun crystal experiment to do!
Today, you’re in for a Christmas tree treat!! I’m joining 8 other super creative blogging friends for a Christmas Tree Hop on this last weekend before Christmas! A special thank you to Wendy at WM Design House for putting this fun hop together! Grab a warm drink and be sure to check out all of the lovely tree creations!
If you’re stopping by from Diane at South House Designs welcome! I’m so glad you’re here! Didn’t you just love Diane’s adorable tree on her stair landing?
(This post contains affiliate links, so I may earn a small commission when you make a purchase through links on my site at no additional cost to you. As an Amazon Associate I earn from qualifying purchases.)
Does your family love to craft at Christmas?
Christmas time is the perfect time for lots of fun DIYs and crafts — either for decorating your home or for gifting friends and family.
I must confess that sometimes, well a lot of times, I take over the kitchen and make a very intrusive mess that the rest of my family must deal with while I’m in my DIY/crafting zone!
Sometimes I get some less-than-favorable looks and side-eyes about the messes I make creating all the fun projects to show you.
However, this project had the whole family interested! It’s not just another Christmas craft, it’s a fun science project!
If your family loves fun experiments and Christmas crafts, this DIY is the best of both worlds, and with a little bit of patience, the end result is a beautiful display for your home during the holiday season!

One of my favorite things to do during the holidays is decorate our Christmas tree! It’s such a creative outlet for me!

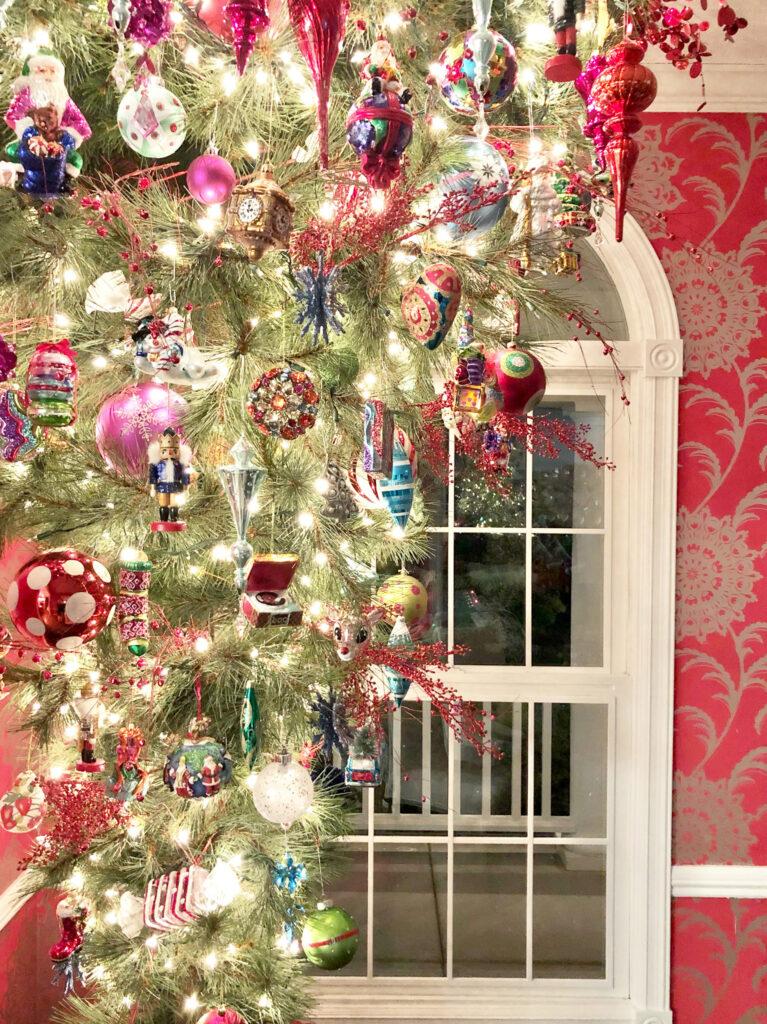
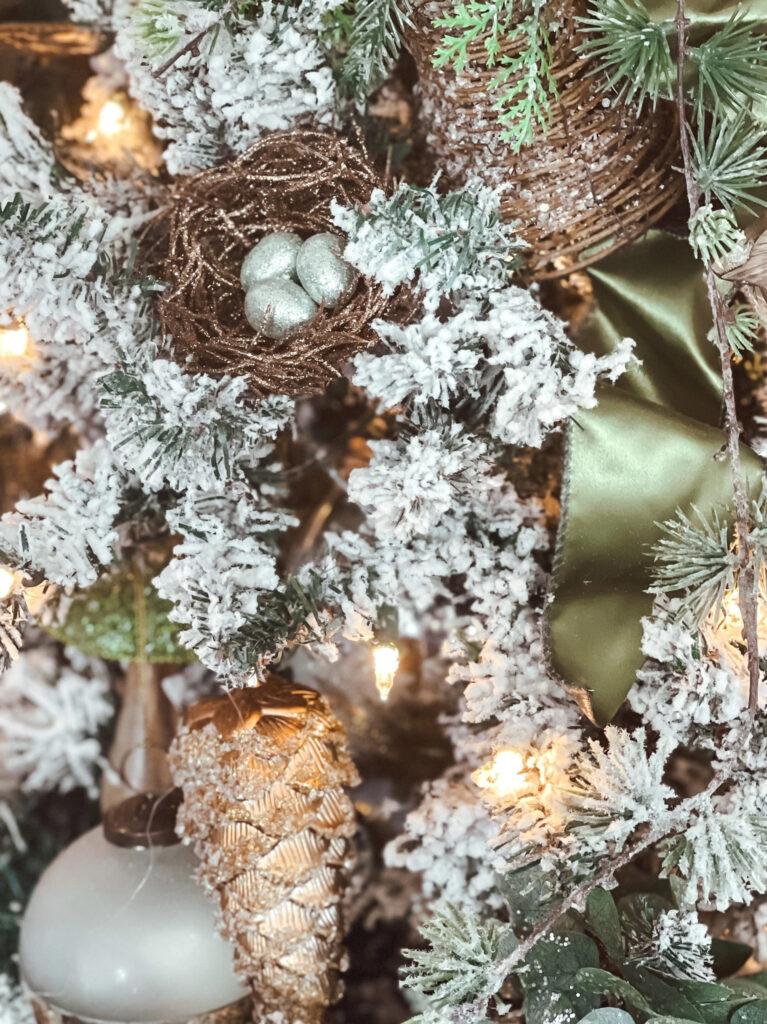
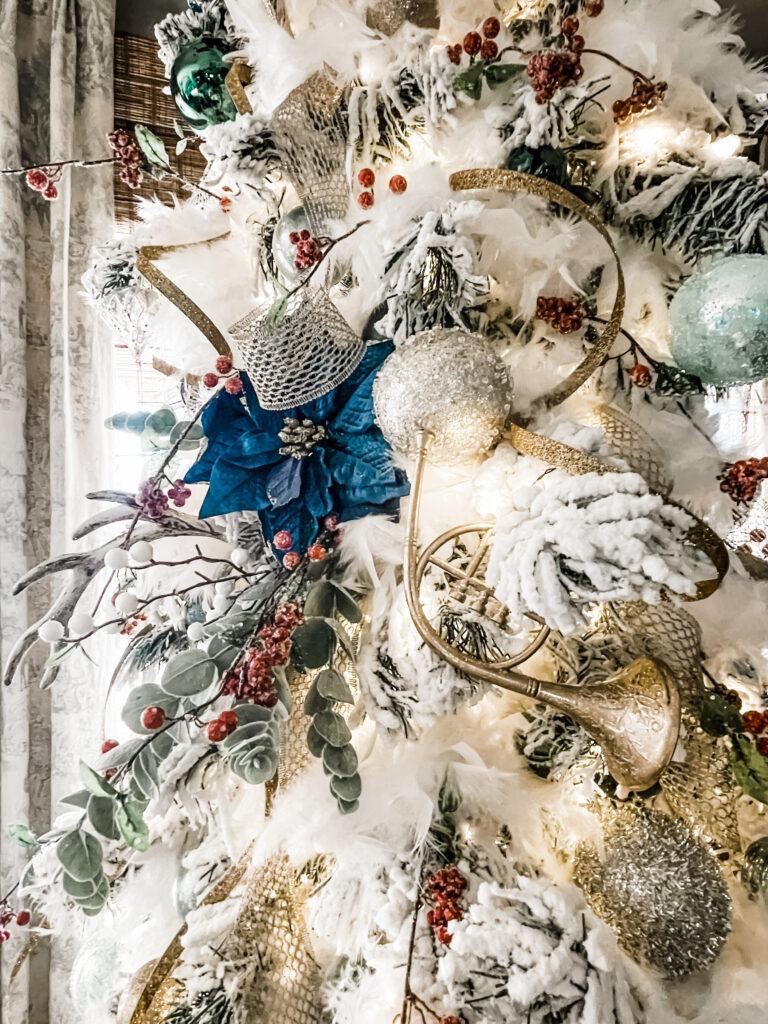
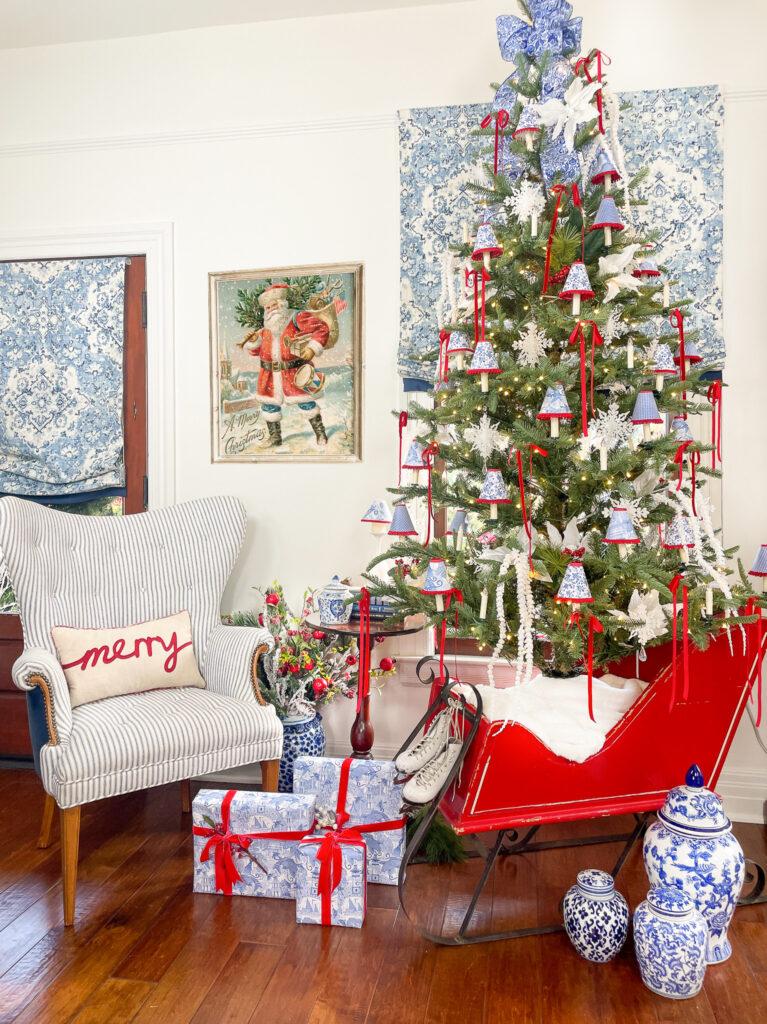
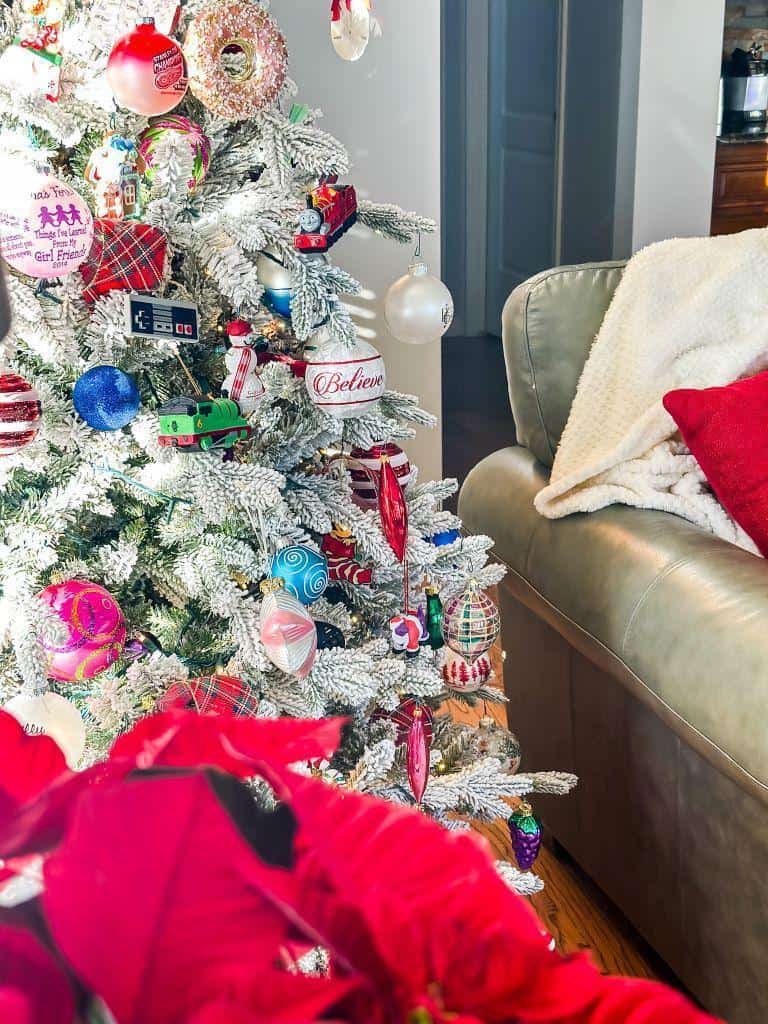
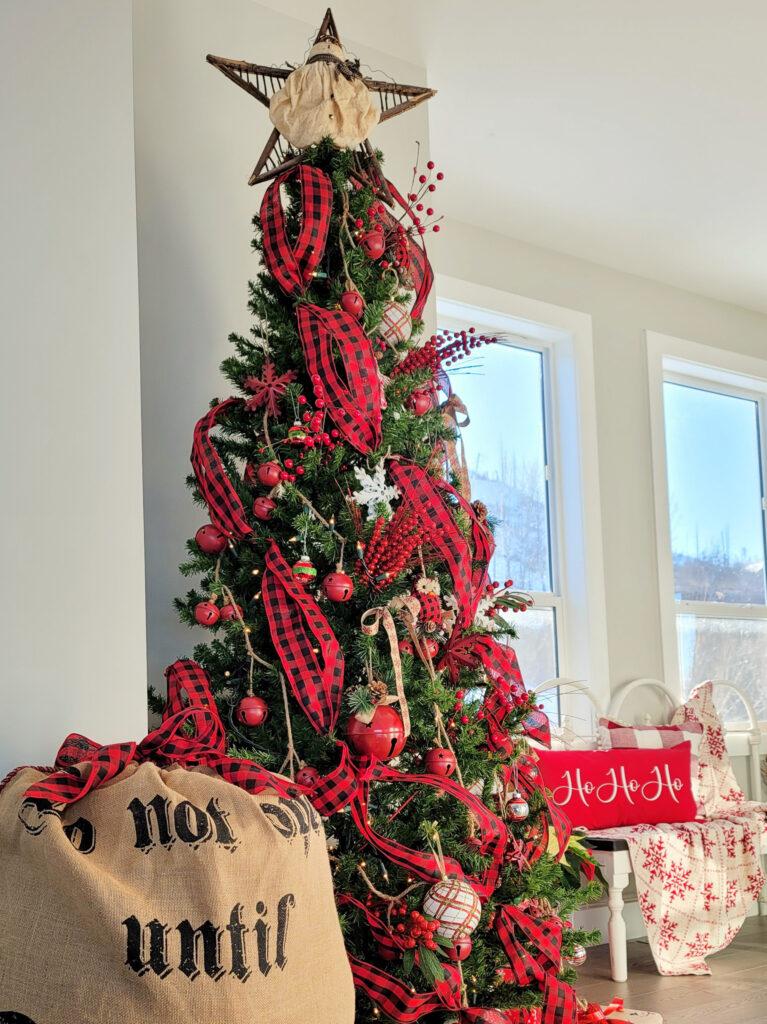
I love this year’s Christmas tree with it’s Pinecone and Red Velvet theme.
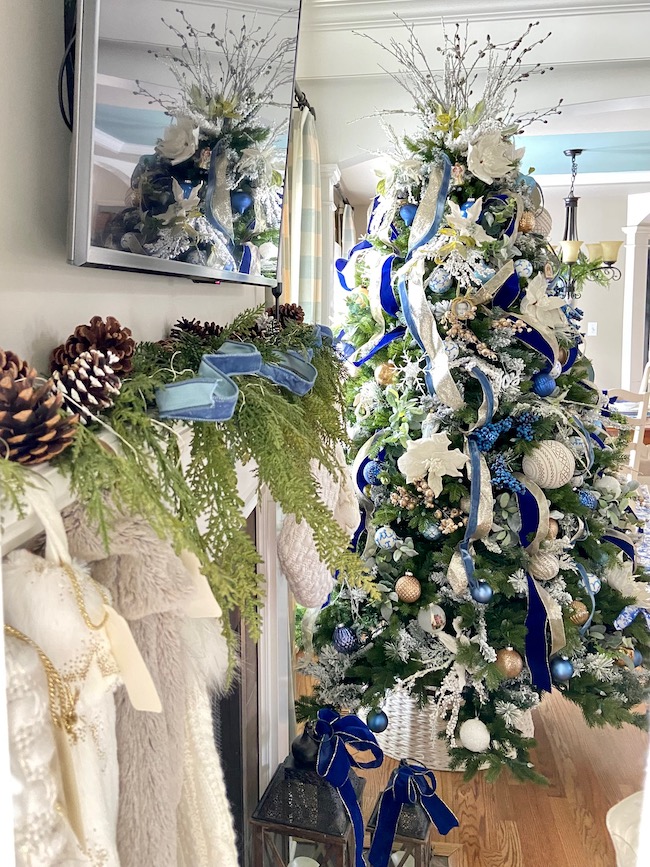
Last year’s tree was a departure from the traditional red that I love with this blue, white, and gold creation.
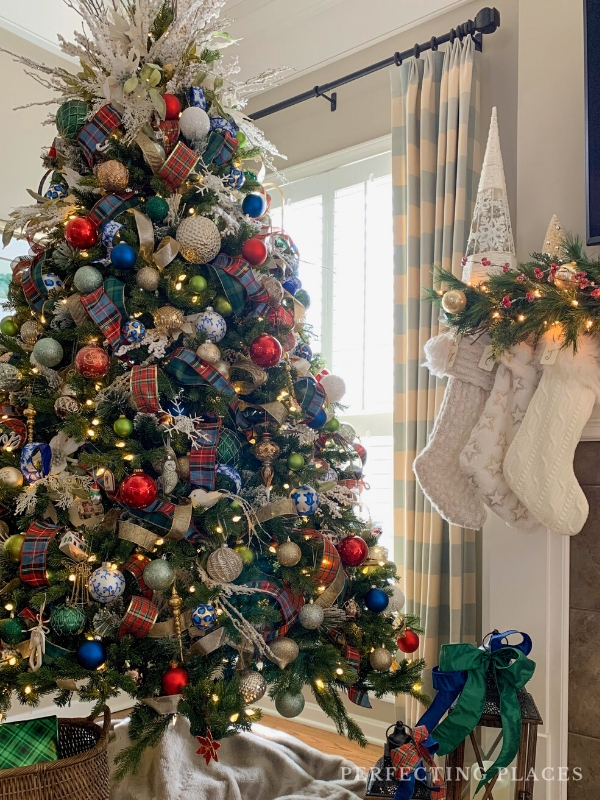
This colorful Tartan plaid tree has always been a favorite!
But after all the Christmas tree decorating was completed this year, I wanted to give this gorgeous DIY crystal tree project a try. I was inspired by Leslie’s flocked snowflake trees at My One Hundred Year Old Home but wanted to put my own creative spin on it.
What is Borax?
Borax, also called sodium borate, is an all-natural laundry booster and cleaning product than comes in powdery form. It’s commonly sold as 20 Mule Team Borax and can be found in the detergent aisle of your grocery store. Be sure to protect your hands and avoid getting the powder or solution in your eyes. It should not be injested, so be careful with pets or small children. This project should be completed by an adult or under careful adult supervision with older kids.
What supplies do you need to make this crystal Christmas tree craft?
- 20 Mule Team Borax
- Boiling Water (several gallons depending on the size of your trees)
* The Borax to water ratio is 1 1/2 cups of Borax for every 8 cups of water
- Measuring cup
- Large pans for boiling water
- Gloves and safety glasses
- Pot holders or oven mitts
- Long spoons
- Small branches or sticks from your yard, or wooden dowels
- White pipe cleaners (chenille stems)
- Dry florist foam (extra dense)
- A heavy weighted pedestal base or urn
- A large container or bucket for each tree to soak in (The container needs to be tall enough for the trees to be completely submerged.)
- Towels for drying
- Cotton balls or batting
Shop the Supplies

How to Make Christmas Trees with Borax:
Phase 1 — Create the Trees
1. Decide the size you would like your crystal trees to be.
You’ll need to consider the size of the containers you have available for soaking your trees overnight in the solution. Your trees should be completely submerged in the solution, so you need to make sure your trees are short enough to fit entirely in the bucket or container.
I was a little over-zealous when I decided the height of my trees, and was a little nervous I wouldn’t have the right size container. My tall tree is 16 inches tall, and the shorter one is 12 inches.
I used a large 5-gallon bucket to soak the larger tree and a two-gallon bucket for the smaller tree.
Plan the size of your trees accordingly with the size of containers you have on hand for soaking.
2. Cut your stick or dowel to the height you would like your tree to be. This will serve as the trunk of your tree.
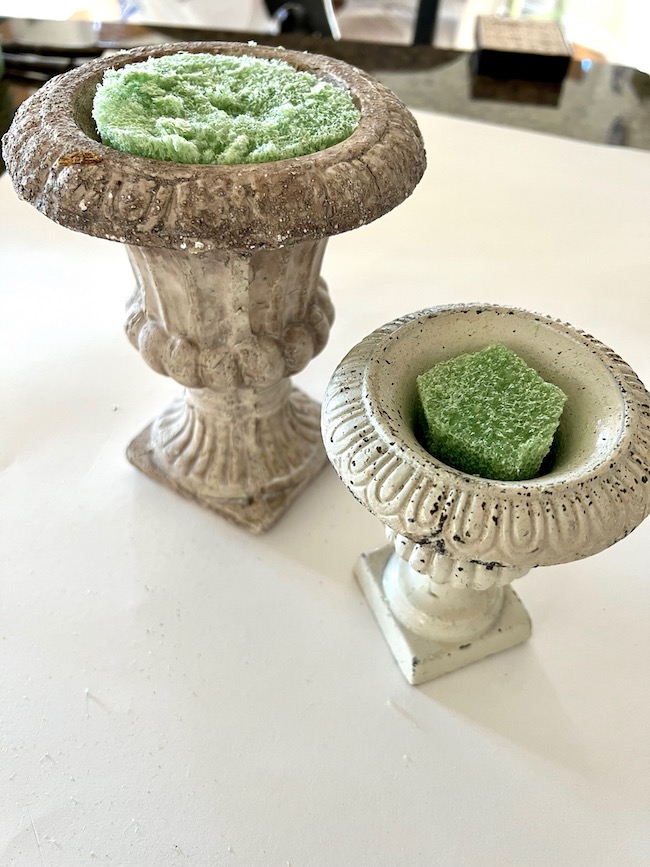
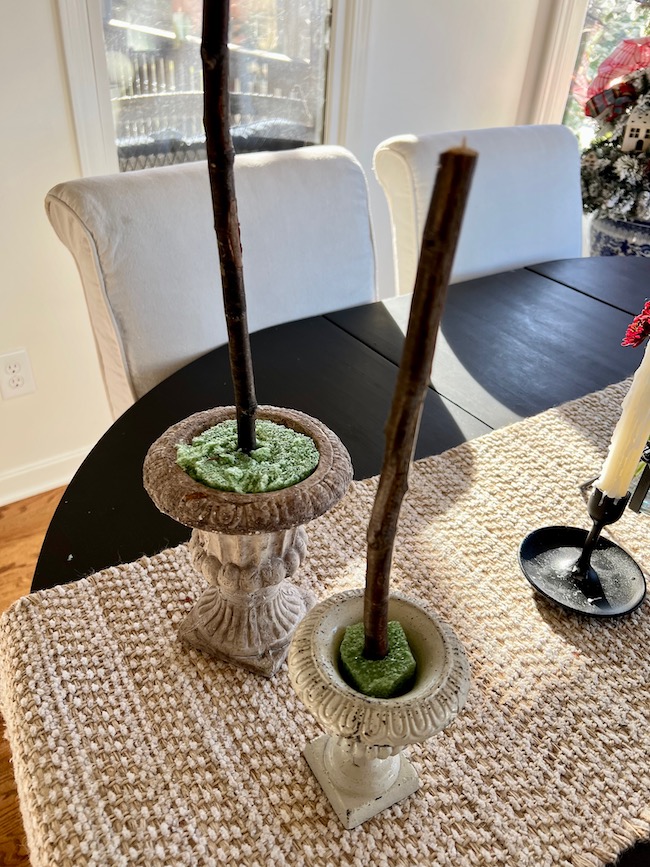
3. Trim the florist foam to fit into the pedestal base and place it in the urn.
4. Insert the base of the trunk into the foam.
You may find that the foam gives a lot and the whole widens as you work. That’s ok for this step. Once the trees are completely finished you can stabilize the trees with additional pieces.
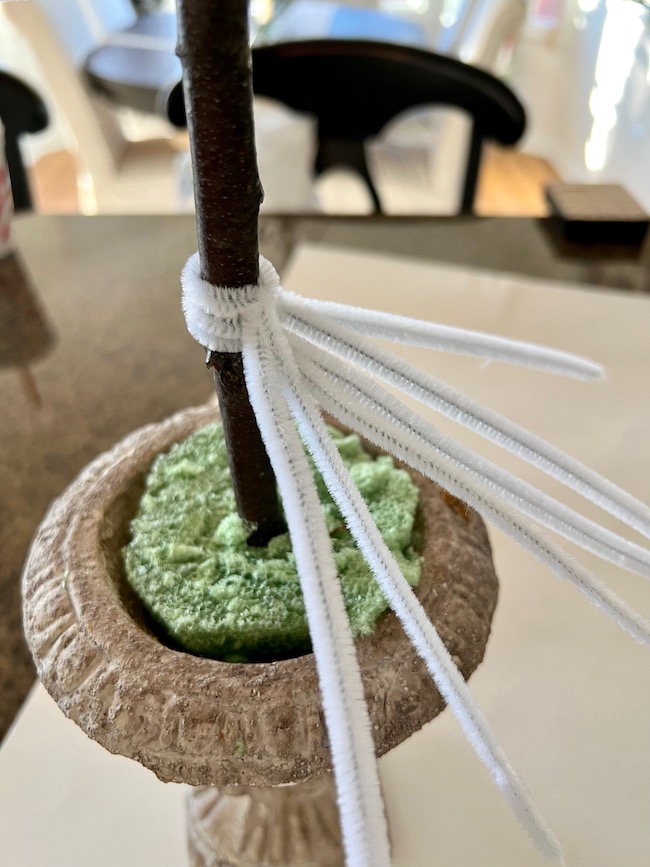
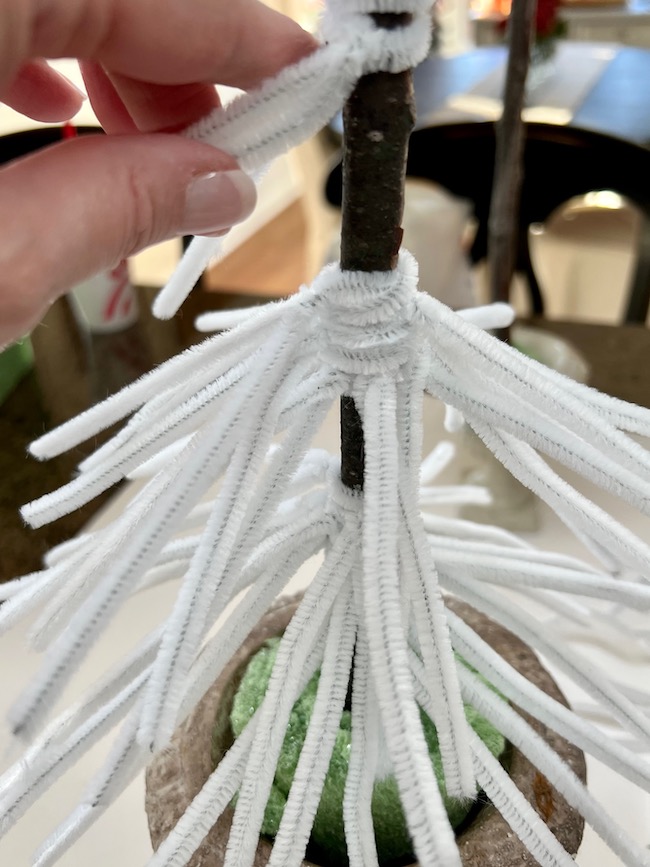
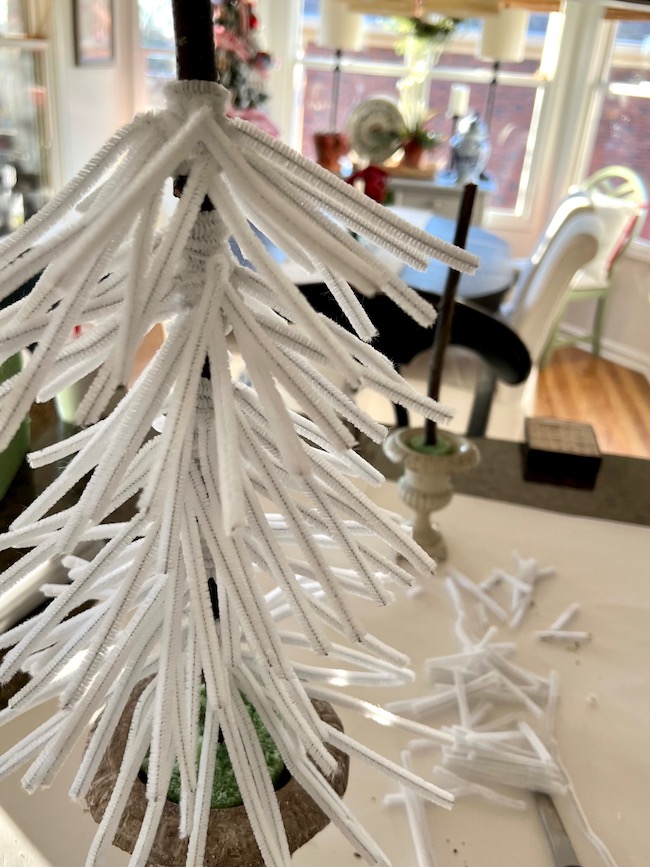
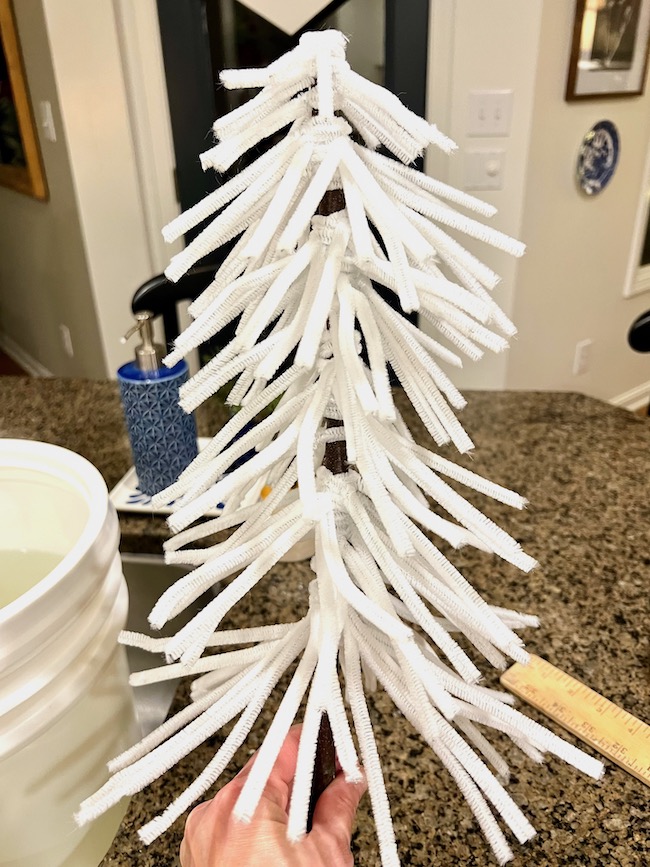
5. Begin at the bottom of the trunk and twist pipe cleaners in rows around the stick working all the way to the top of the tree.
6. Gradually decrease the size of the pipe cleaners as you work up the tree to form into a conical shape.
7. After you’ve added all the pipe cleaners, you might need to trim a few pieces help shape into the shape of a Christmas tree if needed.
8. Repeat this process for each tree you’re making.
Phase 2 — The Crystal Formation on the Trees
1. Bring the water to a rolling boil.
2. Measure the Borax into your container.
3. When the water comes to a boil, pour the hot water into your container and stir with the long handle of a spoon until the Borax dissolves. Be very careful not to burn yourself!
I placed my 5 gallon bucket in the sink for this process and made sure to use pot holders and oven mitts to protect my hands. This would be a good time to don the goggles!
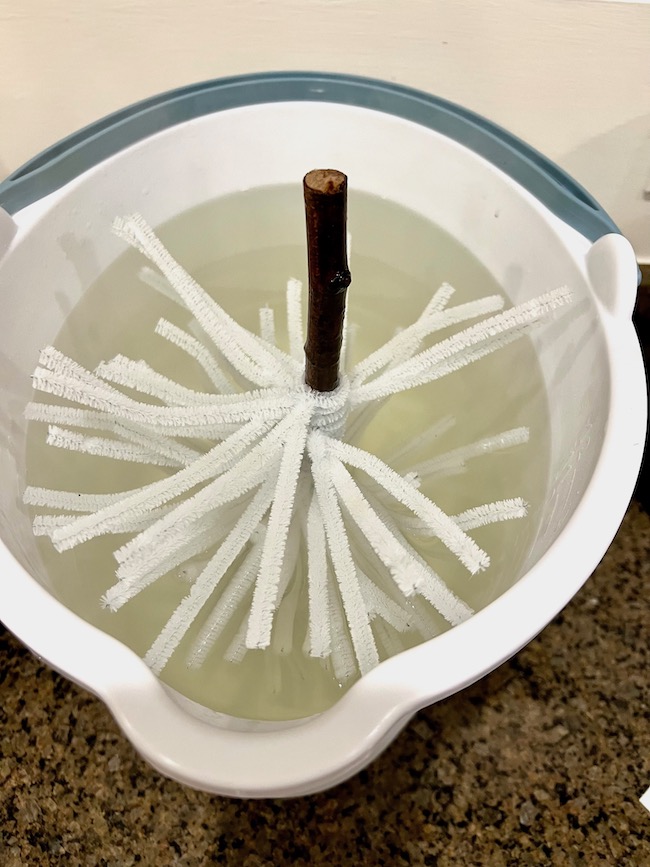
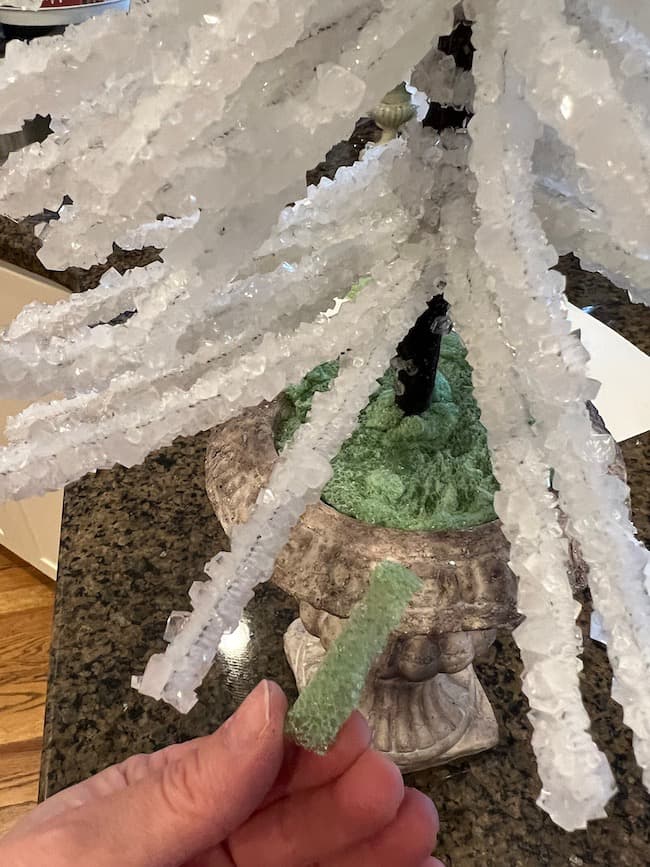
4. Insert the top of your tree into the solution so that the tree is upside down in the bucket and let it sit overnight.
All of the pipe cleaners must be completely submerged in the water. I made my trees so tall that I had to boil several batches of water to completely fill my buckets.
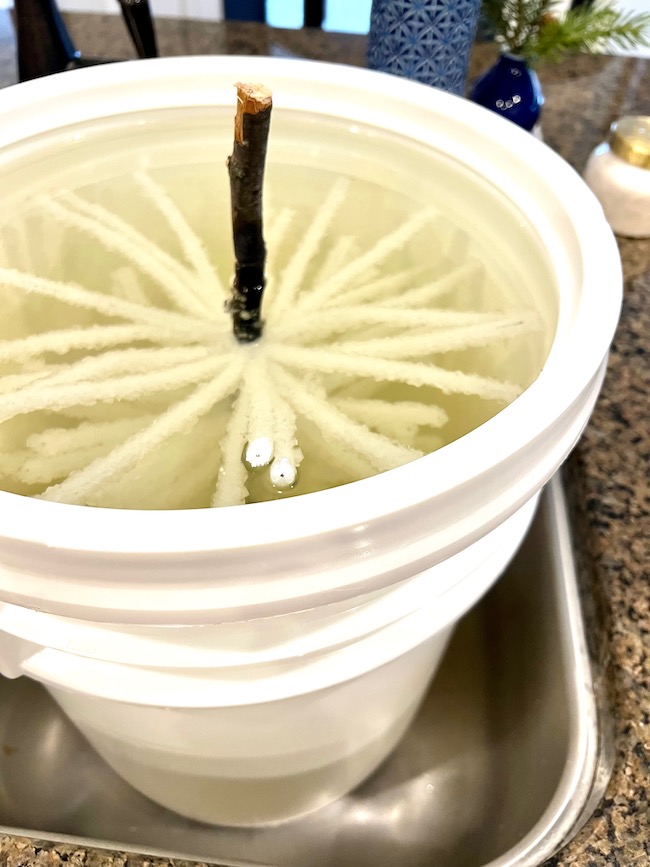
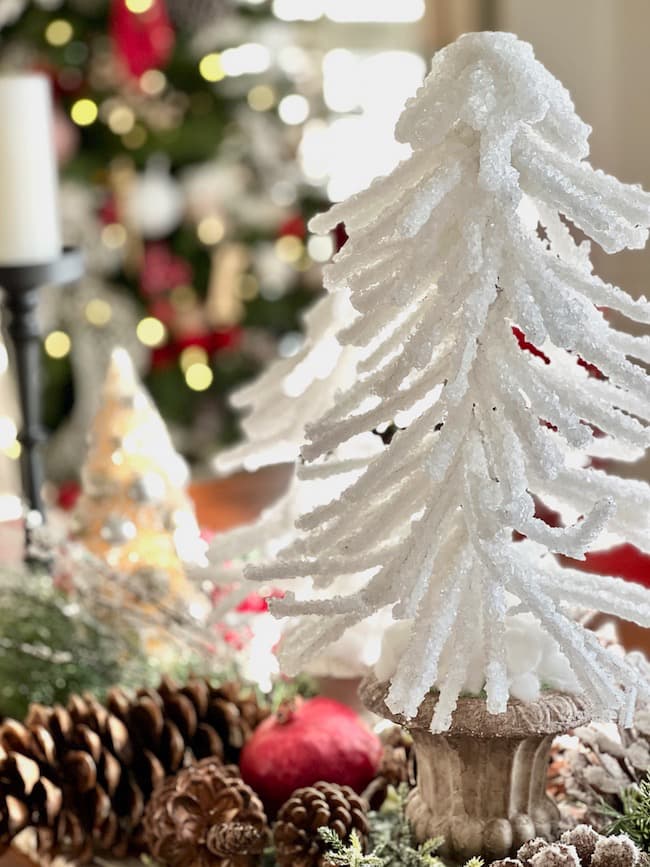
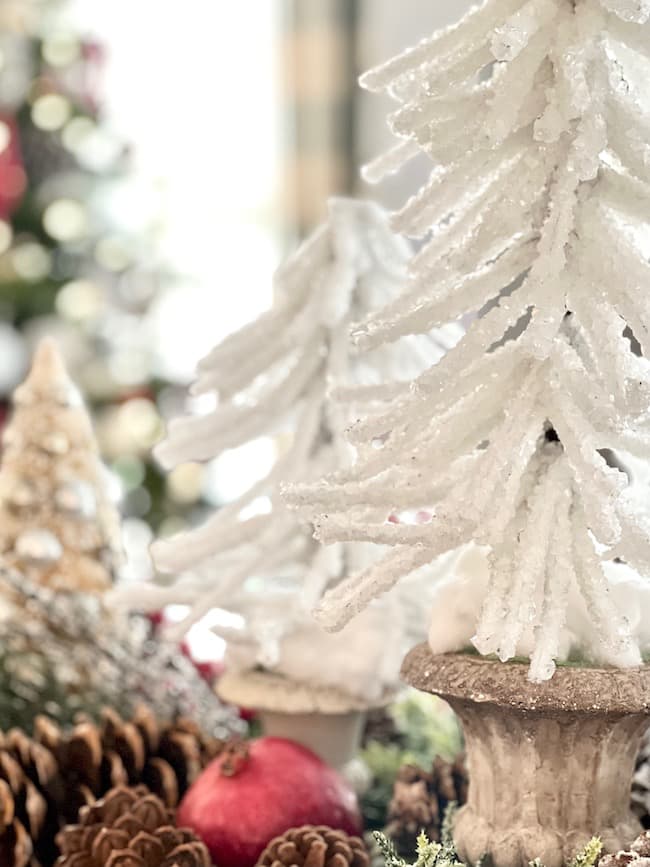
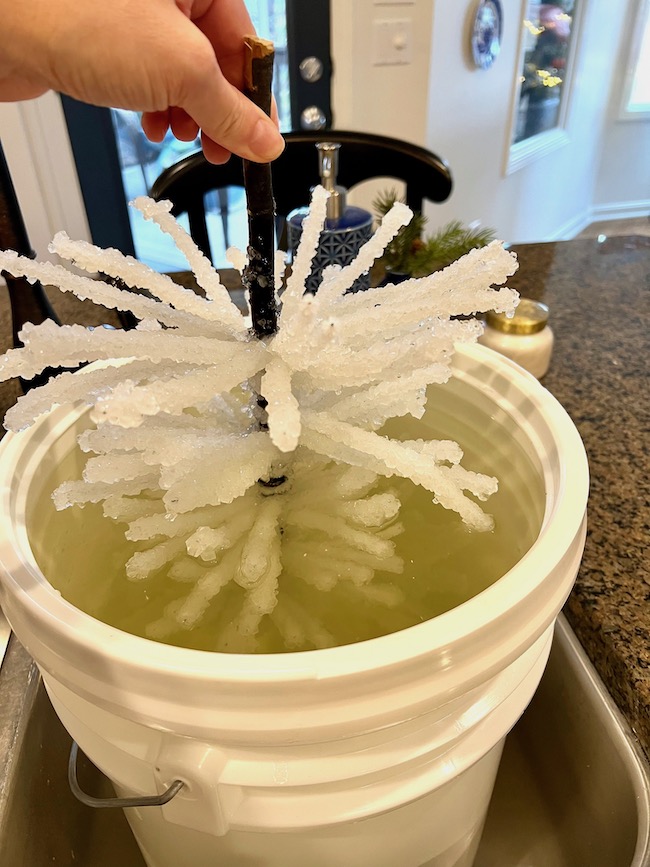
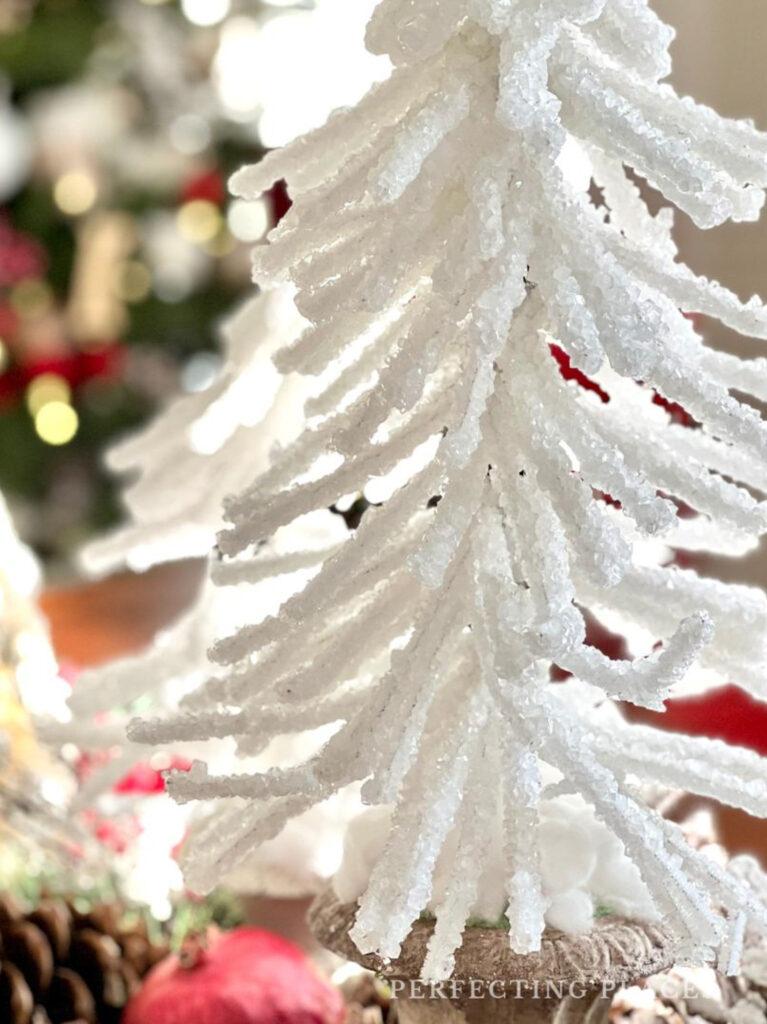
The next day, you’ll see the beautiful crystal growth on your trees! My smaller tree was completely covered in beautiful crystals by morning. It took the larger tree a few extra hours to form the crystals, but by early afternoon I had two gorgeous snowy trees!
5. Carefully remove your trees from the solution and let them air dry. It’s surprising just how heavy the trees are once they crystallize.
I poured the water out of the buckets and left the trees in the buckets to air dry. I let the excess water drain onto a towel before inserting into the base.
6. After they are dry you can insert them into the florist foam in your pedestal bases.
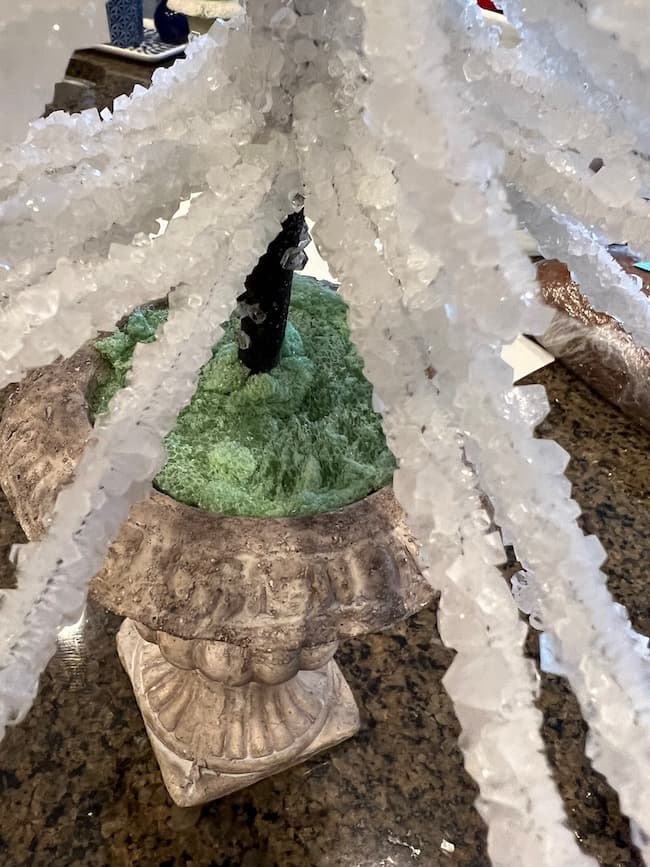
7. I ended up cutting new pieces of the florist foam for my small urns. You want the foam to completely fill the opening of the base so it’s stable when the heavy trees are inserted.
I inserted the trees as far as they would go into the bases. The weight of the trees helps to stabilize them in the urns. I cut small pieces of the foam and inserted into any gaps in the foam to create a solid base for the trees and help level and stabilize them.
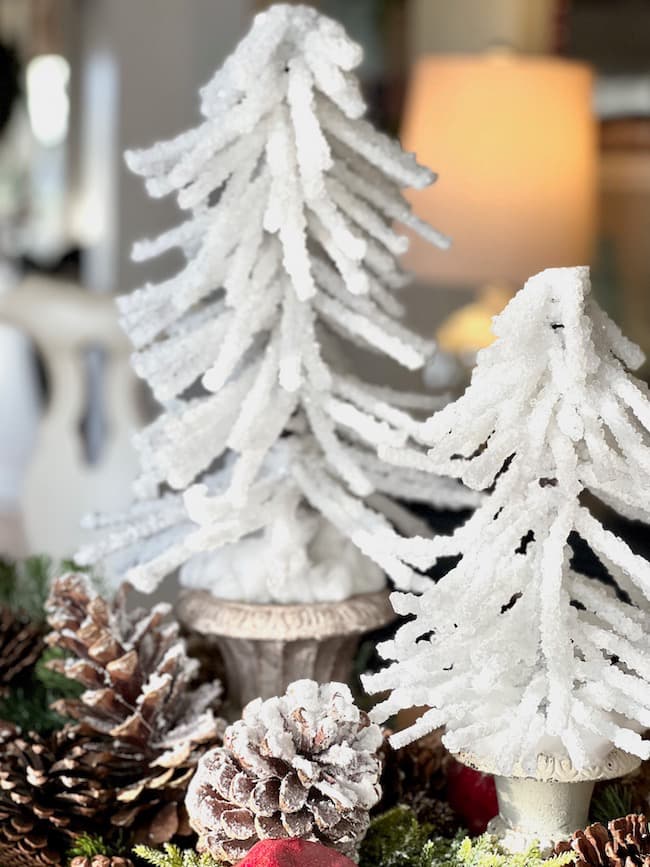
8. Add cotton around the base of the trees to cover the foam and you’re ready to display your beautiful creations.
Clean your buckets and dispose of any extra white crystals from the solution. Crystals will form on the sides of the jar or container, but they can easily be cleaned off with hot water.
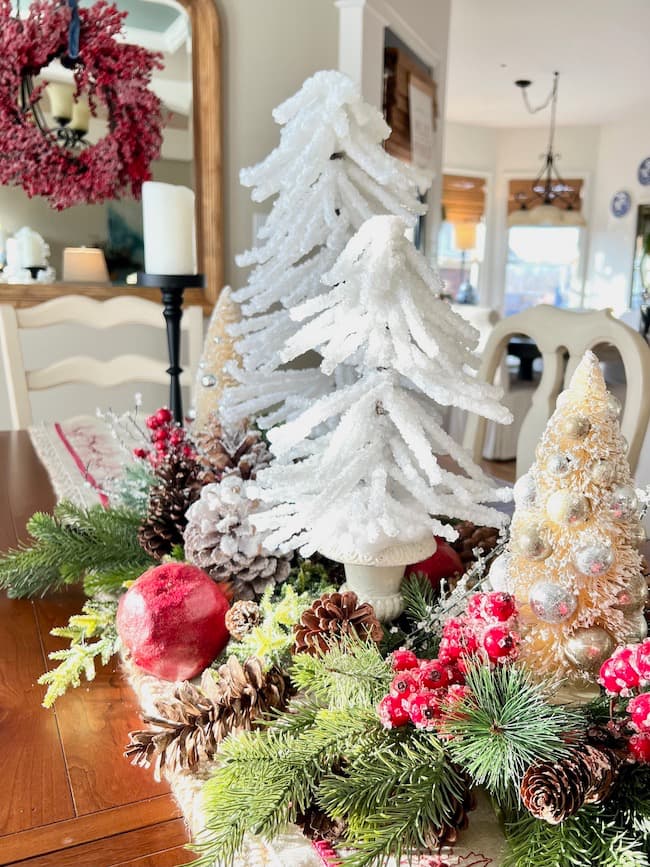
Create a Centerpiece or Vignette with Your Crystal Trees
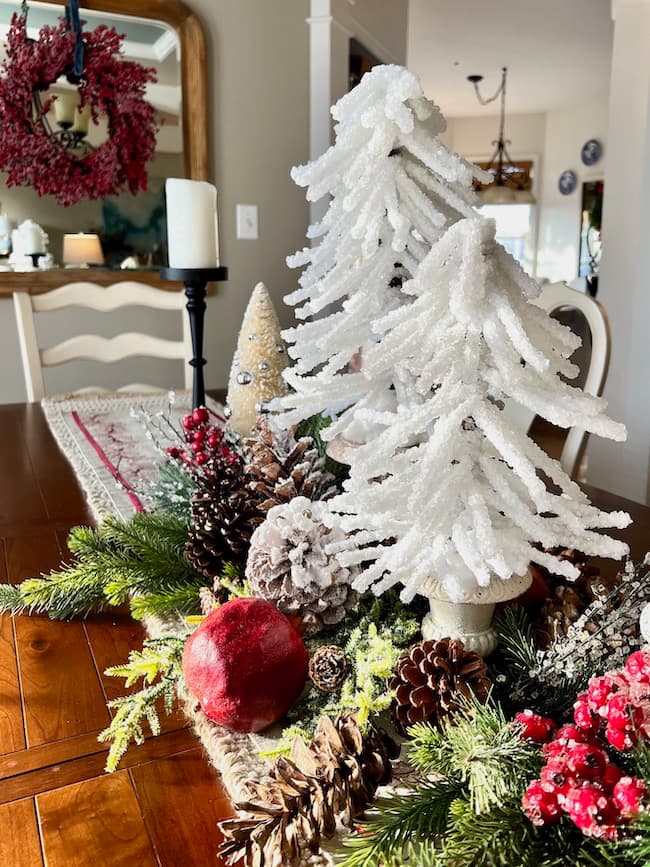
I’ve displayed our crystal trees in our dining room. They’re such a pretty addition to our centerpiece for Christmas, and they’ll be a perfect winter decor accent after the holidays!
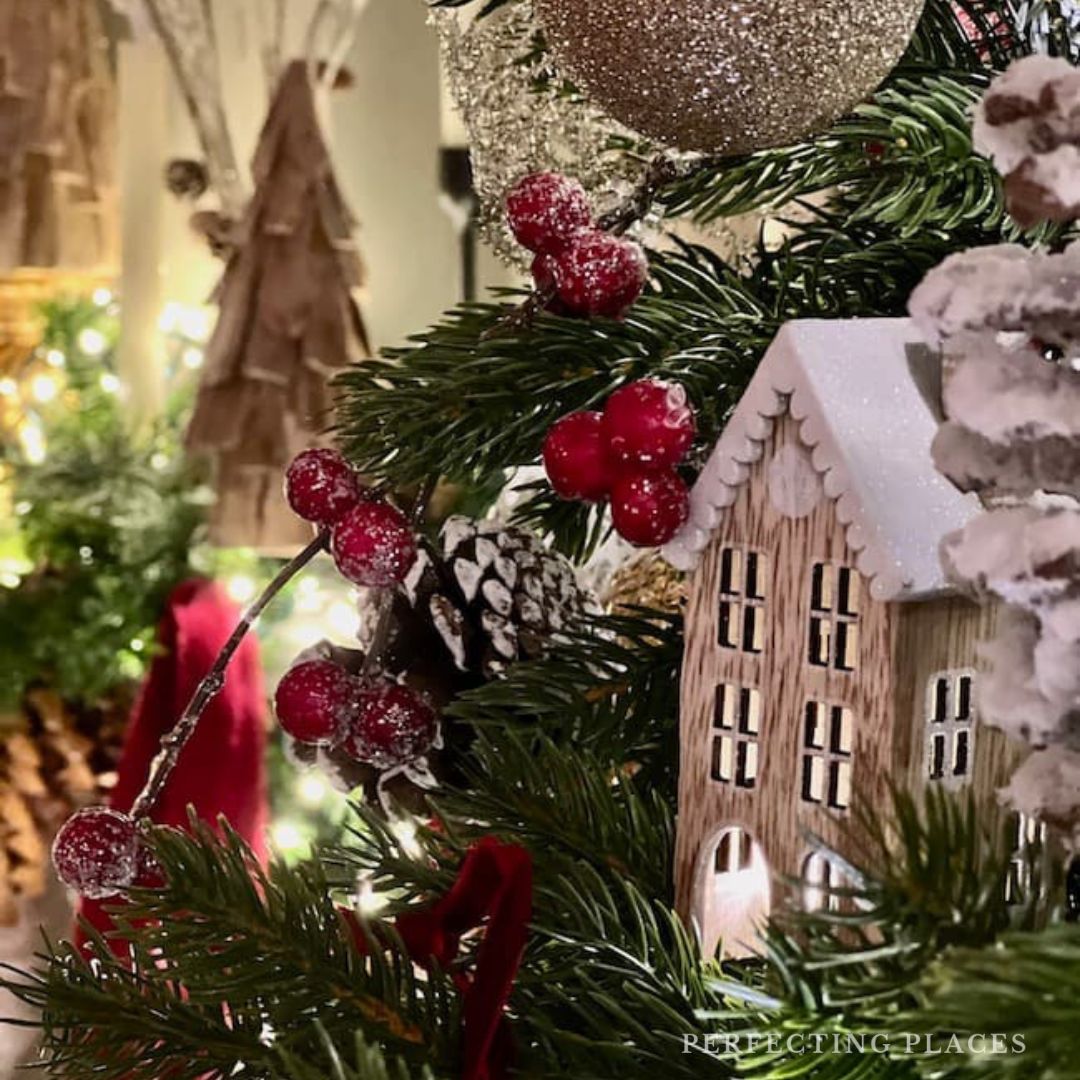
I added a variety of faux Christmas greenery around the crystal trees along with snowy pinecones and crystalized red berries. Pomegranates add pretty color along with the berries.
It’s really a magical look for your table!

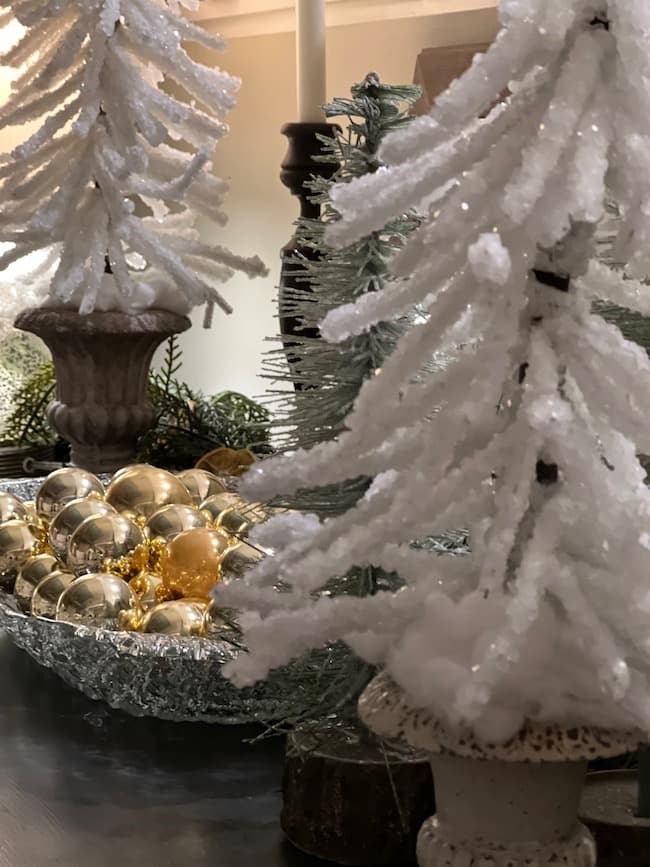
The trees are also beautiful in a vignette on our dining room buffet paired with a glass bowl full of vintage gold Christmas balls and greenery. I just love the sparkle and texture they add to the room.
I hope you give this fun little science experiment a try! It’s a great way to add a little magical sparkle to your Christmas decor!
Now, be sure to visit Susan at Hen and Horse Design, who is next up on our Christmas Tree Hop! You’re going to love her tree and helpful tips for layering your Christmas tree decor!
Pin This Idea for Later!

Thanks so much for stopping by and joining in the Christmas tree fun! You’ll just love all the fabulous ideas from my super creative blogging friends! Be sure to check out their lovely creations!


Oh my goodness! These trees turned out beautifully! I love their crystal branches and how you styled them. And, I loved seeing your decorated trees from past years. You are so talented, Kim!
Thank you so much, sweet friend! It’s been fun hopping with you and seeing everyone’s gorgeous trees!! Merry Christmas!
Kim, I love this project. I have never heard of this technique before and will need to give it a try. Your Christmas tree is so beautifully. I love how you have decorated your home for the holidays.
Thank you so very much, Tammy! The trees were fun to make and quite amazing to see the next morning!! Merry Christmas, sweet friend!
These trees look so amazing! I may have to try this myself! BTW I love your blog! So good hopping with you, today! Merry Christmas, Kim!
Thank you, Kim!! You really should give them a try! They’re perfect for winter decor as well. It was a fun science experiment that we all enjoyed! Merry Christmas!
Kim!!!! I LOVE, LOVE, LOVE this project! I am definitely going to do it. They turned out so beautifully and I love all the different ways you styled them. They are going to look perfect in my green house!!! Thanks for sharing this amazing project.
Oh, thank you so much, Crystal!! They will be fabulous in your greenhouse!! I can’t wait to see what you create and how you style them! Merry Christmas!
These are simply fabulous Kim, I am saving this one for next year for sure! I am so glad you could hop along with us today. Wishing you and your family a very Merry Christmas.
Ooh, I love love love your snowy trees, Kim! They’re perfect for Christmas or throughout the winter months! I adore the ways you’ve styled them too! And thanks for sharing your large Christmas trees too! Everything looks so beautiful!
Kim, this is such a fantastic idea. Love it. You’ve explained it so well. Merry Christmas to you and your family.
Oh my, these crystal trees are fabulous! Such a fun Christmas craft! I’m right there with the side eye looks with our creative endeavors. What can I say, the kitchen feeds the kids and my soul!
These trees are amazing, Kim! I can’t get over how much they look like rock crystals – so cool. I love how they turned out and how you decorated with them too. They’re gorgeous! Just pinned and will share it on this week’s From the Front Porch post. Hugs, CoCo
Oh, that’s wonderful, CoCo — so sweet of you! It was a really fun project to make!
The trees look amazing. Can they be used year after year, will they last? Can they be sprayed sealed with something like a varnish sealer?
I am wanting to try making them now. 😊
Thank you so much, Jennifer! The trees will definitely last and can be used year after year. I don’t think you really need to spray them with anything. I hope you enjoy making them! It’s fun to watch the crystals form!