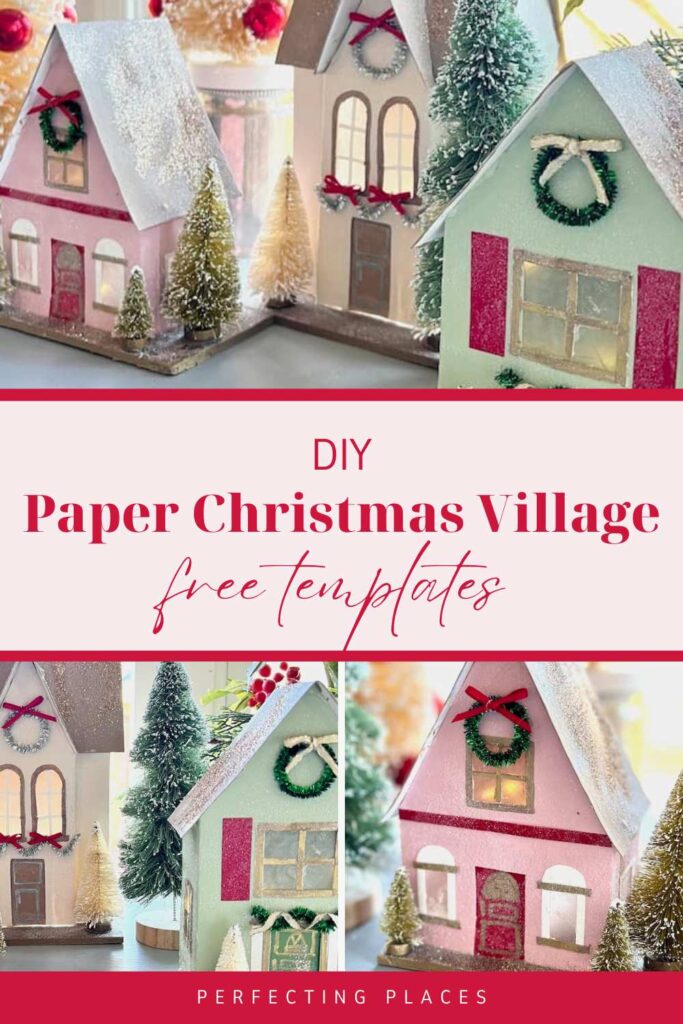
Make Your Own Christmas Magic: Free Printable Christmas Village Templates
Want a little handmade holiday charm? Make your own DIY Christmas village houses with these step-by-step instructions and templates. It’s a fun, festive way to add a little magic to your holiday decor!
With these free printable templates, you can build your own enchanting paper Christmas village without breaking the bank.
(This post contains affiliate links, so I may earn a small commission when you make a purchase through links on my site at no additional cost to you. As an Amazon Associate I earn from qualifying purchases.)
Little Christmas houses hold a special place in my heart during the holidays and are some of my absolute favorite decorations! They’re cozy, cute, and oh-so-nostalgic, adding a warm touch to our holiday decor year after year.
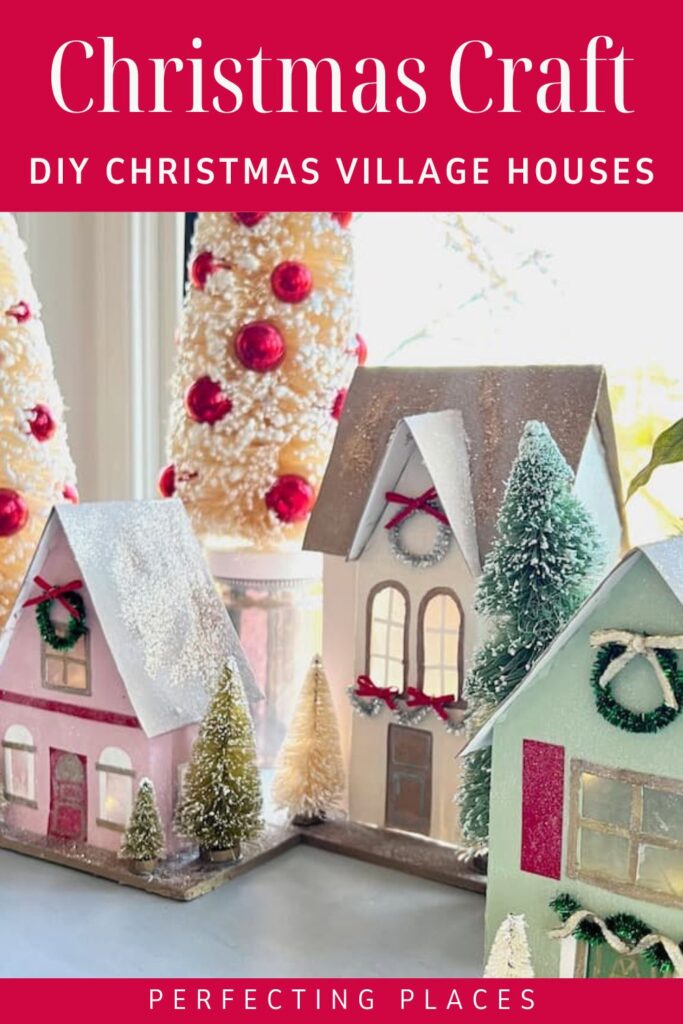
Most of my Christmas village collection includes simple ceramic houses with a few wooden ones mixed in, but my favorite houses are those created with paper!
I love the colorful details of these charming little structures, but collecting them can get a little pricey.
So, I set out to create my own magical little DIY Christmas village with some card stock, glue, and glitter. Today, I’m thrilled to share all the instructions—plus a free printable template so you can make your own!
How to Make Your Own Paper Christmas Village Houses?
You don’t have to spend a fortune to have a pretty Christmas village; you can make your own Christmas houses like I did!
I’ve always loved the intricate vintage paper putz houses, but it can be quite expensive to collect a whole village. So, rather than collecting houses, I’ve been collecting Christmas inspiration, and I had a ball creating these enchanting little DIY Christmas village houses using foam board and card stock paper. If you’re like me, and love paper crafting, this is the perfect project for you!
Follow the instructions below and use the printable paper Christmas village template to create your own unique and festive Christmas village like I did.
Just print out the Christmas house templates below for your pattern. Cut out and trace your patterns onto poster board or heavy card stock, and then start assembling and decorating away!
I’m sharing an easy tutorial with detailed instructions below!
Supplies for DIY Christmas Village Houses:
- Printer
- House template — see below for download
- Printer paper
- Poster board
- Micro tip scissors
- X-Acto knife
- Pencil
- Foam board
- Self-healing cutting mat
- Hot glue gun and glue sticks
- Ruler
- Paper cutter
- Acrylic paint in the colors of your choice
- Paper plates for mixing paint and catching glitter
- Extra fine glitter in gold and iridescent
- Wax paper or vellum
- Mod Podge
- Gold and silver paint pens
- Foam brushes
- Small paint brushes
- Cardstock in colors of your choice
- Metallic chenille stems
- 1/8 inch ribbon in colors of your choice — gold, red
- Small bottle brush trees
- Fairy light strands
Printable Christmas Village House Templates:
I’ve created free printable templates for the houses I made. Just sign up below for access to the downloads!
Step-by-Step Instructions for Paper Holiday Village Houses:
1. Create your house templates.
To create your house templates, download the printable paper Christmas village templates and print onto printer paper.
Remember, you’ll need to print 2 copies of the main body of each house.
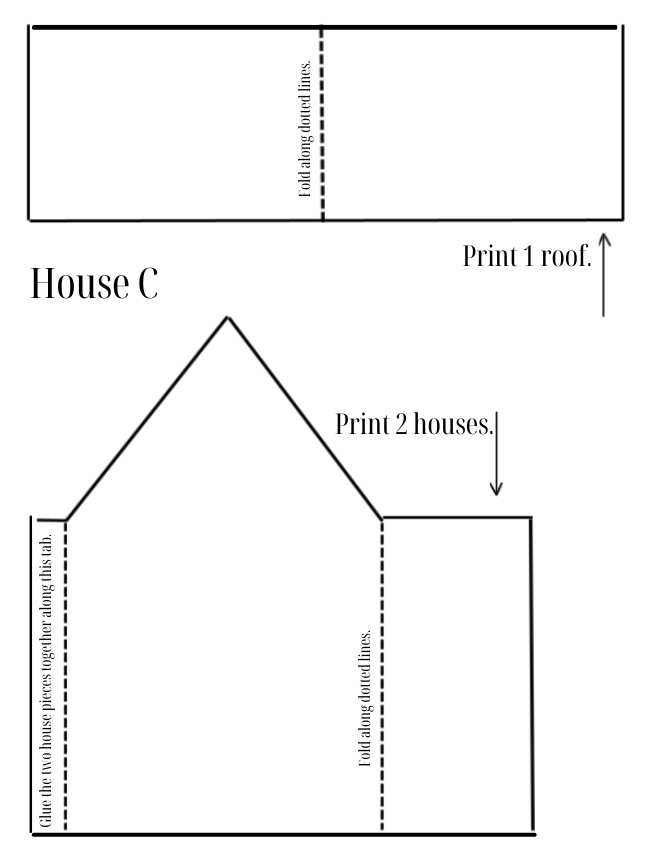
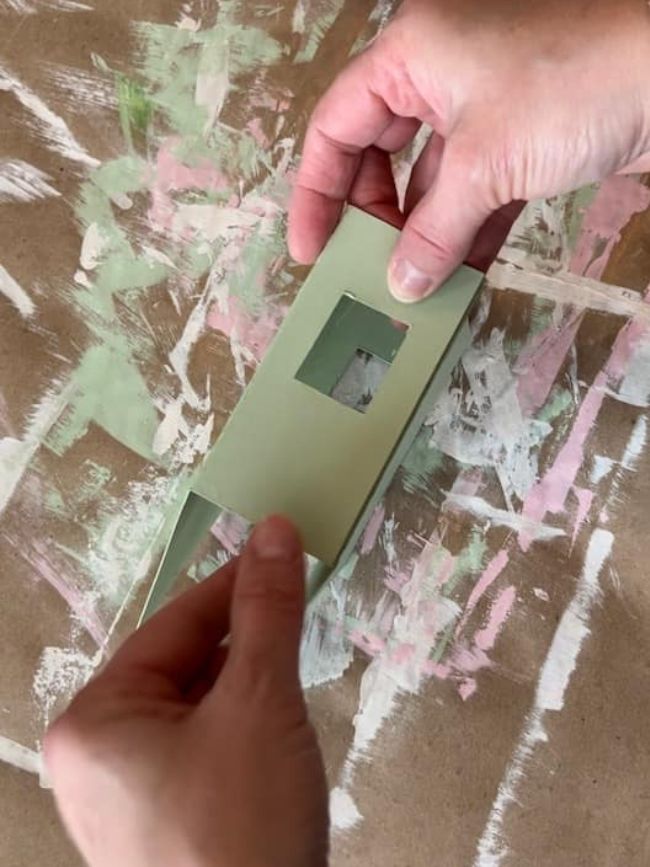
Cut out these house body and roof templates and glue the “house body” pieces together. For the larger “House A” you’ll also need to cut out the front door bump out and dormer pieces.
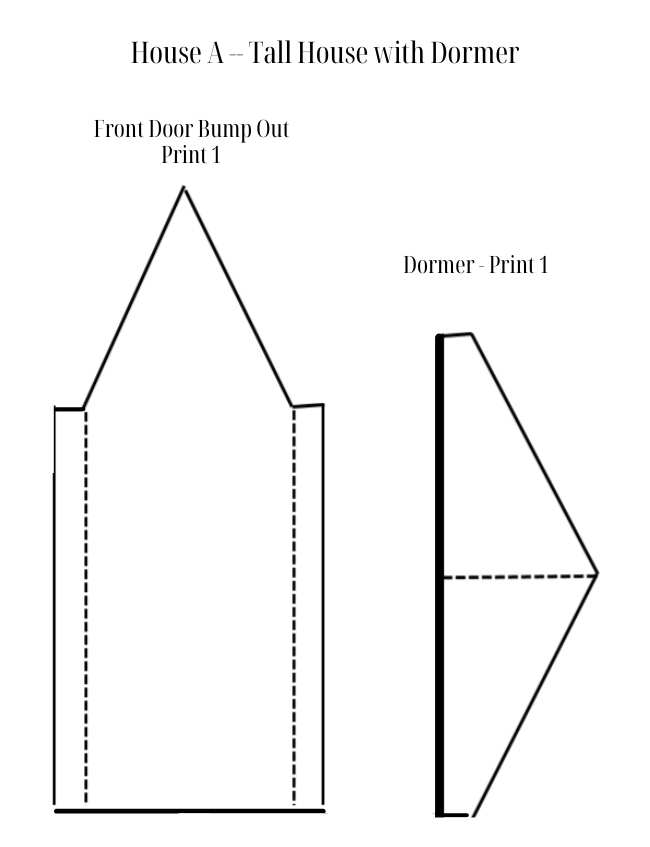
Use these patterns to trace onto heavier poster board, or card stock. I used white posterboard for all of my DIY houses, and added color later with paint.
All of the dotted lines on the template are for your folds. The house body pieces have tabs that you’ll use to glue the two house body pieces together.
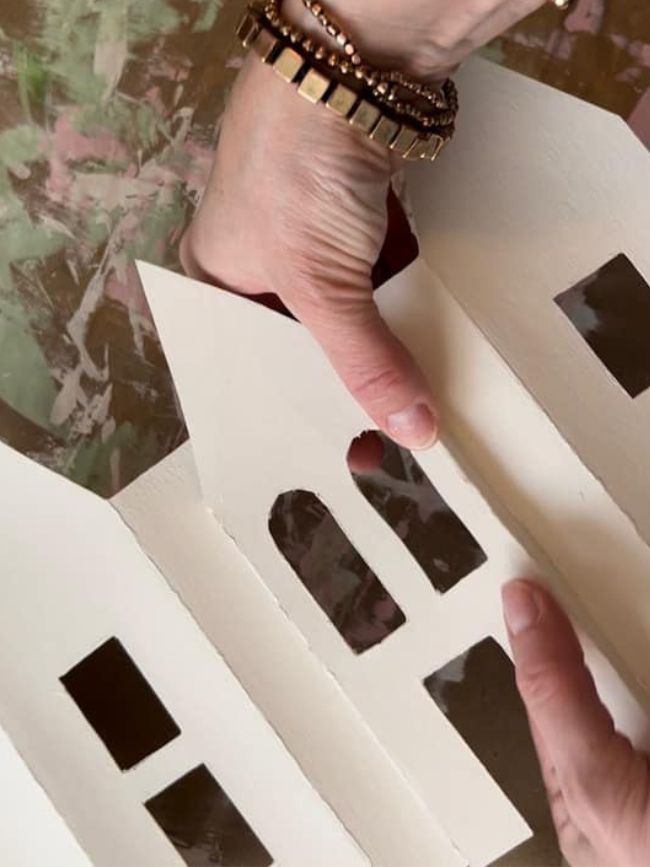
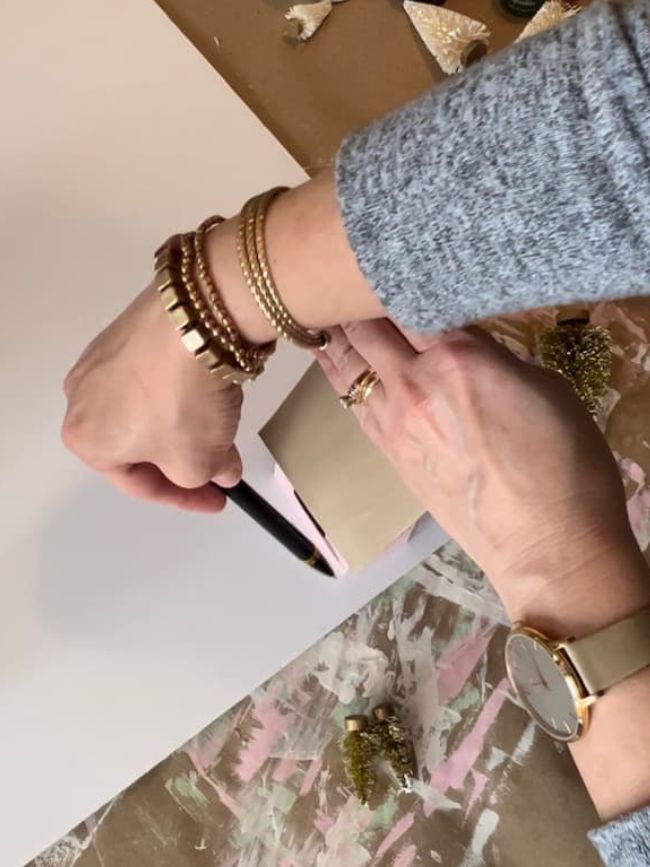
2. Design your windows and door styles.
Determine the number and style of windows and doors for your houses. You can use a ruler and pencil to draw the designs and placement for these features.
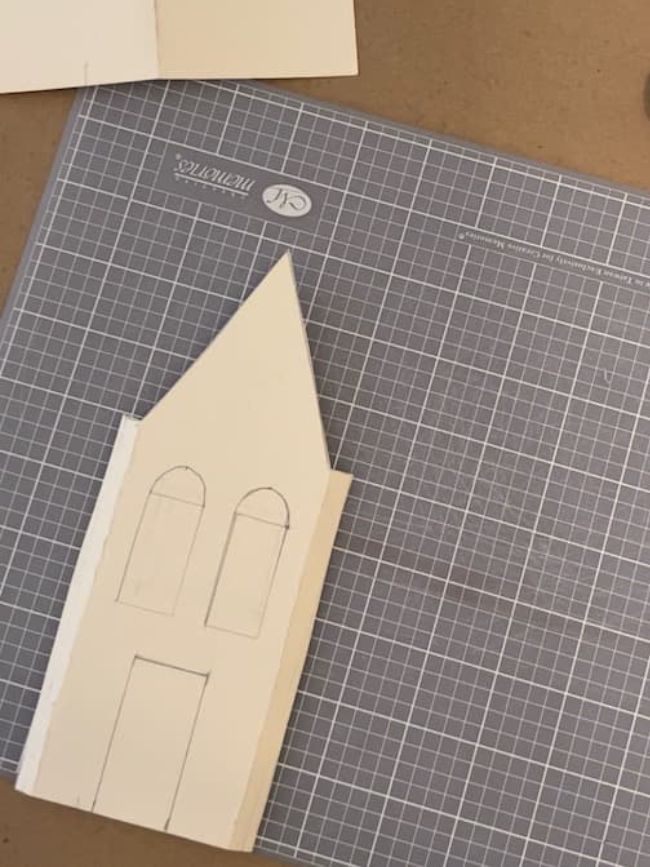
Just a special note, keep the window and door openings fairly simple at this point. You can always add more features such as window panes and door trim later by adding paper trim.
If you want to be extra precise, line up your house on the lines of a cutting mat. Use the lines on the mat to help you line up your drawings for your windows.
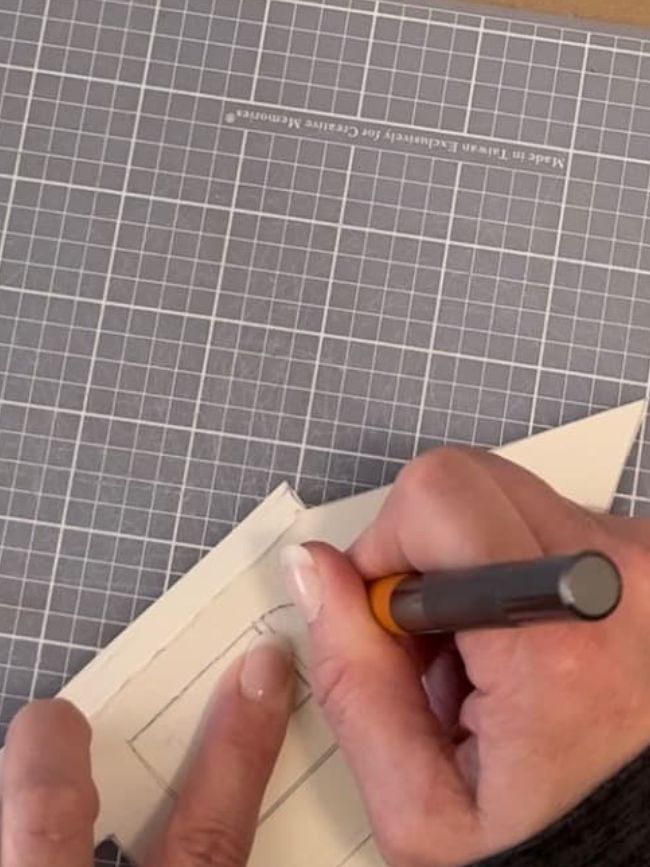
Use a cutting mat and X-Acto knife to cut out the window and door openings.
3. Paint the houses and roofs, and bases in your chosen color scheme.
This is the fun part! Determine the color scheme you would like for your houses and paint away. Whether you prefer a more neutral color scheme, or a tiny village full of cheerful bright colors, select a color palette for your favorite look.
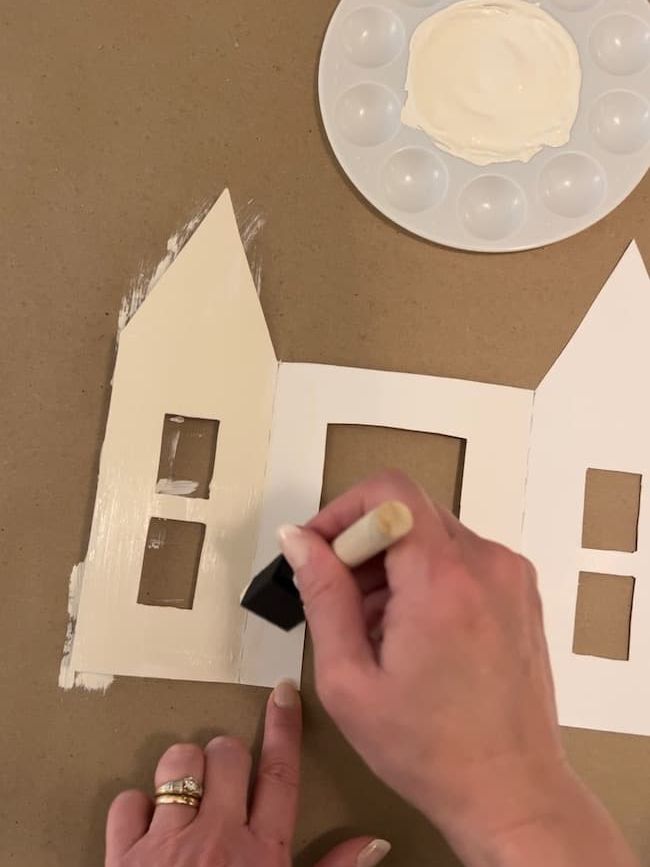
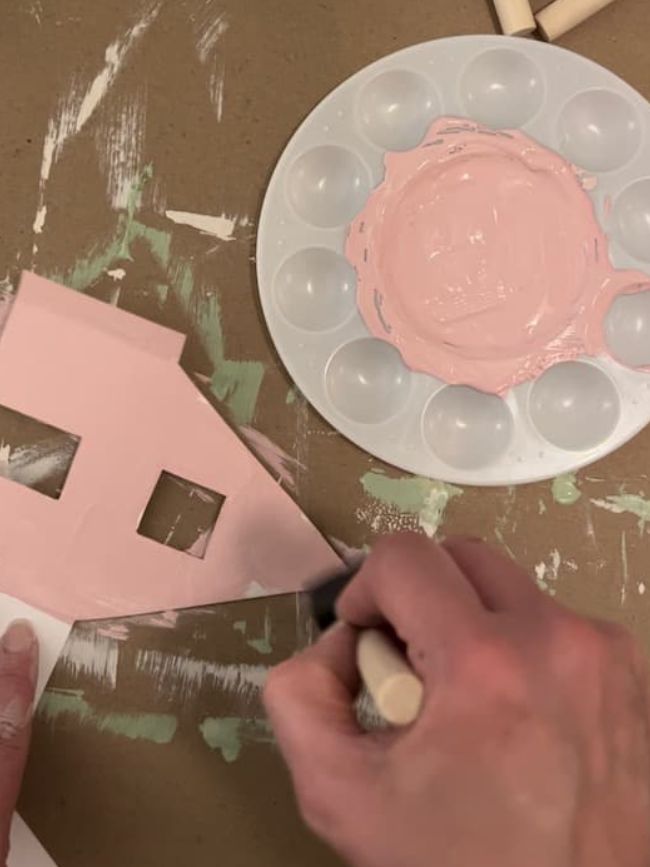
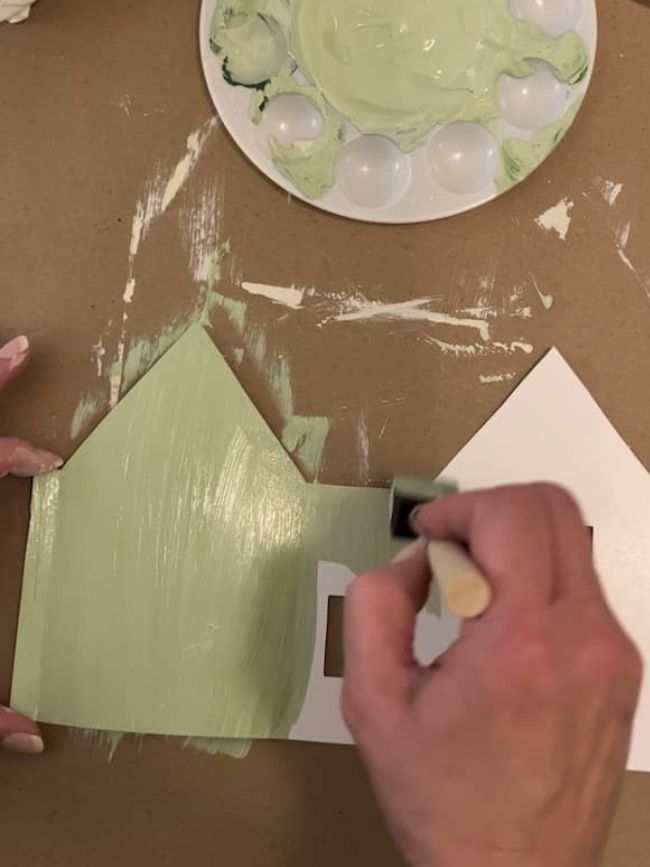
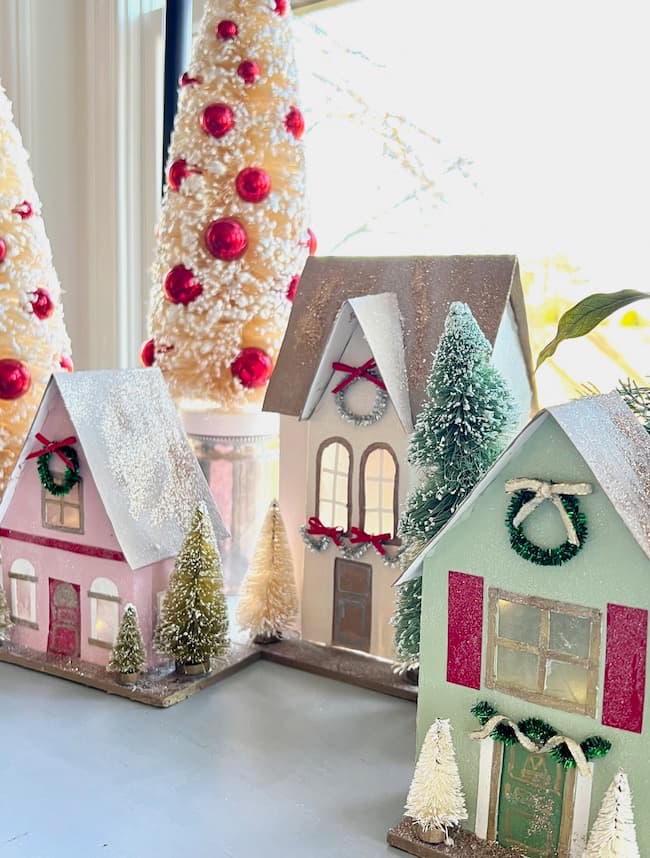
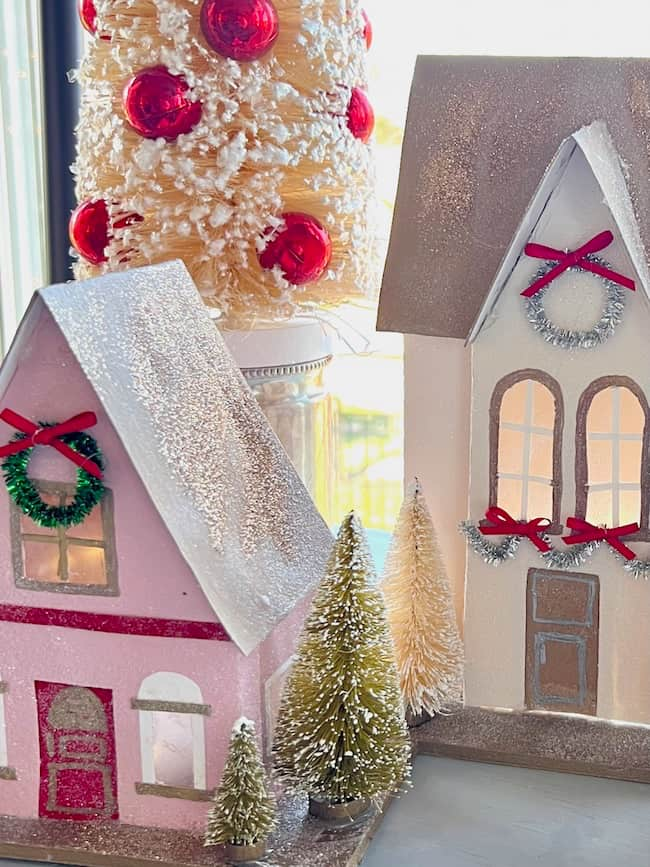
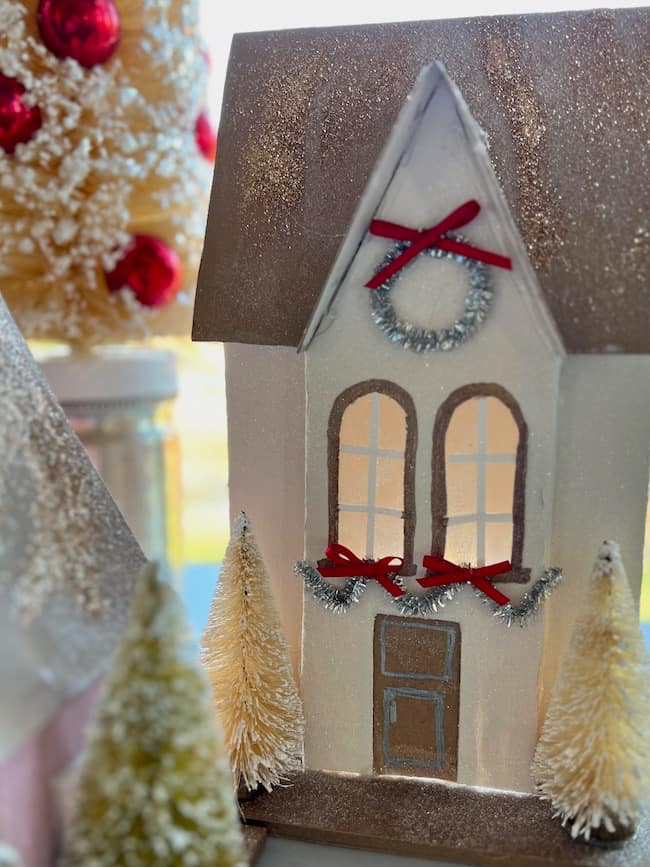
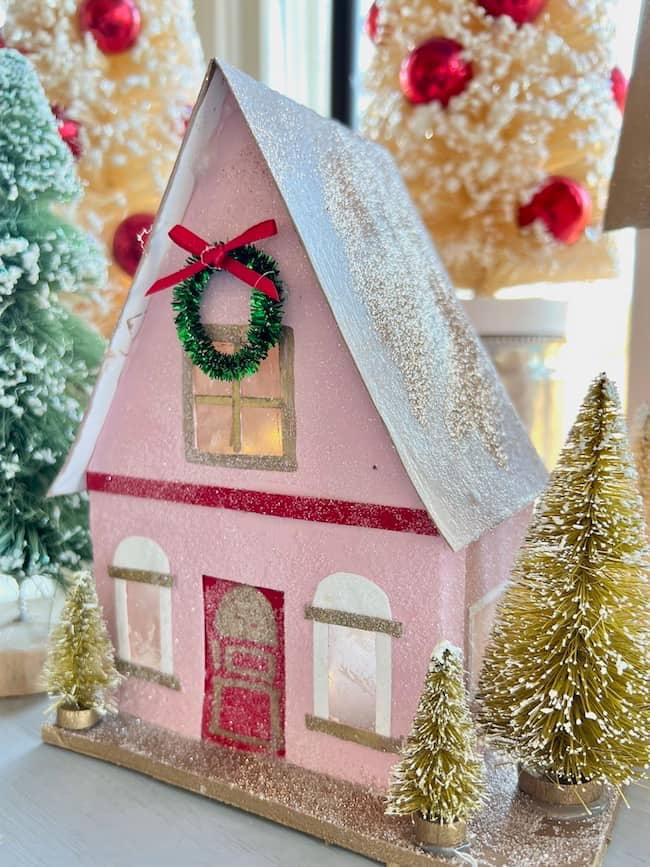
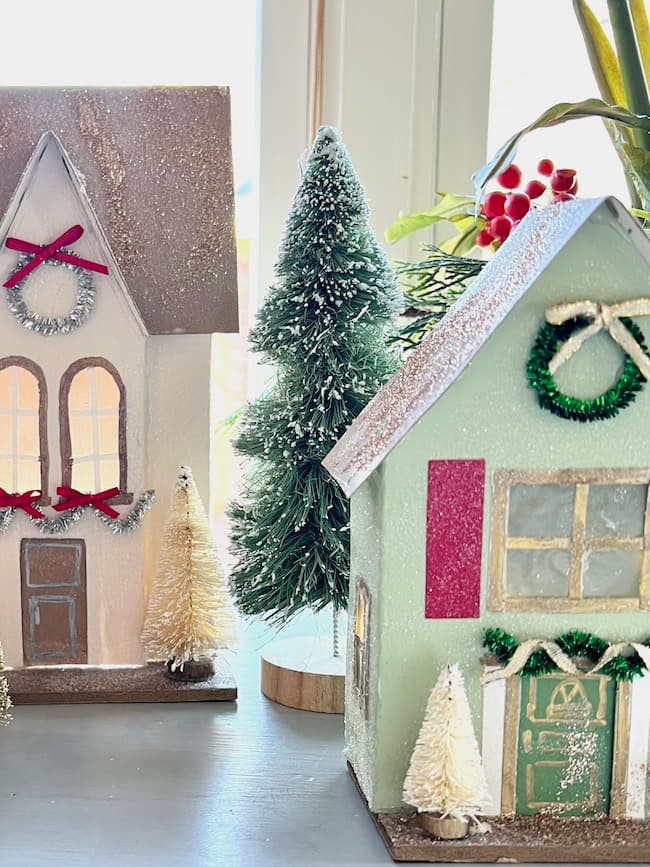
I wanted all of my houses to coordinate, so I used various shades of red, pinks, darker and lighter greens, creams, gold, and silver for my designs. For the body of my houses, I chose a light pink, light green, and cream.
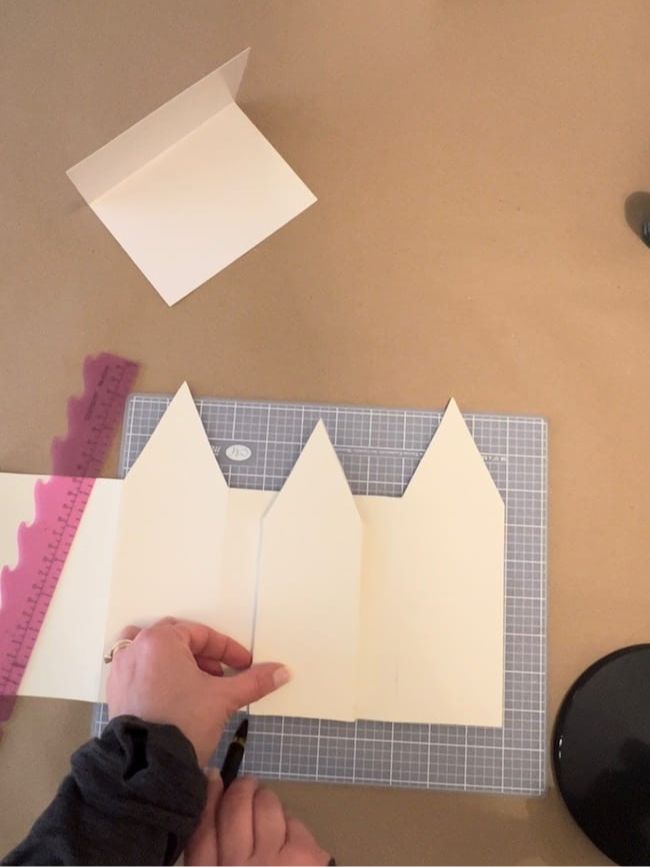
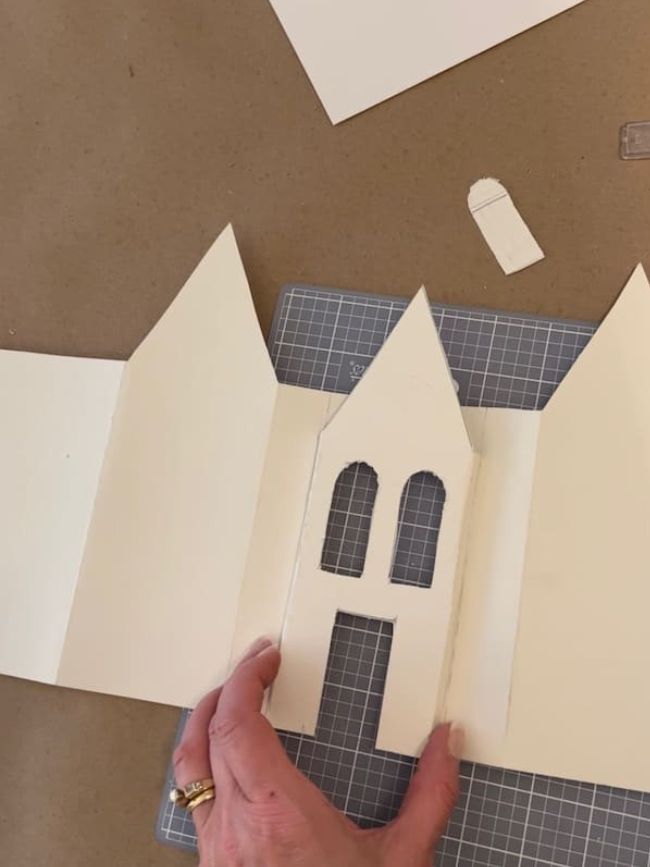
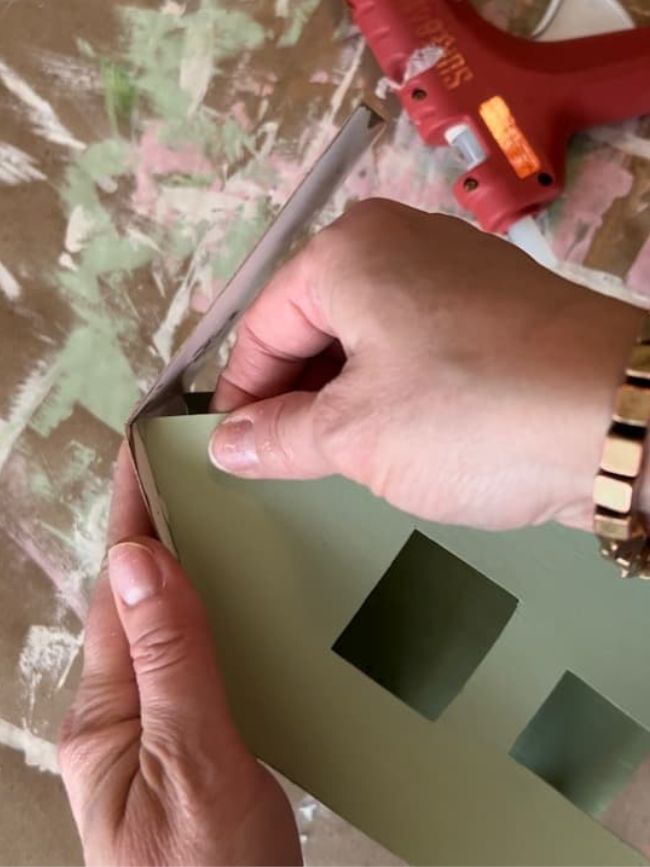
4. Assemble the Christmas houses.
Fold along the lines to create your houses, and glue together at the tabs.
If you are building the larger home with the dormer, you need to add the front door bump out next. Add the roof, and then position the dormer in place.

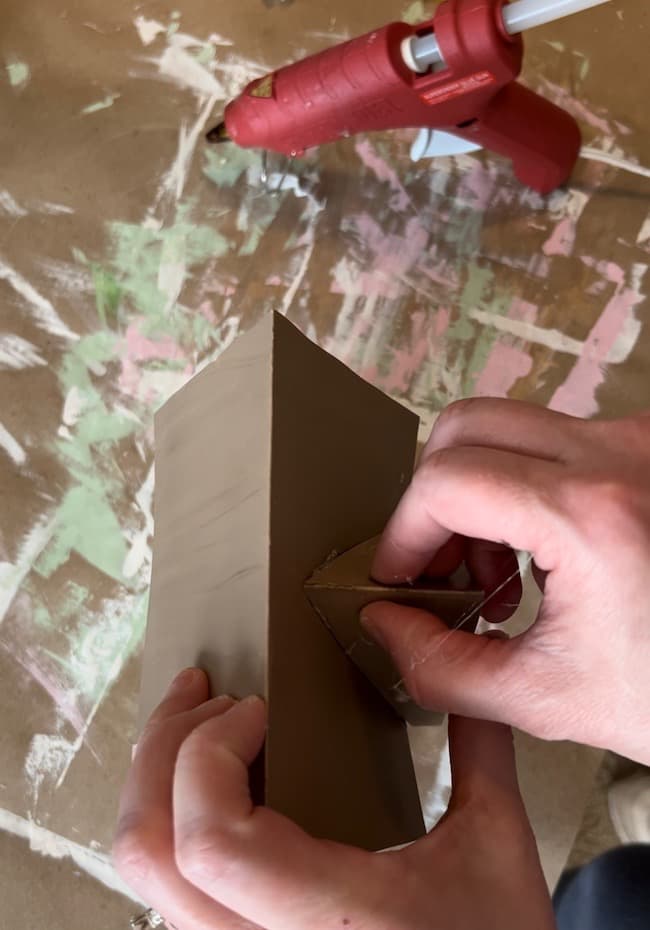
I used a hot glue gun to assemble my homes and attach the roof pieces. Repeat the process for all of your houses.
5. Measure and cut out your foam board bases.
After your houses are assembled, for the next step, you can cut your foam board bases to fit each house. Determine if you want the board to extend beyond the houses at all or if you want them to line up directly below the houses.
For my pink house, I wanted one bottle brush tree to the right of the house so I made the foam board piece a little bit longer for this house.
Just play around with each house on the boards to determine the size you need.
6. Paint the foam bases.
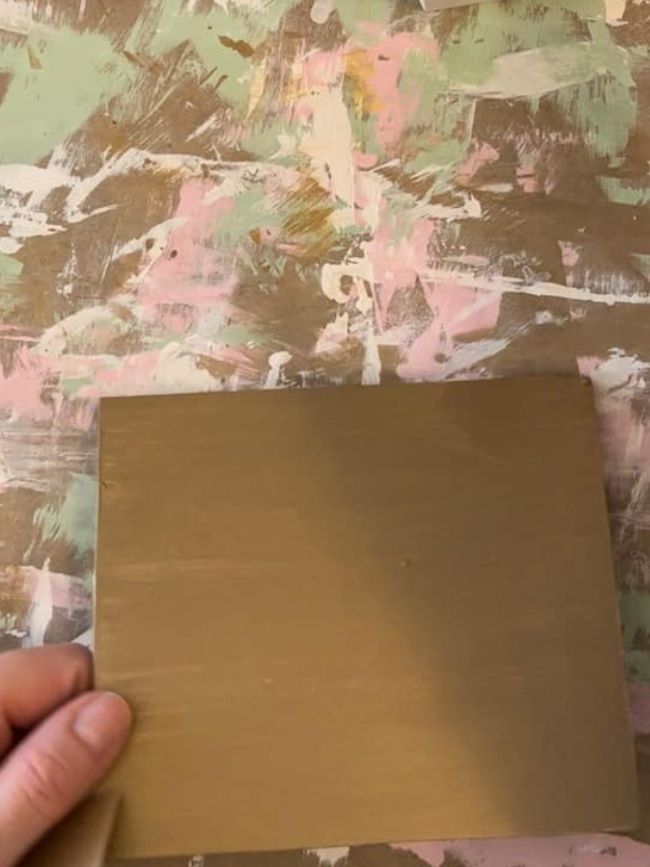
I used a brown paint color for my base to match the rooftops, but yours doesn’t have to be brown. You can choose any color you like.
7. Add the windows.
To give your windows a frosted appearance, use small pieces of vellum or wax paper to cover your window openings. I didn’t have any vellum on hand, so I used small pieces of wax paper to cover my window openings.
Use a small paint brush to apply a little bit of Mod Podge around the windows on the inside of your house for attaching the wax paper or vellum pieces. Cover your window openings by attaching small pieces of wax paper from the inside.
8. Cut out a small square in the back.
If you would like to light your houses, don’t forget to cut a small square in the back of each house at the bottom near where it will attach to the base. This will allow you to insert a small strand of fairy lights if you would like to light your houses.
9. Add paper trim pieces for windows and decorative moldings.
I used card stock in various colors to cut out my doors and other features like house trim, and window panes.
I also used both gold and silver paint pens to draw on features or add more details.
10. Glue the houses to each base.
Use hot glue to attach your houses to each base.
11. Add the glitter for a little extra sparkle.
Now that your houses are assembled and attached to each base, it’s time to add a little sparkle!
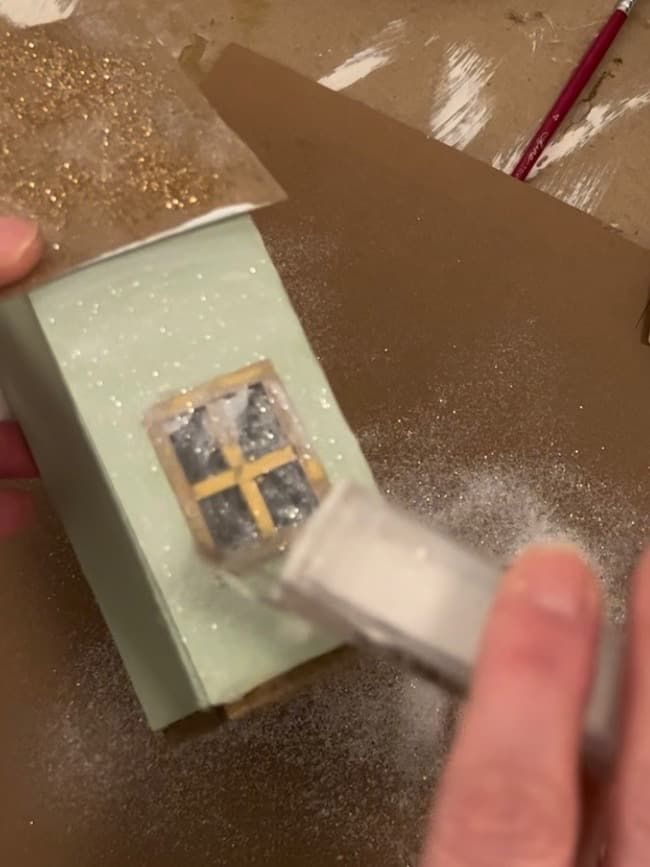
Use a foam brush and apply a thin layer of Mod Podge to your house. I think it’s best to work in sections.
I started with the roof and then worked my way around the sides of each house. Working with one section at a time, apply the mod podge, and then sprinkle with glitter.
You will want to do this over a surface such as a large paper plate, or a large piece of paper to capture the excess glitter.
I used a fine iridescent glitter all over each house.
For each roof, I applied another very thin amount of mod podge randomly over the first layer of glitter. Then I sprinkled a little bit of fine gold glitter, for a fun layered effect on the roofs.
Be sure to shake off all of the excess glitter, as you work with each segment of the house.
12. Add other embellishments.
Now it’s time to deck out each house for the holidays and personalize them according to your own decor style.
You can use chenille stems to create mini wreaths and garland on your homes. I’m using metallic chenille stems for a little extra shimmer.
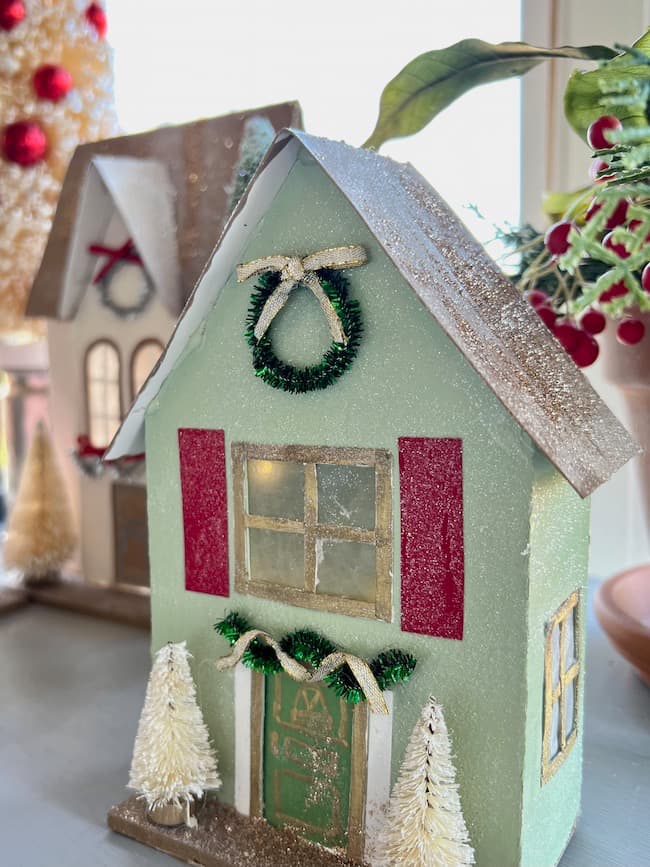
Use 1/8 inch ribbon to add bows to your wreaths, and for a festive look!
Don’t forget to landscape your houses! Add small bottle brush trees to the front of each house. You can keep them neutral like mine, or add tiny ornaments to turn them into Christmas trees!
There are so many creative ways to design and decorate your houses! The sky’s the limit!
13. Create your Christmas village display.
Now that you’ve built your houses, you can create a Christmas village on any tabletop surface in your home you’d like. I’m displaying our Christmas village on our kitchen buffet, surrounded by bottlebrush trees.


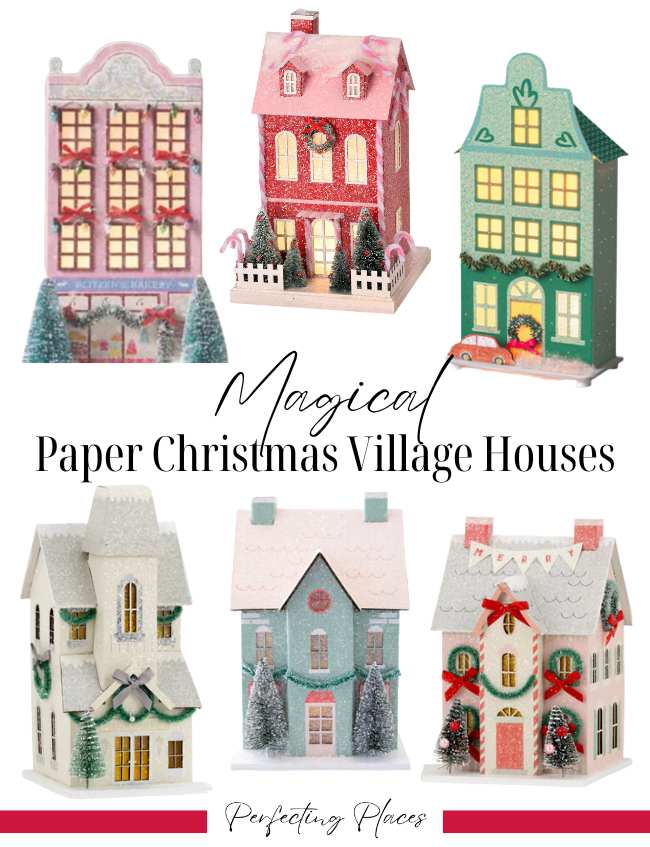
If DIY isn’t your thing, I’ve gathered some favorite paper holiday village houses for you to shop!
A mini Christmas village adds such a cozy, nostalgic touch to any room. Place your new paper houses on shelves, a mantle, or even a coffee table in your living room for a little holiday magic.
You could greet guests with a charming village display on an entryway table or add some vintage flair to your kitchen by tucking these mini houses, faux snow, and bottle brush trees into large glass jars or canisters.
Make it a family tradition and create a new house each year—before long, you’ll have a treasured collection of handcrafted Christmas memories!
If you love creating Christmas paper crafts to decorate your own home, be sure to check out this post with a template for paper Christmas house ornaments for your Christmas tree.
Enjoy your little village, and happy holiday crafting!!


By the way, do you follow me on all the socials? If not, check out my Pinterest, Instagram, and Facebook and be sure to follow along so you don’t miss out on any of my decorating and DIY ideas.

These are adorable Kim! I am saving this for next year.
Thank you so much, Wendy! I had so much fun making them, and I’ll will be adding to my collection!
Hi Kim, I love handmade Christmas village houses and yours turned out adorable. The colors you chose are wonderful, and they go beautifully with the rest of your Christmas decor! Sharing this post in my weekly newsletter on Saturday! Have a great day!
Thank you, Donna! I appreciate that so much!! These were so fun for me to make!
Hi Kim,
I’m new doing these pretty diy houses. I am having trouble with putting the house together with the Front Door Bump Out for House A. I already messed up two andI am determined to do it right! I am using heavy duty paper and I’ve already done one house so I spent like eight hours doing these today and I’m on that one that I’m asking you about so I don’t know if you could send me pictures of each step I would appreciate it. Yours are so pretty and I love them. Thank you.
I’m so glad you’re making them, Karen! I just used a tiny bead of hot glue along the edge to attach the bump out. I’ll try emailing you a picture.