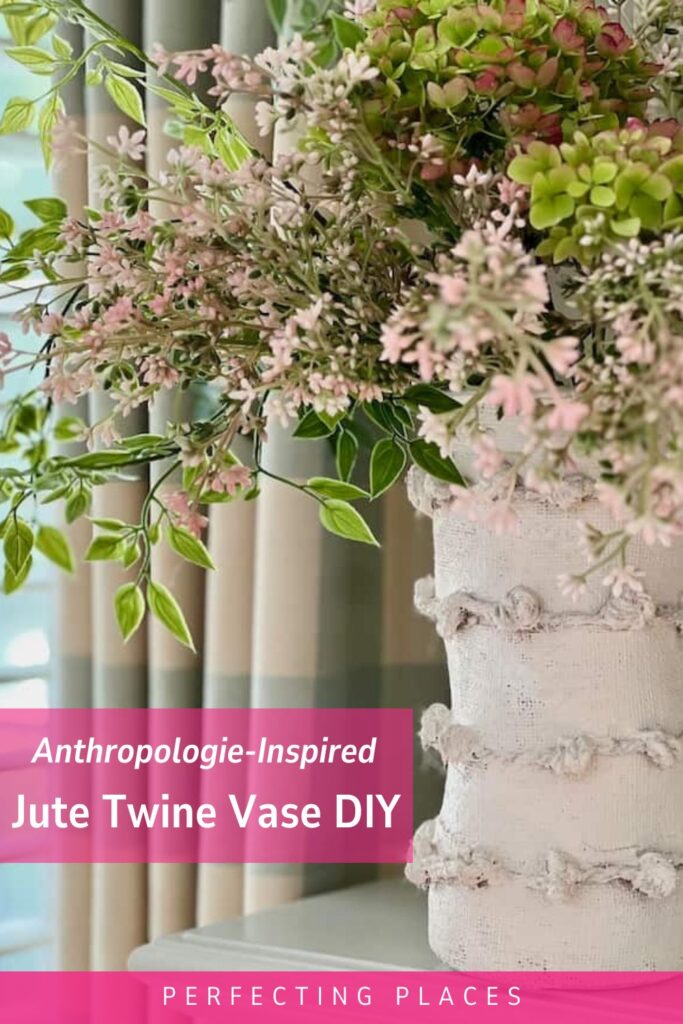
Get the Look: Anthropologie-Inspired Jute Twine Vase Tutorial
Love Anthro style? This jute twine vase tutorial will transform an ordinary florist vase into a stunning Anthropologie-inspired piece!
With this budget-friendly project using a little jute twine, paint, and Plaster of Paris, you’ll get a high-end Anthropologie look without the high-end price tag.
(This post contains affiliate links, so I may earn a small commission when you make a purchase through links on my site at no additional cost to you. As an Amazon Associate I earn from qualifying purchases.)
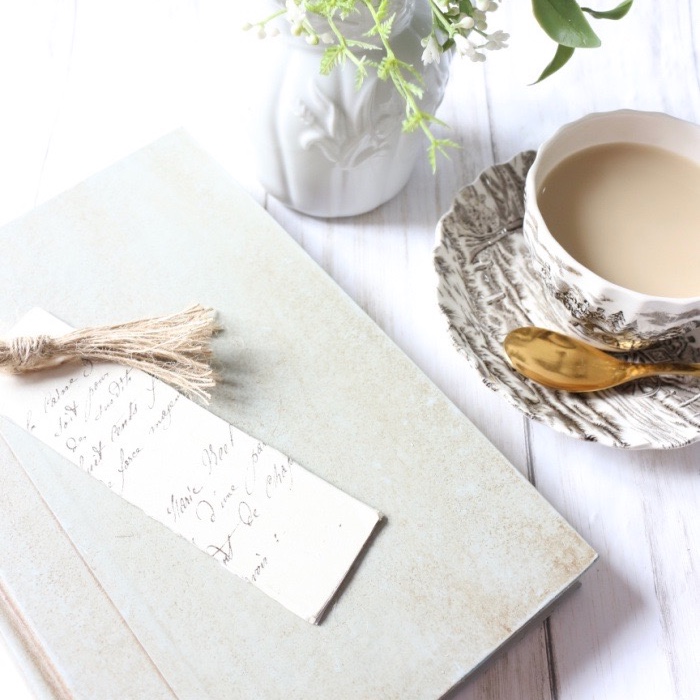
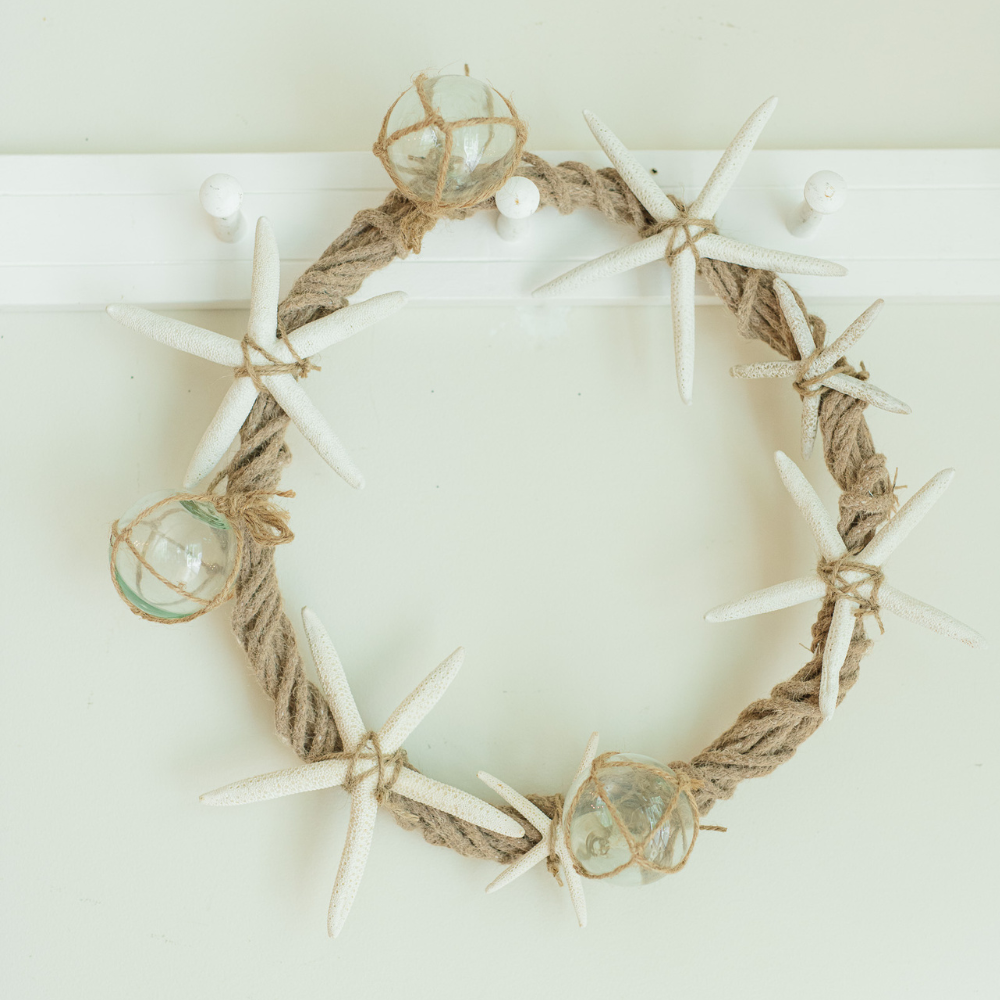
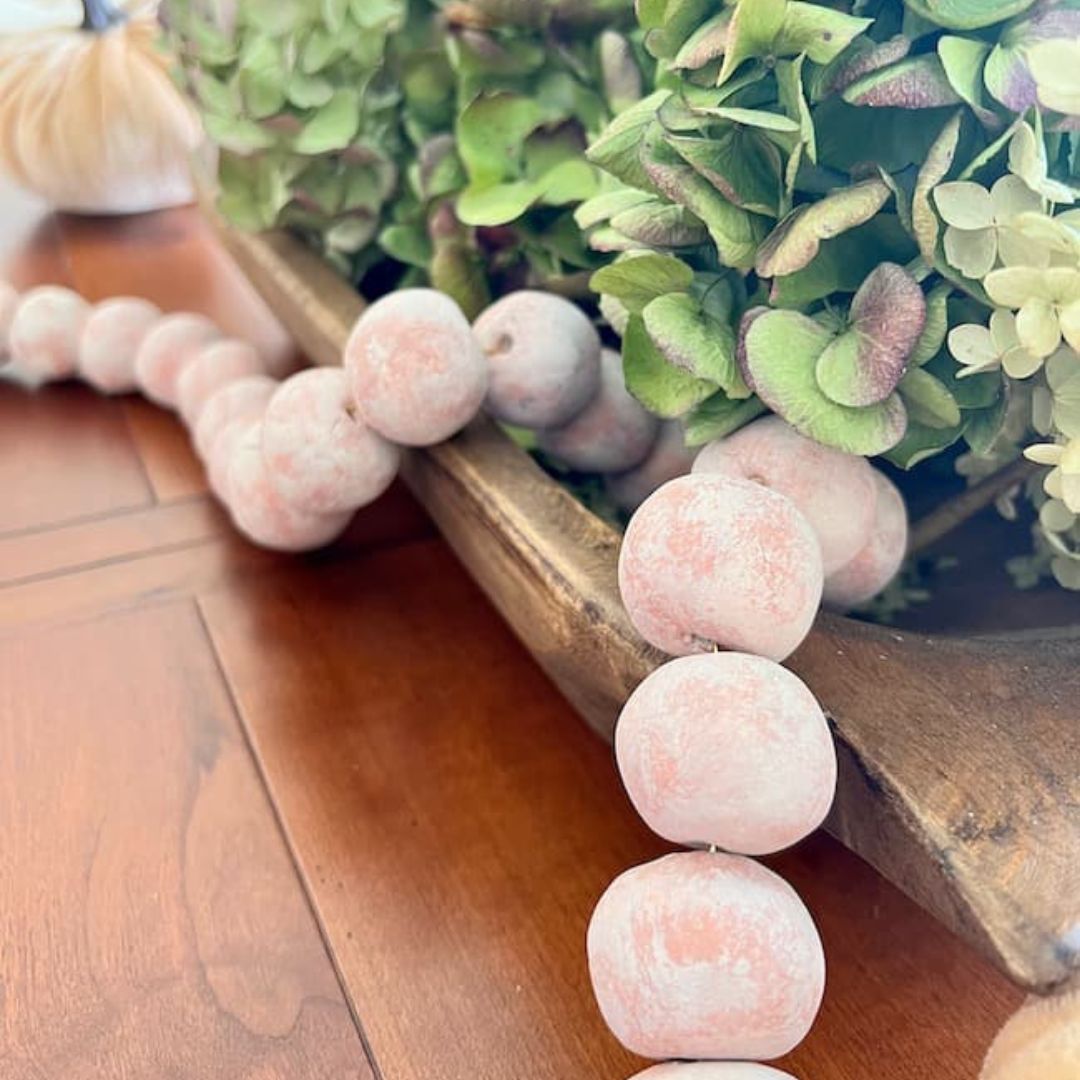
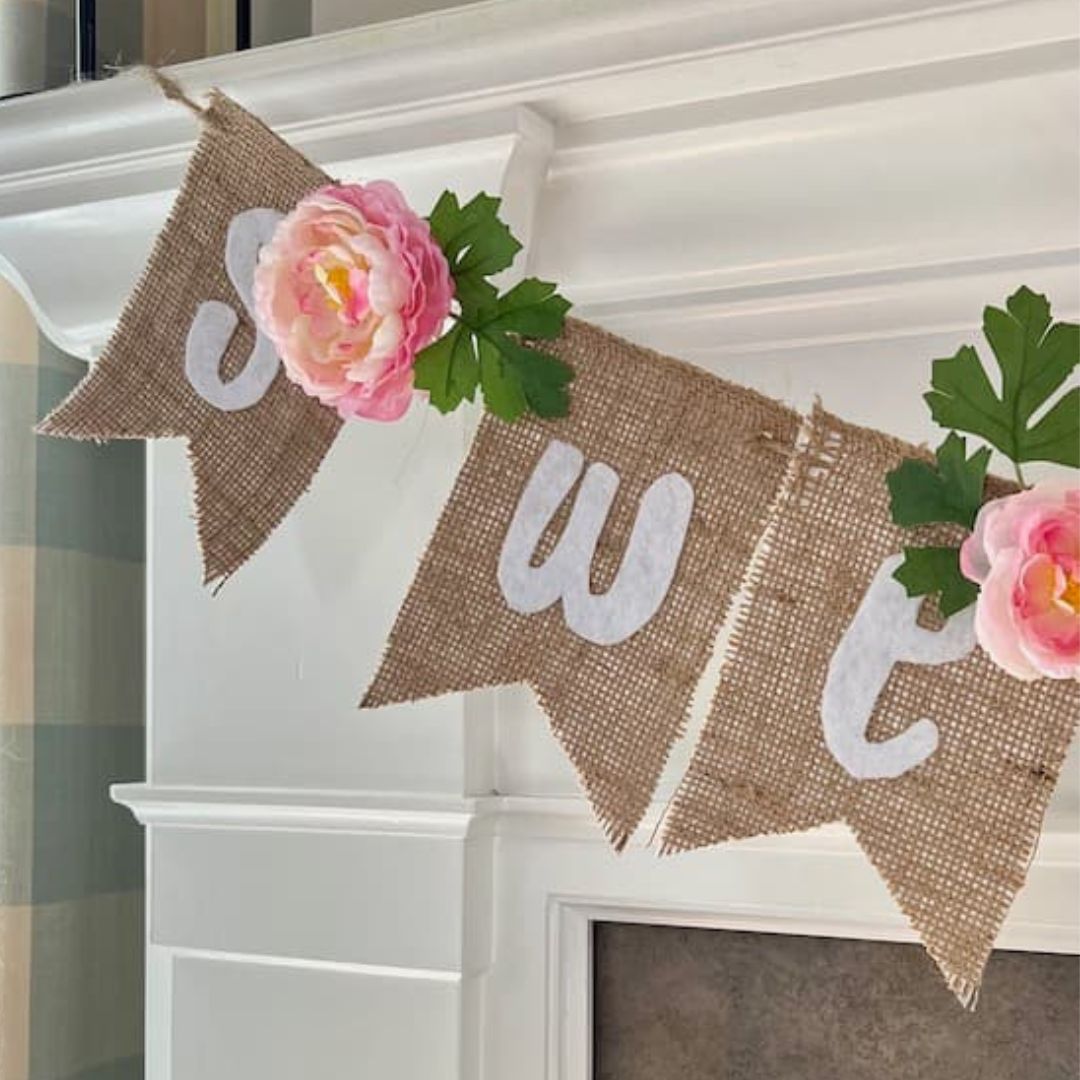
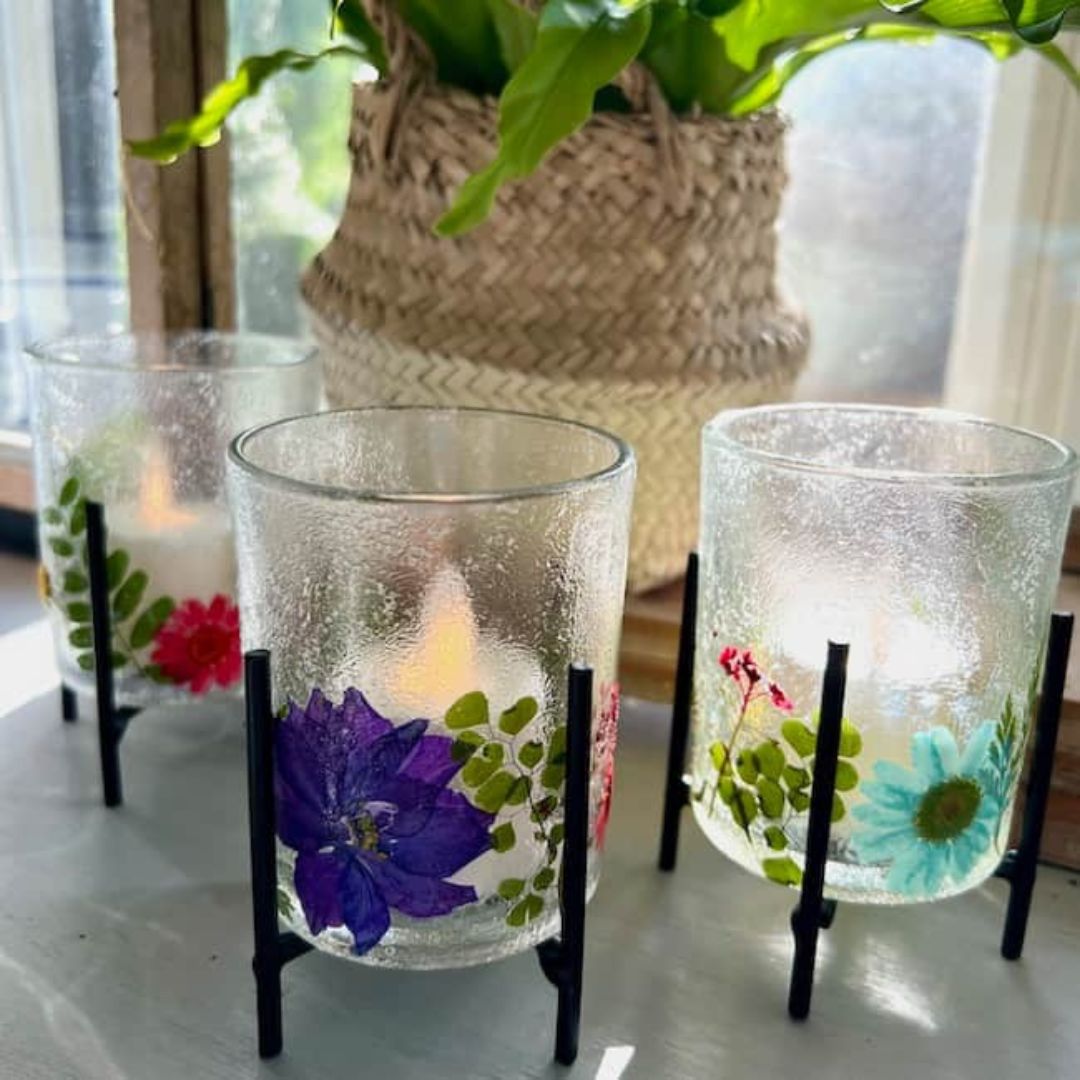
You’re in for a treat today! It’s time once again for our monthly Handcrafted Society Blog Hop! The Handcrafted Society is a special group of my very talented blogging and crafting friends who come together each month to share one another’s beautifully crafted creations centered around a specific theme or craft medium for the month — and today it’s all about rope and jute!

You’re going to love the jute and rope-themed creations made by my talented friends, so be sure to visit everyone at the end of the blog post to be inspired!
If this is your first time to Perfecting Places, welcome! I’m so glad you stopped by! I’m Kim, and I blog about all things home decor! I love to share easy DIYs and crafts for your home as well as paint colors, design sources, and favorite decorating tips and tricks to help you make your house a home!
There’s something so satisfying about turning something ordinary into something special. And what’s more ordinary than a basic florist vase.
I bet you have some stashed away — under your kitchen sink, in a laundry cabinet, on a random storage shelf in your basement — all just waiting for a little creativity to turn them into something spectacular!
And today’s post is all about spectacular! It’s all about transformation!
It’s all about turning a basic glass florist vase into a spectacular piece that looks like a designer piece straight out of the Anthropologie catalog!
The Anthropology Minka Vase: Why It’s a Must-Have
First, let’s start with a little inspiration. If you’ve wandered through Anthropologie or perused their catalog, you’ve probably come across the popular Minka vase—a beautiful, textured piece that catches your eye and makes you think, ‘I need that in my home!’
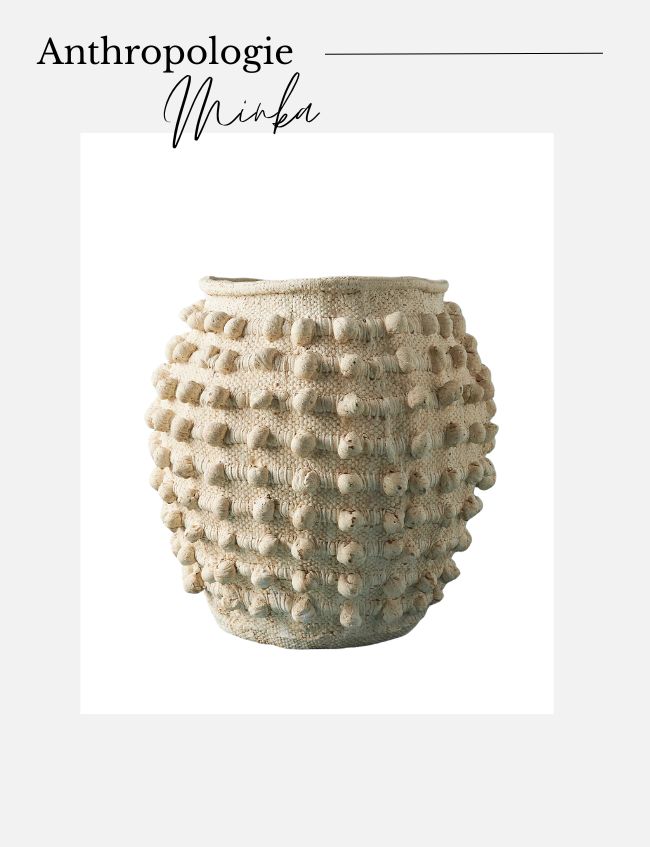
The texture is amazing. It’s neutral color blends with many different decor styles and color schemes — whether you love farmhouse, rustic, modern, or even a classic coastal look. The vase has character and imperfections that give it a handcrafted look and makes for a fun statement piece.
But instead of splurging, why not create your own version that’s just as stunning and even more meaningful.
Read on for the easy steps and instructions in this jute twine vase tutorial!

Materials You’ll Need for This Jute Vase DIY:
- Old glass florist vase
- Acrylic paint (white or off-white)
- Plaster of Paris (or cornstarch)
- Bowl and spoon for mixing
- Paint brush
- Disposable gloves
- Paper to cover your work surface
- Burlap Ribbon (or texture fabric pieces)
- Scissors
- Jute Twine
- Hot glue gun and glue sticks
- Florals and greenery for styling
All of these materials are budget-friendly and easy to find at a local craft store. You probably have a lot of these items around your home. I didn’t need to purchase anything for this project because I already had these materials on hand.
Step-by-Step Jute Twine Vase Tutorial:
This really is a simple project to complete. It just takes a little patience and time for the paint to dry.
Step 1: Preparing Your Vase
Begin this florist vase upcycle with a quick cleaning of the glass vase. I chose a tall narrow vase for this project. Make sure it’s dry before you apply the paint,
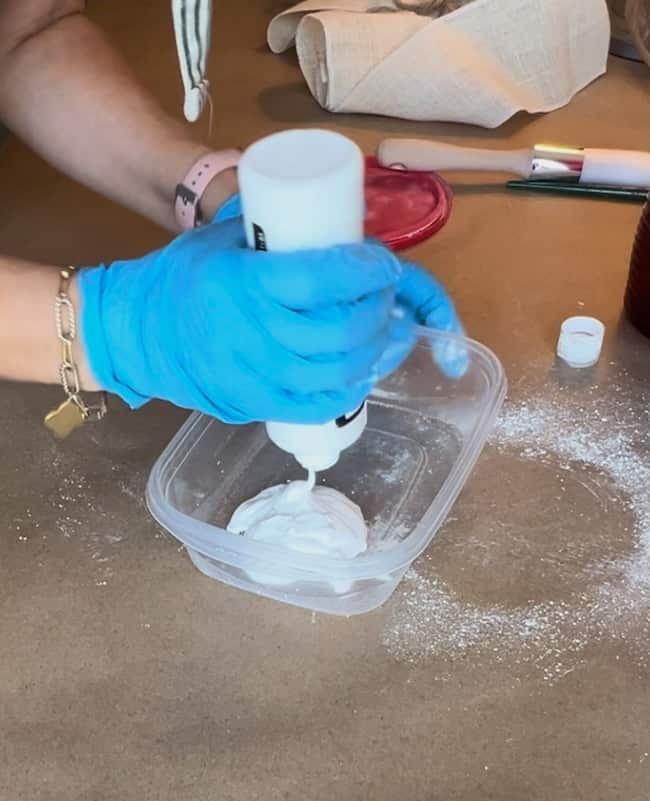
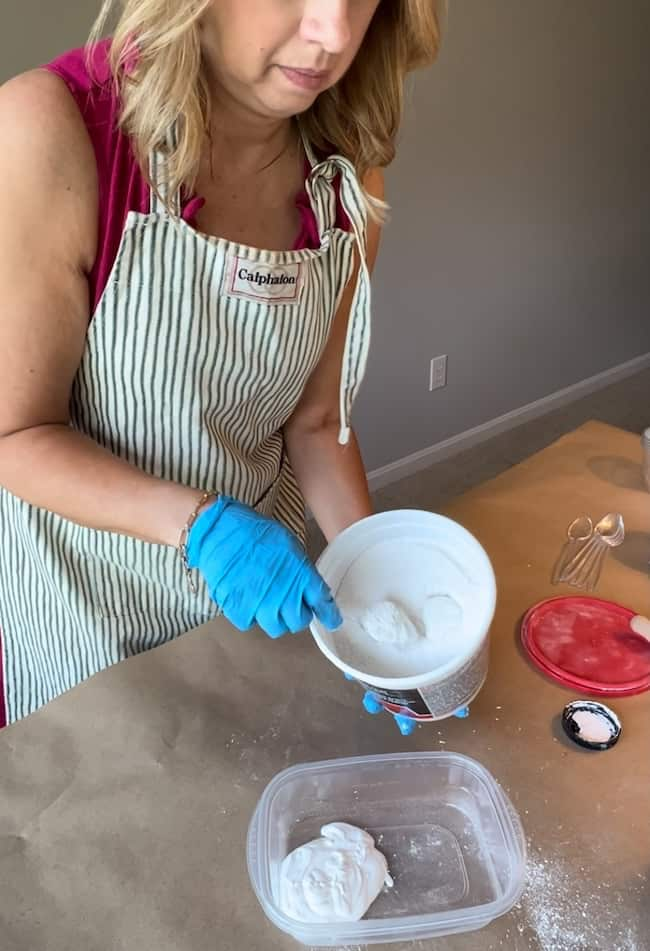
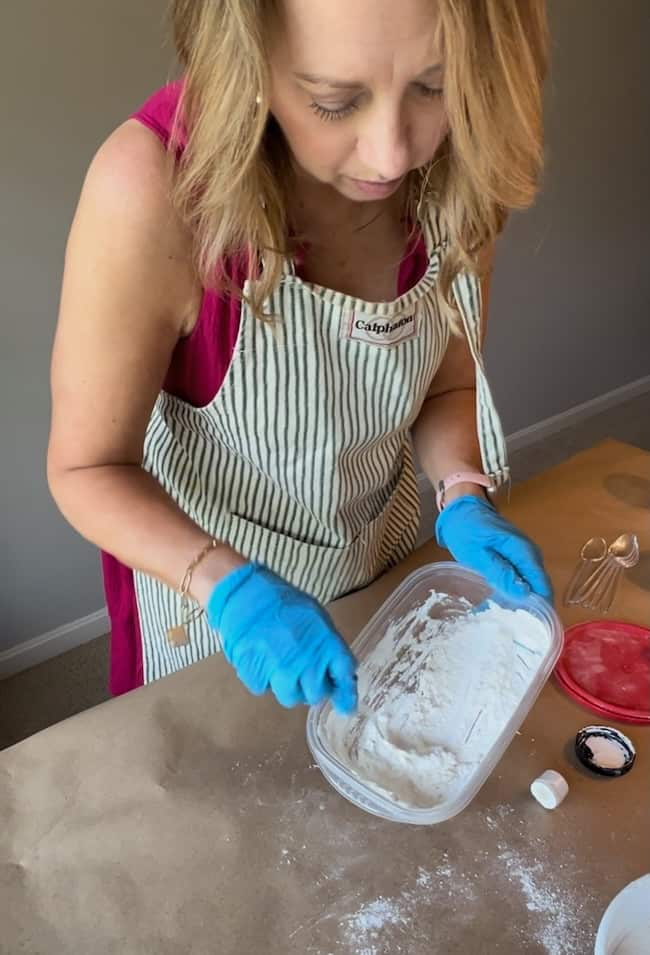
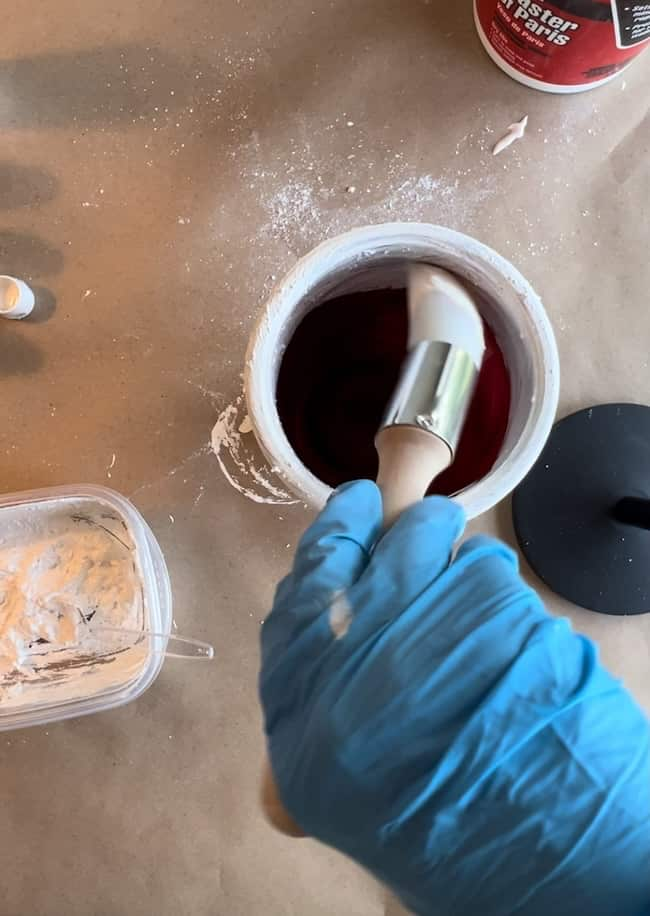
Step 2: Mixing the Paint
For this step, you’ll need to mix your acrylic paint with Plaster of Paris to create a textured consistency. I happened to have Plaster of Paris on hand, but you can also use cornstarch from your pantry in place of the Plaster of Paris if you need to.
I probably added a little too much powder to my paint to begin with and needed to add a little more paint. You want a consistency that is textured, but still wet and smooth enough to brush on with your paintbrush.
I used a combination of titanium white acrylic paint as well as an ecru color to achieve an off-white look. I didn’t measure the exact amount of the paint I mixed with the Plaster of Paris, I just kept adding until I had a consistency I liked.
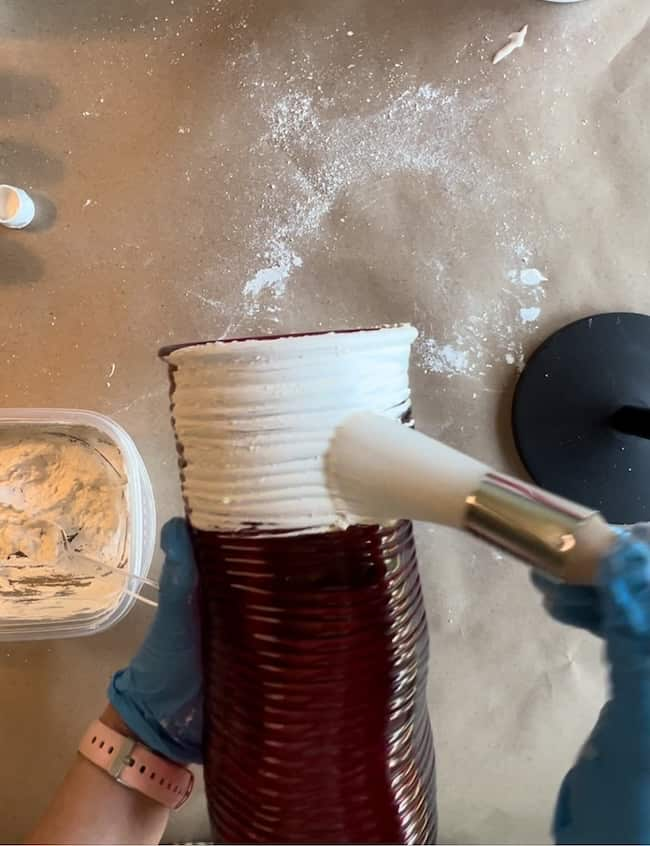
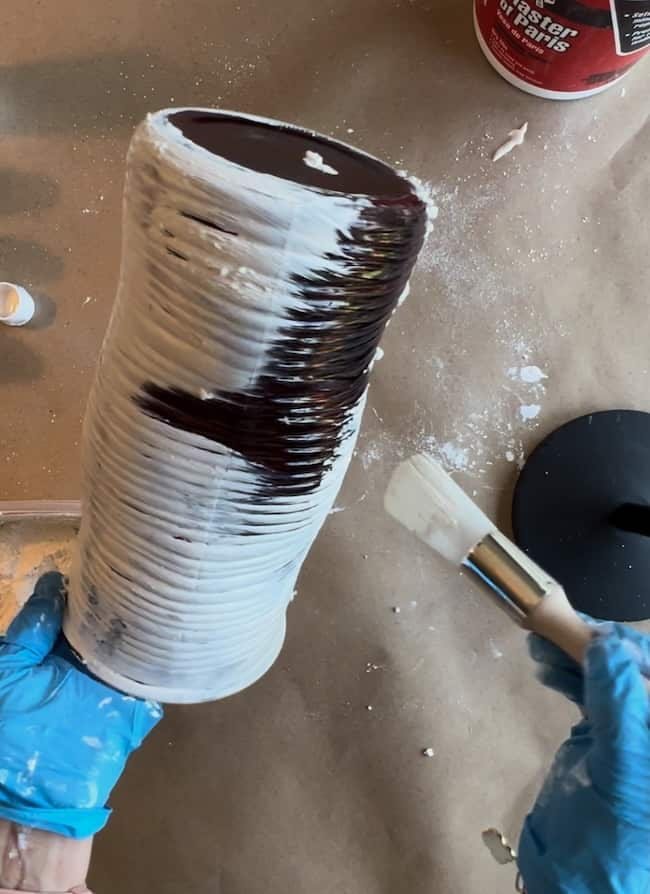
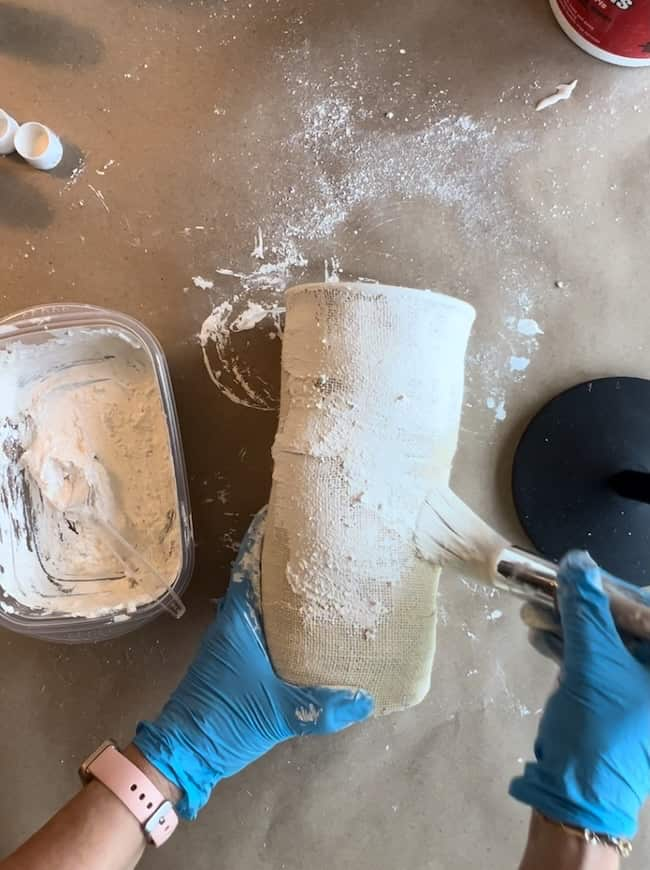
Step 3: Painting the Vase
The textured paint mixture was very easy to apply to the vase. The paint mixture adhered very well to the glass, and it covered very nicely.
Be sure to paint the top 2 or 3 inches of the inside of the vase so you don’t see any of the glass when you add your flower arrangement.
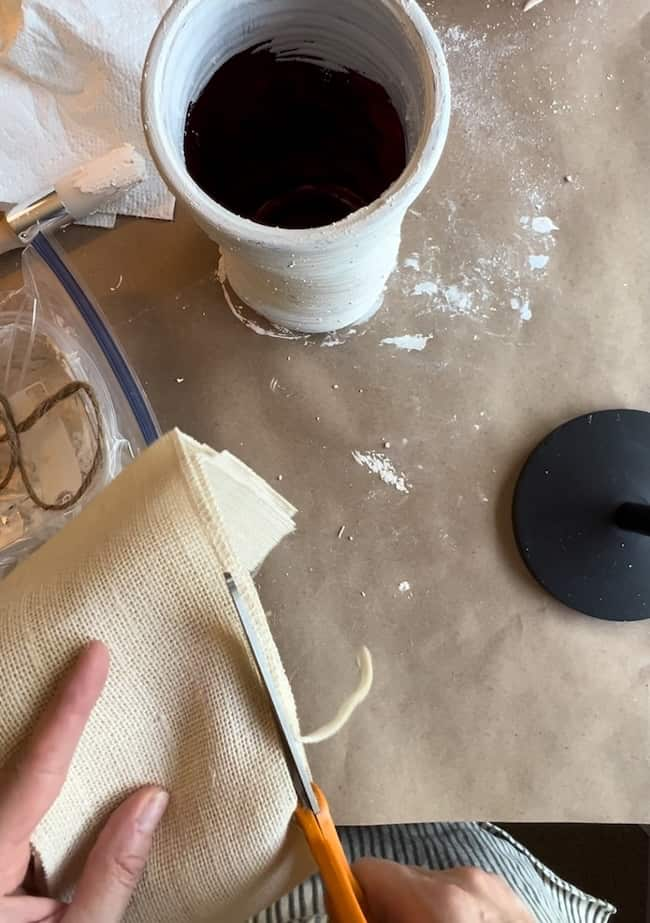
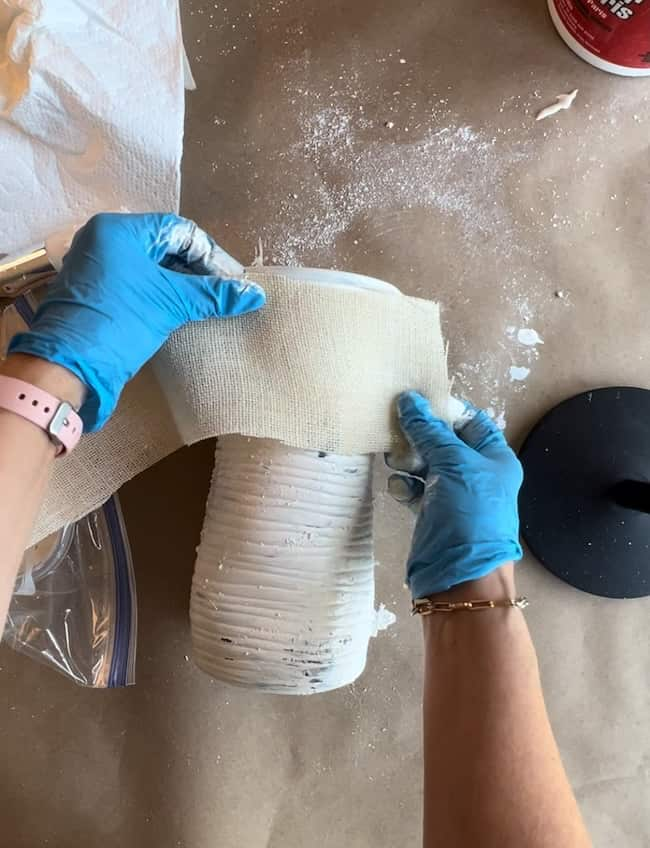
Step 4: Applying the Textured Ribbon or Fabric
While the paint is still wet, cut strips of textured fabric or ribbon such as burlap to wrap around your vase.
I used some old wired burlap ribbon for this process, so first had to remove the wire down each side.
Simply wrap the strips around the vase and press it into the paint. The wet paint will hold the fabric in place as it dries to the vase. You may find that you need to add a little hot glue along some of the overlapping edges, or you can also add a little more wet paint under the fabric if needed.
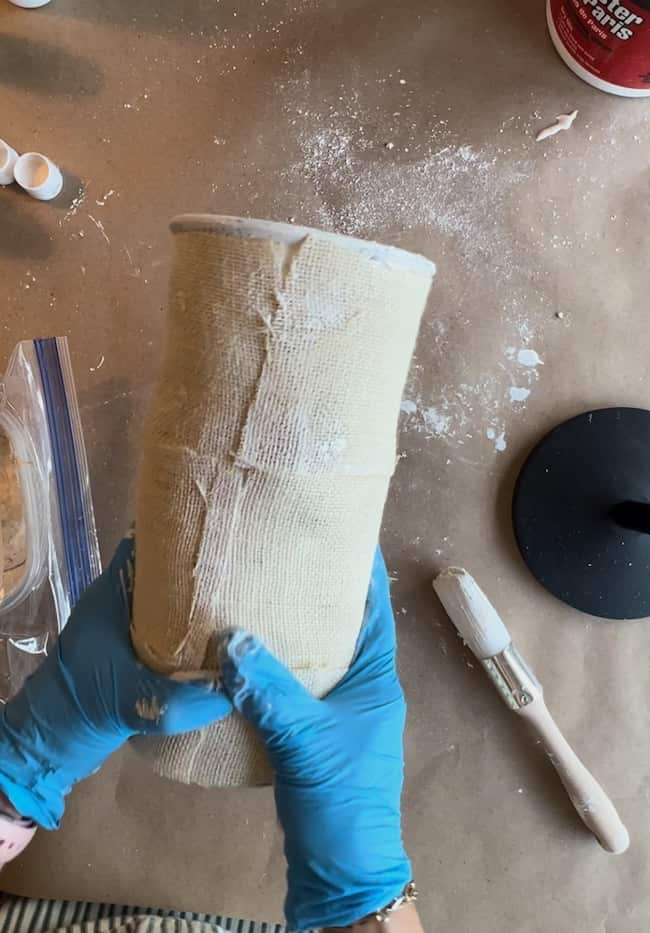
Step 5: Painting over the Fabric
Paint another layer of the textured paint mixture over your fabric strips.
Step 6: Allowing the Paint to Dry
Now it’s time to exercise a little patience. Allow the paint to dry before attaching the jute twine.
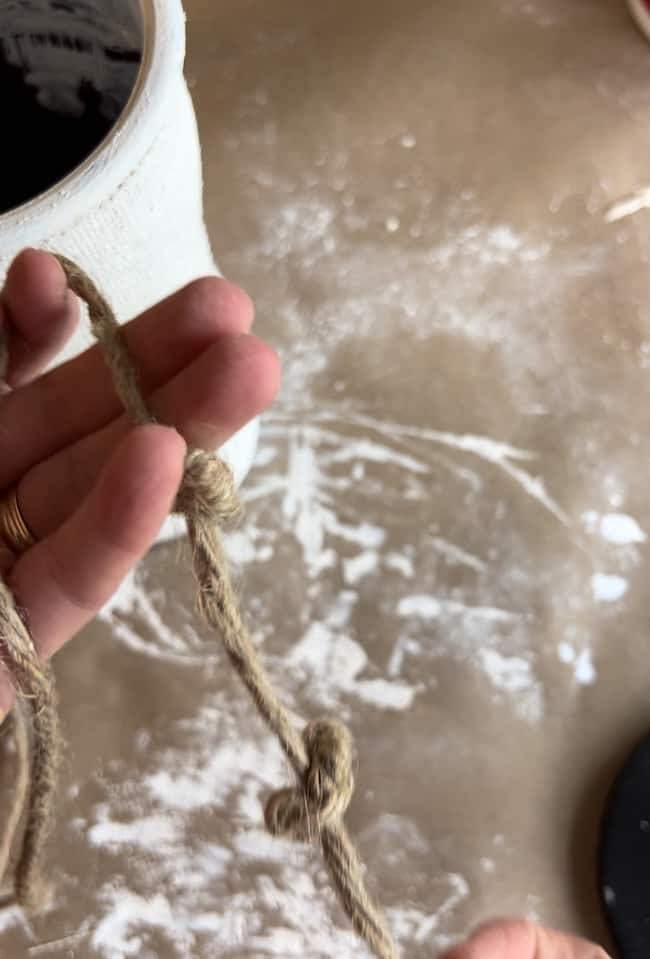
You can use this drying time to knot your jute twine.

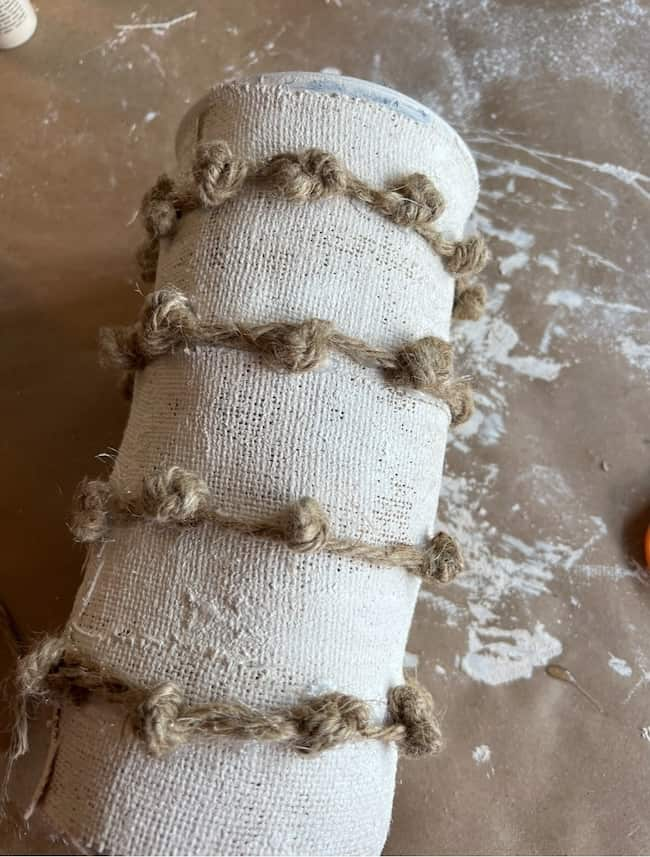
Step 7: Knotting the Jute Twine
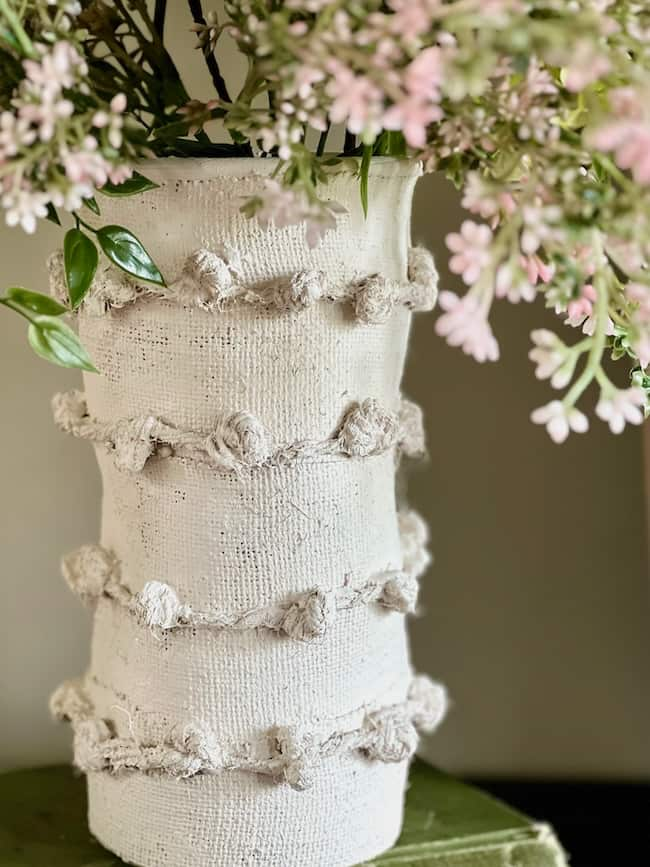
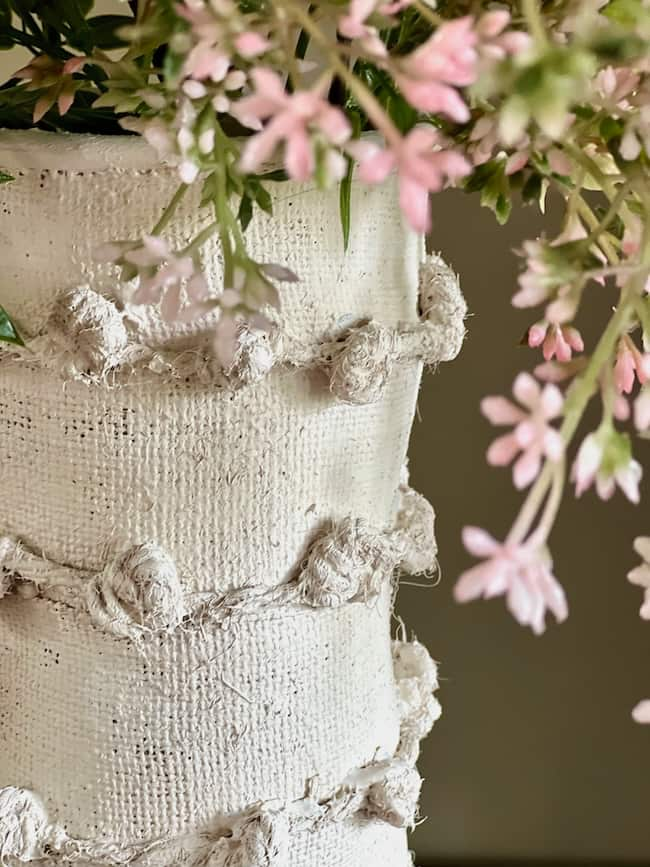
The next step in creating this vase is to create the unique knotted character that the Anthropologie Minka vase is known for. I decided to use knotted jute twine to mimic this feature. I created triple knots every 1 1/2 inches along the twin for a bumpy, gnarly effect.
After I had long enough length of the knotted jute twine to completely wrap around the vase one time, I cut the strip.
Repeat this knot-tying process to create the number of knotted jute pieces you need to cover your vase. I used 4 strips of jute pieces for my vase.
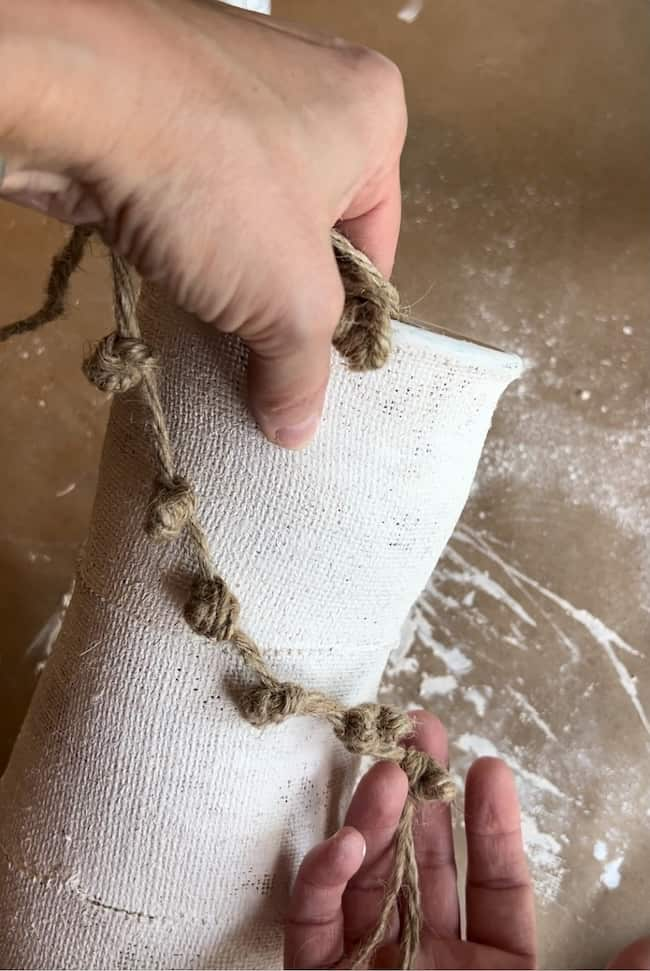
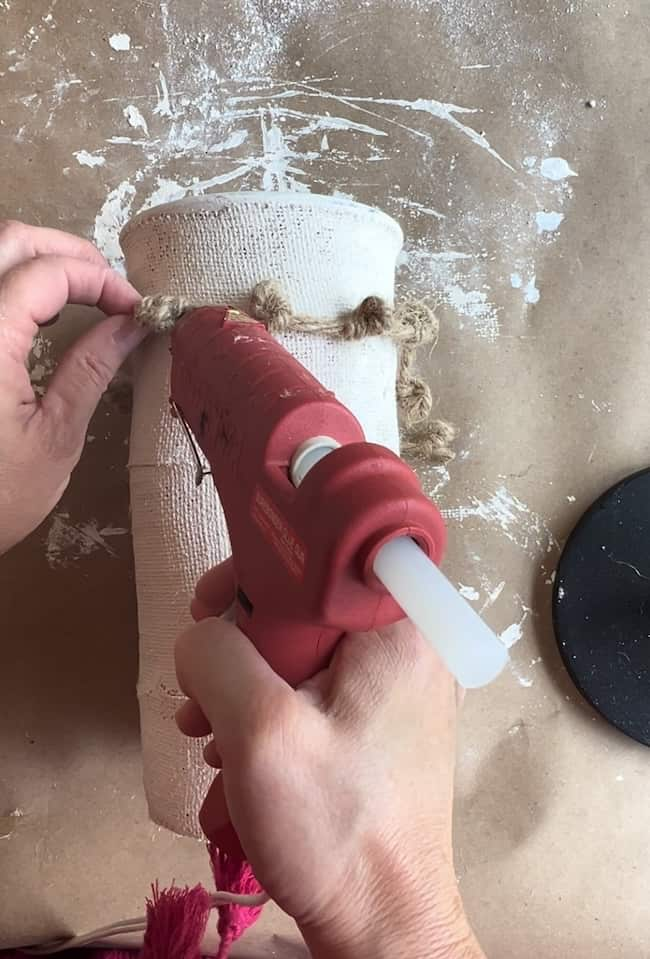
Step 8: Gluing the Knotted Jute Twine around the Vase
Use a hot glue gun to carefully attach the knotted twine around the vase. Be sure to overlap and tuck in the ends of the twine — and be careful not to burn your fingers! My twine is spaced about 2 inches apart down the vase.
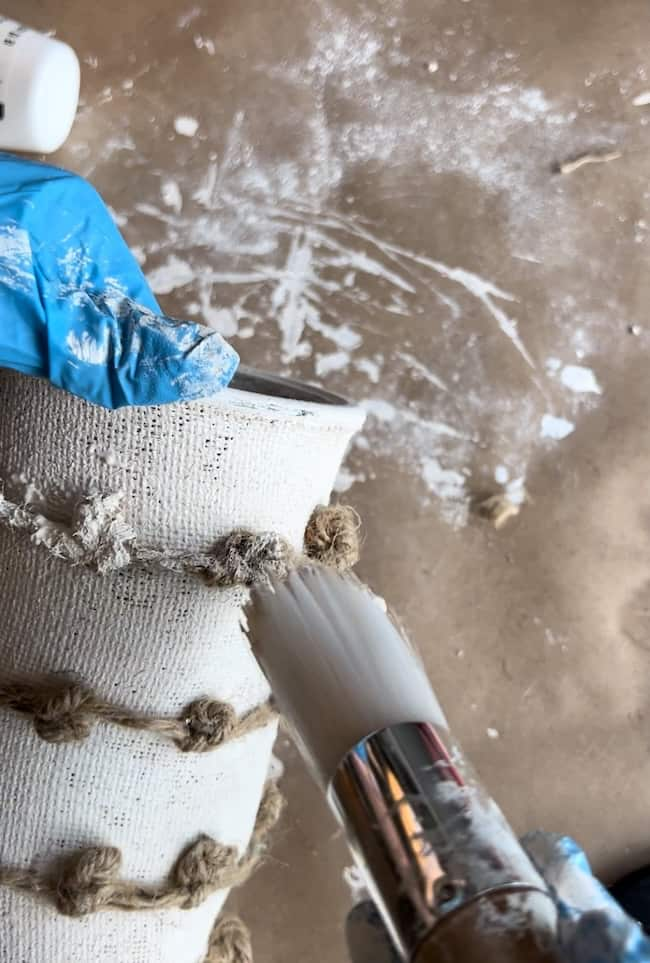
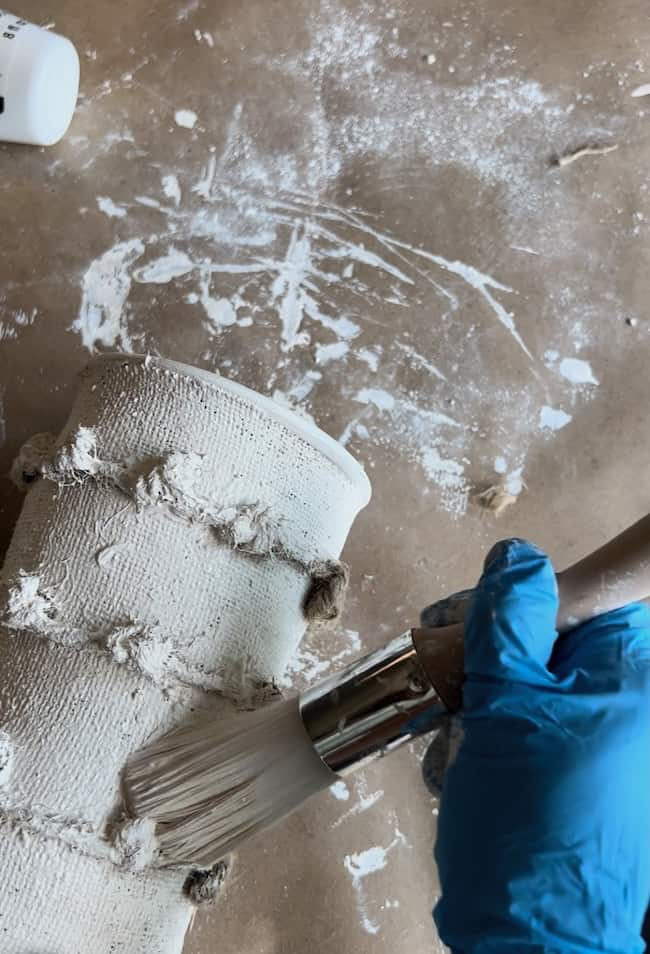
Step 9: Painting the Knotted Twine
One more step remains to complete the designer look of the Minka Vase — painting over the twine.
I used the same paint and Plaster of Paris combination to cover the knotted jute. I had to use more of a “dabbing” technique with my brush to get my paint mixture into all of the nooks and crevices along the knots in the jute.
It was helpful to use some thicker portions of the paint mixture to fill in some of the areas. You can even add a little more powder to create a paste if you need to fill some gaps.
This is also a good time to add a second coat of paint inside the vase if you haven’t done that already.
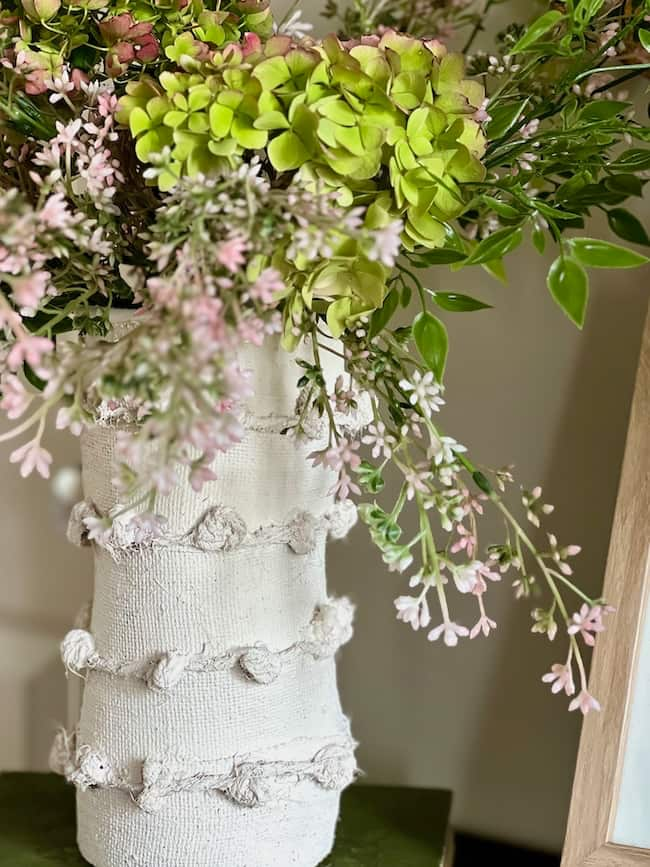
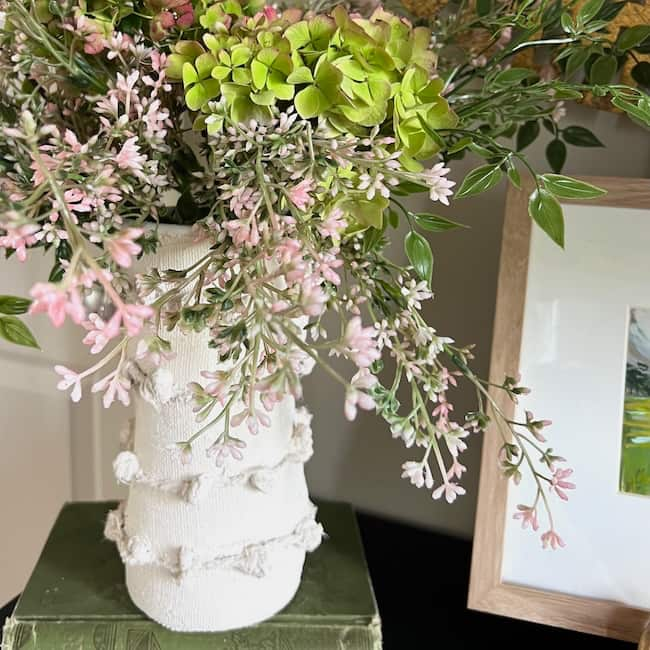
The inspiration Minka vase is characteristically course and rough in texture, so I wasn’t going for perfection with this project.
Step 10: Allow the Paint to Dry
After painting over the jute twine, allow the paint to completely dry before styling it with flowers or greenery. Since the paint is very thick, it will take several hours for all of the paint to dry in all of the crevices.
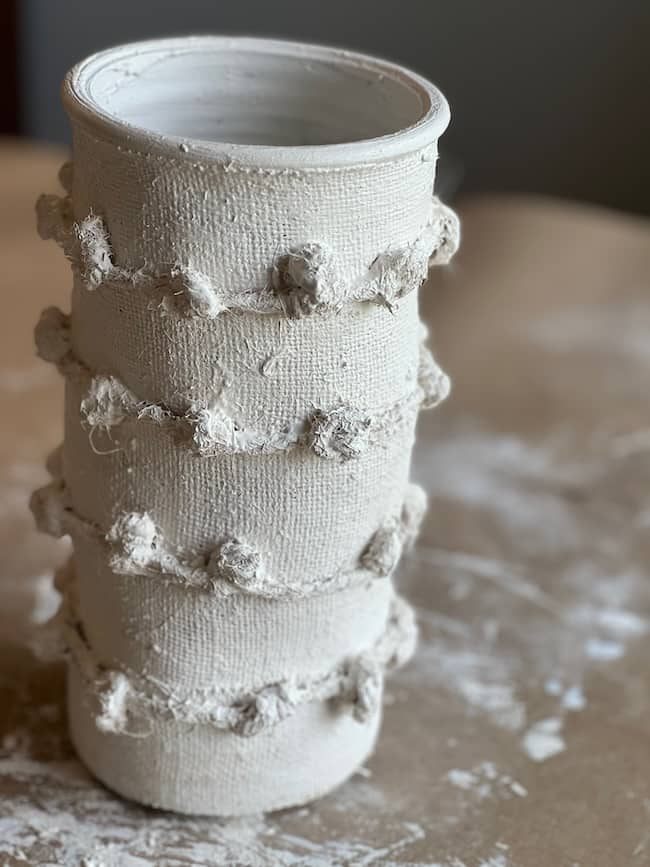
I’m so pleased with how the vase turned out!
Other DIY Vases and Containers:
If you love creating your own DIY vases and planters you might also enjoy these posts:
- Paint a Vase for a Fall DIY Makeover
- Hand Painted Flower Pots: Paint Your Own DIY Cachepots
- How to Make DIY Cement Planter Bowls with Yarn
Tips for Achieving the Perfect Anthropologie-Inspired Look
When making your own Anthro-inspired Minka vase, here are a few helpful tips and techniques to keep in mind to help you get the designer look of the vase.
1. Embrace Imperfections — This little vase is all about personality. Don’t worry about getting a perfectly smooth finish. All those little bumps and imperfections add to the charm of the vase.
2. Play with Texture — Don’t be afraid to add a little extra Plaster of Paris to your paint mixture if you want a thicker, chunkier texture for a more rustic look.
3. Use Neutral Tones — Stick with neutral colors like off-white, white, light beige, or soft warm grays for your paint.
4. Layer on Your Paint — You might need to use a dabbing technique for applying the thicker paint in the nooks and crannies of this piece.
5. Don’t Rush the Drying Process — Patience is a virtue, and also necessary if you don’t want to make a mess with wet paint!
6. Wear gloves — Applying the paint and pressing the fabric into the wet paint is a messing process, so you’ll probably want to protect your hands.
Styling the Minka-Inspired Jute Twine Vase
Now comes the fun part — styling your new designer-look vase!
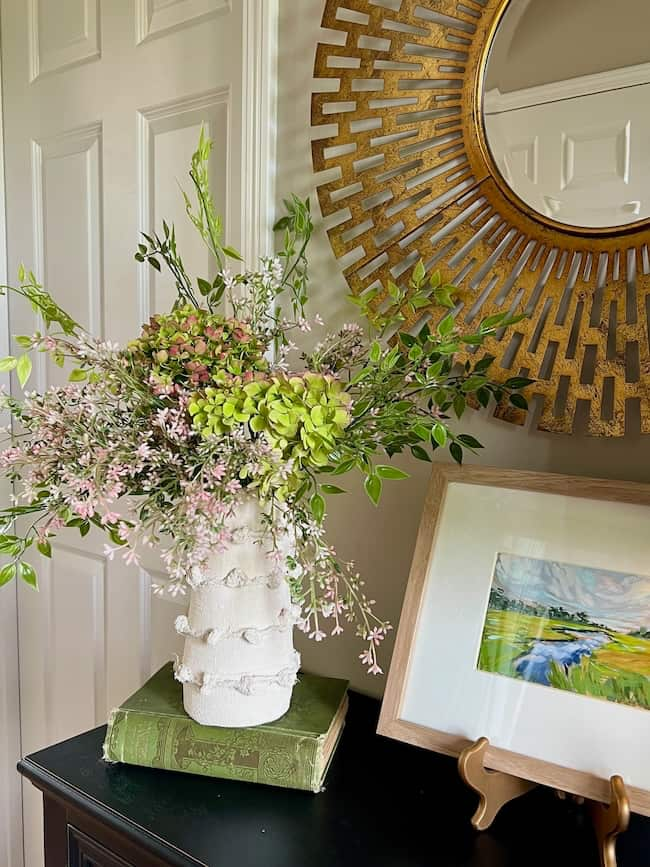
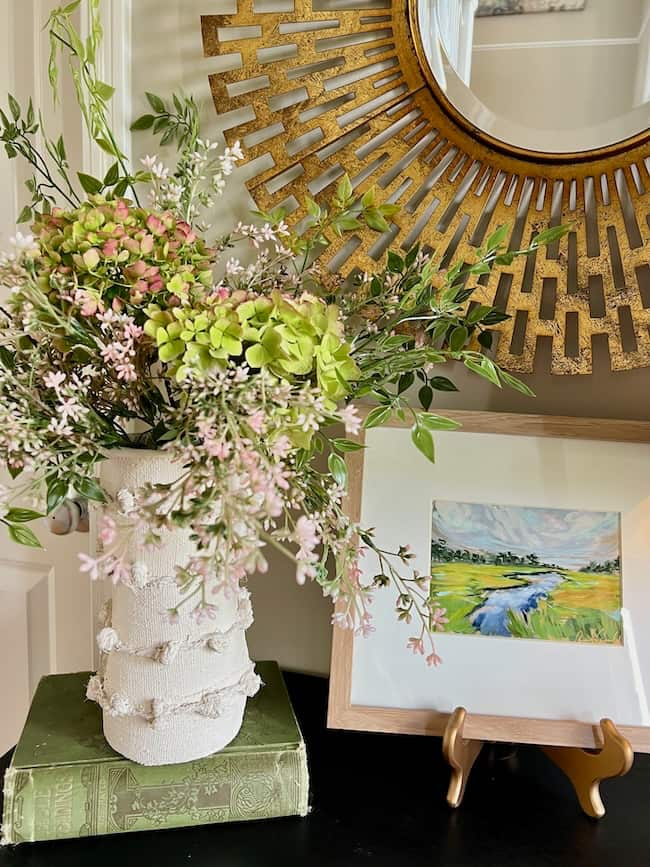
This little vase can hold its own when it comes to style, but fill it with seasonal blooms and greenery and you’ll have a gorgeous focal point for any table or surface!
I filled my vase with this faux greenery and pink floral stems, then added some dried pink hydrangeas for a pretty seasonal look.
Here, it greets our guests with a warm welcome on our foyer table.
The tall size of the vase is perfect for a stunning arrangement on our mantel for a pretty focal point in the room.
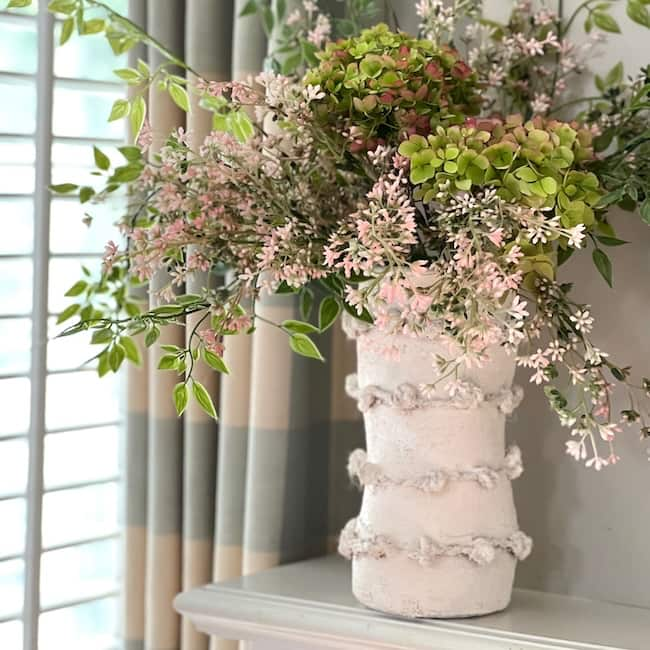
I love the texture and charm the vase adds to the flowers!
I’m so thrilled with how this vase turned out, and I hope you enjoy creating your own version just as much. Whether you keep it for yourself or gift it to someone special, this project is a fun and easy way to add a little Anthro-inspired flair to your home!
Now be sure to check out all the other amazing rope and jute creations from my super-talented friends below!
Happy crafting,


Great job and tutorial. You gave great tips and information.
Thanks so much, Cindy! I appreciate you!
Such a fun way to give fresh life to a basic vase, Kim. It doesn’t even look like the same piece – that is so cool! I’ve always wanted to try using plaster of paris so I’m excited to try your technique. This vase is fabulous! Hugs, CoCo
Thank you so much, CoCo! I really enjoyed this DIY and am so pleased with how it turned out!
Kim this may just be one of my favorite projects of yours. Your right about how this vase can fit so many decorating styles, and I can see it in my home too. Thanks for the inspiration!
Thank you, Michelle! I think it’s my favorite, as well!
Kim, love all the mediums you used to create this vase. What a stunning upcycle with all the textures on the vase. A favorite! Such great creativity, Kim.
Thanks so much, Tammy! I had so much fun with this project!
Kim. this is fabulous! I’ve wanted to dupe this vase for a long time but had no idea how to! Yours turned out beautiful and I can’t wait to try this sometime! Thanks for the inspiration friend!!
Thank you, Donna! You really should!
What a lovely transformation, Kim. I am obsessed with the texture and color — what a great Anthropologie-inspired project. Honestly, I love any project that embraces imperfection too.
Thank you, Kelly! It was a lot of fun to create, and I’m so pleased with the end result!
How many times have I looked at that Anthro vase with love and yearning! A LOT! You have shown me how to make my own and I love it! You did a beautiful job and have inspired me! Pinned!
Missy, you’re so sweet, and I’m so glad you feel inspired. I’ve actually thought of several different vases around here that I’d like to do this to!
Hi Kim! I love the organic look of your vase. It reminds me of something I would see in a Leeanne Ford home. I also thought it was so smart to use plaster of paris! Thanks for the great instructions and clear photos.
Thank you, Anna! You’re so sweet! I’m so glad you liked it!