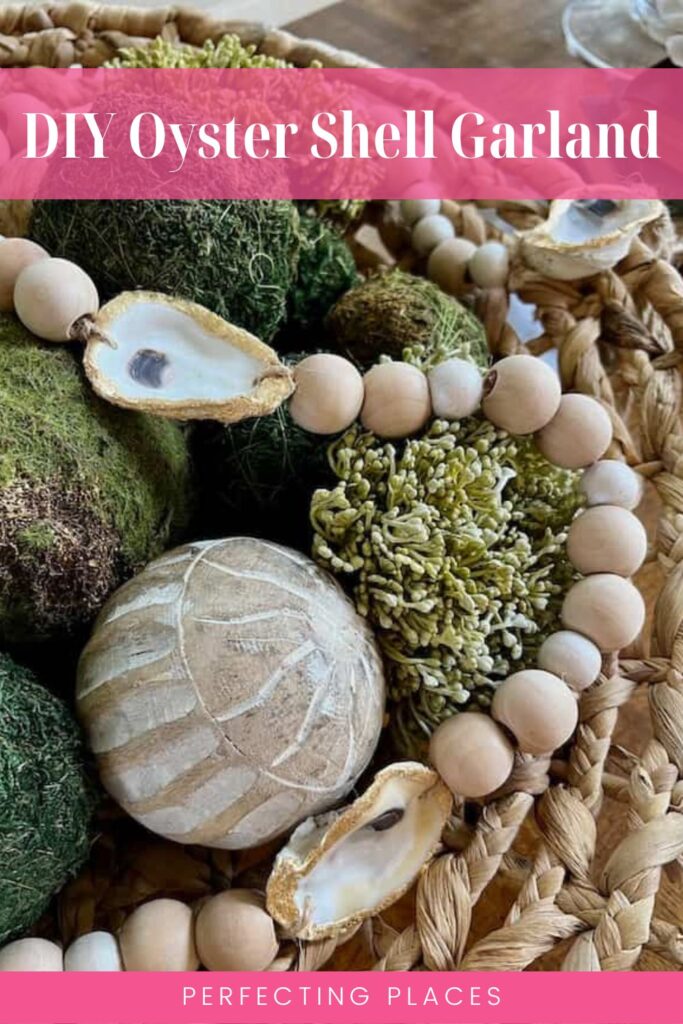
Create this Gorgeous DIY Oyster Shell Garland
Incorporate the beauty of natural elements and texture into your decor with this stunning DIY oyster shell garland.
Elevate your living spaces and add a touch of relaxed elegance to your home with this beautiful step-by-step oyster shell DIY!
(This post contains affiliate links, so I may earn a small commission when you make a purchase through links on my site at no additional cost to you. As an Amazon Associate I earn from qualifying purchases.)
If this is your first time to Perfecting Places, welcome! I’m so glad you stopped by! I’m Kim, and I blog about all things home decor! I love to share easy DIYs for your home as well as paint colors, design sources, and favorite decorating tips and tricks to help you make your house a home!
Where is your happy place? The place that brings you joy, peace, and a breath of fresh air?
I love a little coastal charm! And no, I don’t live anywhere near the coast, much to my dismay! But I love adding little reminders of my happy place around our home.
Lately, I’m loving the gorgeous natural texture of oyster shells! They’re full of natural beauty all on their own, but there are also so many lovely things you can make and decorate with them!
Today, we’re adding a little coastal chic to our home with an easy-to-make DIY oyster shell garland that’s the perfect accent piece to add to so many areas in your home.
Decorating with oysters allows you to incorporate the beauty of natural elements and rich textures into your home decor, and guess what? It’s not just reserved for beach homes! Whether you’re in a cozy countryside cottage or a stylish city apartment, this delightful garland will add a little reminder of the soothing beauty of the sea, adding a touch of relaxed elegance to your living space.
So, gather some oyster shells, wood beads, a little jute twine, and a dash of creativity and let’s get started!
Step-by-Step Guide: How to Make a Handcrafted Oyster Shell Garland
Materials Needed:
- Oyster shells (cleaned and dried and with holes drilled on both ends)
- Jute twine
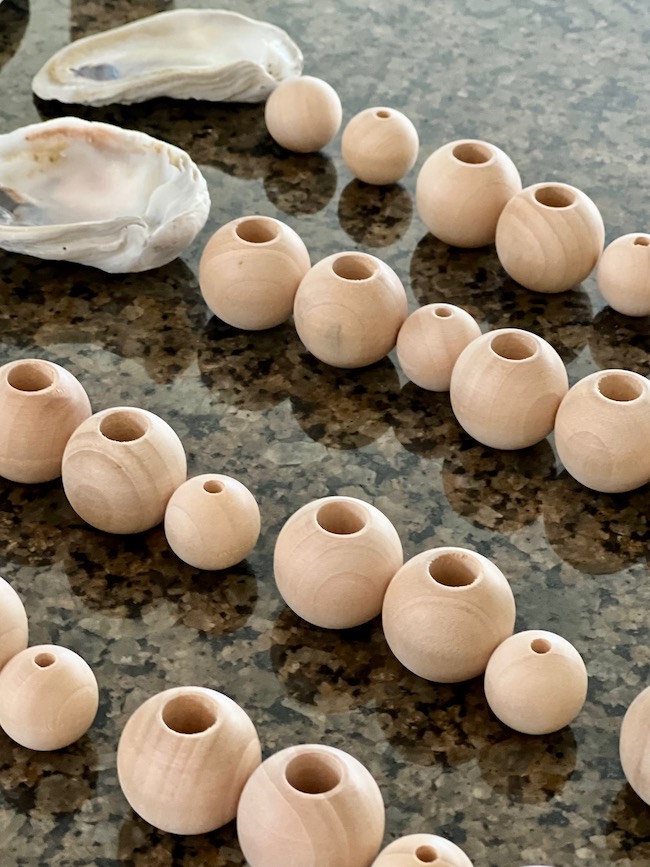
- Wood beads in 1″ and 3/4″ sizes
- White acrylic paint in a pearly finish
- Small paintbrushes (for painting beads and applying Metal Leaf Adhesive)
- 3/32 drill bit and a drill (if drilling your own holes)
- Plastic bowl
- Sponge
- Metal Leaf Adhesive
- Gold Metal Leaf
- Scissors
- Glue gun and glue sticks (optional if you want to secure the knots of the twine on the oysters)
Step-by-Step Instructions:
Step 1: Prepare Your Oyster Shells
Start by collecting a selection of oyster shells that have been thoroughly cleaned and dried. You can purchase them from a craft store or online. Ensure that the shells are free of any dirt, debris, or lingering odors.
Step 2: Drill Holes in the Shells
If your oyster shells are not already pre-drilled, you will need to drill holes. I confess that I was initially intimidated by this process; however, it’s really quite easy with the use of a sponge and a large plastic bowl or container with about an inch or two of water in it.
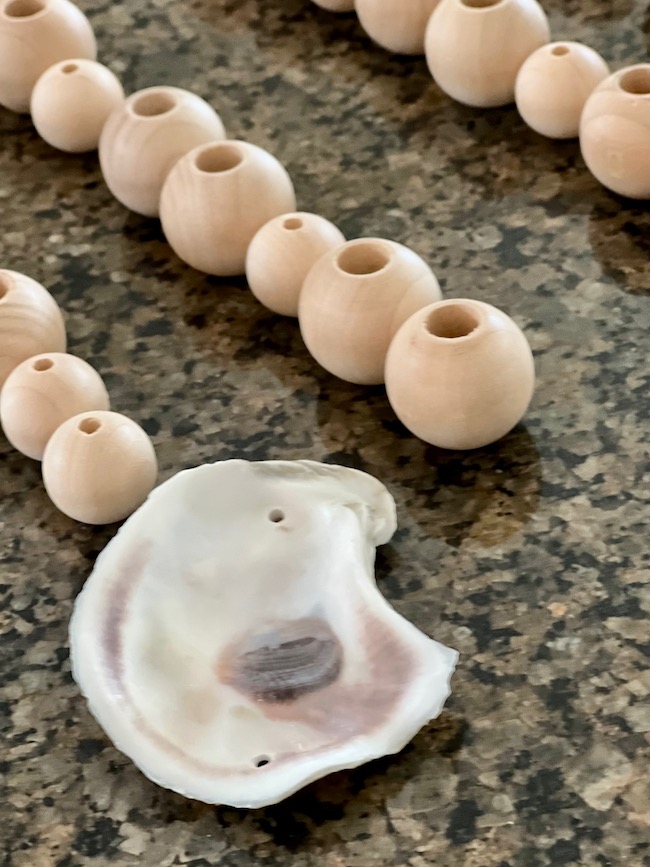
You can find oyster shells with predrilled holes available to purchase, but they usually only have a single hole. You can still complete this garland with only one hole in the shells. The shells would simply hang on the garland from a single hole in the top– which is still a pretty look!
To drill the holes, add the water to your bowl and place the sponge in it.
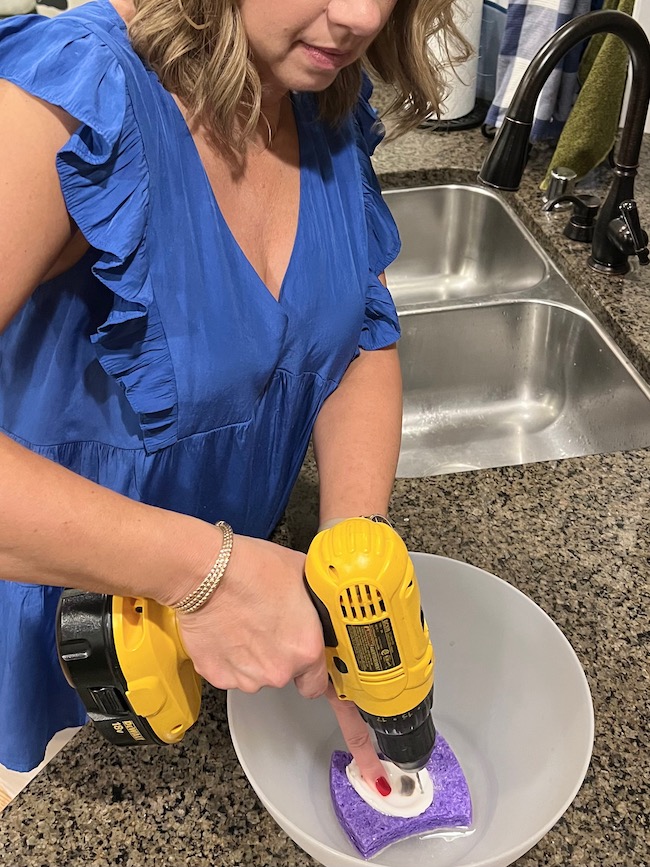

Place an oyster shell on top of the sponge with the bottom side up. Determine where you want the holes to be. Using a 3/32″ drill bit, apply gentle pressure to the shell and very patiently drill the small hole. You’ll need to drill in spurts of 10 seconds or so at a time. Then stop to rinse the shell and the drill bit of the shell dust. Make sure the area of the shell where you’re drilling stays covered in water while you drill. This will keep the drill bit and shell from overheating and damaging the shell or drill bit.
Be gentle and steady to avoid cracking the shells.
Be patient. This will take a few minutes to get all the way through the hole, but once you do it you’ll see it’s a pretty simple process.
This is certainly an adult job. I would recommend wearing safety goggles just to be on the safe side, and certainly be careful with your fingers while drilling!
Step 3: Paint the Small Beads a Pearly White Color
I used wood beads in two different sizes for this garland. For an added touch of coastal charm and to complement the oyster shells, I painted the smaller size wood beads a beautiful pearly white hue. Before you begin this step, put on disposable gloves to protect your hands from any paint residue.
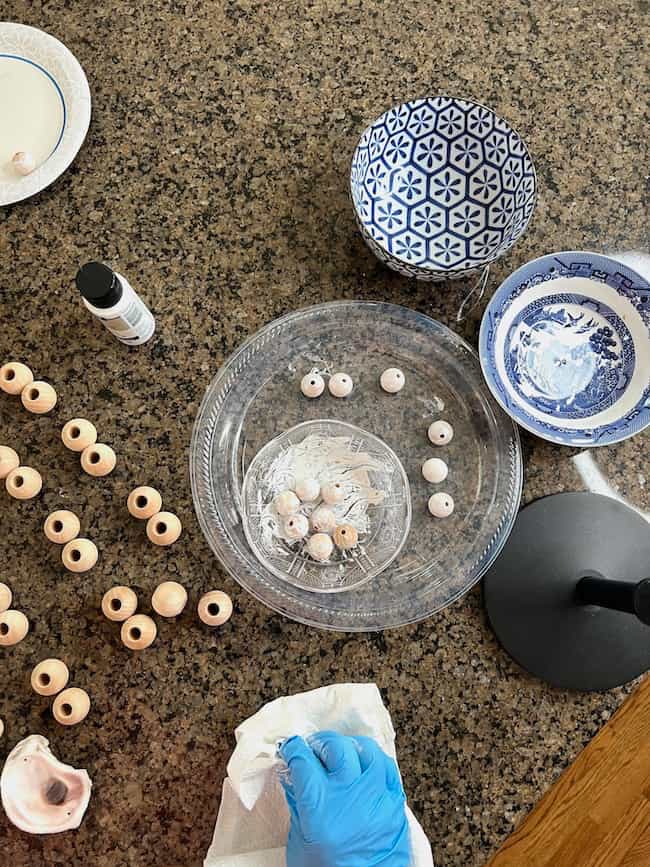
In a small bowl, pour a small amount of pearly white acrylic paint. Take the smaller wood beads and roll them gently in the paint, ensuring they are evenly coated. If you prefer a slightly distressed look, you can use a soft, dry cloth to wipe away some of the excess paint, allowing the wood grain to peek through and adding to the organic feel of the garland.
Set the painted beads aside to dry completely before moving on to the next step. This simple addition will beautifully complement the oyster shells, enhancing the overall elegance and natural appeal of your handcrafted oyster shell garland.
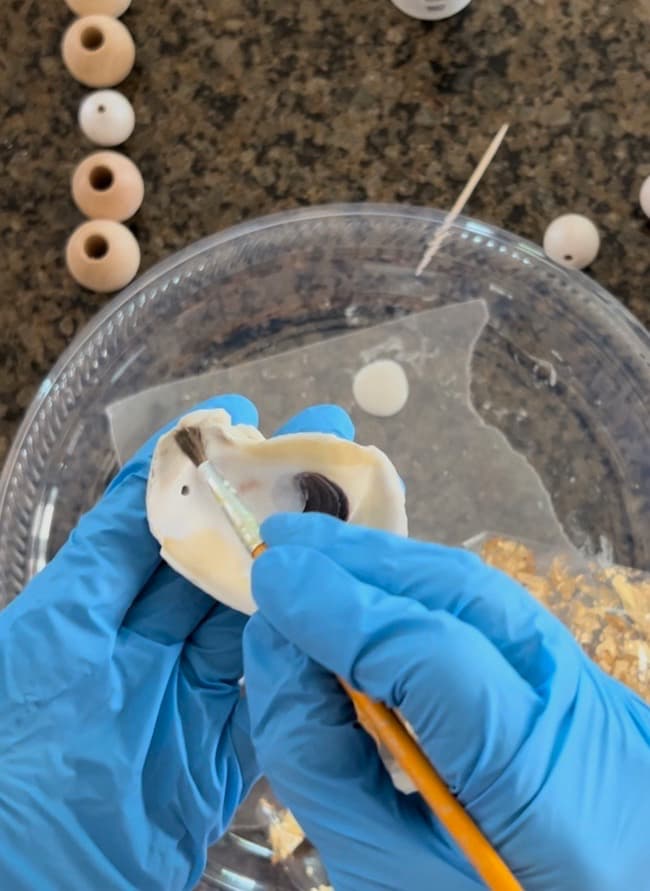
Step 4: Apply Gold Leaf to the Rim for a Gilded Oyster Shell Look
I recommend wearing disposable gloves for applying the gold leaf.
Begin by carefully cleaning and drying the oyster shells to ensure a smooth surface. Next, using a small paint brush, apply a thin layer of gold leaf adhesive around the outer edge of each shell’s rim. Allow 30 – 60 minutes of dry time for the adhesive to become tacky to the touch.
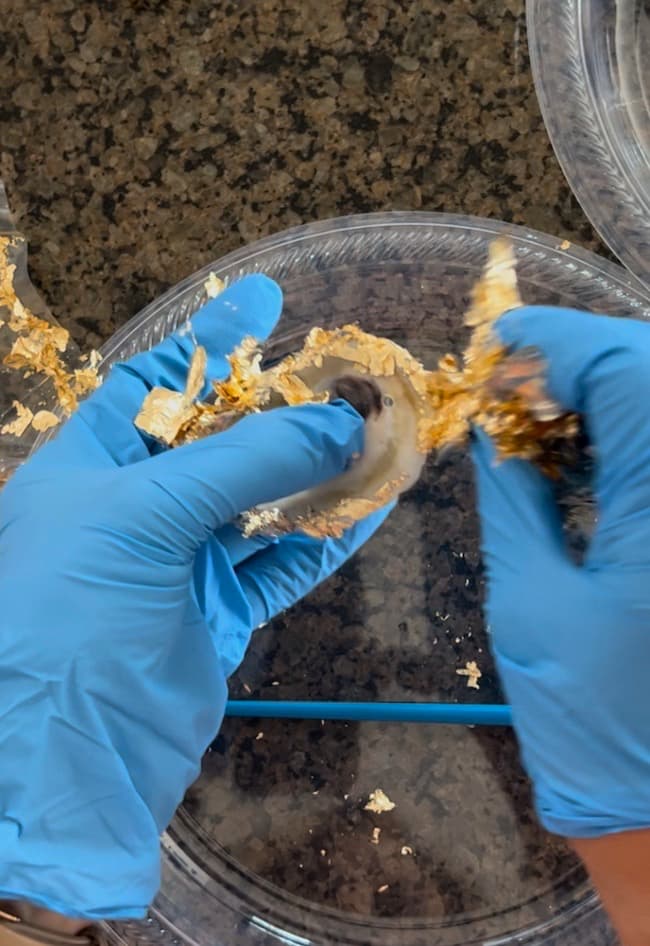
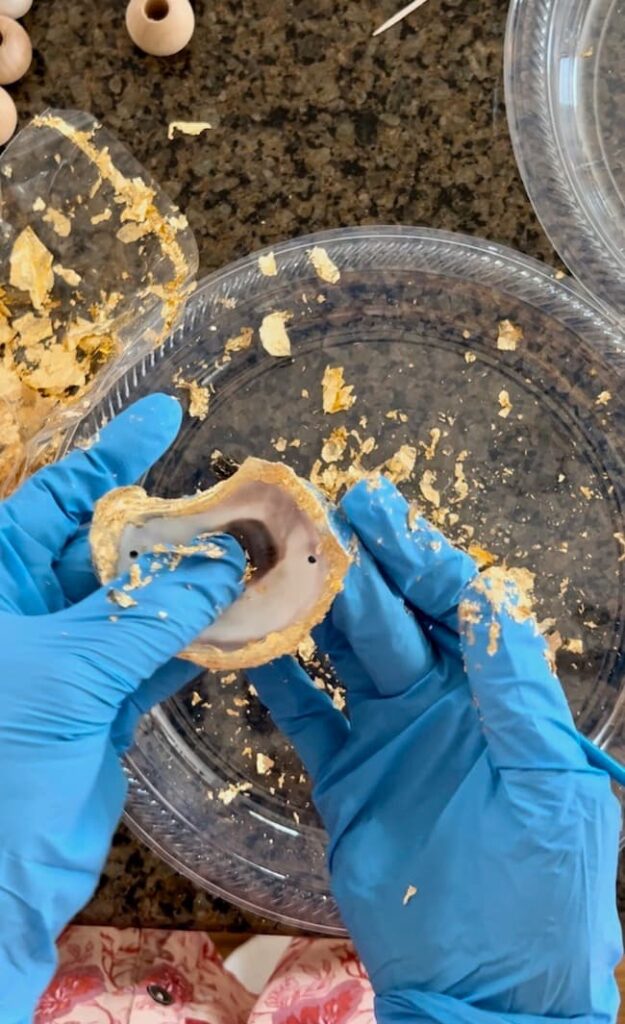
I used gold leaf scraps for this process, but you can use sheets of gold leaf as well. Gently place the gold leaf sheet or pieces over the areas of adhesive, ensuring it adheres evenly to the entire rim. Allow it to set for a moment before using a soft, dry brush to gently remove any excess gold leaf, revealing a beautifully gilded rim. I found it easiest to use my gloves hands to smooth the gold leaf as the final step in this process.
Repeat this process for each oyster shell.
Once you’ve applied the gold leaf to all the shells and allowed them to dry completely, it’s time to assemble the garland!
Step 5: Plan the Garland’s Layout and Design the Arrangement
Now that you have your beautifully painted pearly white beads and gilded oyster shells ready, it’s time to plan the layout and design of your oyster shell garland.
Planning out your design will make the assembly much faster.
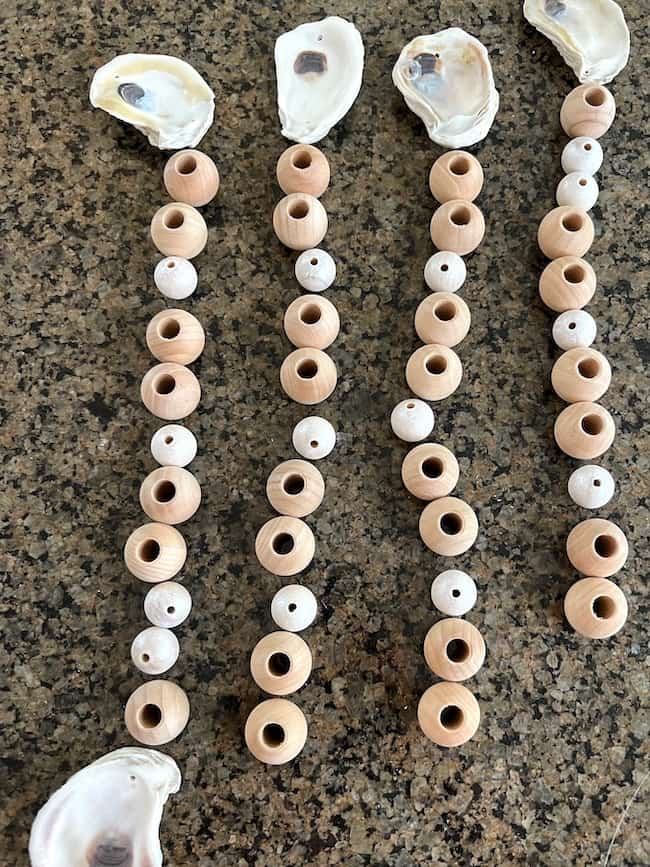
Start by laying out your wooden beads and oyster shells in front of you. Envision the overall look you want to achieve. Consider alternating the sizes of the wooden beads, creating a pattern that appeals to you. Decide on the number of beads you want to place between each oyster shell for the desired length for your garland.
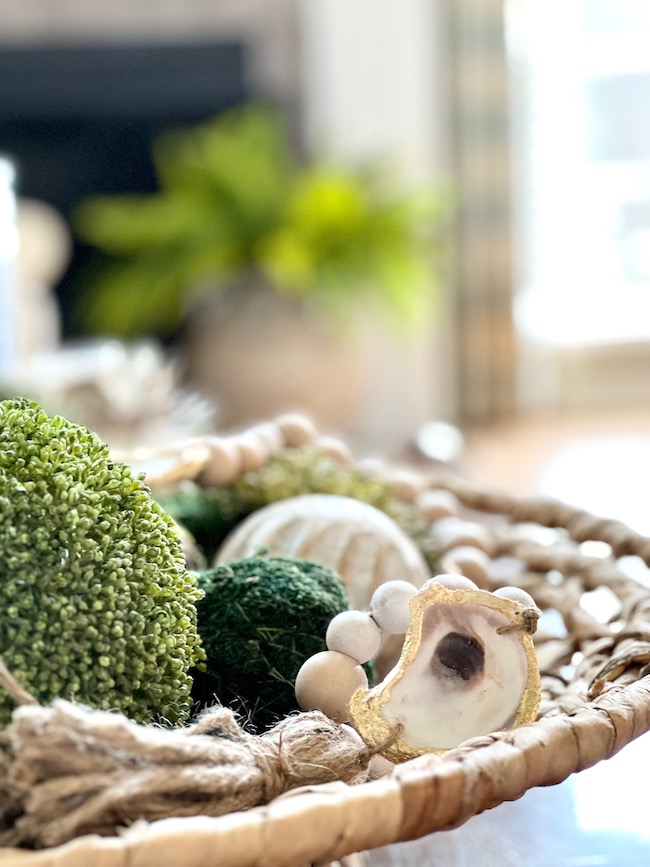
I placed an oyster shell at both ends of my garland, and evenly spaced the remaining 3 shells along the beads.
Having a clear plan and predetermined order in place will make the assembly process a breeze.
Step 6: Measure and Cut the Jute Twine
You will assemble this garland in sections, so you’ll need a length of twine for each section. By section, I’m referring to the group of wood beads in between each oyster.
Based on the bead design you plan, cut each length of jute twine. For my garland, I used 5 oyster shells — one on each end, with the remaining 3 spaced between the sections of wood beads. I needed 4 pieces of twine.
Measure and cut your pieces of twine, leaving some extra length on each end for tying and assembling.
Step 5: Assemble the Garland
Now, it’s time to bring your oyster shell garland to life with a thoughtful and organized approach. To start, tie one end of the jute twine securely through the hole of the oyster shell that will be your first end piece. This will serve as the anchor for your garland.
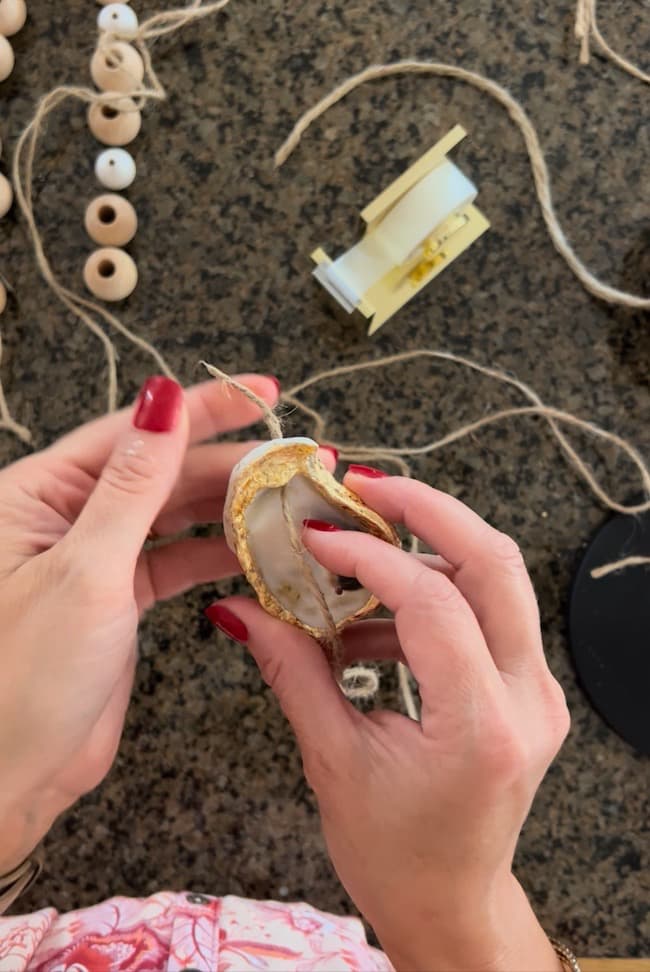
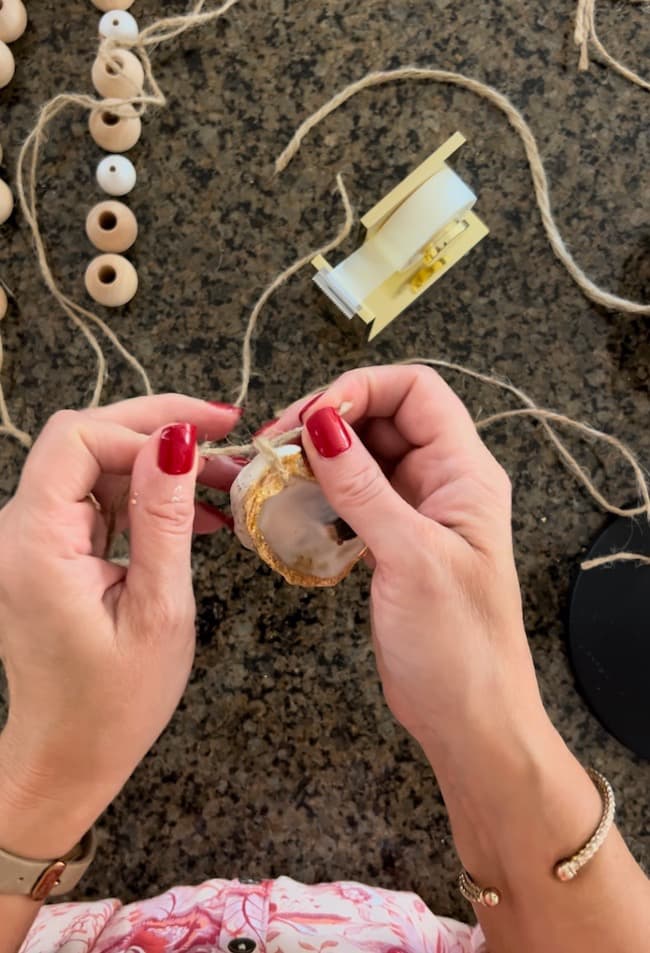
Next, thread the wooden beads onto the jute twine, creating the first section of your garland. Once you’re satisfied with the arrangement of beads in this section, secure the end of the jute twine to the second oyster shell. To do this, carefully pass the twine through an additional hole in the second oyster shell and tie it off securely. This will connect the first section of beads to the second oyster shell.
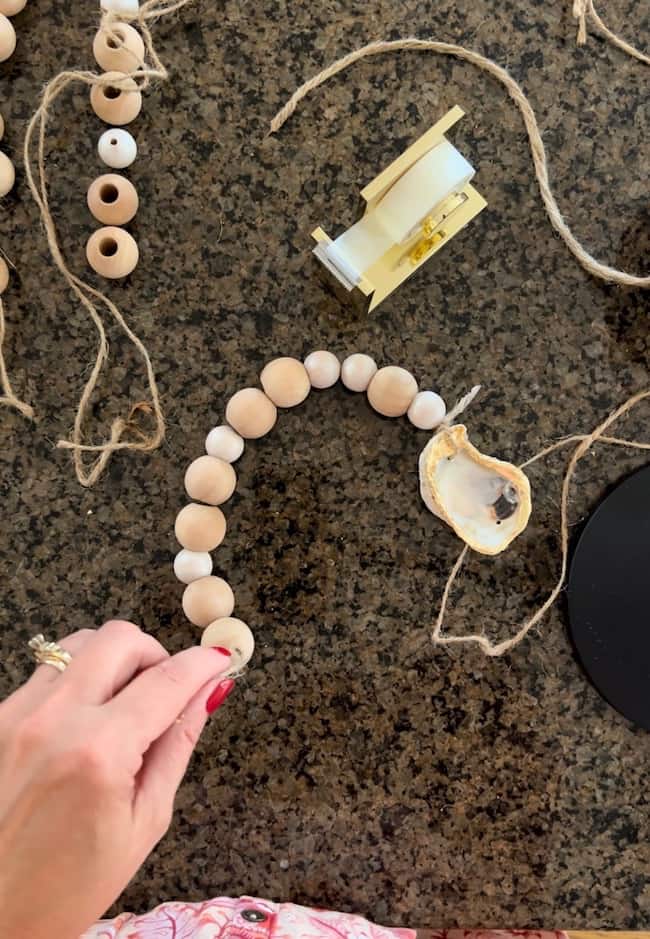

Continue this process of threading beads and attaching oyster shells for each section of your garland. You may choose to alternate bead sizes or create a specific pattern that enhances the visual appeal.
Repeat this process until your oyster shell garland reaches the desired length. Finish the garland by attaching an oyster shell to the other end, mirroring the oyster shell at the opposite end of the garland.
Step 7: Secure the Shells (Optional)
If you want added security, you can use a small dot of hot glue on the back of each shell where is is tied to the twine. This step is especially useful if you plan to hang the garland.
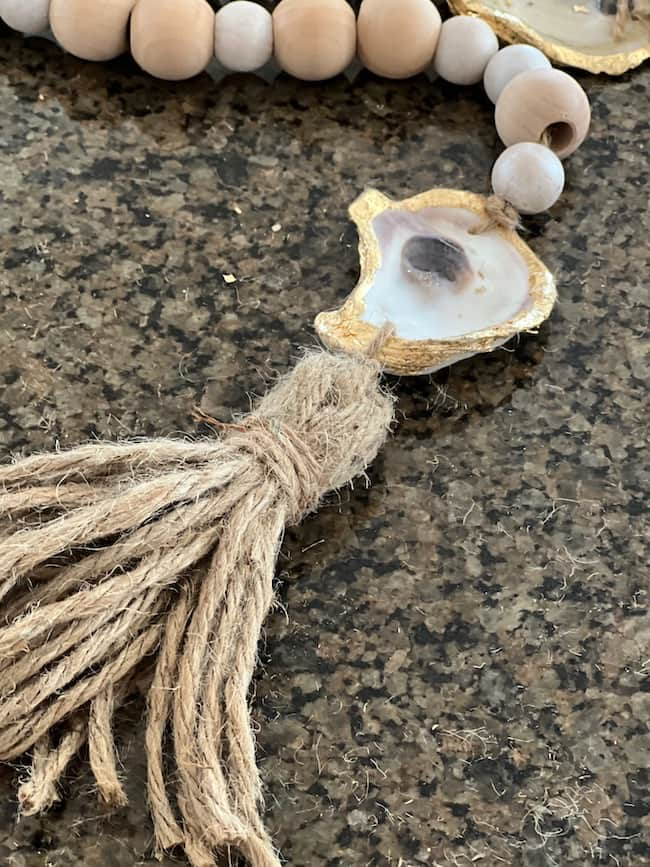
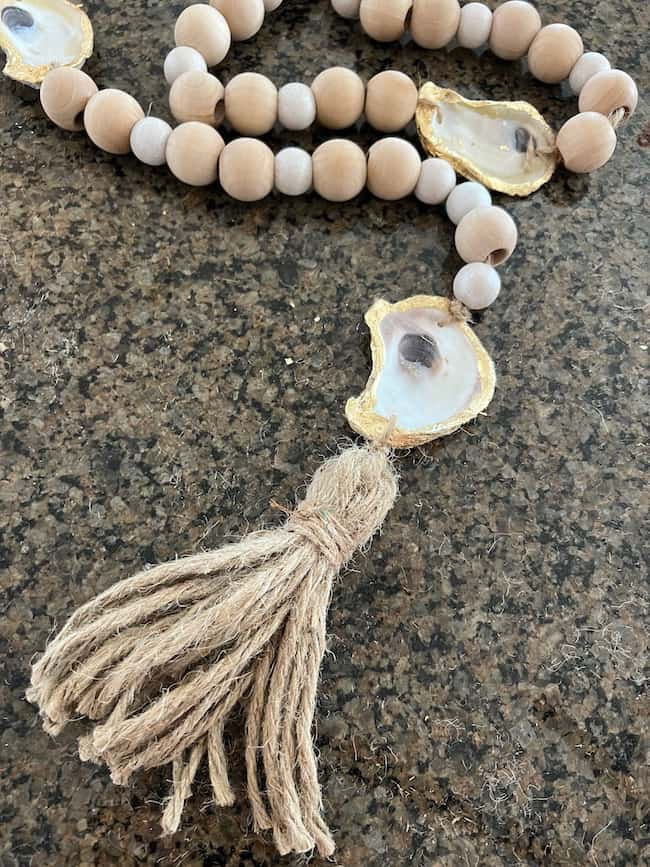
Step 8: Add Jute Tassels to the Oyster Shell Garland
Next, create tassels made from jute twine to attach to the oysters at each end of the garland.
Follow these simple steps to make an easy tassel:
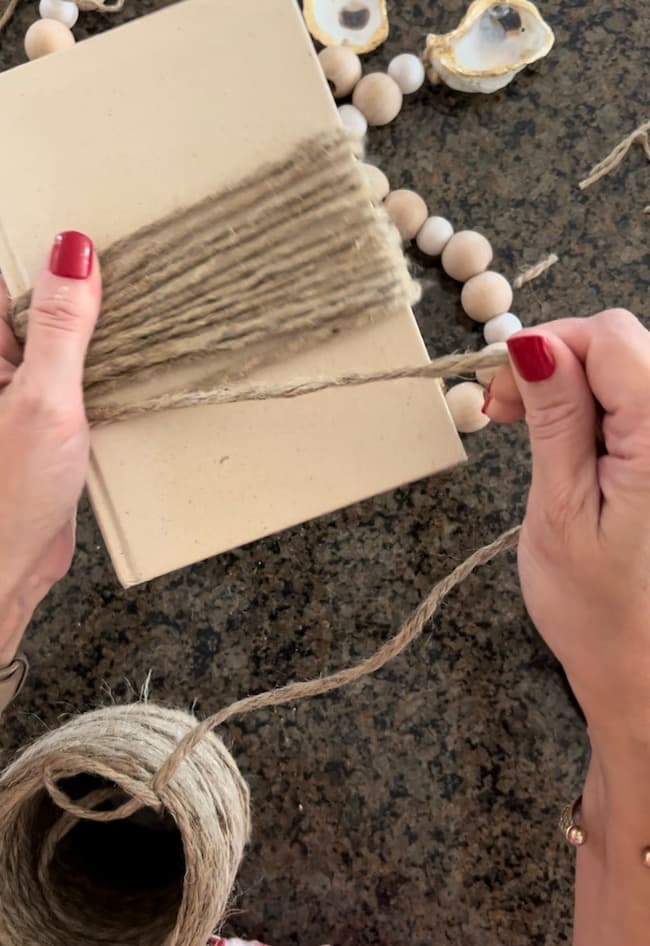
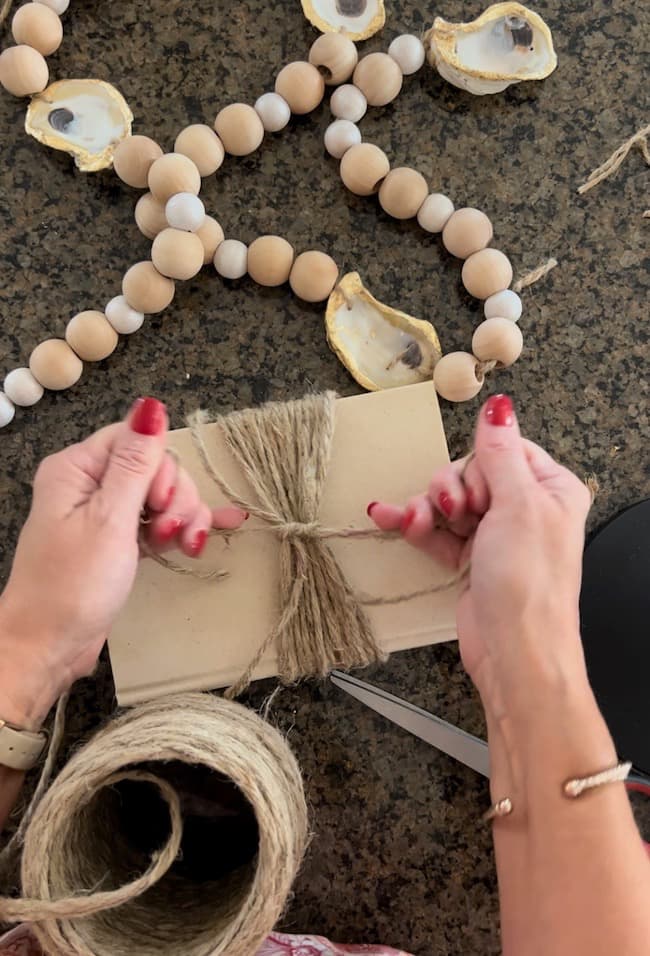
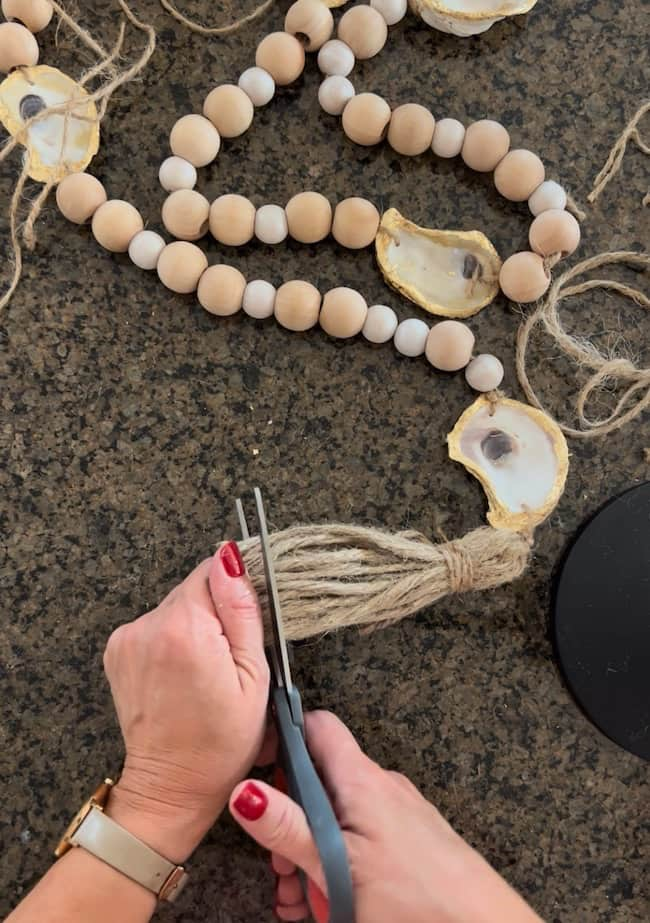
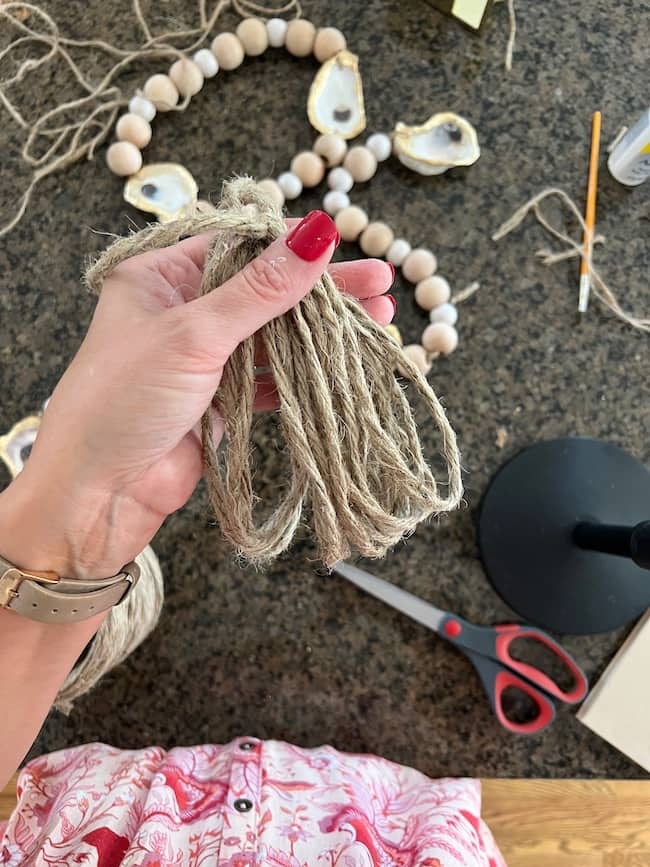
- Wrap Jute Around a Small Book — Take a piece of jute twine and wrap it around a small book or any similar object about 15 times. Adjust the number of wraps to achieve your desired tassel thickness.
- Tie Off the Wrapped Jute — Once you’ve completed the wraps, tie another piece of jute tightly around one end of the wrapped jute. Make sure it’s secure and forms the top of the tassel.
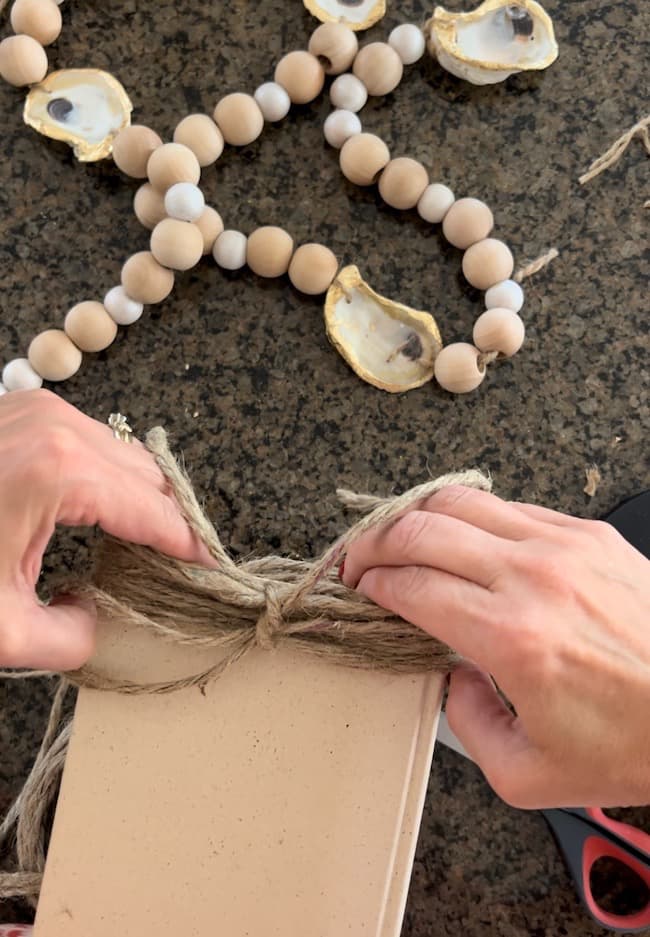
- Slide Off the Book — Carefully slide the wrapped jute off the book, keeping the tied end at the top.
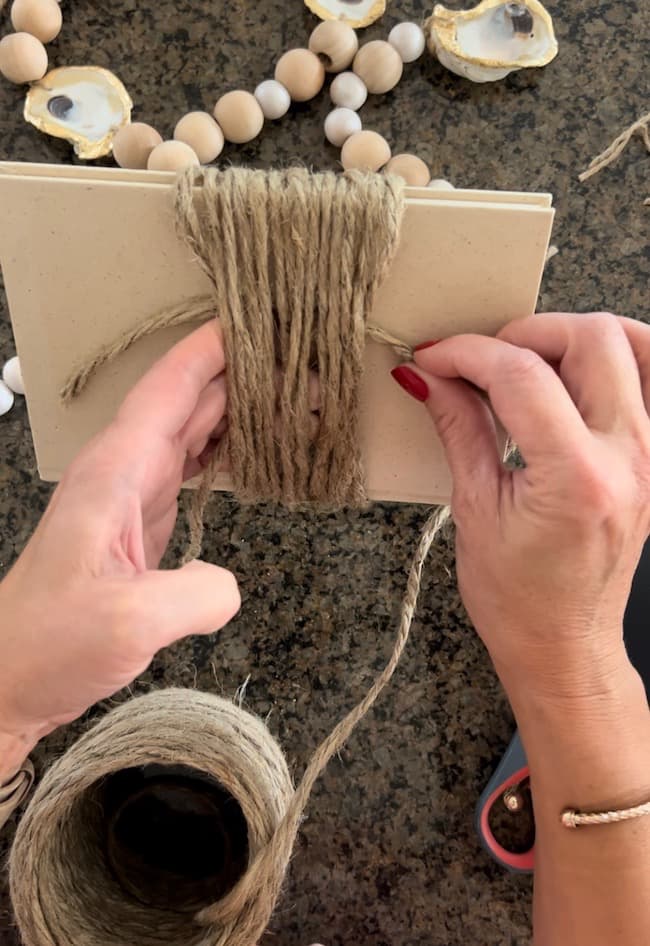
- Secure the Top of the Tassel — Take another smaller piece of jute twine and wrap it several times around the top of the tassel, near the tied end. Tie it tightly to create a secure top for the tassel.
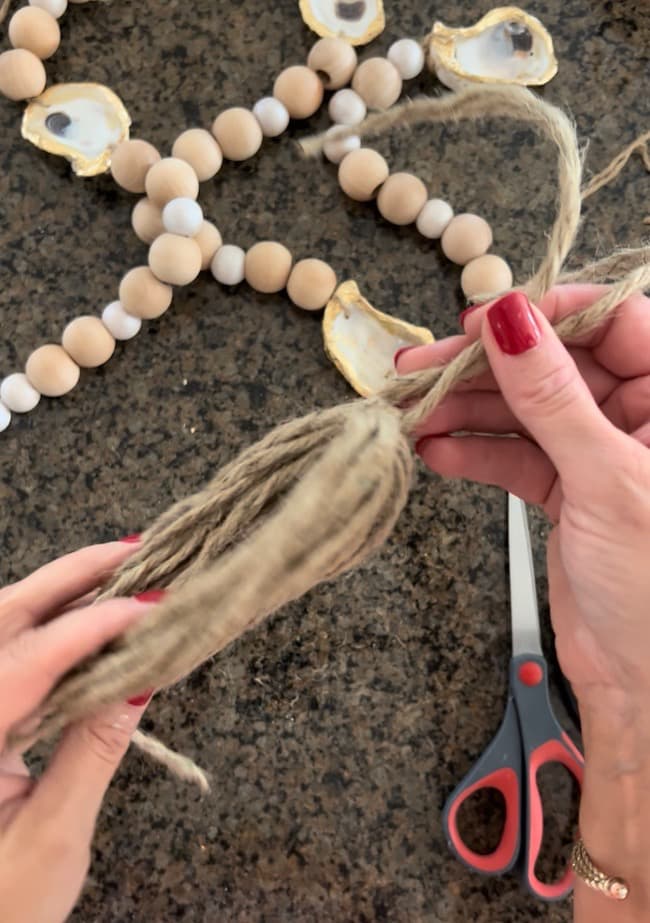
- Trim the Bottom — With scissors, cut through the loops at the opposite end of the tied section to release the jute strands and create the tassel fringe. Trim the ends of the tassel to the desired length.
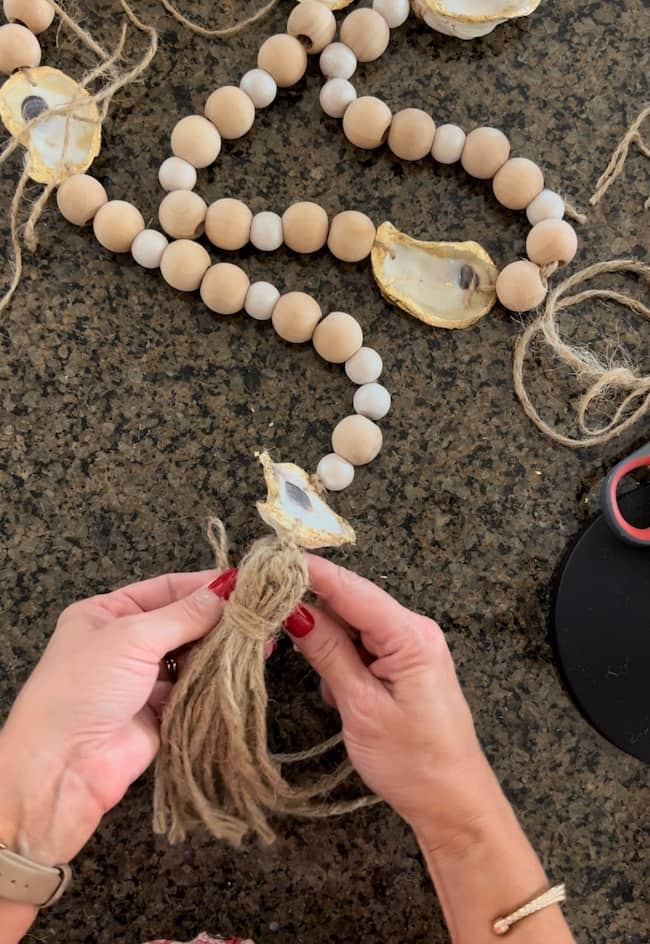
- Attach the Tassel — Now, it’s time to add these charming jute tassels to the oysters at both ends of your garland. Use a small piece of twine to tie each tassel securely to the bottom edge of the oyster shells. Use this small twine piece to attach the tassel to the shell.
Step 9: Display and Admire
Find the perfect spot to display your oyster shell garland – whether it’s on the fireplace mantel, along a bookshelf, or as a charming coastal touch to your holiday decor.
Crafting this gilded oyster garland is a wonderful way to add a handmade shell garland to your home decor displays. Whether it graces your mantle, adorns a decorative wall shelf, or elegantly drapes along a staircase railing, the oyster shell garland is a lovely addition to your living space.
Creative Ways to Use an Oyster Shell Garland Around Your Home
This oyster shell garland is such a versatile piece of decor, and can be used in so many creative ways around your home!
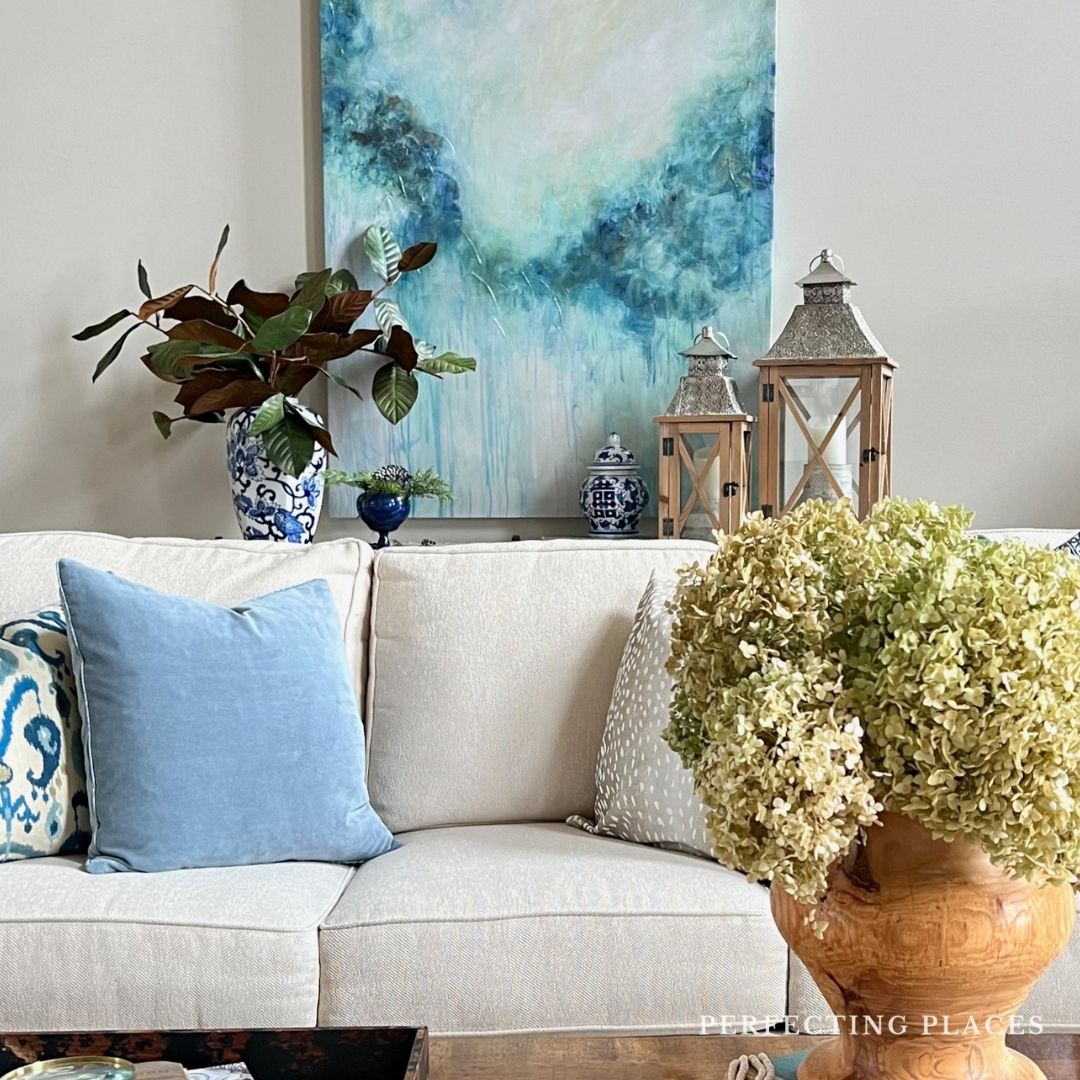
1. Add charm to your living room or family room by draping the oyster shell garland along your fireplace mantel. Combine it with other natural accents like driftwood, sea glass, and candle lanterns for a relaxing coastal retreat.
2. Elevate your dining room by layering the gilded oyster garland in a stunning centerpiece with taper candles and candle holders on your dining room table. This unique accent will serve as a beautiful focal point during gatherings and dinner parties.
3. Create a beautiful piece of wall art by hanging the handcrafted garland on a wooden dowel or driftwood. Display it in your entryway, hallway, or above a console table to make an eye-catching coastal-inspired statement.
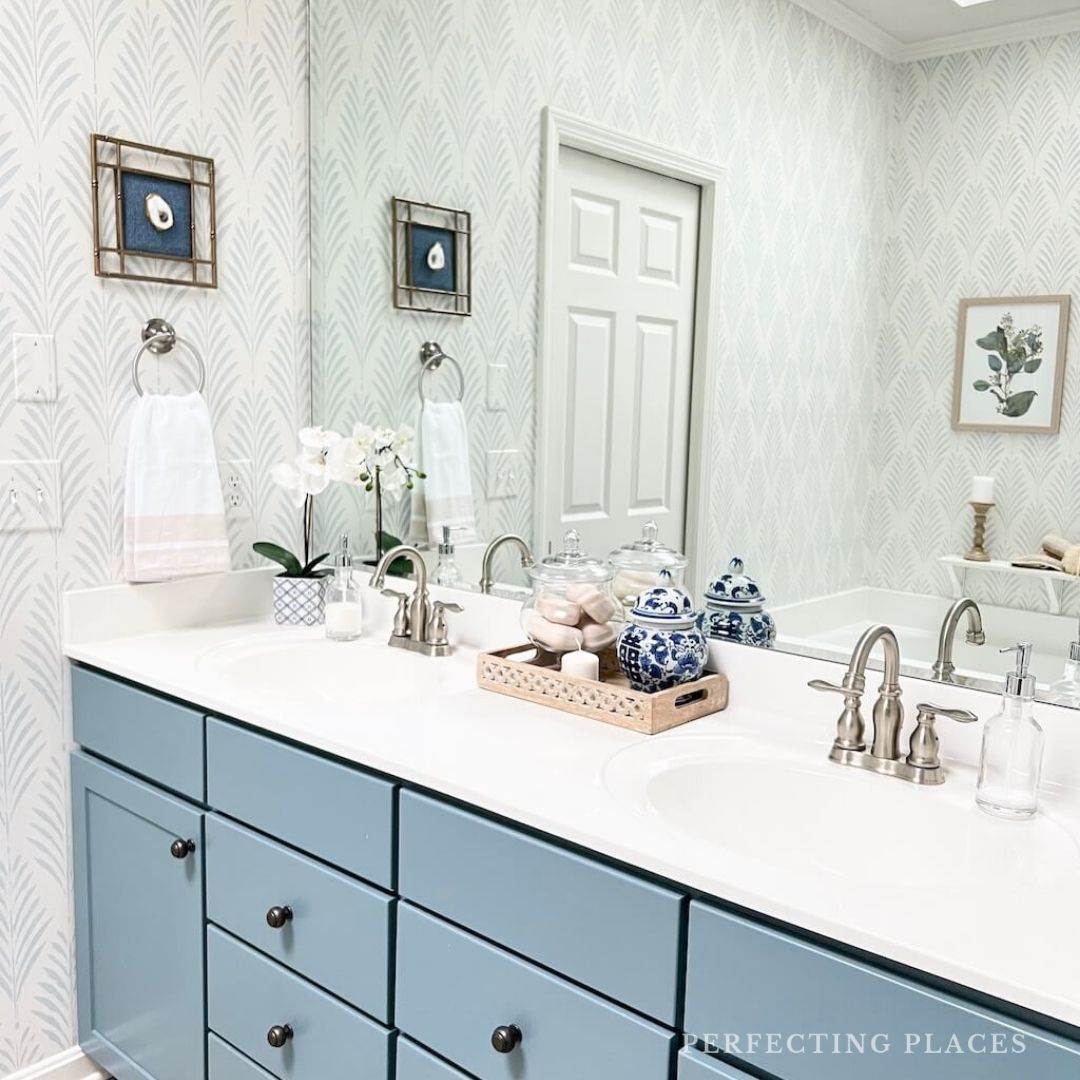
4. Incorporate the natural oyster shells into your bathroom shelf decor. Include coastal-themed accessories like starfish, seashell-shaped soaps, and ocean-scented candles for a refreshing coastal retreat.
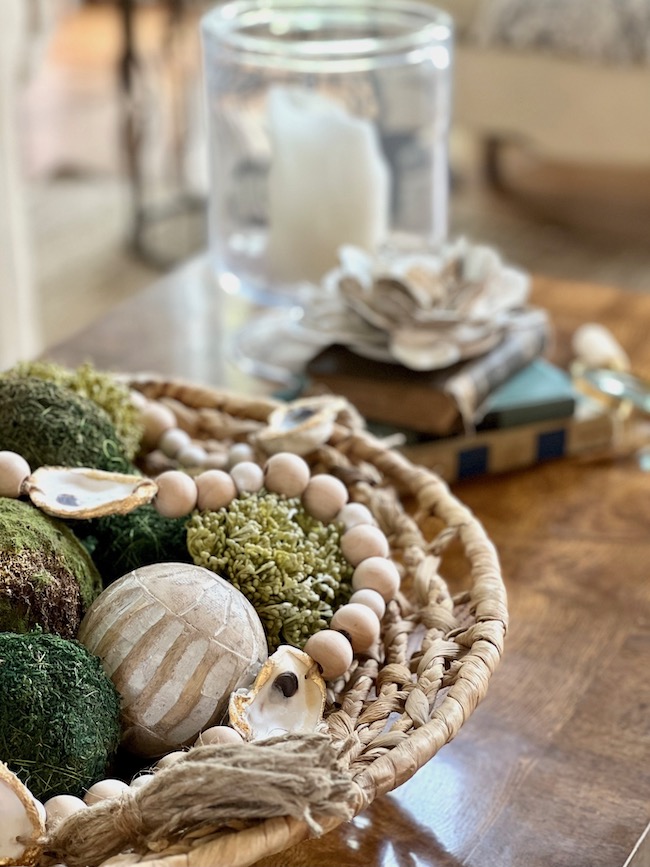
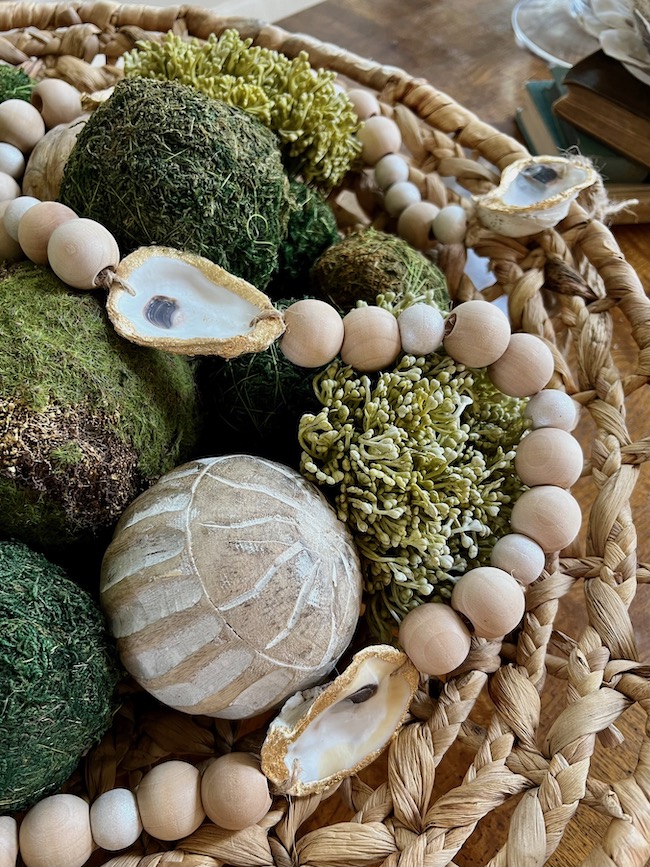
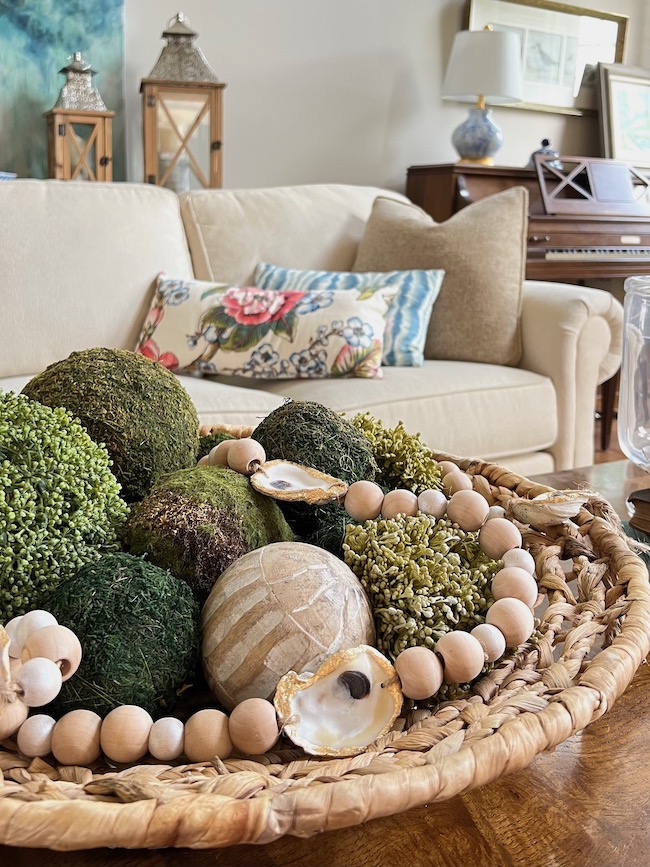
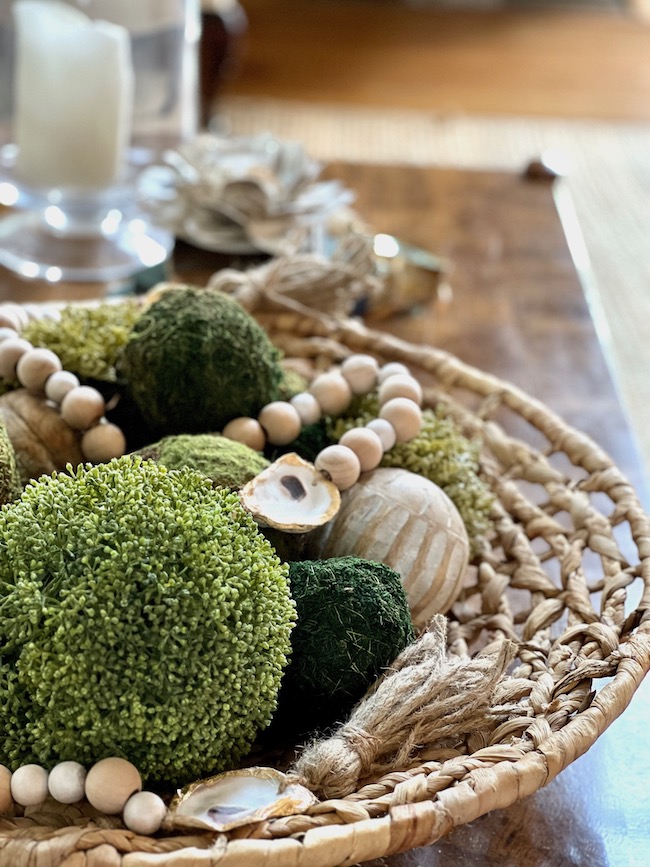
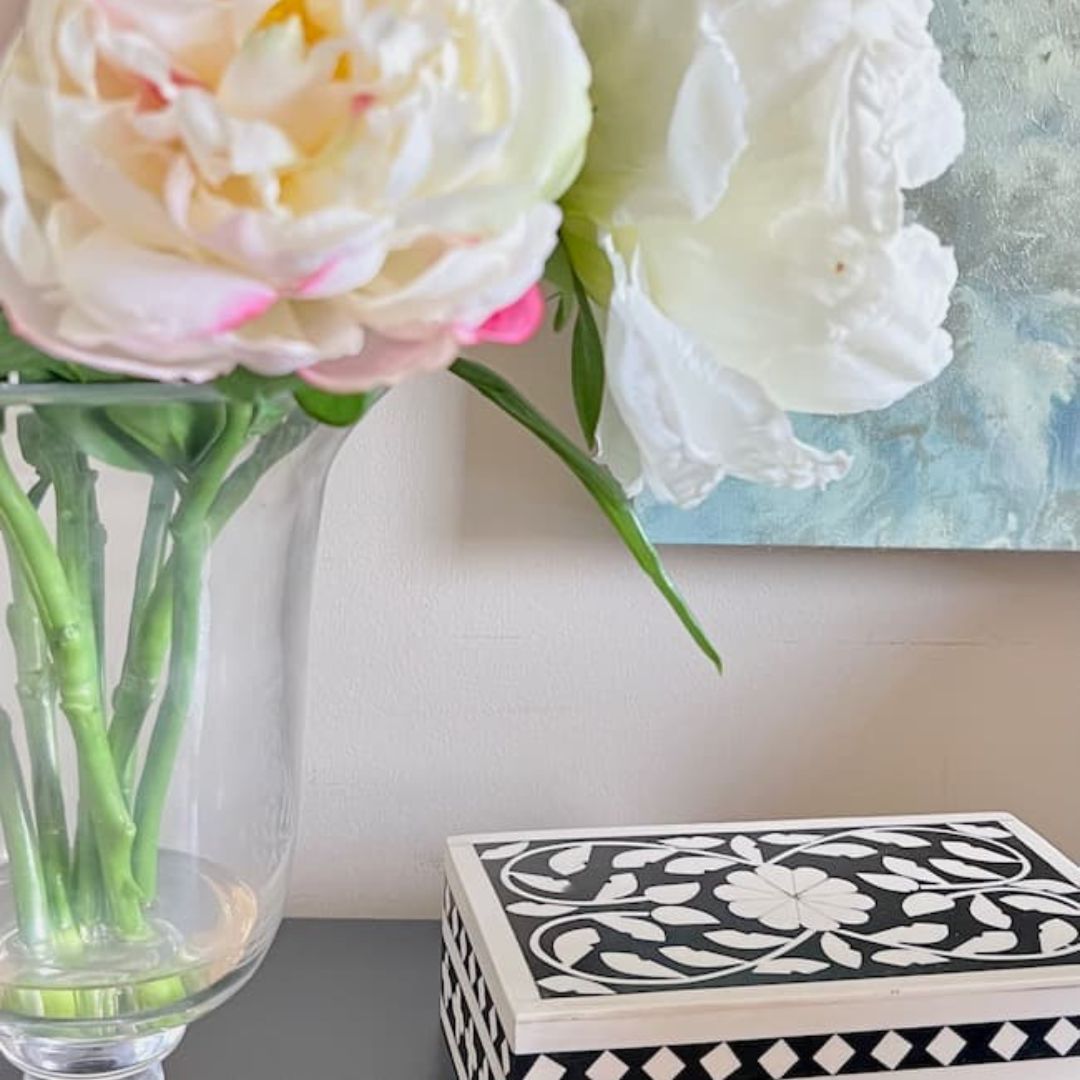
5. Create a charming vignette by gathering your oyster shell garland in a rustic basket or a decorative bowl and placing it as a stunning centerpiece on your coffee table. Surround it with vintage books and a vase of fresh flowers for a captivating and elegant display.
6. Add a touch of seaside allure to a bookshelf by draping the oyster shell garland along the shelves. Nestle it among your favorite books and intersperse it with small coastal trinkets and souvenirs.
7. Welcome family and friends in your foyer by adorning a wooden lantern with the oyster shell garland. The soft glow of the lantern combined with the coastal charm of the garland will set the perfect tone for your guests as they enter your home.
I hope you give this fun DIY a try. I love adding handcrafted details around our home. It’s such a satisfying way to express my creativity and add a personal touch!

If you love this look, but creating a DIY oyster shell garland isn’t your cup of tea, I’ve curated some lovely done-for-you garlands below! Just click on the picture for details.

More Gorgeous Oyster-Themed Decor:
If you love the beauty and natural texture of oysters, you’ll want to check out this DIY Oyster Shell Art that I created for our bathroom!

You’ll also love this gorgeous oyster shell votive holder! I have it on our coffee table and absolutely love it!
You might also love these oyster shell finds:


As you can see, there are so many beautiful ways to display this DIY oyster shell garland, and the best part — it’s a lovely reminder of my happy place!
Happy Decorating!


This is beautiful! And so easy to do. Thanks, friend.
It was fun to make and yes, so easy — especially if using pre-drilled shells! I was, however, surprised by how easy it was to drill the holes. Thanks so much for your kind words, Renae!