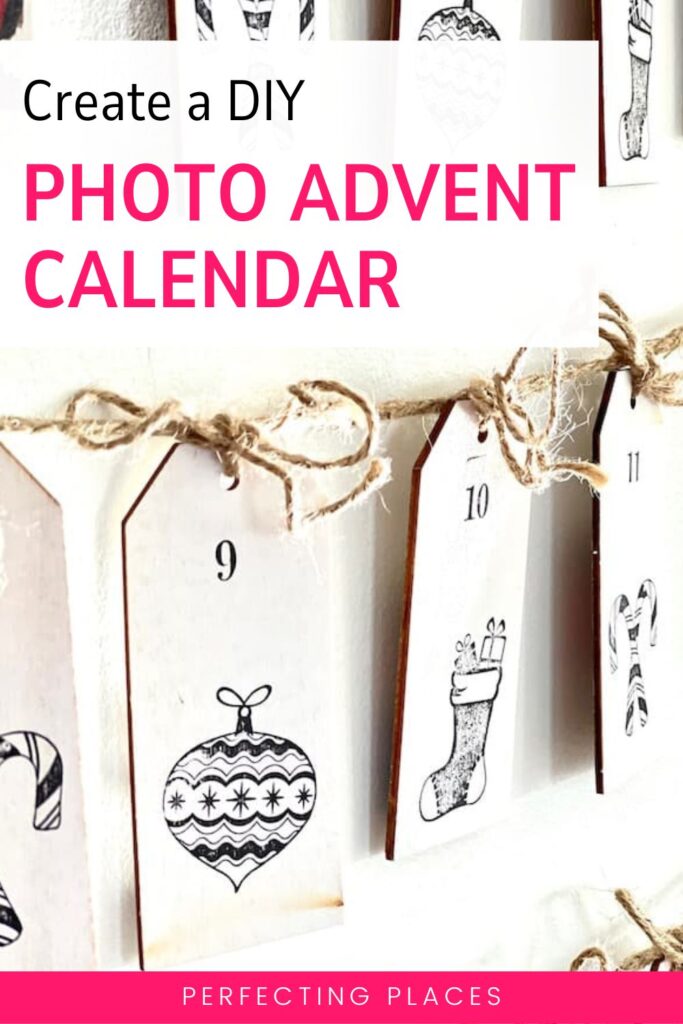
Unwrap Memories This Holiday Season with a DIY Photo Advent Calendar
Looking for a unique and sentimental way to countdown to Christmas? This DIY photo Advent calendar is the perfect project for you!
An Advent calendar is a fun Christmas tradition that adds a little excitement and anticipation to your home during the Christmas season. This DIY Advent calendar idea is extra special because it’s made using sweet family photos from Christmases past so it’s sure to bring smile! Through the use of Mod Podge and a photo transfer technique you’ll create a lasting keepsake for your family to enjoy year after year!
(This post contains affiliate links, so I may earn a small commission when you make a purchase through links on my site at no additional cost to you. As an Amazon Associate I earn from qualifying purchases.)
I’ve been thinking about hope a lot lately.
During this season of Advent we turn our hearts and attention to the One who is our hope — and oh, how this weary soul rejoices!
It’s advent — the season of hope! It’s a time of counting down, anticipating, looking forward to — and hoping for what is to come!
This is also a time to reflect on sweet memories and traditions from the past.
This DIY Advent calendar idea is such a special one for me because it’s the perfect combination of reflecting on sweet memories from the past and looking forward with anticipation and excitement to Christmas Day!
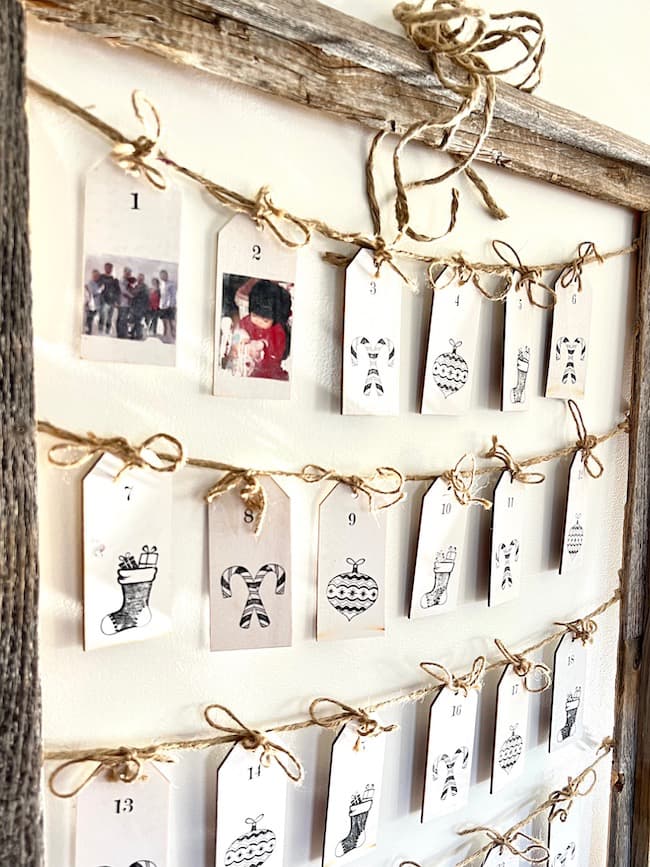
A Vintage Family Photo Advent Calendar
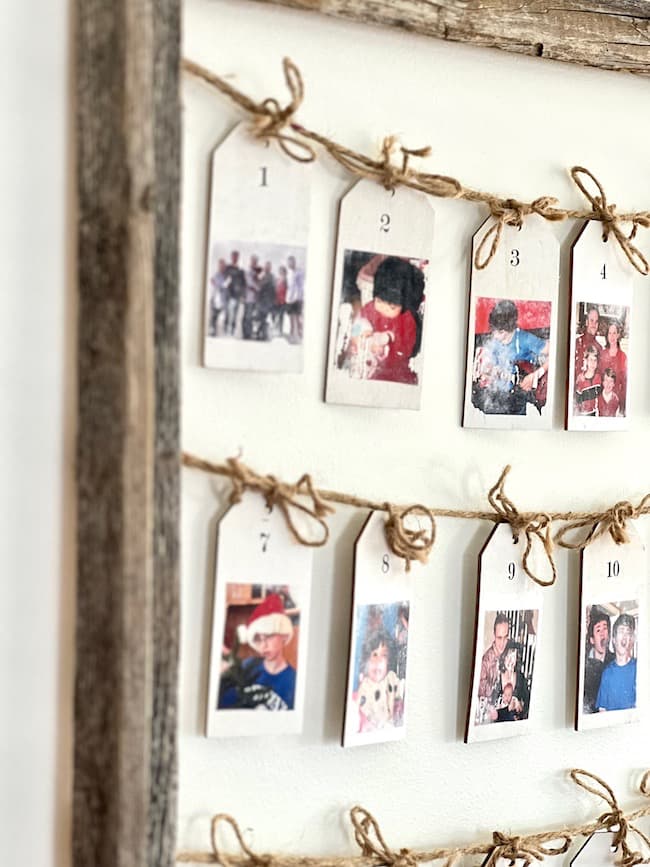
The concept for this Christmas Advent calendar idea is to turn a tag around each day of December to reveal a treasured family photo from a past Christmas. It’s a great way to showcase old family photos as your family is gathered together during the holidays.
While many Advent calendars hold small treats or candy for little ones to open each day, this DIY photo project is a wonderful way to reminisce over sweet Christmas memories, and it makes a great gift idea for loved ones. It will become one of your most treasured pieces of Christmas decor!
What supplies do you need for this DIY Advent calendar?
- Old family Christmas photos
- Laser printer (you can send the photos to a local print shop)
- Scissors
- Large rustic open frame
- Small nails
- Jute twine
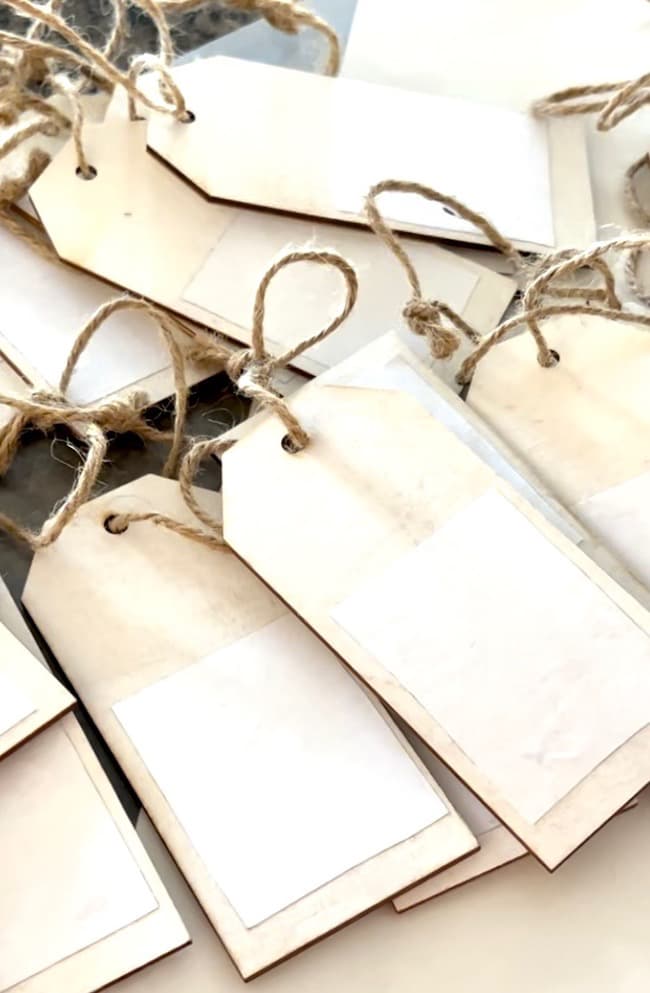
- Wooden gift tags
- Mod Podge (matte finish)
- Small sponge paintbrush
- Bone folder/scoring tool
- Number stamps — number stamps linked here
- Christmas stamps — Stocking, Candy Canes, Ornament
- Black Ink Pad
- Wet Cloth
- Paper towels
Gather 24-25 old family Christmas photos.
You’ll need 24-25 depending on whether you want to include Christmas Day in your countdown, or stop on Christmas Eve.
This is the fun part of the project — searching for and gathering up all those treasured photos! Some of my photos were so old that I simply took a picture of the photographs. Fortunately, at one point in my life, I was diligent about organizing and scrapbooking our Christmas photos, so it was easy to find them.
I used Canva to organize and size the photos onto an 8 1/2 x 11 document to send to a printer.
Print photos on a laser printer.
For the transfer process to work, the photos must be printed on a laser printer. An inkjet printer will not work. I sent mine to our local FedEx office center to print since we only have an inkjet printer at home.
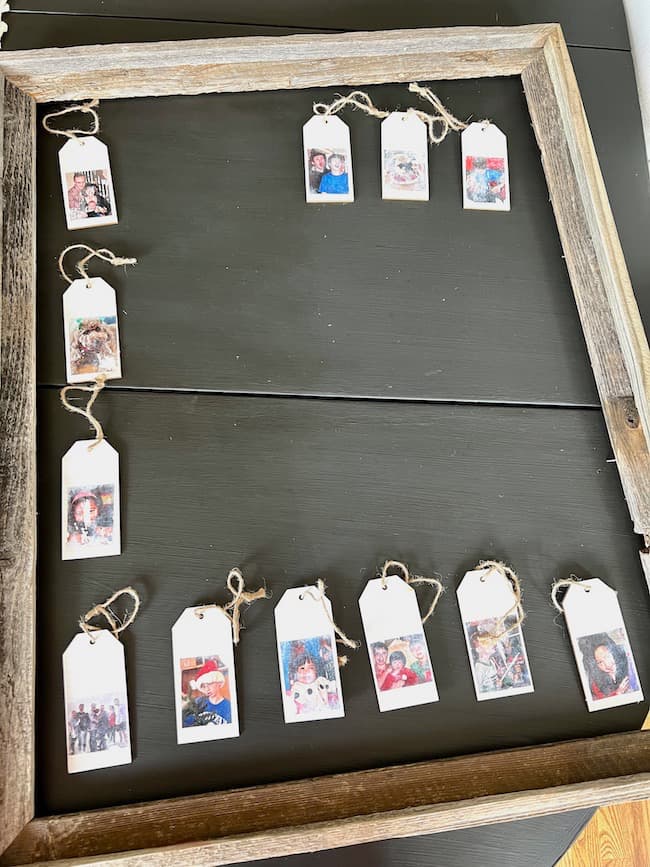
You need a large open frame to hold your favorite photos.
I’m using a large empty rustic wooden frame that I purchased from Hobby Lobby over five years ago. It was originally used for a graduation display for our son. It’s since been used for a bridal shower for our other son and daughter-in-law, and also for a birthday party for our daughter.
It’s had a starring role in special events for all three of our children, and now it’s framing some special family Christmas memories!
It’s perfect for this project because it’s large; it has an open back; and it’s made of wood which allowed me to hammer nails into it.
This is a similar rustic frame on Amazon.
A large thrifted frame would be perfect for this calendar if you have one on hand. Or, head out to your local thrift store for an inexpensive option.
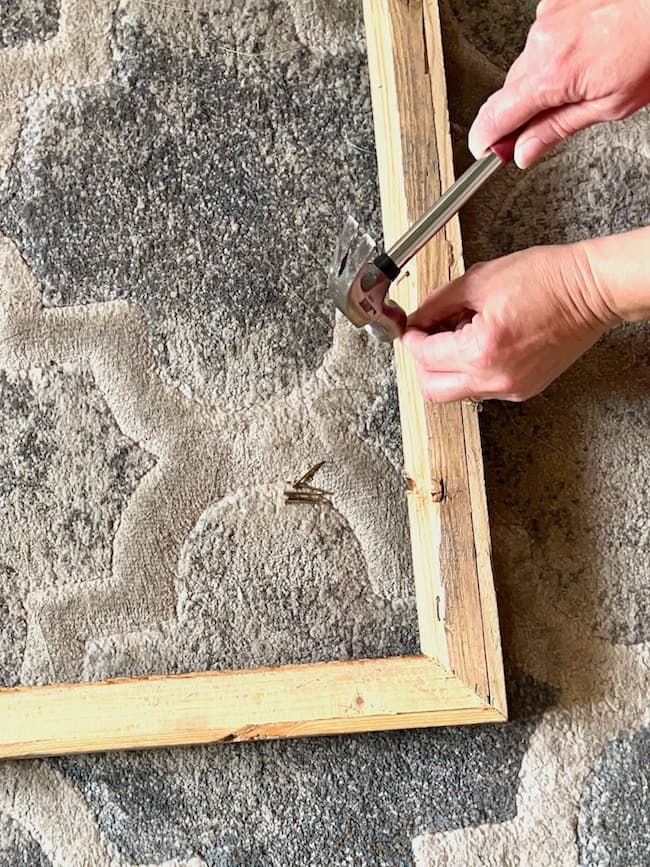
Hammer small nails into your frame.
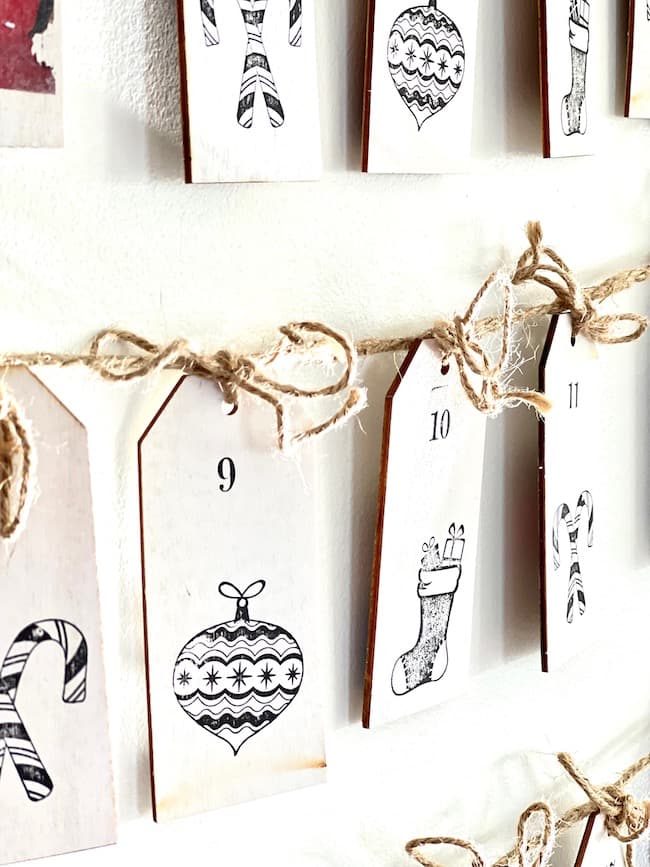
I used 8 small finishing nails hammered into the frame to secure the jute twine to the frame. The nails should be lined up side to side. Use two nails to attach each string of jute across the frame.
String the jute twine.
I strung the jute twine across the frame for the wooden photo tags to hang from. I used a roll of larger 4-ply twine for this project.
You’ll also need smaller 3-ply jute twine to tie through the tags. The tags I used from Hobby Lobby already had this twine attached.
Use wooden gift tags for your photo transfers.
You’ll need unfinished wooden tags to create this project.
Mod Podge for Your Photos:
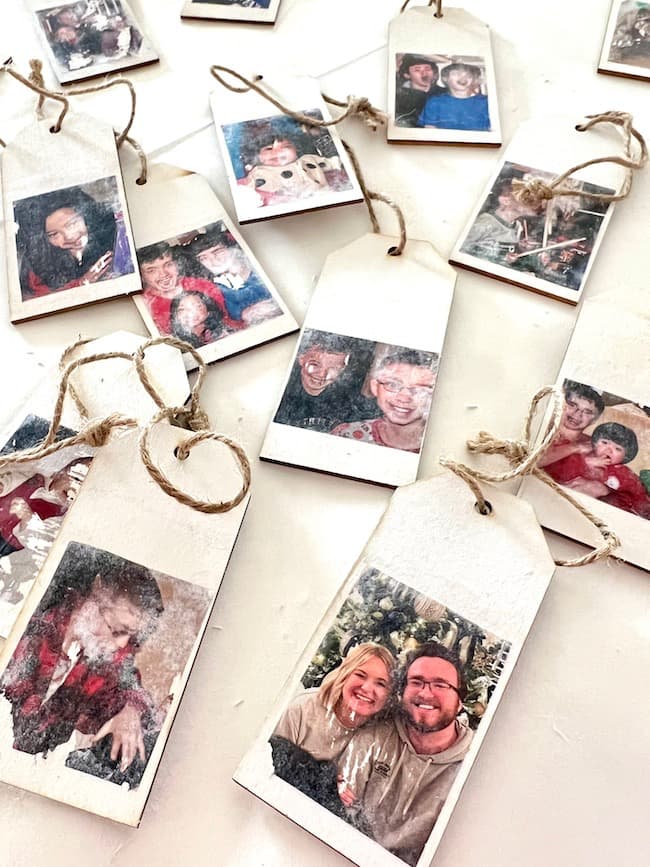
Mod Podge is your key to success for this DIY Advent calendar idea. I applied a layer of Mod Podge to the wooden tags for the upside-down photos to adhere to. I also applied a finishing layer over the photos after they were transferred.
Small Sponge Brush
A simple small sponge brush is all you need for applying the Mod Podge.
Bone Folder/Scoring Tool
A small kitchen scraper or bone folder tool is perfect for smoothing down the photos and getting all air bubbles out.
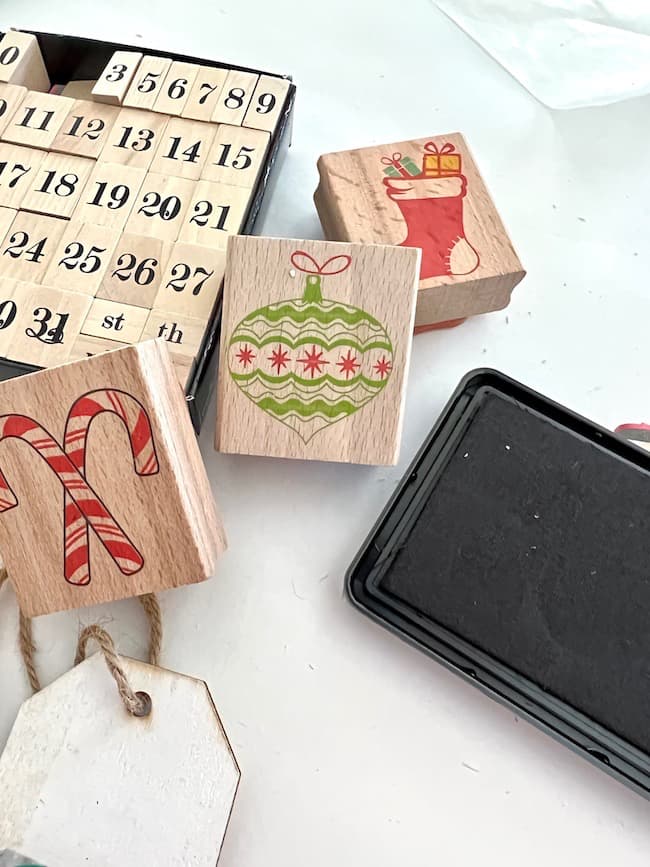
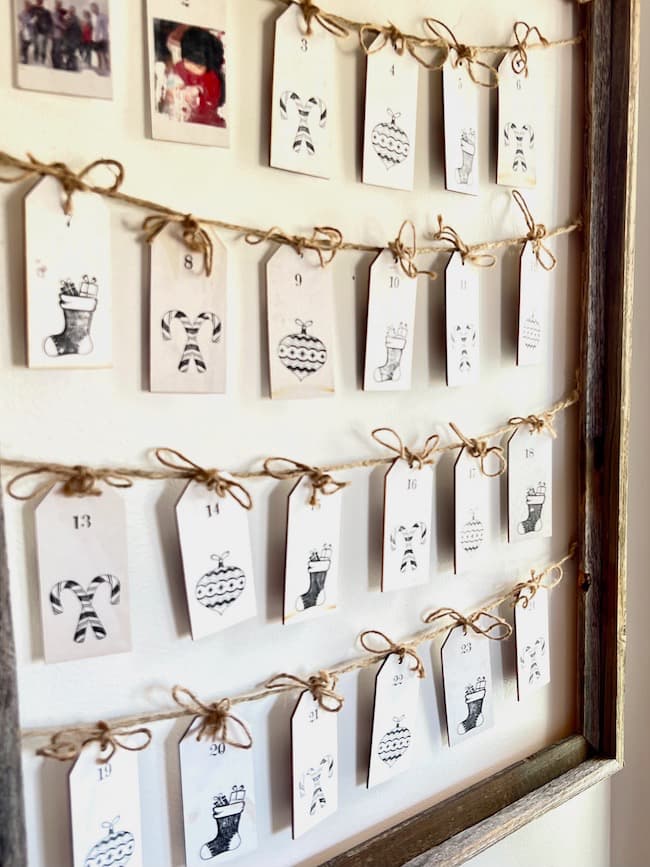
Stamps and Black Ink Pad
I used a set of small number stamps and 3 different Christmas stamps for this project including this stocking stamp , this candy cane stamp, and this ornament stamp. I used a black ink pad for the stamps, but you can certainly use different colors of ink if you prefer.
Rag or Cloth
I used a small Norwex cloth for removing the paper backing from the photos, but you could use any cloth.
How to Make a DIY Advent Calendar with Old Photos:
You’ll need to plan to do this project over a couple of days. Allow time to send your photo documents to a printer if you’re printing at a print shop for the laser printer.
On the first day of the project you’ll adhere the photos to the tags with Mod Podge. You’ll need to wait about 24 hours for the Mod Podge to dry completely before removing the paper backing with the wet cloth.
Create the Photo Tags for your Advent Calendar
1. Select your family photos.
Collect a variety of photos of all family members from previous Christmases. For my older non-digital photos, I just photographed them with my phone. I added all of my photos to a file on my computer and then used Canva to resize them and organize them onto a document page like the example below. You could also do this in Word on your computer.
Keep in mind that the photos will be reverse image on your tags. So, if you have words or writing in any of your photos, you can flip them in Canva on the document before you print.
Save the document as a PDF for printing.
2. Send the photo document to a laser printer.
If you have a laser printer at home, then you’re in luck. I don’t, so I sent my documents to a local FedEx office center for printing.
Be sure to print onto regular laser printer paper, and NOT photo paper.
3. Cut the photos to fit your wooden tags.
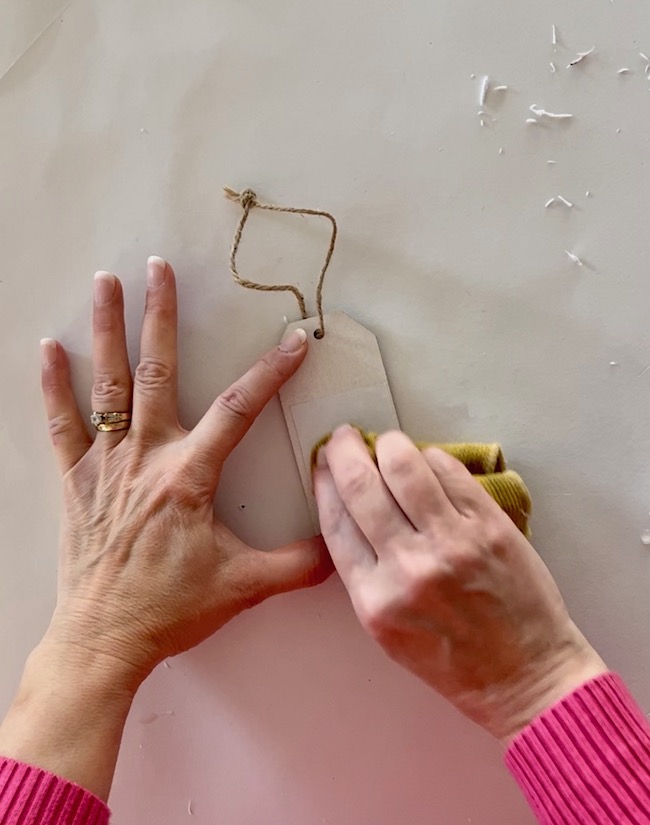
4. Apply a layer of Mod Podge to the bottom area of the tag.
Be sure to cover the entire area where your photo will be.
5. Place the photo on the tag with the photo side down.
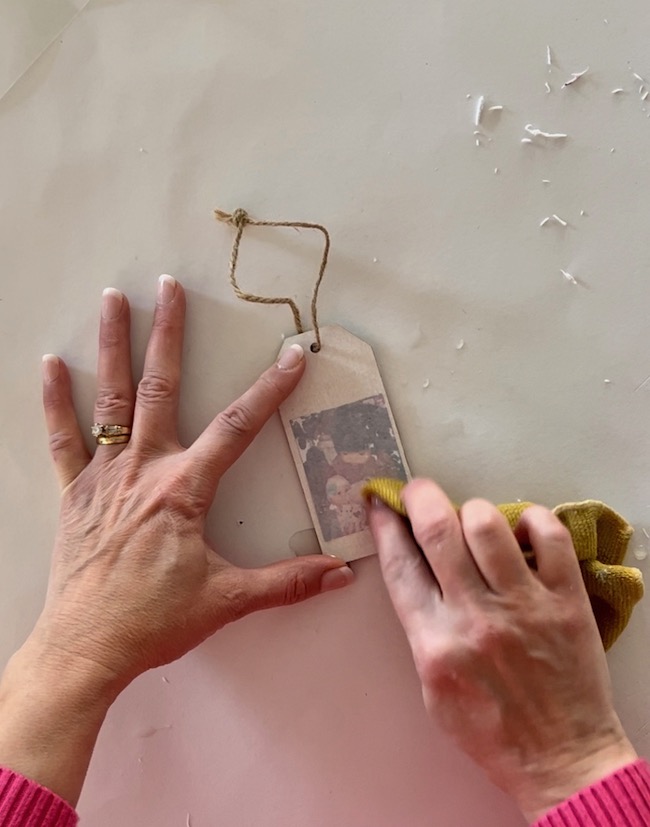
6. Use the bone scorer or a kitchen scraper to smooth the photo down.
Use a paper towel to wipe away excess adhesive.
7. Repeat with all of your photo tags and set aside to dry for approximately 24 hours.
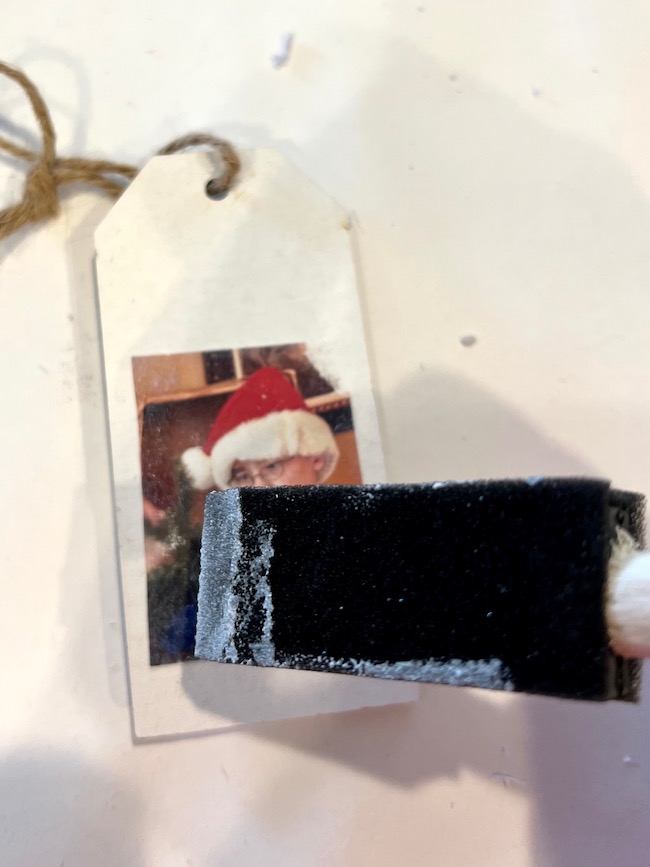
8. The next day, use a wet cloth to gently begin rubbing away the paper backing on the photos.
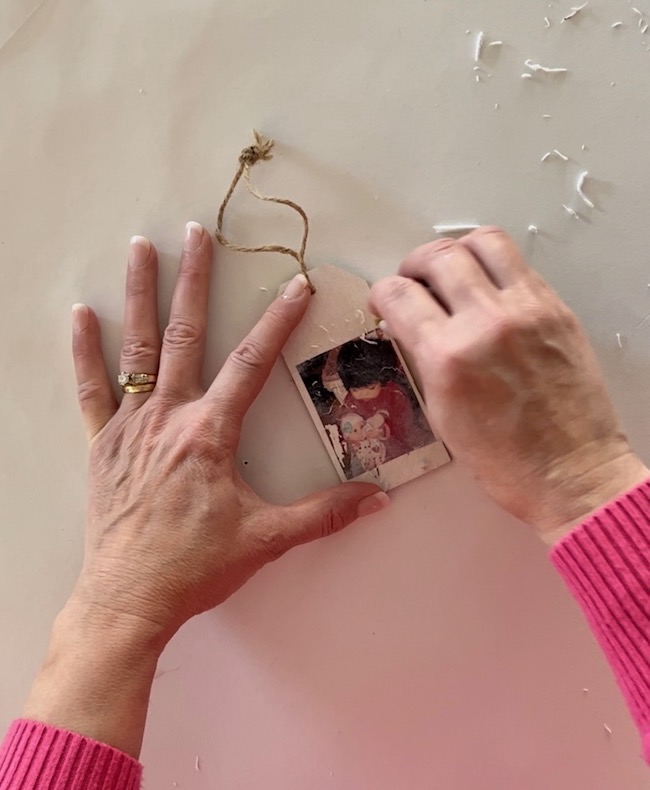
Use a gentle and patient hand for this process. It will take a little bit of time for the paper to wipe away. Be careful not to rub too hard so that you don’t remove part of the photograph. I had a few issues with this on a few photographs. I was impatient and didn’t wait a full 24 hours as was recommended, and I think this may have been part of the problem.
I was going for an aged vintage look with these photo tags, so I don’t mind that the photos look worn. I just tried to make sure I didn’t wipe away important features — like someone’s face!
9. Use a dry paper towel to brush away the excess paper.
10. Apply another thin layer of Mod Podge over the transferred photo images.
This final layer will dry pretty quickly for you to continue working.
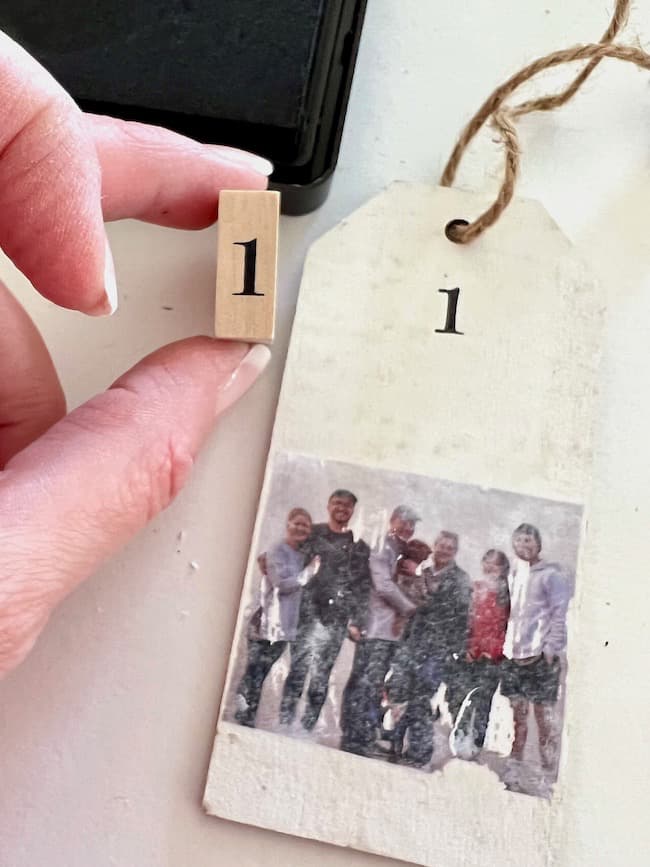
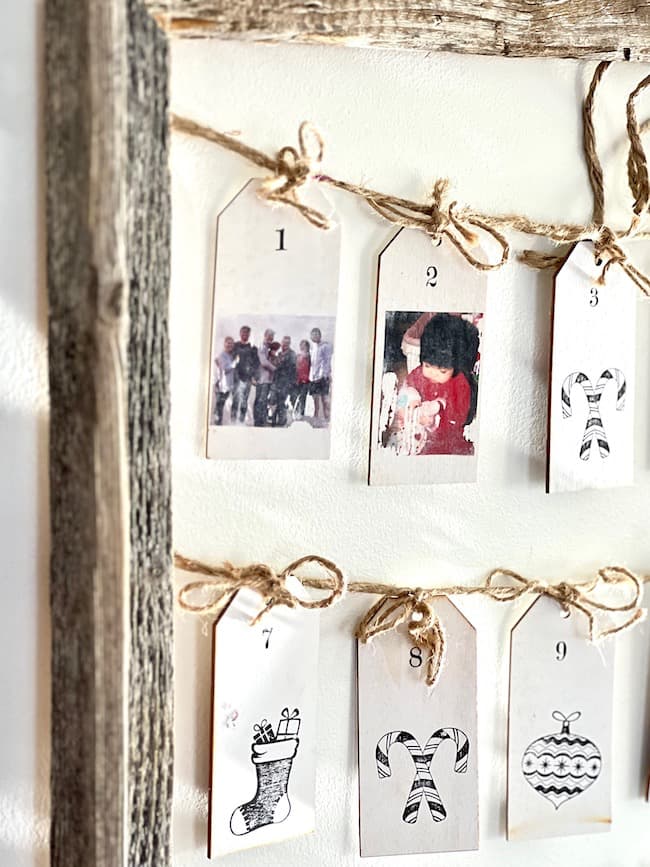
11. After the Mod Podge has dried, use the number stamps and add numbers on both sides of the tags.
Before I added the numbers, I arranged the tags in the order I wanted with the photos.
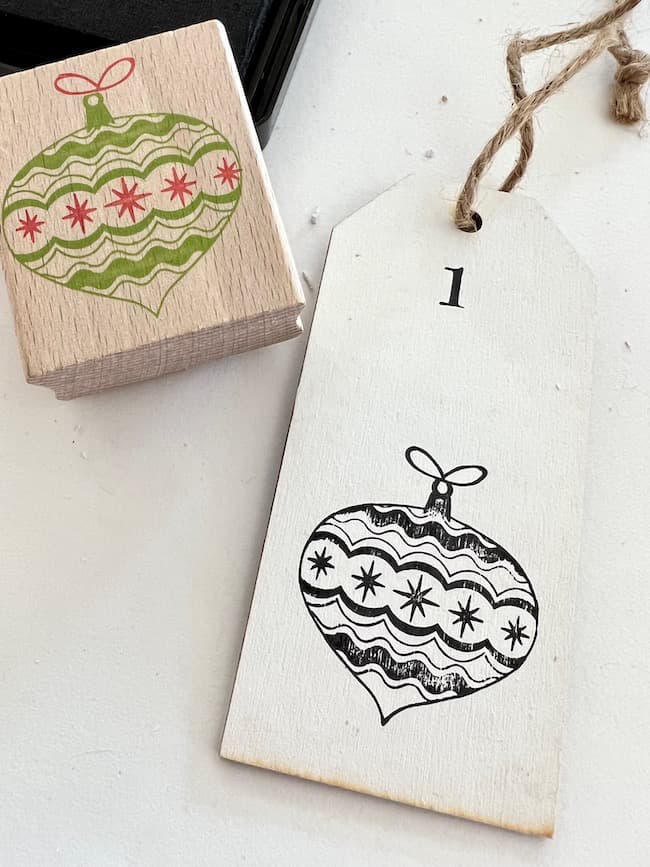
12. Stamp the Christmas images on the backs of your tags.
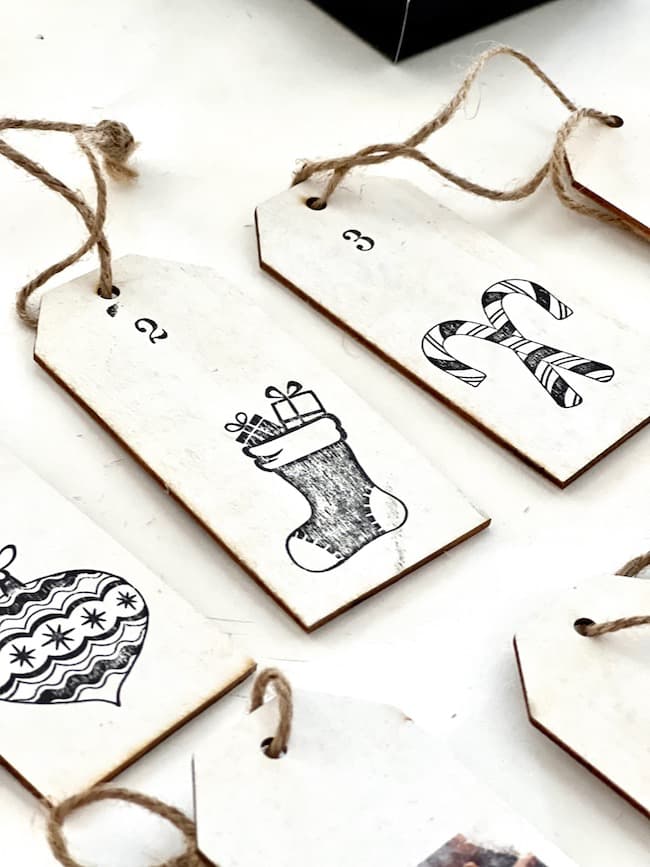
I used three different stamps and alternated them.
Prepare the Frame:
1. Measure and mark where you want to place the nails.
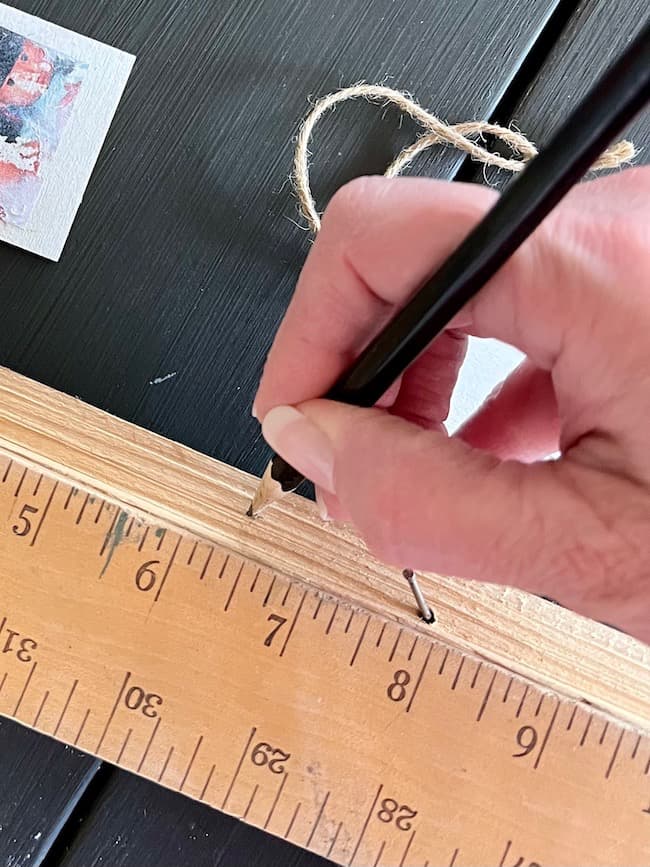
I spaced my nails about 6 1/2 inches apart down each side of the frame.
2. Cut 4 long pieces of the jute twine.
These pieces should be long enough to stretch across the frame and tie around the nails.
3. Tie the the jute twine onto the nails.
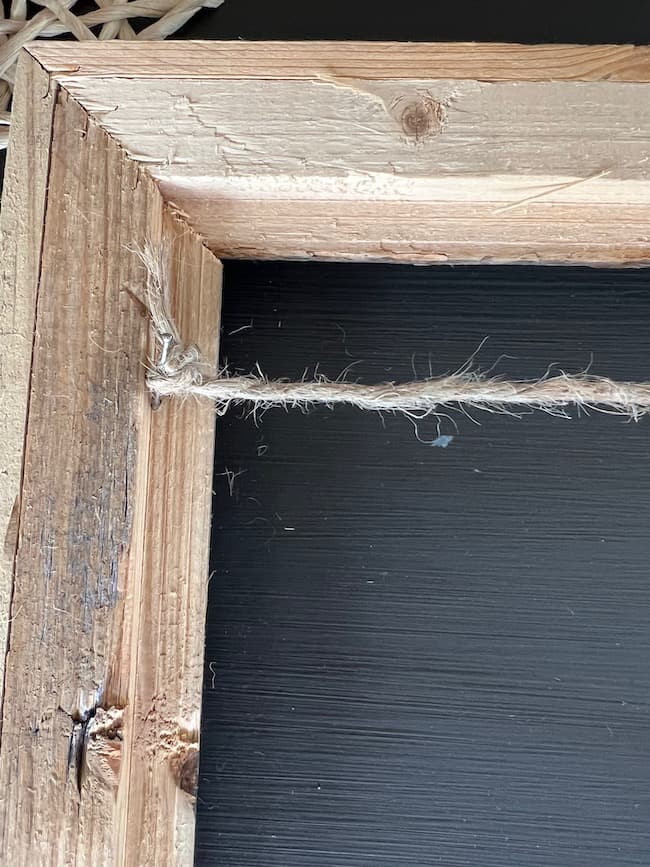
I didn’t want a lot of give or sag in my string, so I tied it as tightly as I could get it. You’ll naturally have a little give.
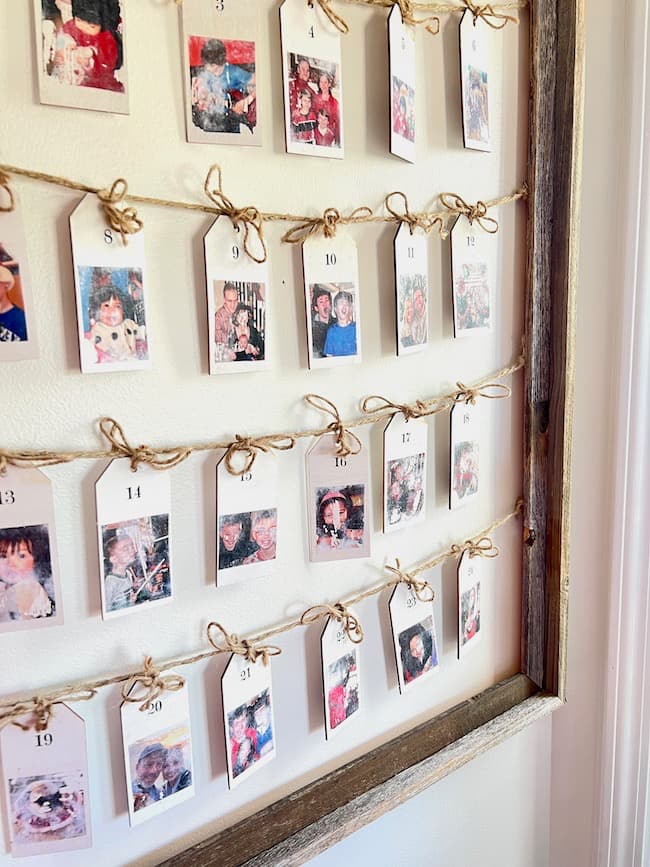
Add the Photo Tags to the Frame:
Since I only numbered 24 tags, I added 6 tags per line.

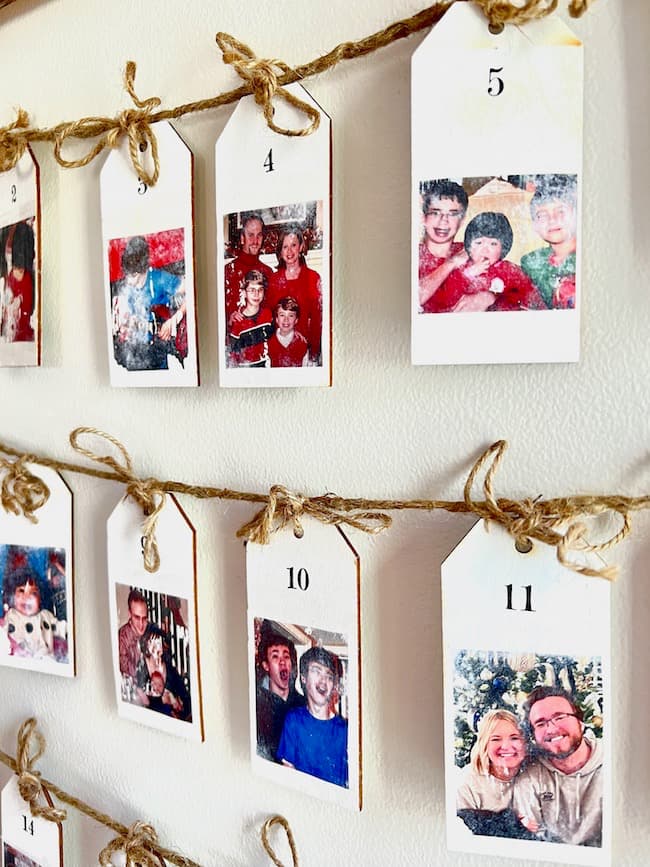
Tie the tags onto the jute string with the photo side facing backwards. Tie the strings into bows so you can easily untie them to turn the tags around each day.
Each day of advent turn a tag around to reveal a precious family photo. As the days go by you’ll have a treasure trove of sweet Christmas memories on display.
Hang your frame in a location for all to enjoy and start your Christmas countdown!
I’m hanging ours in our kitchen.
An Advent calendar is such a fun family tradition for the holiday season. Whether you decide to create an Advent calendar with old family photos, or use some other way to celebrate this Advent season, I hope you take time to slow down and reflect on the hope we have because of the One we celebrate this season!
"A thrill of hope the weary world rejoices
For yonder breaks a new and glorious morn."  O Holy Night
Merry Christmas!

Cute Advent Calendars to Purchase if You Don’t Want to Make One


By the way, do you follow me on all the socials?? If not, check out my Pinterest, Instagram, and Facebook and be sure to follow me on all the socials so you don’t miss out on any of my holiday decorating and DIY ideas!


Kim, I love this idea for an advent calendar! How fun to relive special memories every day as you count down to Christmas! I know you and your family will enjoy this so much!! Pinning now!
Thanks so much, Donna! It was such a fun project to create!
This is so cute, Kim. I love the idea of adding this personal touch.
Thanks so much, Wendy! It was a fun stroll down memory lane to create this project!
This is an amazing project. I like that it’s so personal.
Reverse transferring is a love of mine and I’ve been doing for a long time.
Pinned!
Thank you so much, Cindy! It was so much fun to make!
What a special project! The photos make it so personal…definitely a tradition to be treasured!
Thank you so much, Missy! I had so much fun creating it!! So many sweet memories!
This is so pretty and sweet, Kim! Such a great way to countdown to Christmas.So excited to tell you this post will be featured in Tuesday Turn About Link party this week! Thanks for joining us and I hope to see you at the party this week! Pinning! 😊
Oh, thank you so much, Cindy!! I am honored and thrilled! I appreciate all of the hard work you all do for the link party, and am so grateful to be featured!
Hi, Kim! Your DIY advent calendar is so wonderful! I was super inspired by your creativity! I would love to invite you to link up your project at Whimsy Home Wednesdays to inspire others and have a chance to be featured https://www.artsandclassy.com/category/diy/whimsy-home-wednesdays-linky-party/
Thank you so much, Meredith!
This is SUCH a cute idea! I love how you put them in a frame. Pinning so I can use this next year.
Thanks so much, Anna!
Hello, Kim! Congrats! Your DIY photo advent calendar will be featured at the Fabulous Friday Link Party tomorrow! Thanks and have a great day!
Wow! Thanks so much, Donna! I am honored!!