How to Fluff and Light an Artificial Christmas Tree with King of Christmas
I may be setting it up a little earlier than usual, but I just couldn’t wait to see our new King of Christmas Alpine Fir in place! From the moment it was out of the box, I knew it would be a gorgeous centerpiece for the season, and I had a ball getting it fluffed, lit and decorated to show you.
In this post, I’ll share why I chose this tree, what comes with it, and my favorite tips for shaping and lighting a Christmas tree so you can create a beautiful, designer look in your own home.
Special thanks to King of Christmas for gifting me with their beautiful Alpine Fir tree! It’s the perfect way to fill our home with holiday cheer, and I’m thrilled to share it with you today.
(This post contains affiliate links, so I may earn a small commission when you make a purchase through links on my site at no additional cost to you. As an Amazon Associate I earn from qualifying purchases.)
No, I haven’t gone completely crazy setting up a Christmas tree in September! But I couldn’t wait to share this King of Christmas Alpine Fir with you because it really is that gorgeous. So yes, we’re pressing pause on pumpkins and fall leaves for just a minute to talk Christmas trees. Don’t worry, the fall decor will be back, but I just had to show you this one in case you’re on the hunt for a new tree this year.
Why I Chose the King of Christmas Alpine Fir
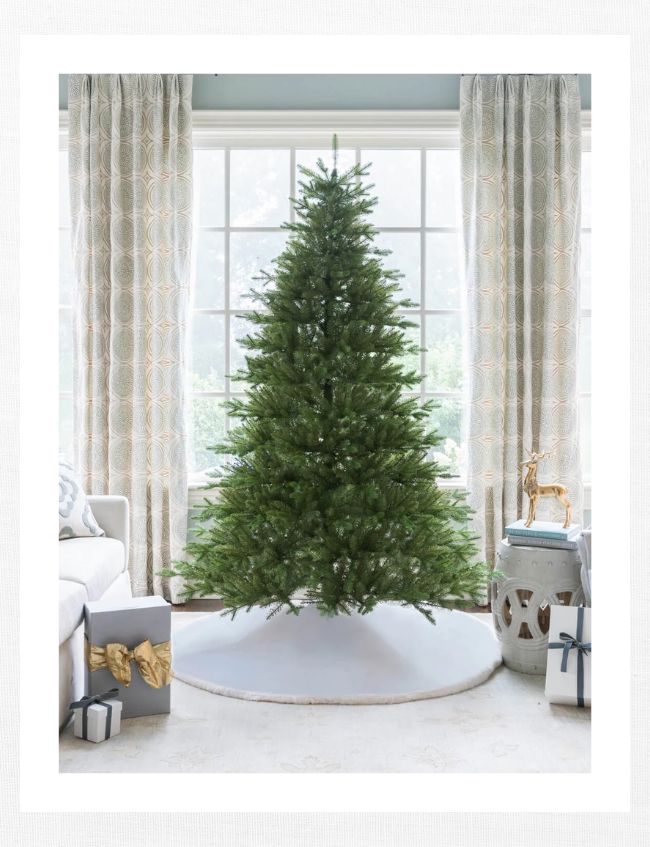
I had so much fun browsing their gorgeous selection of King of Christmas trees! I wanted one that looked realistic, had some height (I wanted an 8 foot tree), and had just the right shape for the way I wanted to decorate this year.
This year, I’ve been drawn to the idea of keeping our tree simple and decorating it mostly with our collection of colorful ball ornaments instead of all the layers of ribbon and floral and berry stems I normally add.
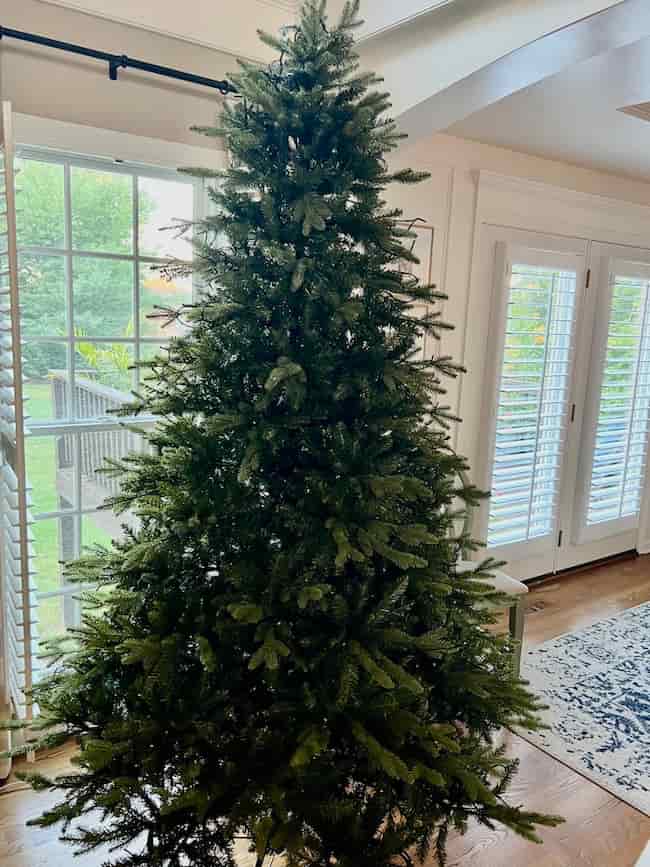
To make that work, I needed a tree that was truly beautiful on its own, with branches and a shape that looks beautiful without all the extra filler and fluff I sometimes add. The Alpine Fir turned out to be the perfect choice!
Here’s why the Alpine Fir is the perfect choice:
- It’s natural shape: The Alpine Fir has such a pretty silhouette and looks full and lush without being overly dense.
- The realistic branch tips: The tips of all the branches look so realistic.
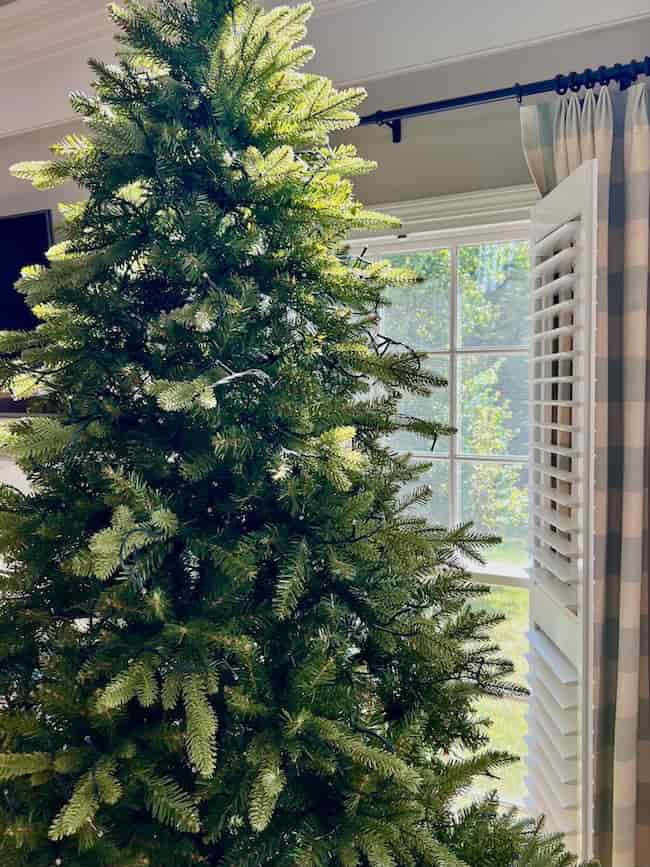
- Beautiful on its own: We set it up early, and it was up a few days before I added ornaments. I loved how pretty it looked before I even added a single ornament. It’s stunning even undecorated.
- Perfect for ornaments: Since I wanted to only use ornaments on my tree this year, this tree’s branches are spaced just right for displaying lots of ornaments so they dangle and sparkle instead of getting lost in the tree.
- Great size: At 8 feet tall, it makes such a statement in our living room without feeling overwhelming or crowding the space.
What Comes with a King of Christmas Tree
The tree arrives well-packed with everything you need to get started.

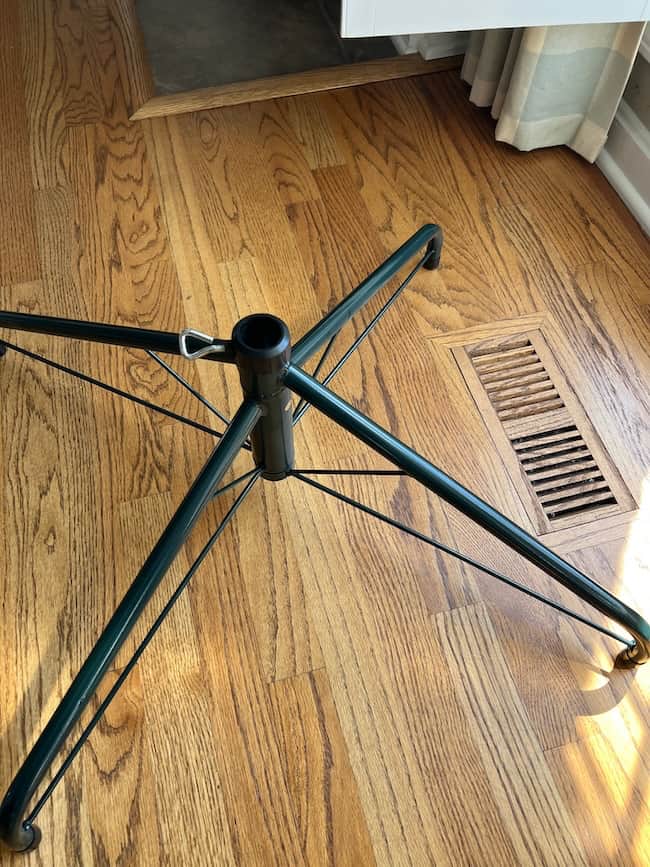
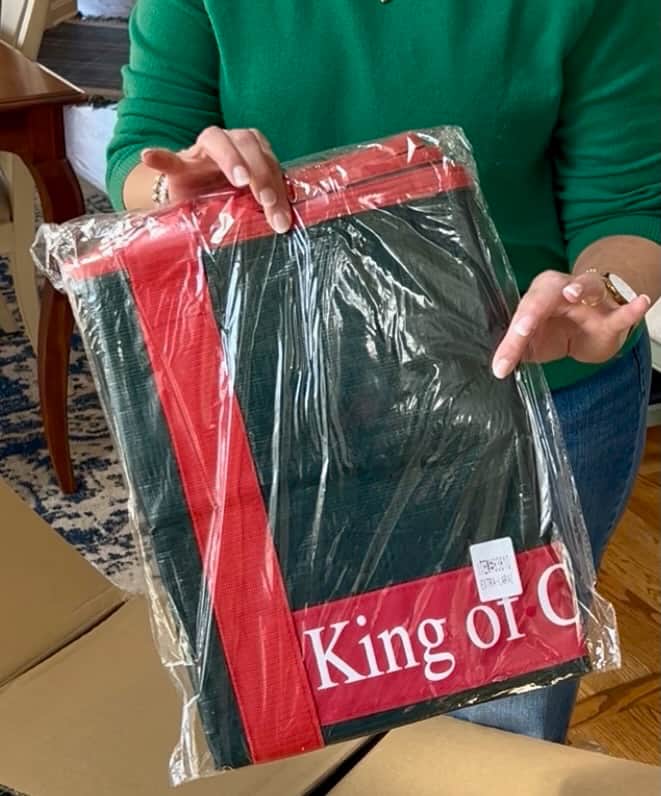

You get a sturdy tree stand, a large storage bag that’s perfect for storing your tree safely in the off-season, and my favorite part, protective gloves! No more prickly scratches while setting it up and fluffing branches.
Unlit vs. Pre-Lit Christmas Trees
The Alpine Fir comes in both pre-lit and unlit versions, and this year I went with the unlit tree. Pre-lit trees are so convenient since you just plug them in and you’re ready to decorate; however, I love being able to control exactly how the lights go on my tree.
Here’s why I chose an unlit tree:
- I can decide how many lights to use and where they go.
- I can customize and use a variety of lighting styles.
- If a strand stops working, it’s easy to swap out just that one.
- Unlit trees are usually a little more budget-friendly (though you will need to buy lights separately if you’re starting from scratch).
How to Set up the Christmas Tree
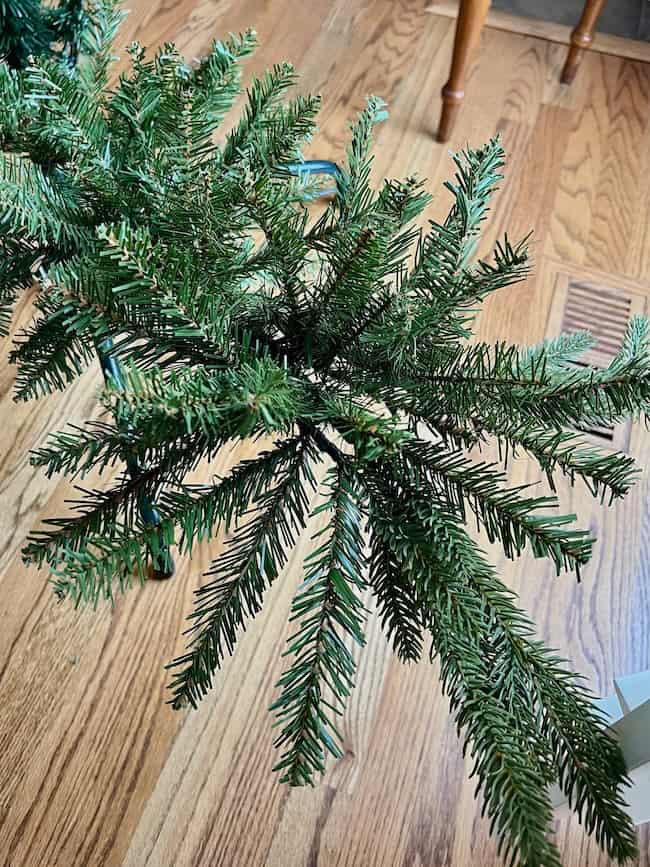
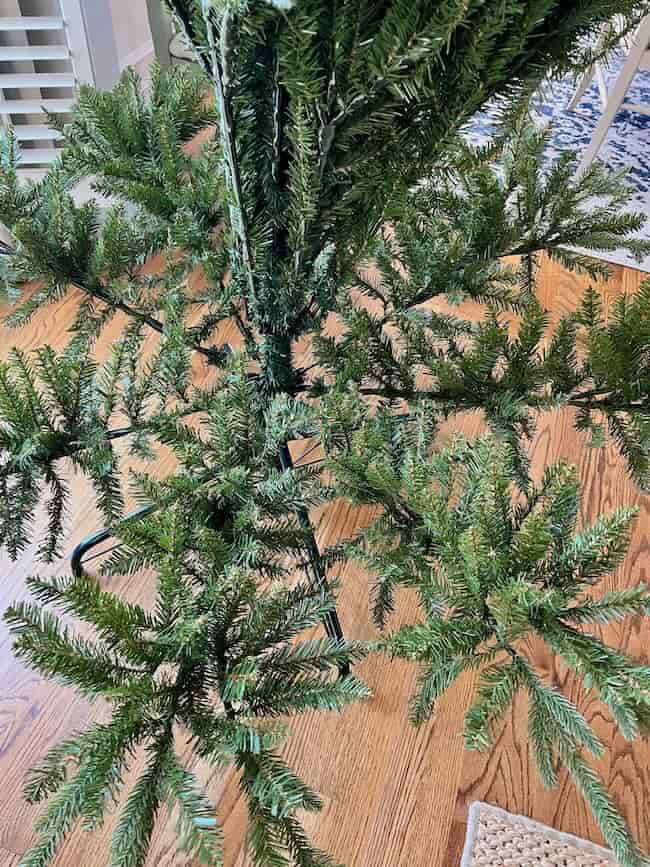
The Alpine Fir comes in four sections, and setting it up is pretty simple.
TIP: One handy tip I use every year is to place the tree stand on top of furniture sliders. That way, if I need to shift the tree into place after it’s decorated, I can slide it easily without having to wrestle it across the floor.

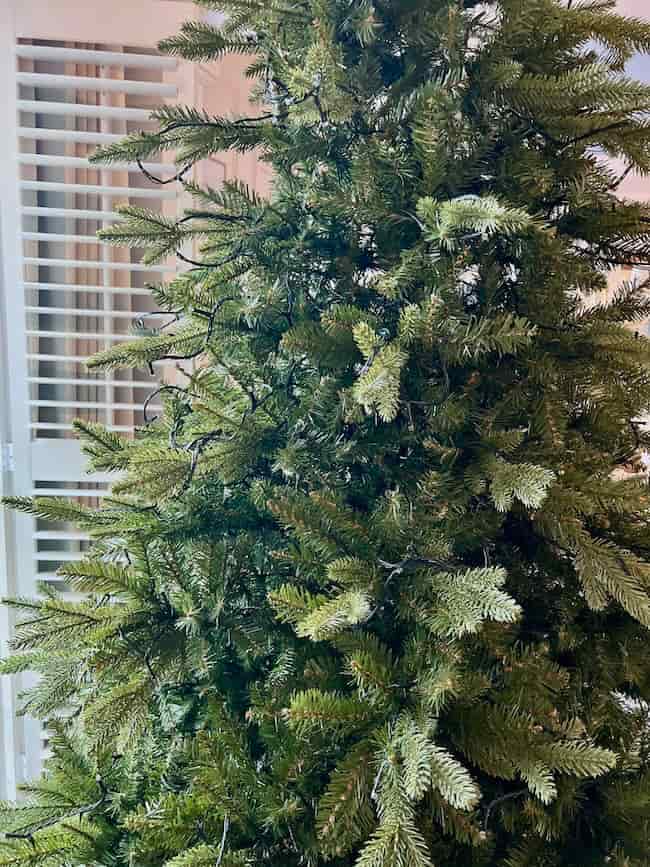
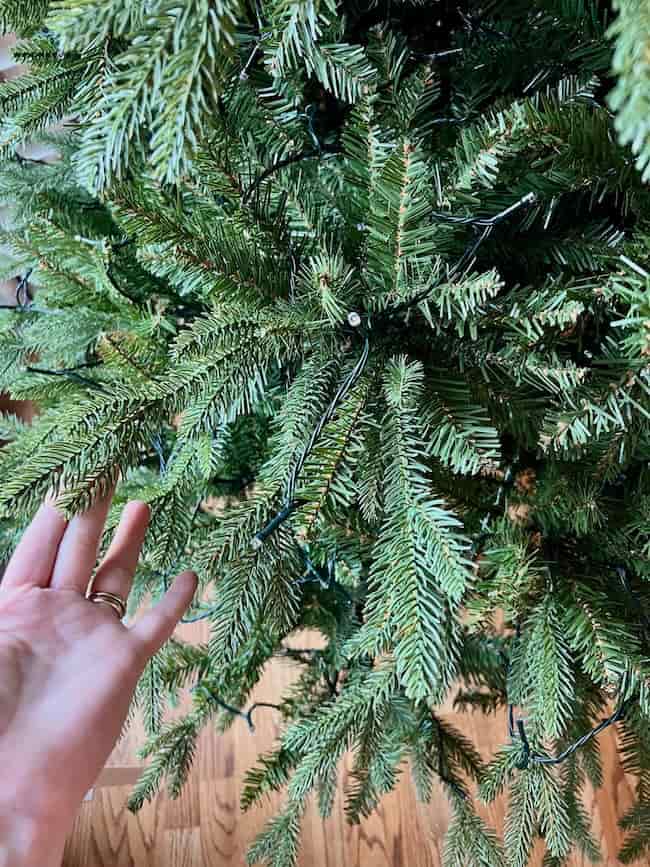
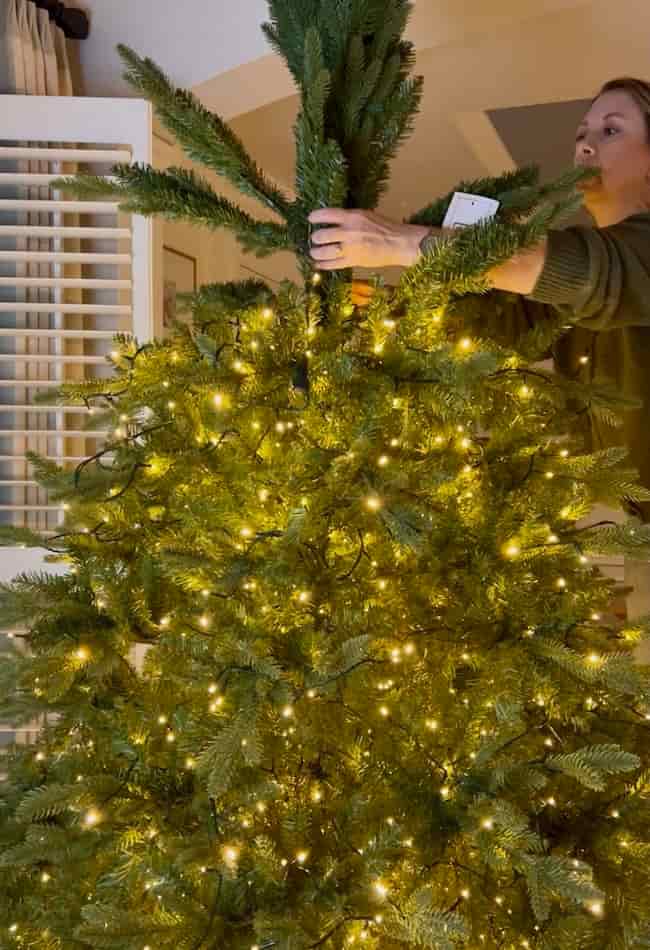
Place the bottom section in the stand, and begin fluffing. Instead of waiting until the tree is fully assembled, I like to fluff and light row by row as I add each section. This approach takes more effort, but it’s the key to achieving that full, designer look I want from the very beginning.
How to Fluff an Artificial Christmas Tree for the Best Look
Fluffing is the secret to making an artificial tree look full and realistic. It’s not the fastest step, but it’s the one that makes the biggest difference. I like to work one row at a time, shaping each branch before moving on to the next, so the tree takes on that designer look right from the start.
Here are a few tips that work well for me:
- Start at the bottom. Pull down one row of branches at a time and fluff them before moving up.
- Spread the branch tips. Separate each smaller tip so they fill in the gaps instead of clumping together.
- Vary the angles. Point some tips upward, some outward, and some slightly downward for a natural shape.
- Step back often. Take a look from a few steps away to check the overall balance and fullness and to make sure you’re filling in all the open spaces.
TIP: As I fluff each row, I also add the lights for that section. It’s a little more effort, but it makes the whole process easier to manage and gives the tree a beautifully even glow.

One thing to note: The first time you set up your tree, you’ll spend the most time fluffing since it’s packaged tightly in the shipping box. After that first setup, you can store it in the large King of Christmas storage bag, and fluffing will be much faster in the following years.
Taking the time to fluff carefully makes the biggest difference in how the tree looks once it’s decorated. It creates that full, layered effect where the branches look natural and the ornaments have space to really shine.
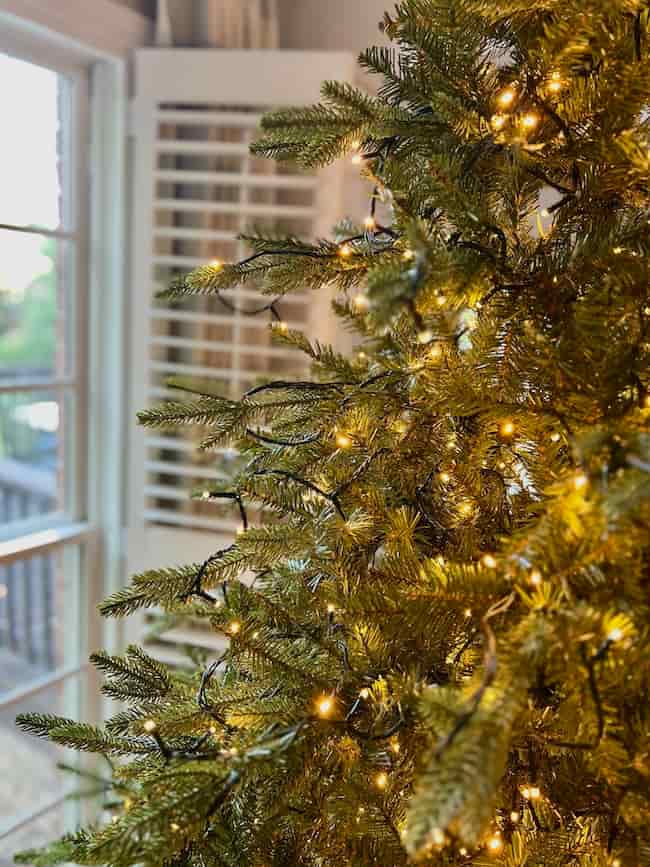
How to Light an Unlit Christmas Tree
Since I chose the unlit Alpine Fir, I get to add my own lights, and I actually love this part of the process. It takes a little extra time, but lighting the tree row by row creates such a beautiful glow.
Here’s my tree-lighting method:
- Work from the bottom up. Start with the lowest row of branches and move upward section by section.

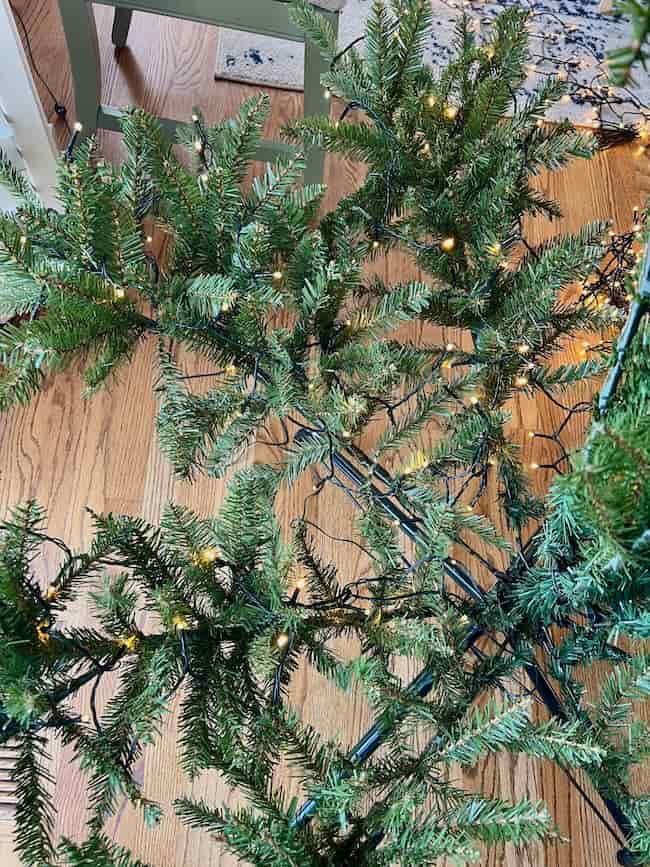
- Light branch by branch. Begin near the trunk and wrap the lights outward to the tip of the branch, then back toward the trunk again. You can wrap the lights around the branch to keep them in place. This gives depth and makes the tree glow from the inside out.
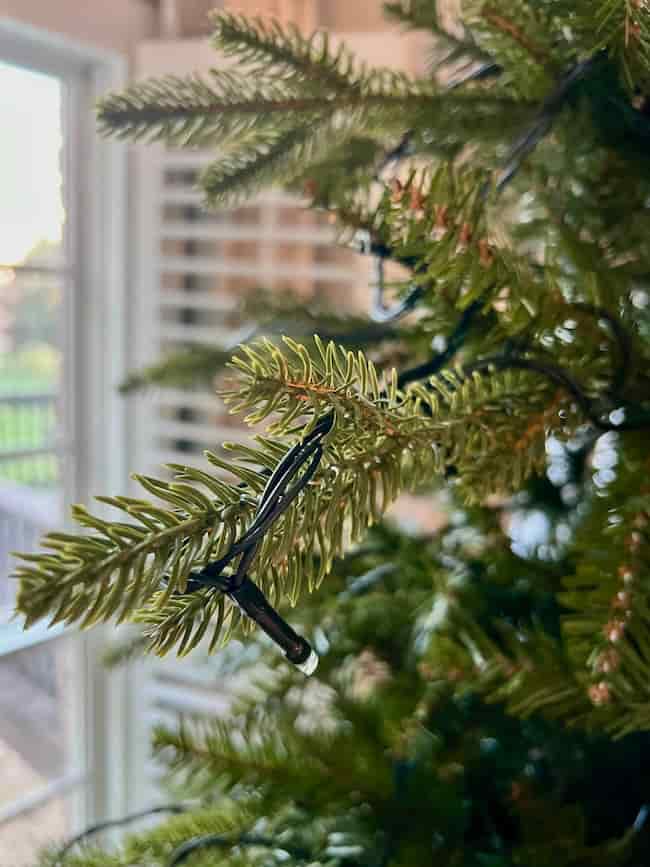
- Follow the lines of the branches. I keep the wires as close to the branches as possible. This helps the wires to blend in better with the tree.
- Fluff and light row by row. Once I finish lighting a row, I lower and fluff the next row of branches, then repeat the same process all the way up the tree.
- Connect strands as you go. When I reach the end of one strand, I simply plug in the next and continue the pattern.
- Keep the lights on. I always plug the strand in while I’m working so I can see exactly how the lights are distributing across the branches.
- Check for balance. Step back often to make sure the lights are even and the tree has the full, glowing look I want.

How many lights do you need for an 8-foot tree?
A good rule of thumb is about 100 lights per foot of tree, so an 8-foot tree usually takes 800–1,000 lights depending on how bright and full you want it.
For this Alpine Fir, I purchased these LED Christmas lights: two 500-light strands plus one 200-light strand. That gave me just the right amount of coverage and the full, glowing look I wanted.
An important note about these lights: when I received the boxes, I discovered that the 500-light strands were not connectable. Fortunately, each strand is 165 feet long, so I was able to drop them straight down the center of the tree near the trunk and still easily reach the outlet or an extension cord. It worked perfectly, but if you’re planning to buy these, just keep in mind that you can’t plug multiple 500-light strands together.
The 200-light strands, on the other hand, are connectable — you can link up to five of those together, which makes them a flexible option if you need a little extra coverage.
This “designer” method is definitely more effort than simply wrapping strands around the outside of the tree, but the payoff is worth it! The Alpine Fir ends up glowing from the inside out, and the ornaments sparkle against a perfectly lit backdrop.

Styling Your Fluffed and Lit Tree
Once the tree is up, fluffed, and lit, now comes the fun part! I love decorating our living room Christmas tree each year, and I was especially excited to get my hands on our new King of Christmas Alpine Fir!
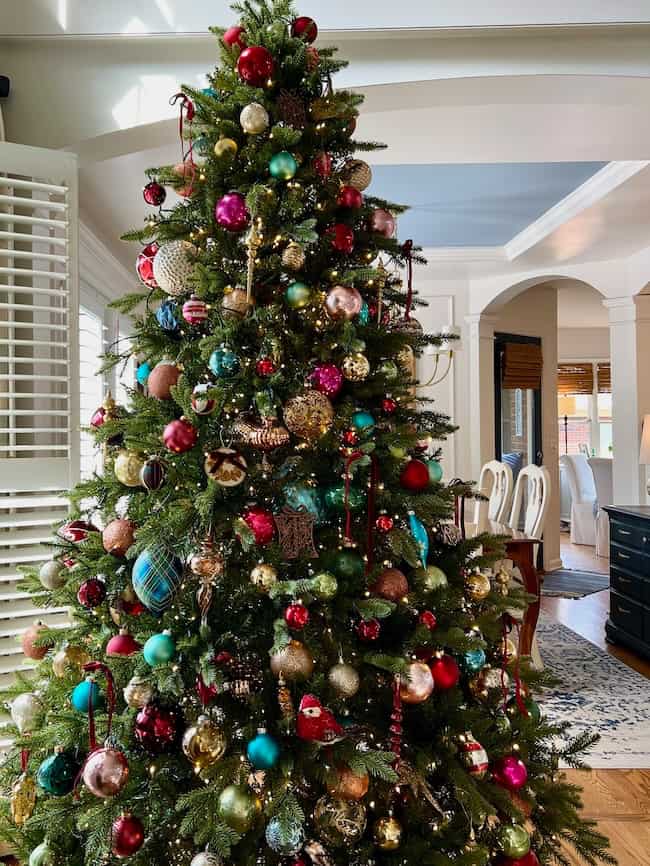
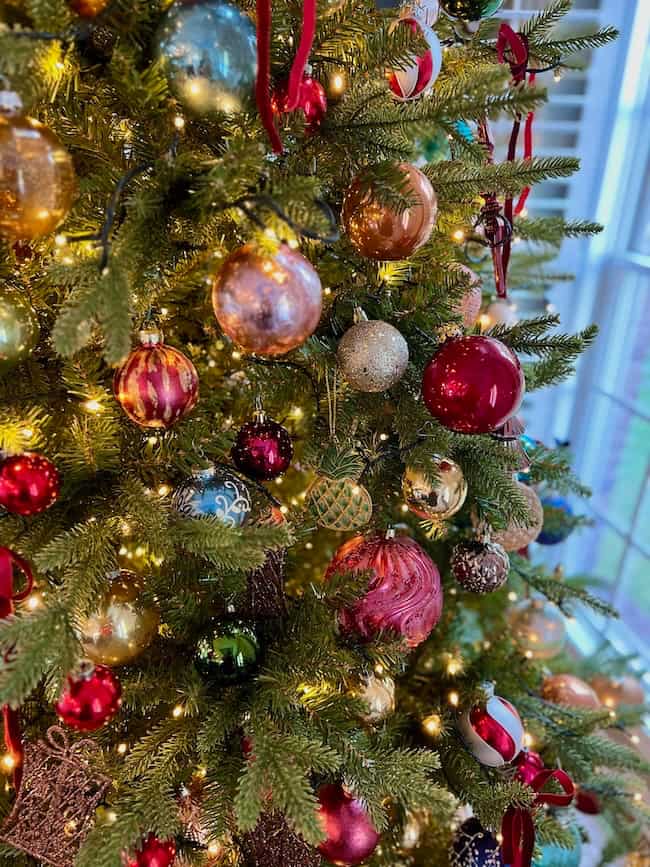
I love a tree full of colorful vintage glass ornaments, and that inspired our look this year. Most years, I add lots of ribbon, florals and berry picks to our tree; however, this year I wanted the focus to be the ornaments themselves rather than adding all of the ribbon and florals. The King of Christmas Alpine Fir is such a pretty tree on its own that it doesn’t need a lot of extras. It’s the perfect backdrop for a colorful display of ornaments.

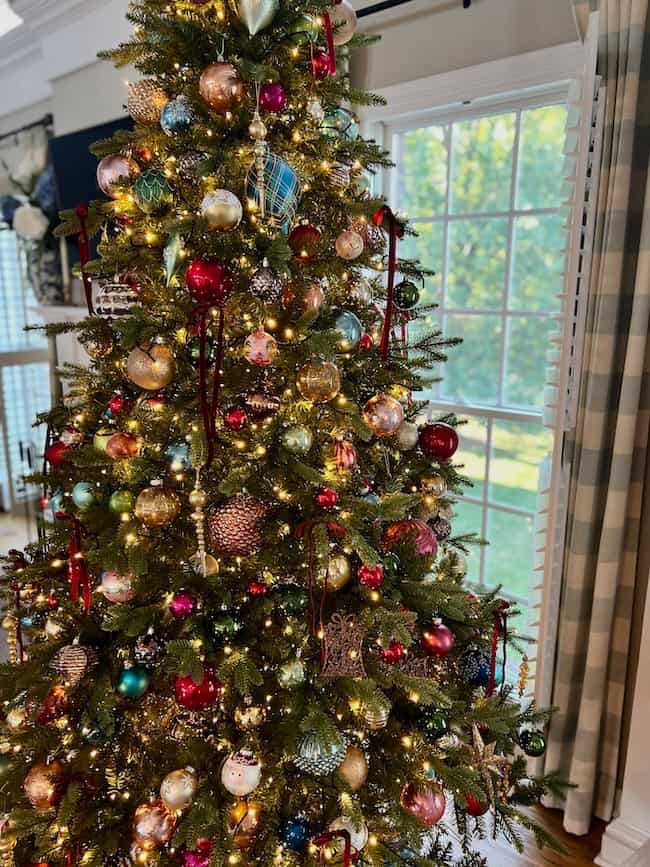
I didn’t stick with just one color scheme this year. Instead, I mixed our collection of glass ornaments, along with a few plastic ones, to create a tree that’s full of color and personality. It turned out to be one of my favorite trees I’ve ever decorated.

I ended up adding around 500–600 ornaments to this tree, but you certainly don’t need that many. One of the things I love most about the Alpine Fir is its versatility. If you love a full look, there are plenty of branches to hold a large number of ornaments. But if you prefer something more minimal, the tree itself is so beautiful that even a lighter touch looks amazing.

A Look at Our King of Christmas Queen Flocked Tree
While our Alpine Fir tree has a beautiful classic green, natural look that I love, we also have a King of Christmas Queen Flocked tree that I’ve decorated in few different styles over the years. The flocking gives it such a soft, snowy feel, and it creates a completely different look from the Alpine Fir.
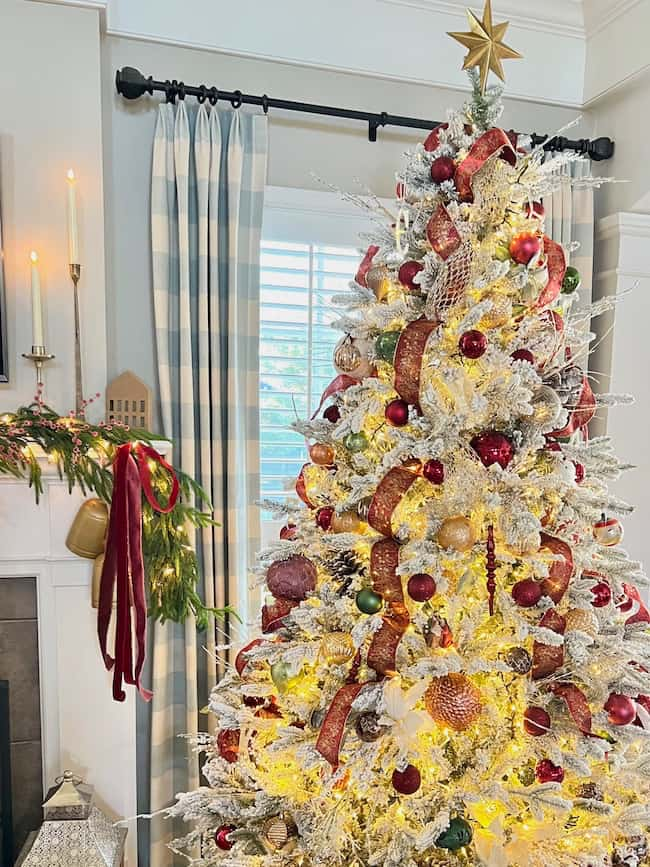
Here it is all decked out in burgundy.

And featuring a classic Chinoiserie look in reds and blue Tartan plaid.

However, I think my very favorite is when we put it up in our primary bedroom and decorated it in soft blues and shiny metallics.
More Christmas Tree Decorating Ideas
If you’re looking for even more inspiration, you can find more Christmas tree decorating ideas in the posts below.


I have to say, I’m really loving our new King of Christmas Alpine Fir! The shape is gorgeous, the branches look so realistic, and honestly, it’s a tree that’s pretty all on its own, even before the ornaments go on.
It’s been the perfect backdrop for the colorful ornament look I wanted this Christmas, but it would be just as pretty kept simple with only lights and some simple ornaments. That’s what I love most about it. No matter how you decorate, this tree really shines.
If you’re on the hunt for a new tree, I think the King of Christmas Alpine Fir is such a great option. It’s easy to set up, beautiful right out of the box, and gives you plenty of flexibility to style it your way.
You can find the King of Christmas Alpine Fir here, and it might just be the perfect tree for your home this Christmas, like ours.
Happy Decorating!


Kim, this King of Christmas tree has a beautiful shape! What a gorgeous combination of colors in your ornaments! It really looks and feels like Christmas! Wonderful inspiration my friend!
Oh, thank you so much, Michelle! This Alpine Fir really does have a pretty shape, and I had so much fun adding all the colorful ornaments to the tree!