DIY Air Dry Clay Hearts: A Simple Valentine’s Wreath Idea
DIY air dry clay is such a fun and simple way to create custom decor, and these little clay hearts are perfect for Valentine’s Day! I used them to dress up a boxwood wreath, but they’d also be great for other decorations around the house.
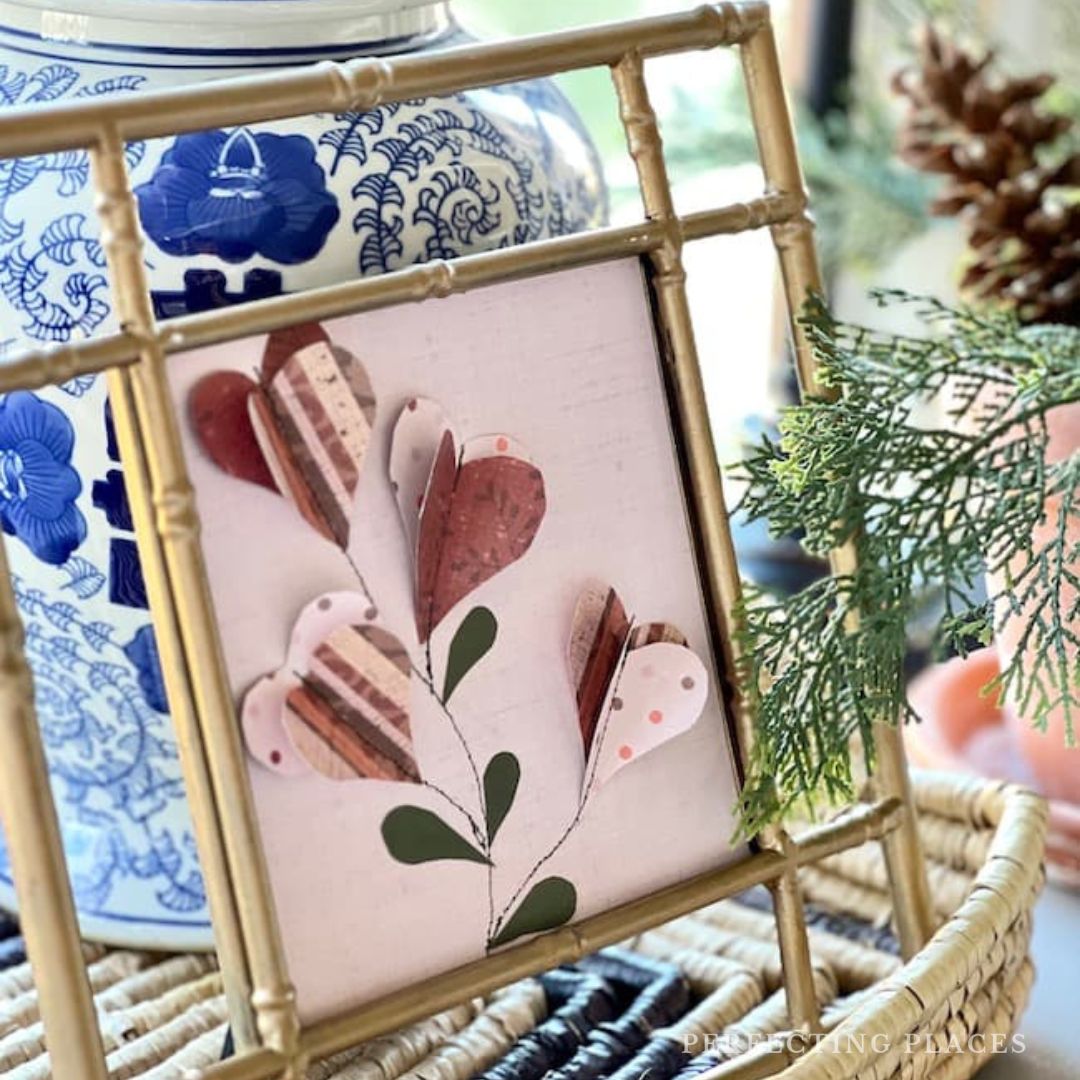
In this post, I’ll show you how to make and paint air dry clay hearts with an embossed texture. Whether you use them on a wreath or style them in a different way, they’re an easy way to add a handmade touch to your decor.
![A Valentine’s Day wreath adorned with pink heart-shaped ornaments takes center stage. Top right shows an ornament in hand, top left a collection of hearts. Bottom left features a heart cutter, and bottom right, clay hearts hang gracefully from the green wreath.](https://perfectingplaces.com/wp-content/uploads/2025/02/DIY_Air_Dry_Clay_Hearts-_or_a_Valentines_Wreath_grid.jpg)
(This post contains affiliate links, so I may earn a small commission when you make a purchase through links on my site at no additional cost to you. As an Amazon Associate I earn from qualifying purchases.)
If you love a hands-on project, this one’s for you! It takes me right back to the days of playing with Play-Doh as a little girl —which, honestly, I’d still play with today if given the chance—but this is the grown-up version using Crayola air-dry clay.
Last fall, when we hosted Caroline’s 16th birthday party, we planned a fun sleepover with crafts for the girls. But, as you can imagine, a group of 16-year-olds doesn’t always want to sit down and make things, so I ended up with a bunch of leftover air-dry clay. It was just waiting for the perfect project, and this was it!
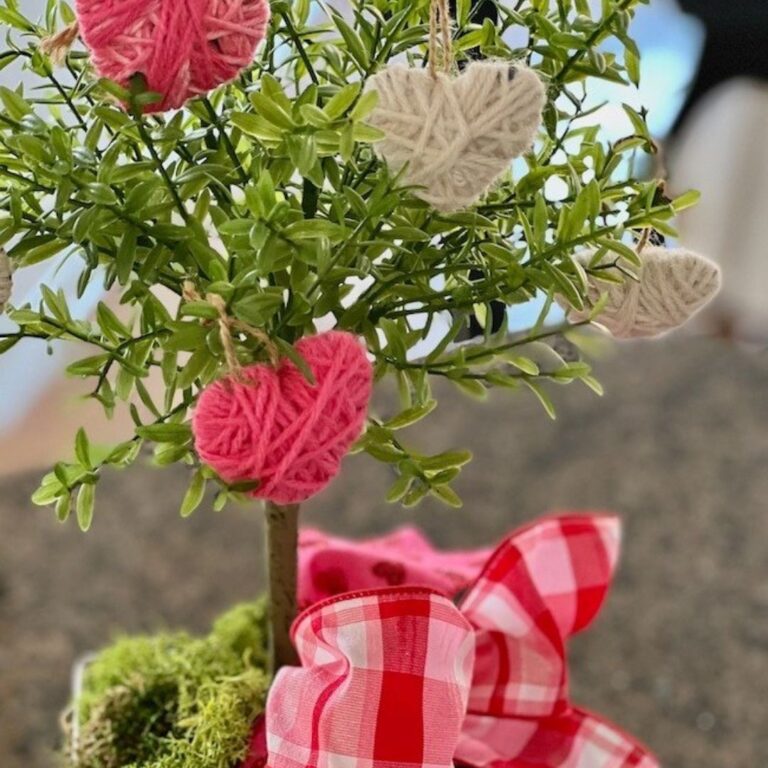
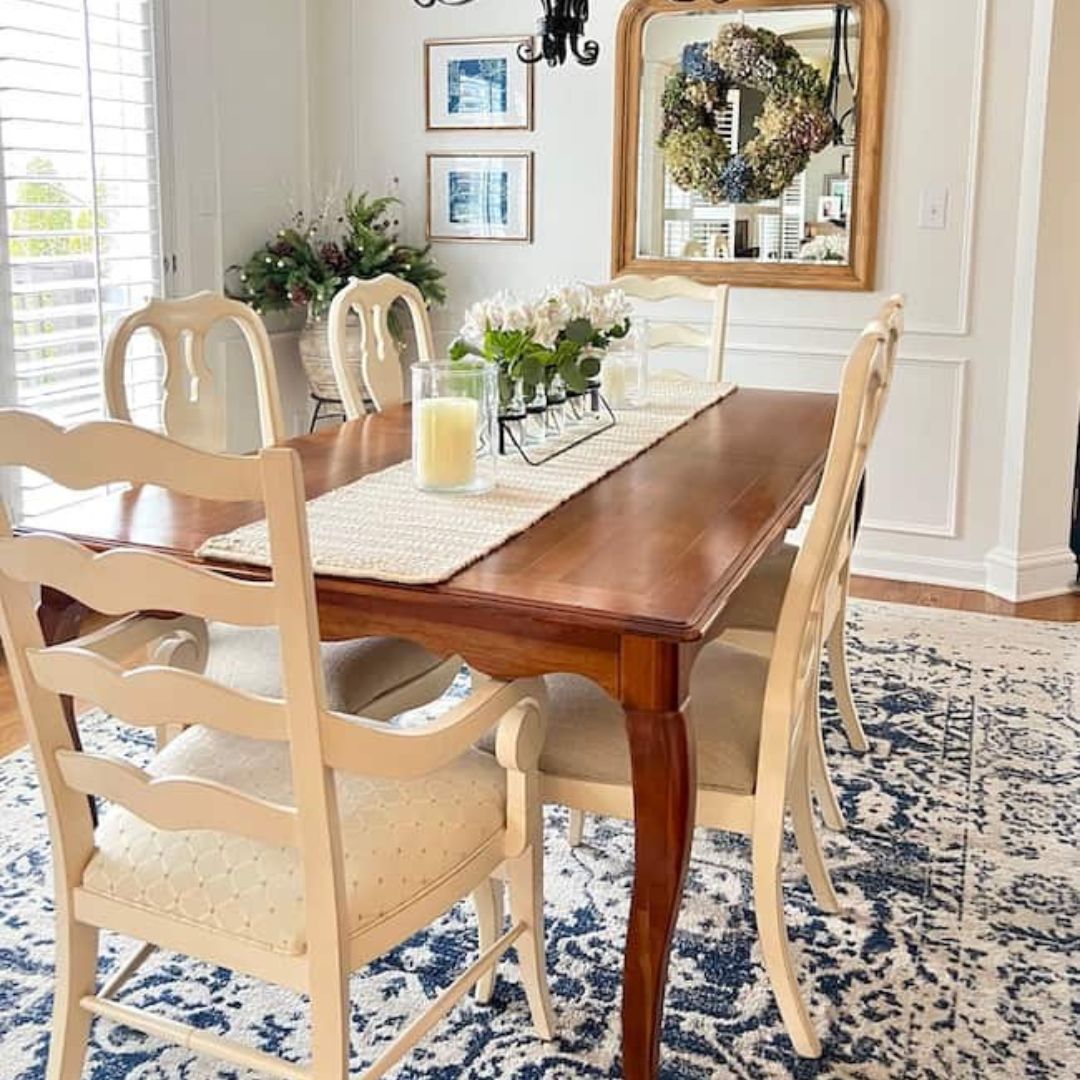
Whenever a new season rolls around, I love finding little ways to update what I already have, and the boxwood wreath in our breakfast area is one of those pieces that gets a seasonal refresh every now and then. Most of the time, I’ll just add a bow, but this year, I wanted something different. So I decided to make clay hearts to dress it up and give it a fresh Valentine’s touch.
This project is so easy, and the end result is really fun. If you’re looking for heart-themed crafts to try this season, these little clay hearts are perfect! All you need is some air-dry clay, heart-shaped cookie cutters, something to roll with, a little texture or pattern, paint, Mod Podge, and some ribbon. That’s it! You can use them to make a Valentine wreath, but they’d also be great for other creative projects around your home.
Simple Steps to Create Handmade Clay Hearts
![A Valentine’s Day wreath adorned with pink heart-shaped decorations, embossed in intricate patterns, dangles elegantly by white ribbons. The charming clay hearts stand out against a lush backdrop of green leaves, creating a heartfelt tribute to love's delicate beauty.](https://perfectingplaces.com/wp-content/uploads/2025/02/DIY_Air_Dry_Clay_Hearts-_or_a_Valentines_Wreath_2323-3-copy.jpg)
Step 1: Gather Your Supplies
Before you start, make sure you have everything you need:
![Craft setup with white clay, two textured rolling pins, and a red heart-shaped cookie cutter on a brown surface. Nearby are fabric strips and a spool of ribbon labeled "Celebrate It," perfect for creating a Valentine’s Day wreath with clay hearts.](https://perfectingplaces.com/wp-content/uploads/2025/02/DIY_Air_Dry_Clay_Hearts-_or_a_Valentines_Wreath_2144-3-copy.jpg)
- Parchment paper and wax paper to protect work surface
- Air-dry clay (I used Crayola air-dry clay)
- Heart-shaped cookie cutters (various sizes work well)
- Acrylic roller (or rolling pin)
- A patterned roller (or anything textured for design)
- A straw (for making holes)
- Acrylic craft paint (light and dark pinks for layering)
- Tissue paper or paper towels (for blending and wiping away paint)
- Mod Podge (I used a gloss finish)
- Ribbon or string for hanging (I used 1 inch raw edge cream velvet ribbon.)
- Hot glue (if needed for securing ribbon)
- Disposable gloves (handy for dealing with the messy paint and Mod Podge)
![A hand cradles a chunk of white dough wrapped in a clear plastic bag, reminiscent of the materials used for crafting a Valentine's Day wreath adorned with clay hearts, all set against a rustic brown paper background.](https://perfectingplaces.com/wp-content/uploads/2025/02/DIY_Air_Dry_Clay_Hearts-_or_a_Valentines_Wreath_2352-3-copy.jpg)
Step 2: Prep Your Workspace
- Cover your surface with parchment paper or a non-stick mat to prevent sticking.
- Knead the air-dry clay until it’s soft and pliable.
Step 3: Roll & Cut Your Clay Hearts
![Two hands meticulously spreading white clay or dough on a brown surface. Adorned with a gold ring and watch, the left hand expertly crafts each detail. This careful work hints at creating a Valentine's Day wreath adorned with delicate clay hearts, ensuring the surface is smooth and even.](https://perfectingplaces.com/wp-content/uploads/2025/02/DIY_Air_Dry_Clay_Hearts-_or_a_Valentines_Wreath_2353-3-copy.jpg)
![A sheet of light-colored clay, intended for a Valentine's Day wreath with clay hearts, is rolled out on brown parchment paper. Its uneven edges and slight texture are visible, with the clay slightly raised and covering a portion of the parchment surface.](https://perfectingplaces.com/wp-content/uploads/2025/02/DIY_Air_Dry_Clay_Hearts-_or_a_Valentines_Wreath_2148-4-copy.jpg)
- Roll out the clay to ¼-inch thickness using a rolling pin. Anything less than this will be too delicate.
- Use a patterned roller or press a textured fabric (like lace) into the clay to add a subtle design.
- Cut out heart shapes using cookie cutters in different sizes.
![Two hands hold intricately patterned rolling pins, perfect for crafting a Valentine's Day wreath with clay hearts. In the background, a sheet of dough or clay awaits on a flat surface, ready to be imprinted with delightful designs and romantic textures.](https://perfectingplaces.com/wp-content/uploads/2025/02/DIY_Air_Dry_Clay_Hearts-_or_a_Valentines_Wreath_2355-3-copy.jpg)
![A rolled-out piece of dough with intricate floral and swirl patterns is embossed on it, much like a Valentine's Day wreath adorned with clay hearts. A patterned rolling pin rests on the top edge, reflecting the same design onto the dough.](https://perfectingplaces.com/wp-content/uploads/2025/02/DIY_Air_Dry_Clay_Hearts-_or_a_Valentines_Wreath_2153-4-copy.jpg)
![A sheet of light-colored, embossed dough with a floral pattern lies spread out on a checkered surface, reminiscent of a Valentine’s Day wreath. Ready for further preparation or cutting, the dough's scalloped edge hints it has been crafted with care, much like delicate clay hearts.](https://perfectingplaces.com/wp-content/uploads/2025/02/DIY_Air_Dry_Clay_Hearts-_or_a_Valentines_Wreath_2173-4-copy.jpg)
![A heart-shaped pink cookie cutter rests on patterned dough, crafting little heart cut-outs perfect for a Valentine's Day wreath adorned with charming clay hearts.](https://perfectingplaces.com/wp-content/uploads/2025/02/DIY_Air_Dry_Clay_Hearts-_or_a_Valentines_Wreath_2159-3-copy.jpg)
Step 4: Make Holes for Hanging
![A hand uses an orange tool to carve intricate, floral patterns on heart-shaped clay pieces, perfect for a Valentine’s Day wreath. The delicate clay hearts rest on a cutting mat with grid lines, ready to add charm and elegance to any romantic decoration.](https://perfectingplaces.com/wp-content/uploads/2025/02/DIY_Air_Dry_Clay_Hearts-_or_a_Valentines_Wreath_2170-3-copy.jpg)
![Heart-shaped decorative ornaments with intricate swirling patterns lie on a sheet of parchment paper, perfect for a Valentine's Day wreath. Some hearts have holes near the top for hanging. The cream-colored ornaments boast embossed designs, ideal for adding an elegant touch.](https://perfectingplaces.com/wp-content/uploads/2025/02/DIY_Air_Dry_Clay_Hearts-_or_a_Valentines_Wreath_2280-3-copy.jpg)
- Use a straw to create a small hole near the top of each heart. This will allow you to string ribbon or twine through for hanging.
Step 5: Let the Clay Hearts Dry
- Place the hearts on parchment paper or wax paper and let them air dry for at least 24 hours.
- Flip them over halfway through drying to ensure both sides dry evenly.
Step 6: Paint Your Clay Hearts
![A person's hand paints a white, heart-shaped clay ornament, perfect for a Valentine’s Day wreath, with textured swirls using a pink paintbrush. The ornament has a small hole near the top, ideal for hanging as part of your festive decoration.](https://perfectingplaces.com/wp-content/uploads/2025/02/DIY_Air_Dry_Clay_Hearts-_or_a_Valentines_Wreath_2359-3-copy.jpg)
![A person is painting a textured heart-shaped clay ornament with pink paint using a brush. The swirled patterns on the ornament shine amid crafting materials, perfect for adding charm to a Valentine’s Day wreath adorned with clay hearts.](https://perfectingplaces.com/wp-content/uploads/2025/02/DIY_Air_Dry_Clay_Hearts-_or_a_Valentines_Wreath_2356-3-copy.jpg)
![Hands are decorating a heart-shaped clay piece with intricate patterns, using a cloth to apply or remove pink paint, perfect for adding to a Valentine’s Day wreath. Other clay pieces are partially visible on a surface covered with paint traces.](https://perfectingplaces.com/wp-content/uploads/2025/02/DIY_Air_Dry_Clay_Hearts-_or_a_Valentines_Wreath_2358-3-copy.jpg)
- Once dry, paint the hearts using a combination of light and dark pink acrylic craft paint.
- While the paint is still wet, dab and wipe with tissue paper or a paper towel to create a textured, worn look for a vintage feel.
- Let the paint dry completely before sealing.
Tip: I only painted one side of my hearts since they would be hanging against the wreath. If you plan to use them for ornaments, garlands, or other decor where both sides will show, paint and seal the back as well.
Step 7: Seal with Mod Podge
- Apply a coat of Mod Podge to seal and add a slight sheen. I used a gloss finish for a subtle shine.
- Let the Mod Podge dry completely before handling.
![Heart-shaped, light pink clay ornaments with intricate patterns and small holes for hanging are spread across a beige surface. Perfect for a Valentine's Day wreath, they vary in size and feature embossed designs, adding texture and detail.](https://perfectingplaces.com/wp-content/uploads/2025/02/DIY_Air_Dry_Clay_Hearts-_or_a_Valentines_Wreath_2301-3-copy.jpg)
Step 8: Attach the Hearts to the Wreath
- Thread 1-inch wide ribbon through the hole in each heart, and tie off at the hole.
![Hands delicately wrapping a pink heart-shaped ornament with a strip of white frayed fabric, as part of a charming Valentine’s Day wreath. The background showcases lush green foliage, highlighting the artisanal touch of clay hearts integrated into the design.](https://perfectingplaces.com/wp-content/uploads/2025/02/DIY_Air_Dry_Clay_Hearts-_or_a_Valentines_Wreath_2365-3-copy.jpg)
![Hands are seen crafting, attaching white frayed ribbon to a pink heart-shaped ornament for a delightful Valentine’s Day wreath. Other similar clay hearts and ribbons are scattered on a brown surface in the background, ready to adorn the festive display.](https://perfectingplaces.com/wp-content/uploads/2025/02/DIY_Air_Dry_Clay_Hearts-_or_a_Valentines_Wreath_2362-3-copy.jpg)
My ribbon trick: Instead of tying off both ends at the top, I trimmed one side shorter and secured it to the back of the heart with a dab of hot glue. This kept the ribbon from feeling too bulky and gave a cleaner look.
![A person is holding a Valentine's Day wreath adorned with three pink clay heart-shaped ornaments hanging from white ribbons. Scissors and more pink hearts lay on the table, ready for crafting. The person is wearing a purple sleeve, adding a touch of color to the festive scene.](https://perfectingplaces.com/wp-content/uploads/2025/02/DIY_Air_Dry_Clay_Hearts-_or_a_Valentines_Wreath_2307-3-copy.jpg)
![A person in a burgundy sleeve ties a white, frayed ribbon onto a Valentine's Day wreath made of green leaves and twigs, adorned with small clay hearts. The wreath rests on a surface as the hands carefully arrange the decoration.](https://perfectingplaces.com/wp-content/uploads/2025/02/DIY_Air_Dry_Clay_Hearts-_or_a_Valentines_Wreath_2371-4-copy.jpg)
- Lay your boxwood wreath flat on your work surface and adjust the placement of the hearts. This will help you determine how long you want each heart to hang from the top of the wreath.
- Once you’re happy with the arrangement, tie each ribbon one at a time onto the hook or frame of your wreath. If your wreath doesn’t have a hook, you can attach one with wire or a grapevine loop.
Tip: A boxwood wreath makes it easy to tuck in and adjust the ribbons until you get the right look.
![A Valentine’s Day wreath adorned with pink heart decorations made of clay hangs by white ribbons on a lush, green wreath. Displayed on a door, it adds a festive touch to the surroundings with its charming, textured patterns.](https://perfectingplaces.com/wp-content/uploads/2025/02/DIY_Air_Dry_Clay_Hearts-_or_a_Valentines_Wreath_2315-3-copy.jpg)
Step 9: Hang and Enjoy!
- Once everything is secured, your Valentine’s wreath is ready to hang on the wall, a mirror, or a door!
![A green Valentine’s Day wreath adorned with three pink clay heart ornaments on a white ribbon hangs on a white, mirrored door. The paneled glass sections complement the bright interior space in the background.](https://perfectingplaces.com/wp-content/uploads/2025/02/DIY_Air_Dry_Clay_Hearts-_or_a_Valentines_Wreath_2317-3-copy.jpg)
And that’s it! With just a little air-dry clay, paint, and ribbon, you can turn a simple boxwood wreath into something special for Valentine’s Day. I love how these clay hearts add just the right touch without being over the top. Plus, since they’re so easy to make, you can use them in all kinds of ways—on garlands, as ornaments, or even as sweet little gift tags.
If you enjoy creating DIY home decor with air dry clay, check out this air dry beaded garland I created. It’s one of my favorite projects!
Thanks so much for stopping by!
Happy Valentine’s Day!
![Kim](https://perfectingplaces.com/wp-content/uploads/2023/05/Signature-1.jpg)
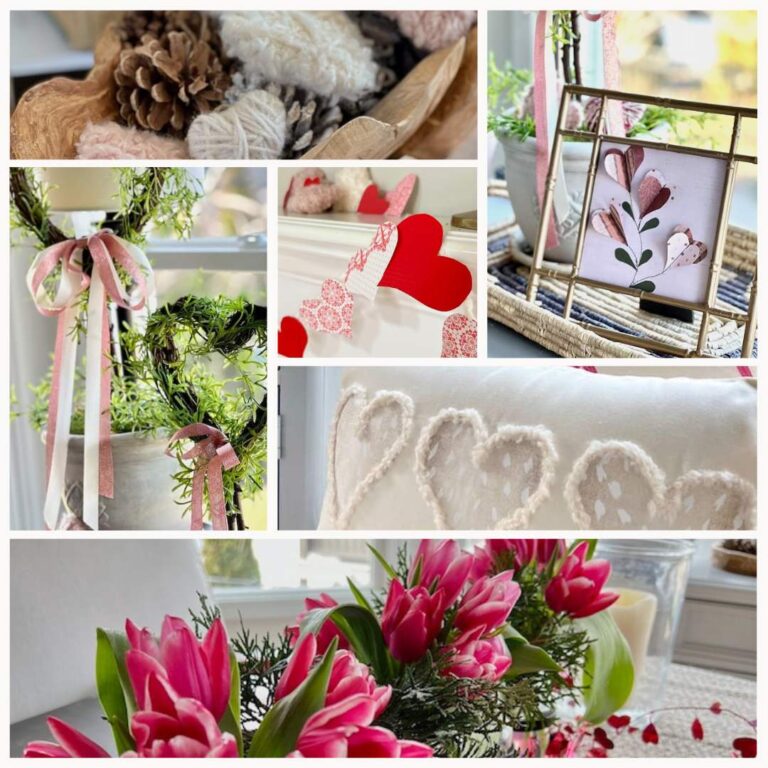
If you’re looking for more Valentine’s Day crafts, be sure to check out these post for more fun and creative ideas!