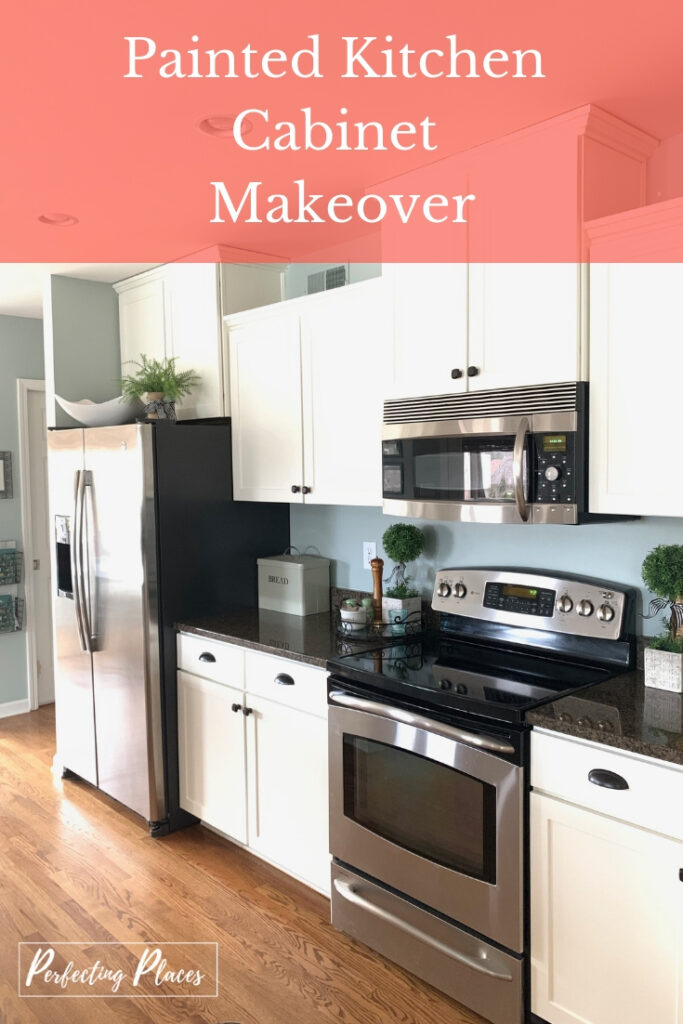
Painted Kitchen Cabinet Makeover Tips
I LOVE painted kitchen cabinets. I’ve ALWAYS loved painted kitchen cabinets. I love the grace, the timeless beauty, and the clean, smooth look of painted kitchen cabinets. I love the fresh, clean look of white cabinets, and I love the richness of dark, bold colors on cabinets. I’ve wanted to give our stained kitchen cabinets a makeover the entire 10 years we’ve lived in our home, and IT FINALLY HAPPENED!!! Today, I’m posting our painted kitchen cabinet makeover before and after pictures, and sharing the steps in our painting process.
(Perfecting Places is a participant in the Amazon Services LLC Associates Program, an affiliate advertising program designed to provide a means for us to earn fees by linking to Amazon.com and affiliated sites. It’s no added cost to you, and I only recommend what I like or have used!)
The Before:
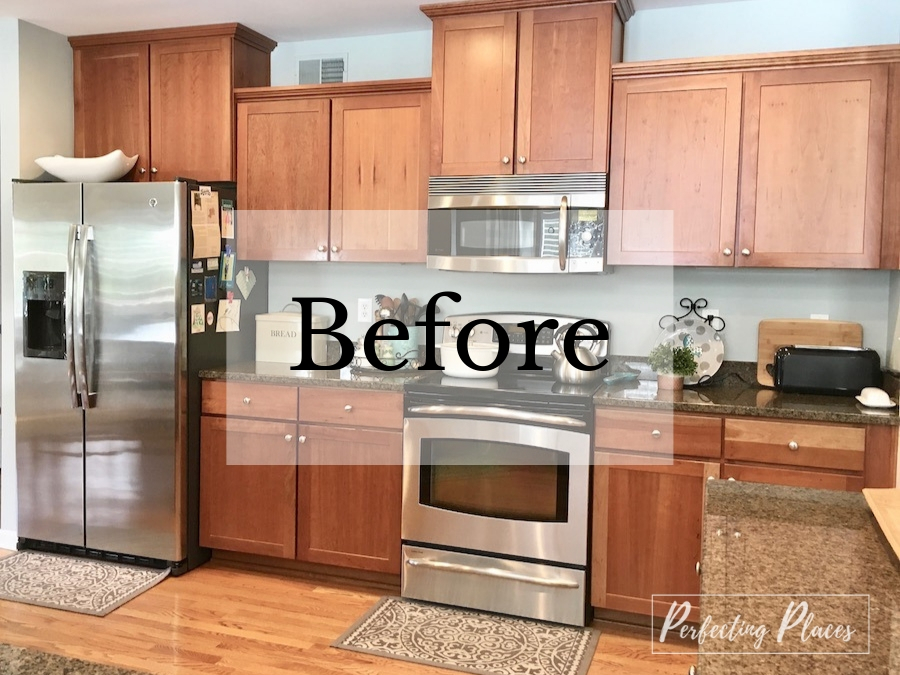
Our formerly orangey-brown stained cabinets made our kitchen feel very dark. I’m such a light-sensitive person and really need brightness in my life!
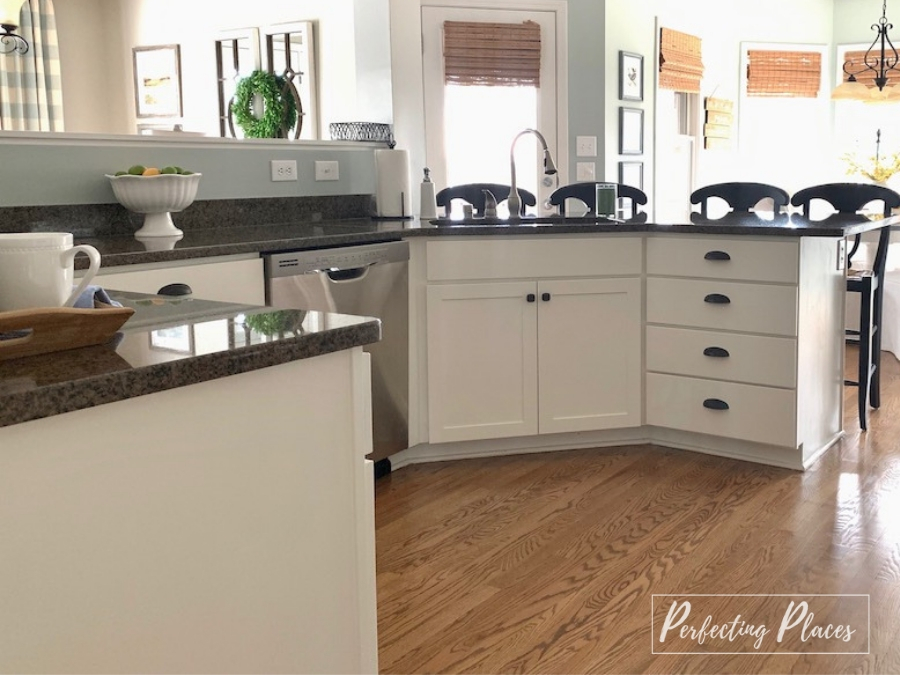
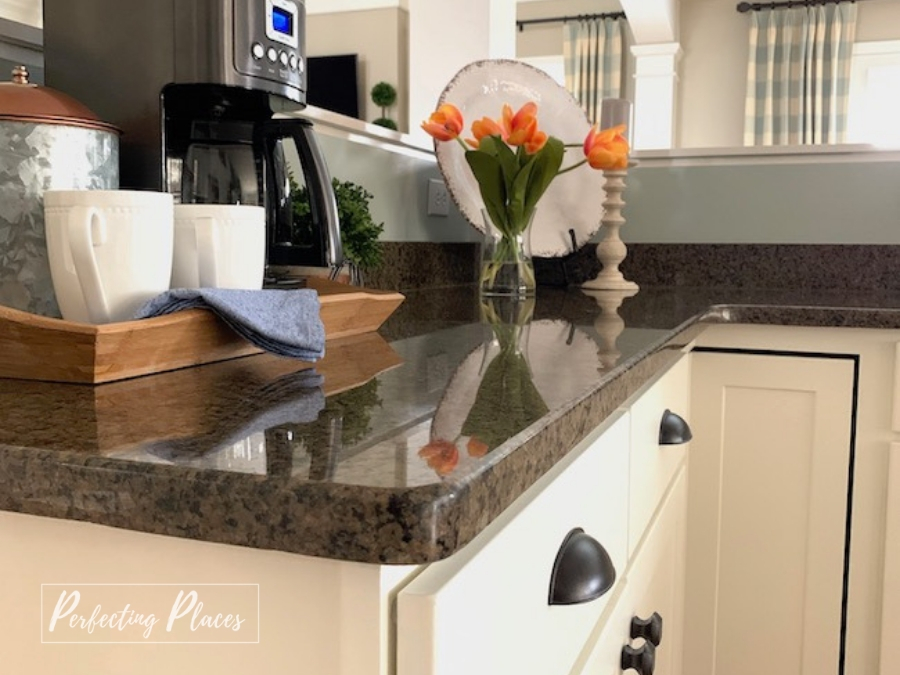
The After: Our New White Cabinets!!
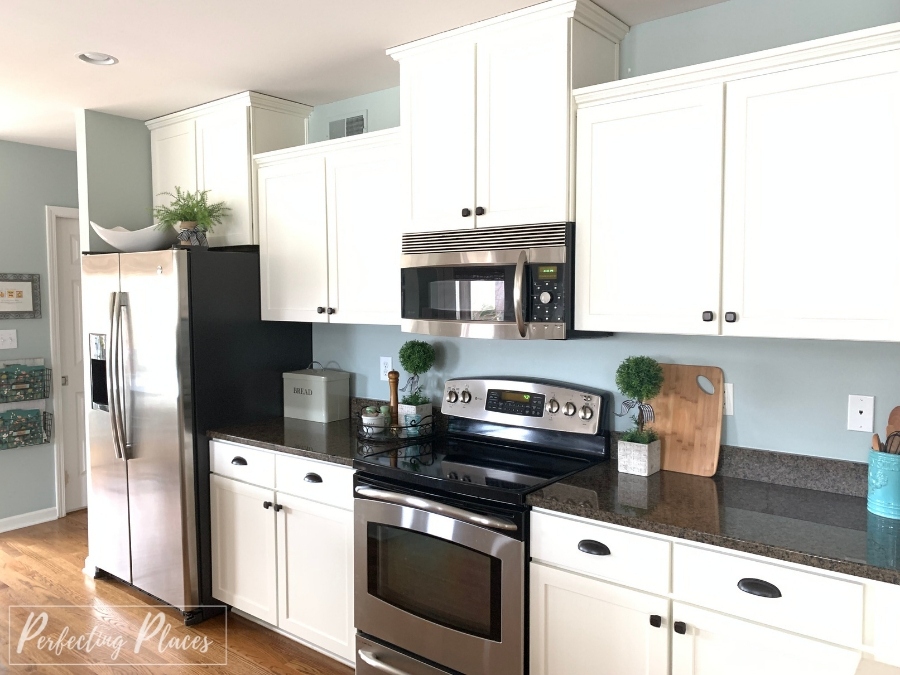
I wrote about my design plan for the kitchen project here. Our makeover budget did not allow for new cabinets or new countertops, so painting our cabinets was the most cost effective way to update our look. Since this was a budget kitchen makeover, we tackled the painting process ourselves.
Painting your kitchen cabinets is no small task, as you can imagine. It requires patience, attention to detail, flexibility (both mentally and physically), good attitudes, a VERY messy kitchen, and LOTS of time. Did I mention good attitudes?? Painting your kitchen cabinets is not for the faint of heart, and let me just put this out there — if your budget allows you to hire a painter, just do it! However, I would absolutely do it again because our results were so worth it!

Our Kitchen Cabinet Makeover Plan:
I chose a pretty off-white paint color for our cabinets. If you have white trim in your kitchen, it’s best to use that same color on your cabinets if you’re painting them white. Since our home was a spec house when we purchased it 10 years ago, we’ve never known the actual name of our trim color. After 10 years of color matching the trim, I decided it was finally time to pick an actual color, with an actual name for our cabinets! Hello, Sherwin Williams Alabaster 7008! We actually need to freshen up all of the trim throughout our house, so going forward, SW Alabaster will be our new trim color as we update the rest of the house.
We also updated our cabinet hardware to better coordinate with our countertops. We switched out the brushed nickel pulls for oil-rubbed bronze pulls and knobs to repeat the dark brown in our Tropic Brown granite. Changing out your hardware is another relatively inexpensive way to update your cabinets even if you aren’t changing their color.
We learned a lot through the process, and I’m sharing some handy tips in case you decide to tackle this process yourself.
Tips for a DIY Painted Kitchen Cabinet Makeover:
Sigh… this is where patience and a good attitude comes in:) Make sure you allow PLENTY of time. You’ll need a few weeks devoted to this process if you are like us, and painting your kitchen cabinets isn’t the only thing you have going on in your life.
1. Remove all cabinet doors, hinges, and hardware. Label all doors with painters tape, and keep hardware in labeled plastic bags. You’ll be SO glad you did when it’s time to rehang the doors after the job is finished.
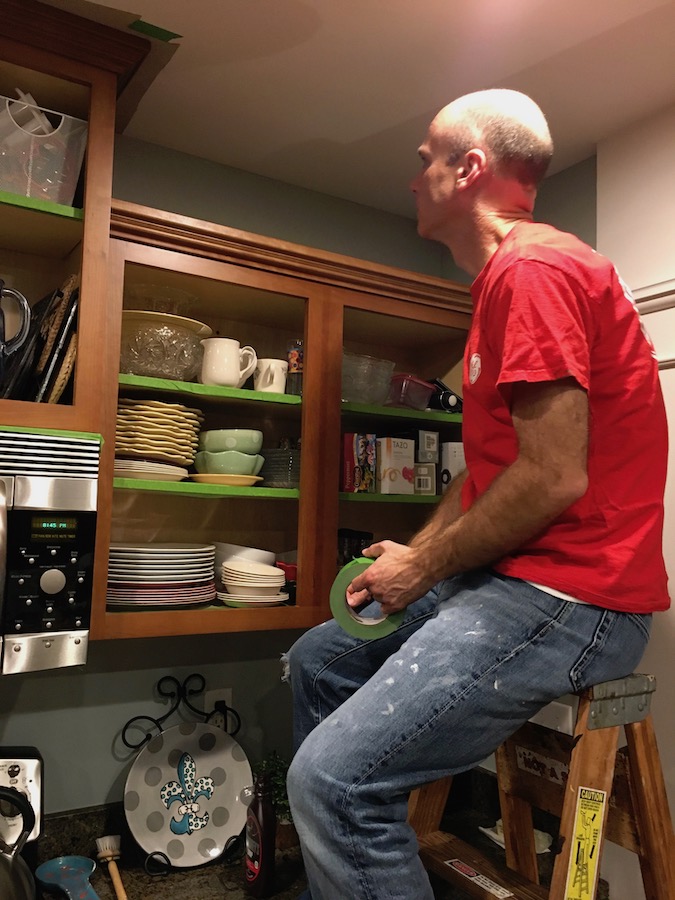
2. Painter’s tape is your friend. I’m a huge fan of green Frog Tape. It seals nicely for a nice straight edge and removes easily when finished. It’s the best and I use it with all of my painting projects. (Thanks to my sweet husband for always being willing to take on my projects!!)
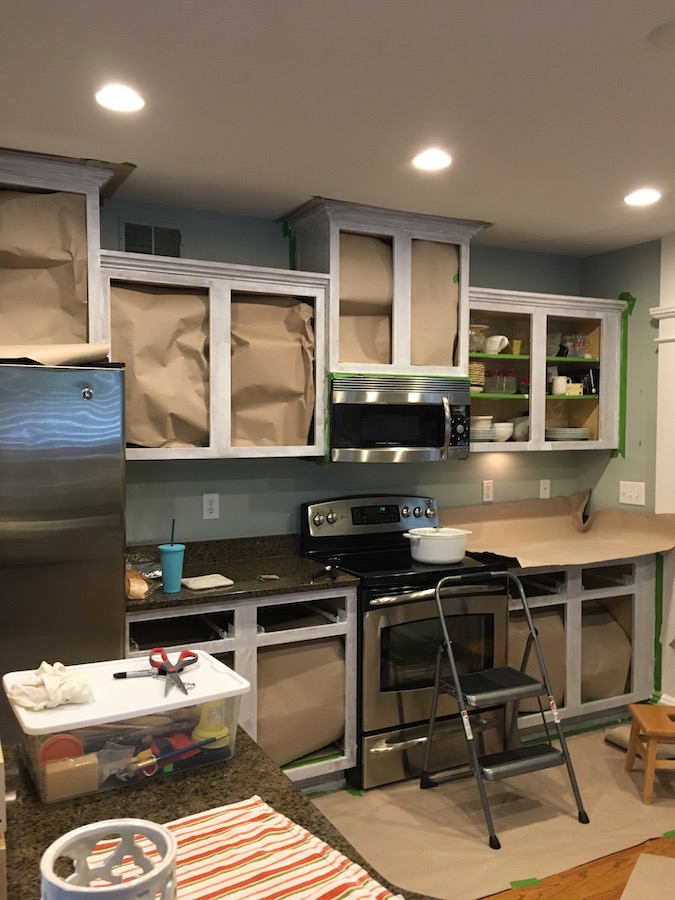
3. We used a roll of brown paper to cover our floors and countertops, and to cover the openings to our cabinets. We did not remove all the dishes from our cabinets during this process, so covering the openings with paper kept dust to a minimum inside the cabinets.
4.Clean your cabinets with a degreaser. Be sure to wear gloves and even a face mask when cleaning the cabinet boxes and doors.
5. Fill any holes or cracks with wood putty before sanding.
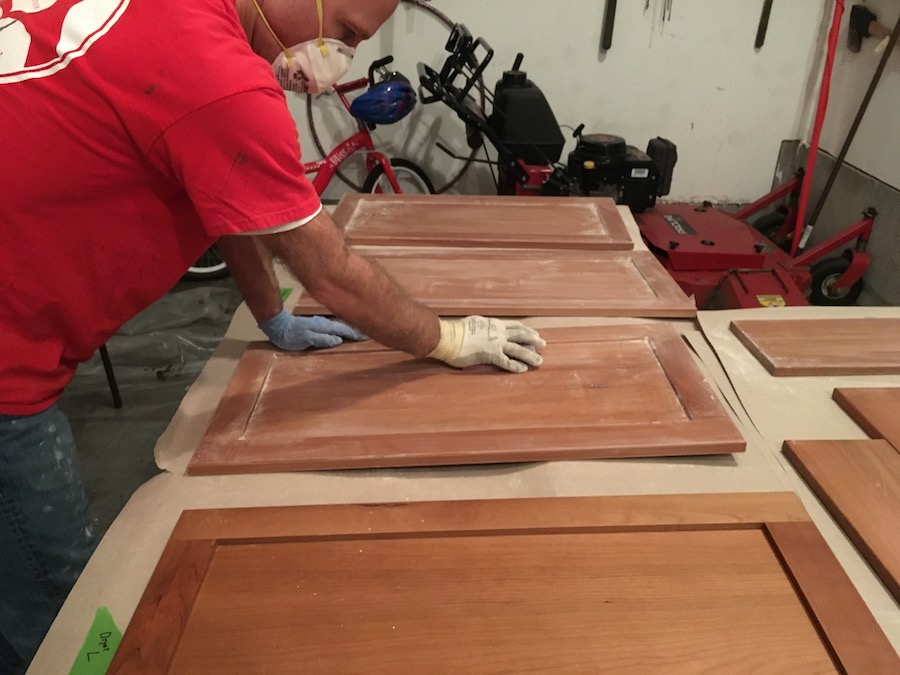
6.Sand, sand, sand. This is a very important, but messy step. Use 100-grit sandpaper for the initial sanding down of the boxes, doors, and drawers. Make sure to sand all crevices and corners. Use a fine 150-grit paper to finish. TIP: Wear a mask. This generates a lot of dust!
7. Make sure you get every speck of dust off your freshly sanded cabinets. We used a vacuum to get rid of the majority of the dust. HINT: Use a shop vac. You don’t want that mess in your good vacuum hose! After vacuuming, wipe with a damp cloth. I used a microfiber cloth for this. Follow up with tack cloth (a sticky cloth) to get any remaining specks of dust. It’s wise to do this right before painting.
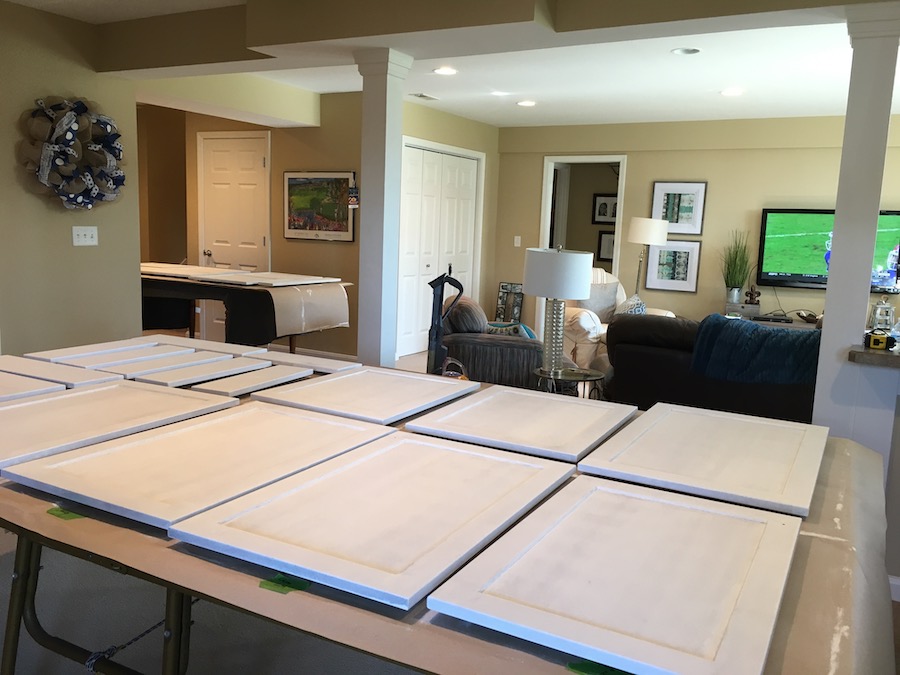
8. Prime! We primed the cabinet boxes, doors, and drawers with Zinsser AllPrime Oil-Base Odorless Stain Blocker using a roller to apply. Allow a couple of days to dry and then sand with fine grit paper. After sanding the primer, use the same vacuum, microfiber, and tack cloth process described above to completely rid the cabinets of dust.
9. After priming, it was time to paint! We used Sherwin Williams Pro Classic Interior Waterbased Acrylic-Alkyd paint in a satin finish. Since we were doing a combination of rolling and brush painting, we added Floetrol to the paint to help the paint level to a smooth finish. We used a 1:16 ratio of Floetrol to paint. This gave us a really smooth finish with very minimal brush strokes. TIP: Use this handy paint can lid with spout for pouring and this lidded paint measuring cup for mixing and storing the paint mixed with Floetrol.
10. This is where patience comes in. I would recommend allowing your paint to dry at least 2-3 days before applying the second coat of paint. Honestly, the more, the better.
11. Apply your second coat of paint.
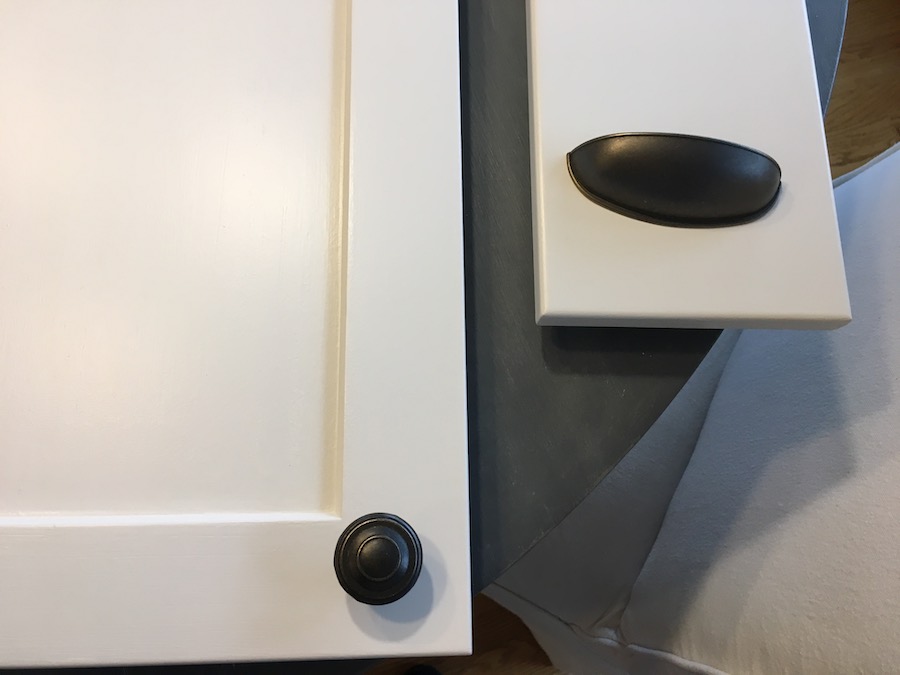
12. Wait at least 2-3 days before attaching hinges and new hardware and rehanging the doors and drawer fronts. Again, the longer you wait, the better. I know it’s hard, but PATIENCE! You can see in this pic how smooth the finish is when adding the Floetrol.
13. You can add bumpers to the doors and drawer fronts, but here’s a REALLY IMPORTANT TIP. Wait for a week or two to let yours cabinets cure before you add the bumpers. The bumpers themselves are rubbery and a little tacky, and if paint hasn’t cured enough, they will cause the paint to pull away.
14. Enjoy your beautiful cabinets!
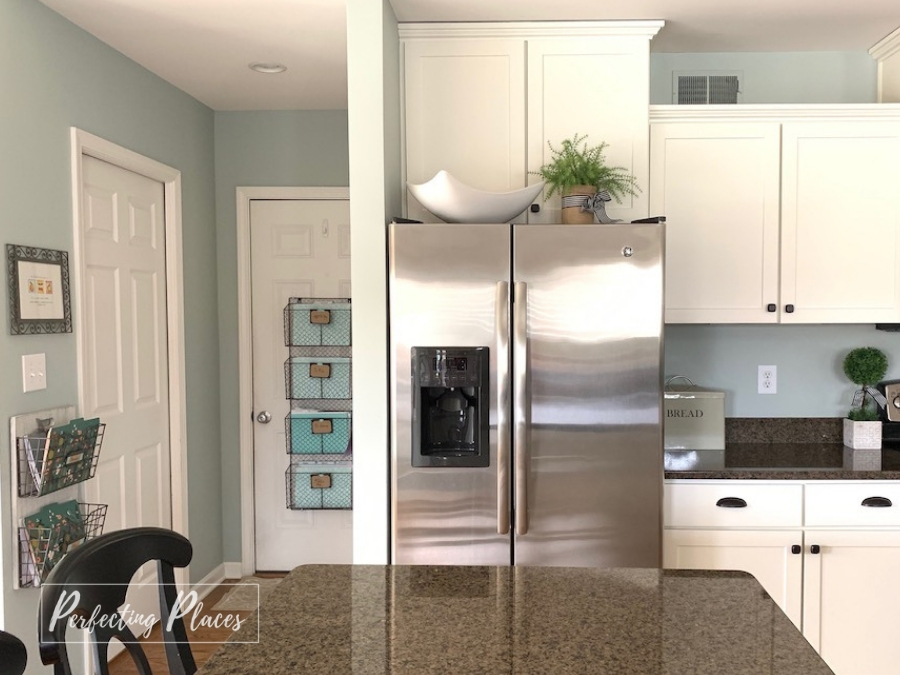
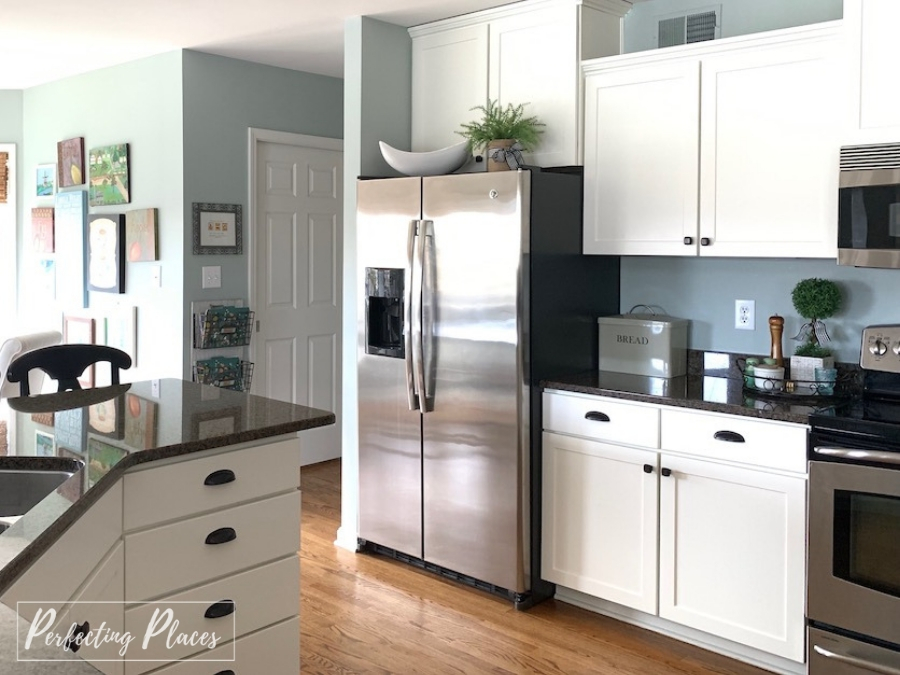
I love our new kitchen look! Our kitchen cabinet makeover was so worth it! Our kitchen looks so much bigger and brighter. The kitchen is in the interior area of our home, and although we have an open floor plan, it doesn’t get much natural light in this area. The painted white cabinets really brighten the space!
I hope you enjoyed our painted kitchen cabinet makeover before and after shots! Do you have a DIY kitchen cabinet story? I’d love to hear it in the comments below.
i just bought a house for my daughter that’s a serious fixer upper. The walls are all different darker colors. I’m glad to see SW alabaster as I didn’t want to do a bright white. The lighting is so different in each room the other colors I’ve tried look so dramatically different in each room that I gave up. I’m hoping that even tho it will differ in each room, the alabaster might handle the transitions better . Also, I was curious about the stain you used on the flooring. When i pulled up the stinky cheapy carpet I found original hardwood (from 1926) that, although it has paint spilled on it, it’s salvageable. Sorry for the longer post, I just really love your style here and I’m not ashamed to be a copycat (yup navy doors too since you pointed out a great non purple shade)
How exciting for your daughter! Be sure to test Alabaster in the rooms as well before you paint. You’re right that lighting affects the colors from room to room, and even at different times of day. How wonderful to find the wood floors! Our wood floors are stained Provincial. It’s a nice timeless medium brown stain that isn’t too red or too dark. Keep in mind that the type of wood will affect the stain color when applied, so test that as well. Thank you so much for your kind words! I’m so glad the paint color suggestions were helpful!