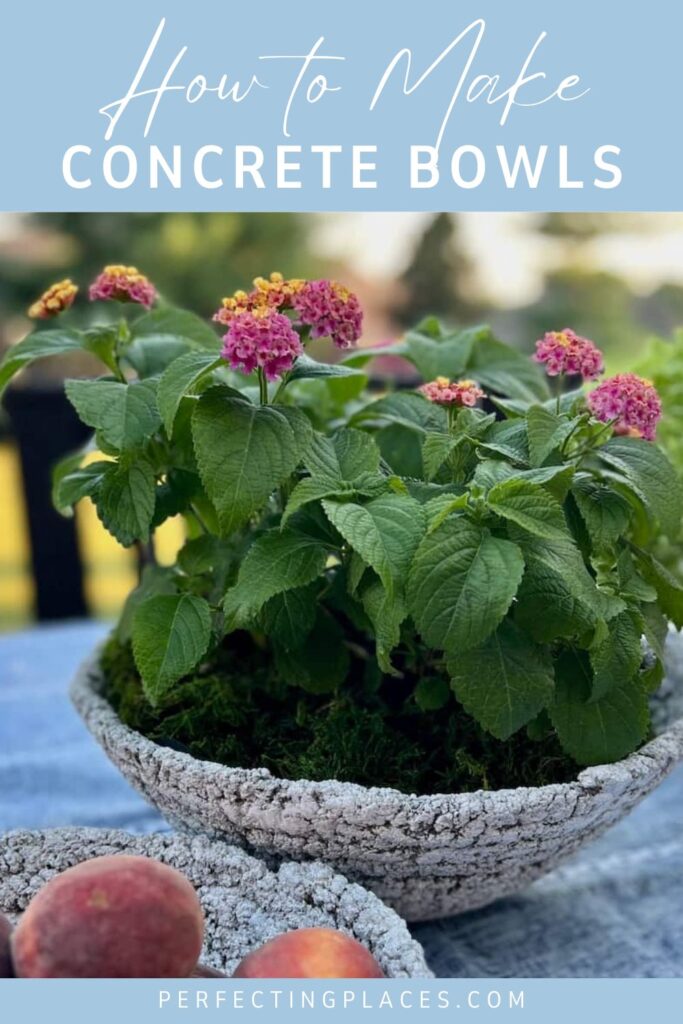
How to Make DIY Cement Planter Bowls with Yarn
Love the rustic look of concrete decor? Create a stunning DIY cement planter bowl using yarn with these easy-to-follow instructions.
Learn how to make a beautiful DIY cement planter bowl with this step-by-step tutorial. This project is ideal for creating stylish planters and centerpieces, with tips for unique designs and home decor ideas.
(This post contains affiliate links, so I may earn a small commission when you make a purchase through links on my site at no additional cost to you. As an Amazon Associate I earn from qualifying purchases.)
Welcome back to another exciting Handcrafted Society blog hop! The Handcrafted Society is a special group of my very talented blogging and crafting friends who come together each month to share one another’s beautifully crafted creations centered around a specific theme or craft medium for the month.

This month, we’re all about concrete, and I’m so excited to share my latest creation with you along with all of the other creative projects made from concrete! Be sure to check out the photos and links to everyone’s projects at the end of this post!
Is your first time visiting Perfecting Places? If so, welcome! I’m so glad you stopped by! I’m Kim, and I blog about all things home decor! I love to share easy DIYs for your home as well as paint colors, design sources, and favorite decorating tips and tricks to help you make your house a home!
I’ll admit, I was a bit nervous about how this DIY cement planter bowl would turn out. However, the process was surprisingly fun and rewarding, and I love the finished project! Follow along as I walk you through the process and share some tips and tricks I’ve learned along the way.
How to Make a Cement Planter Bowl with Yarn
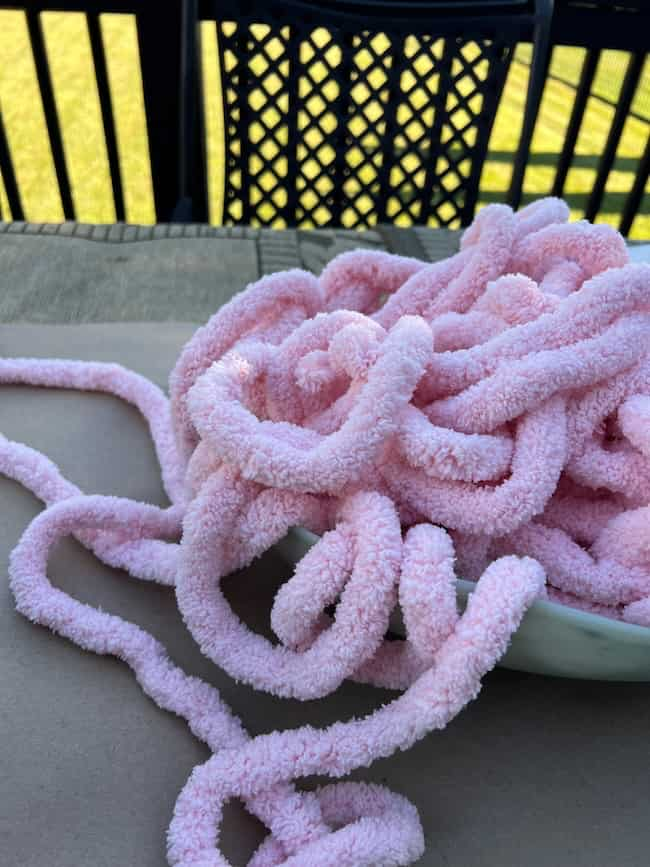
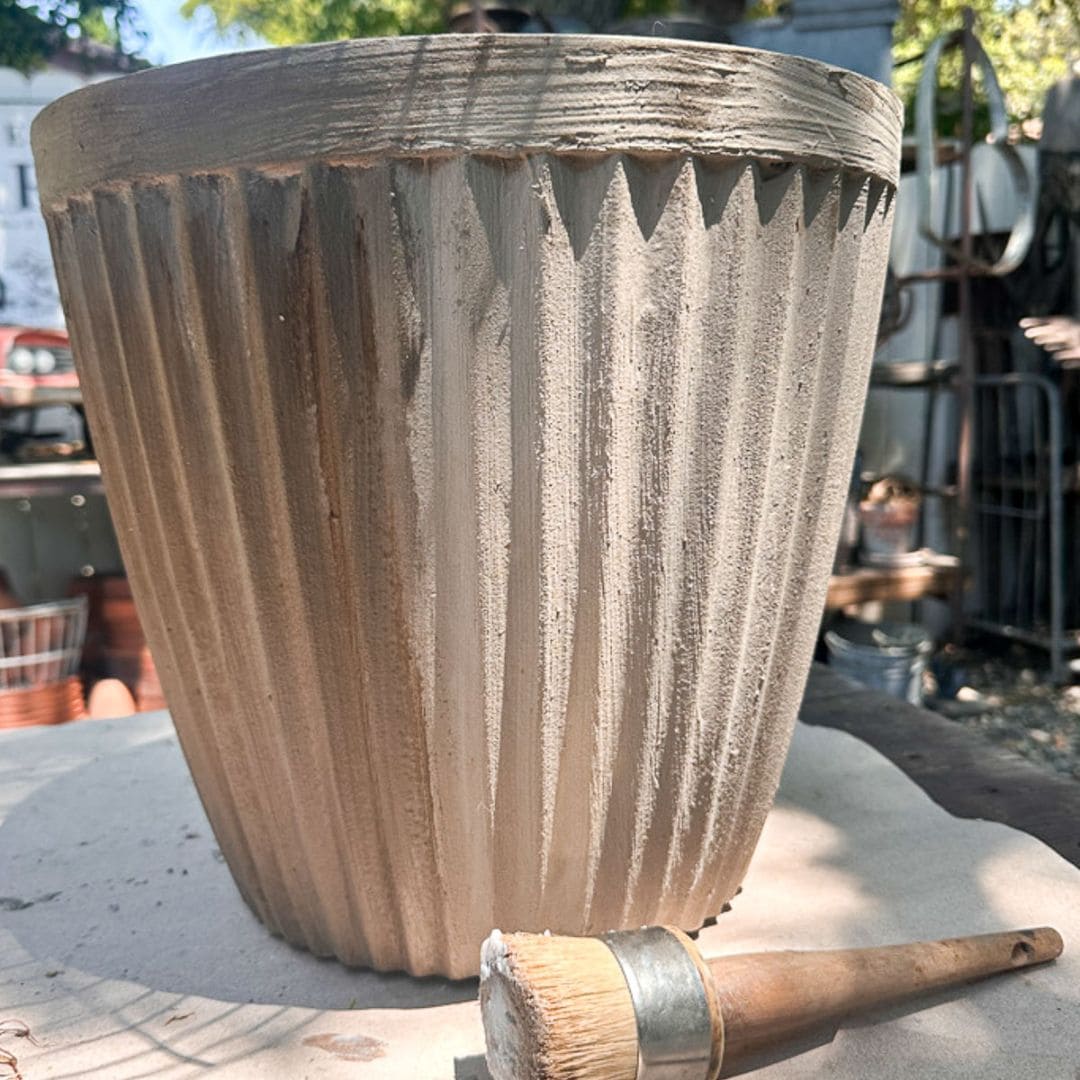
There are a variety of ways to make creative cement or concrete bowls from using traditional silicone molds to draping a towel dipped in concrete over a form to create an unusual shape. For this project, I thought it would be fun to use some thick yarn I had on hand to create a planter bowl with lots of texture and pattern.
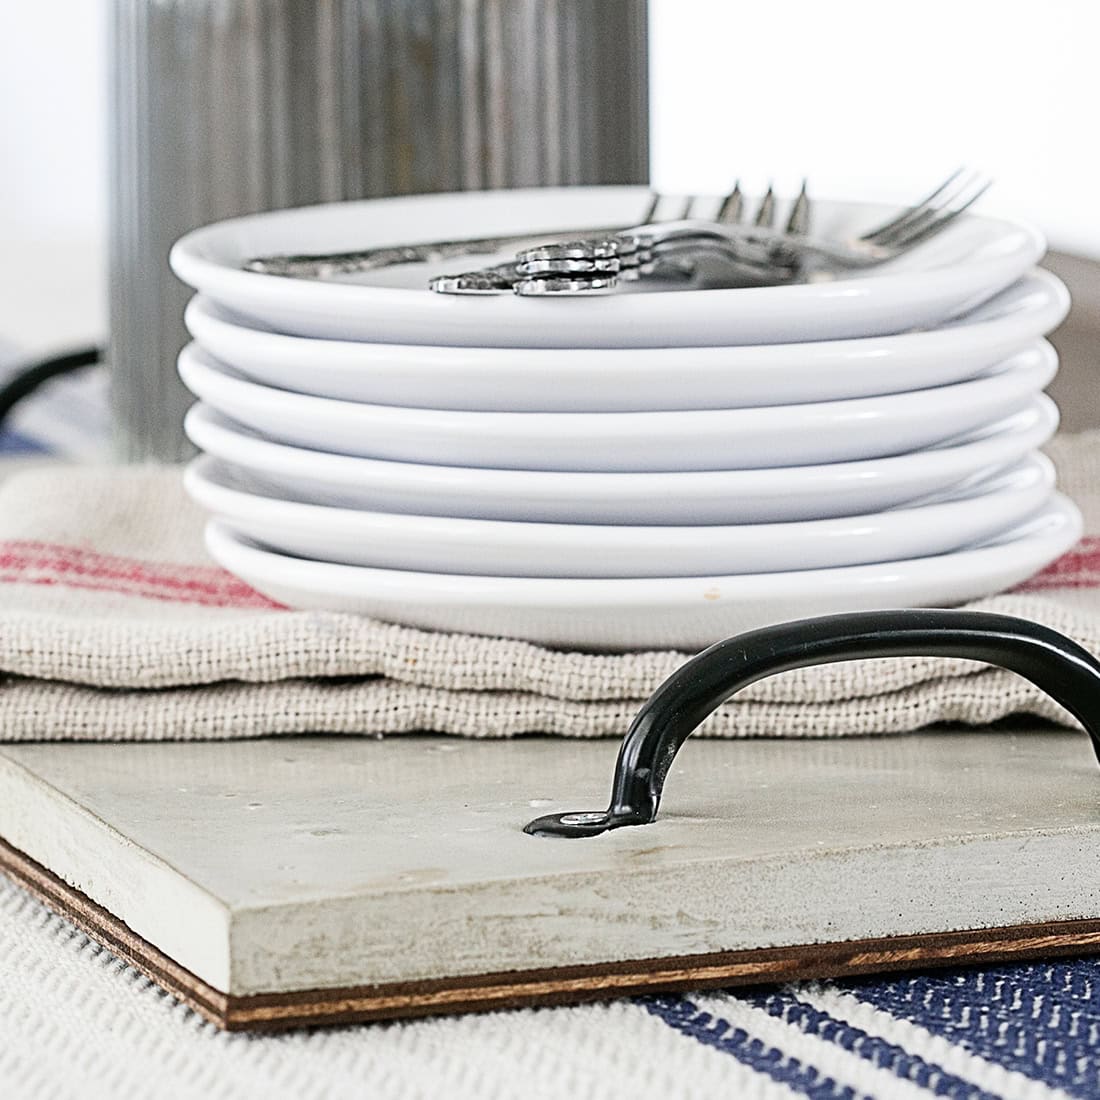
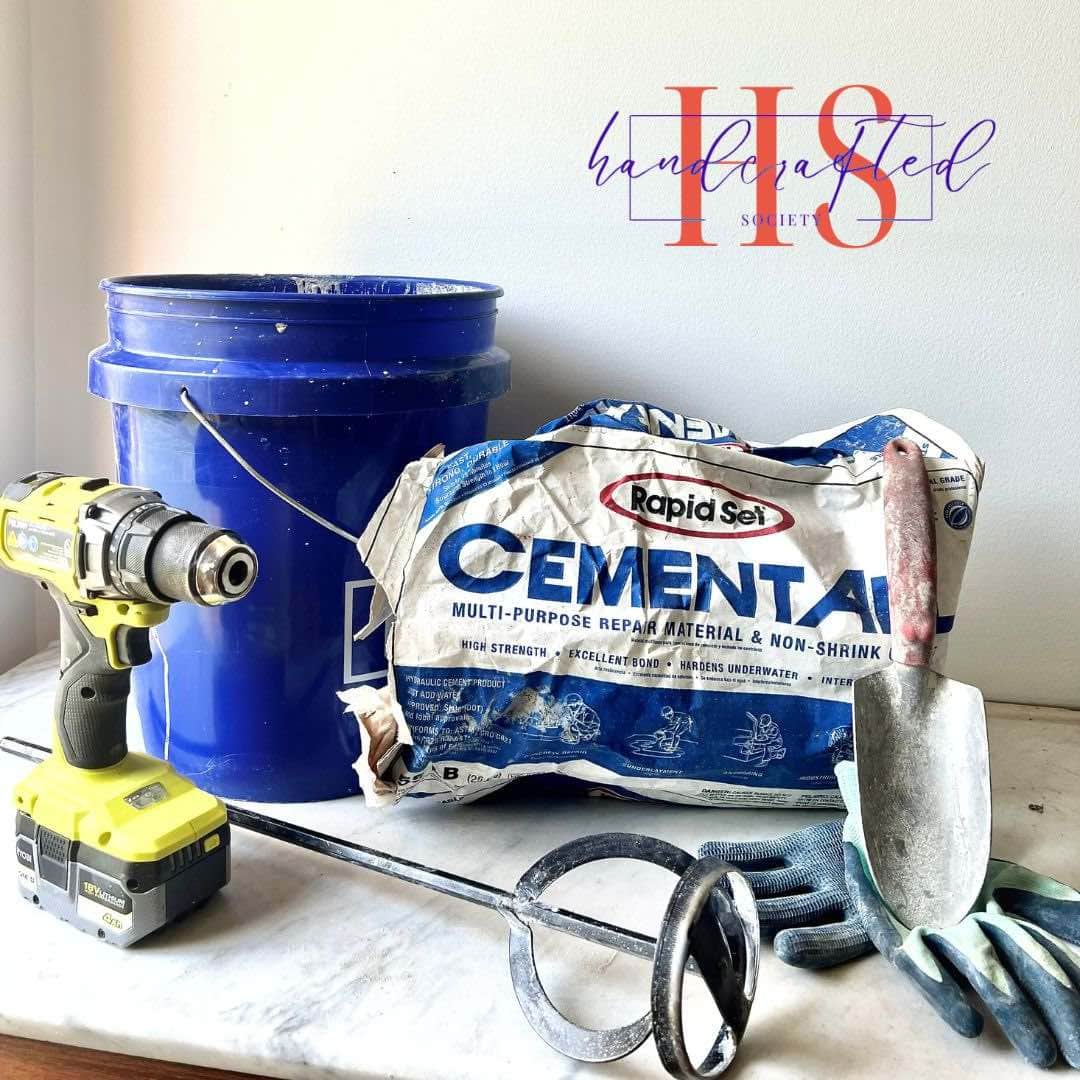
Supplies Needed:
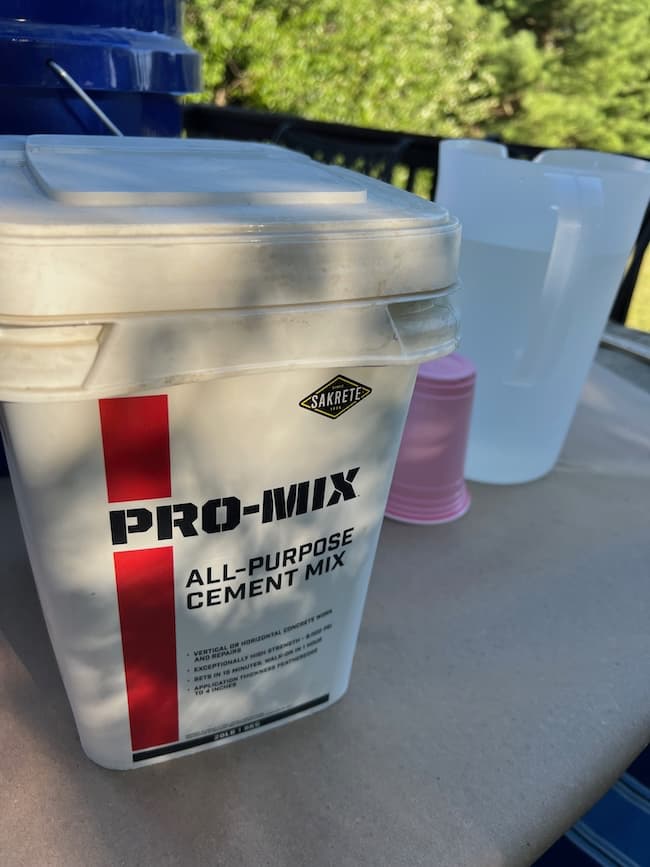
- Quick-dry cement product
- Water
- Chunky plush chenille yarn
- Large bowl for mold (mine was similar to this one)
- Plastic garbage bags
- Vegetable oil
- 5-gallon bucket (for mixing)
- Plastic pitcher (for adding water)
- Stirring stick
- Off-white acrylic paint
- Foam craft brush
- Paper towels
- Brown paper roll for covering the table
- Rubber gloves (to protect your hands)
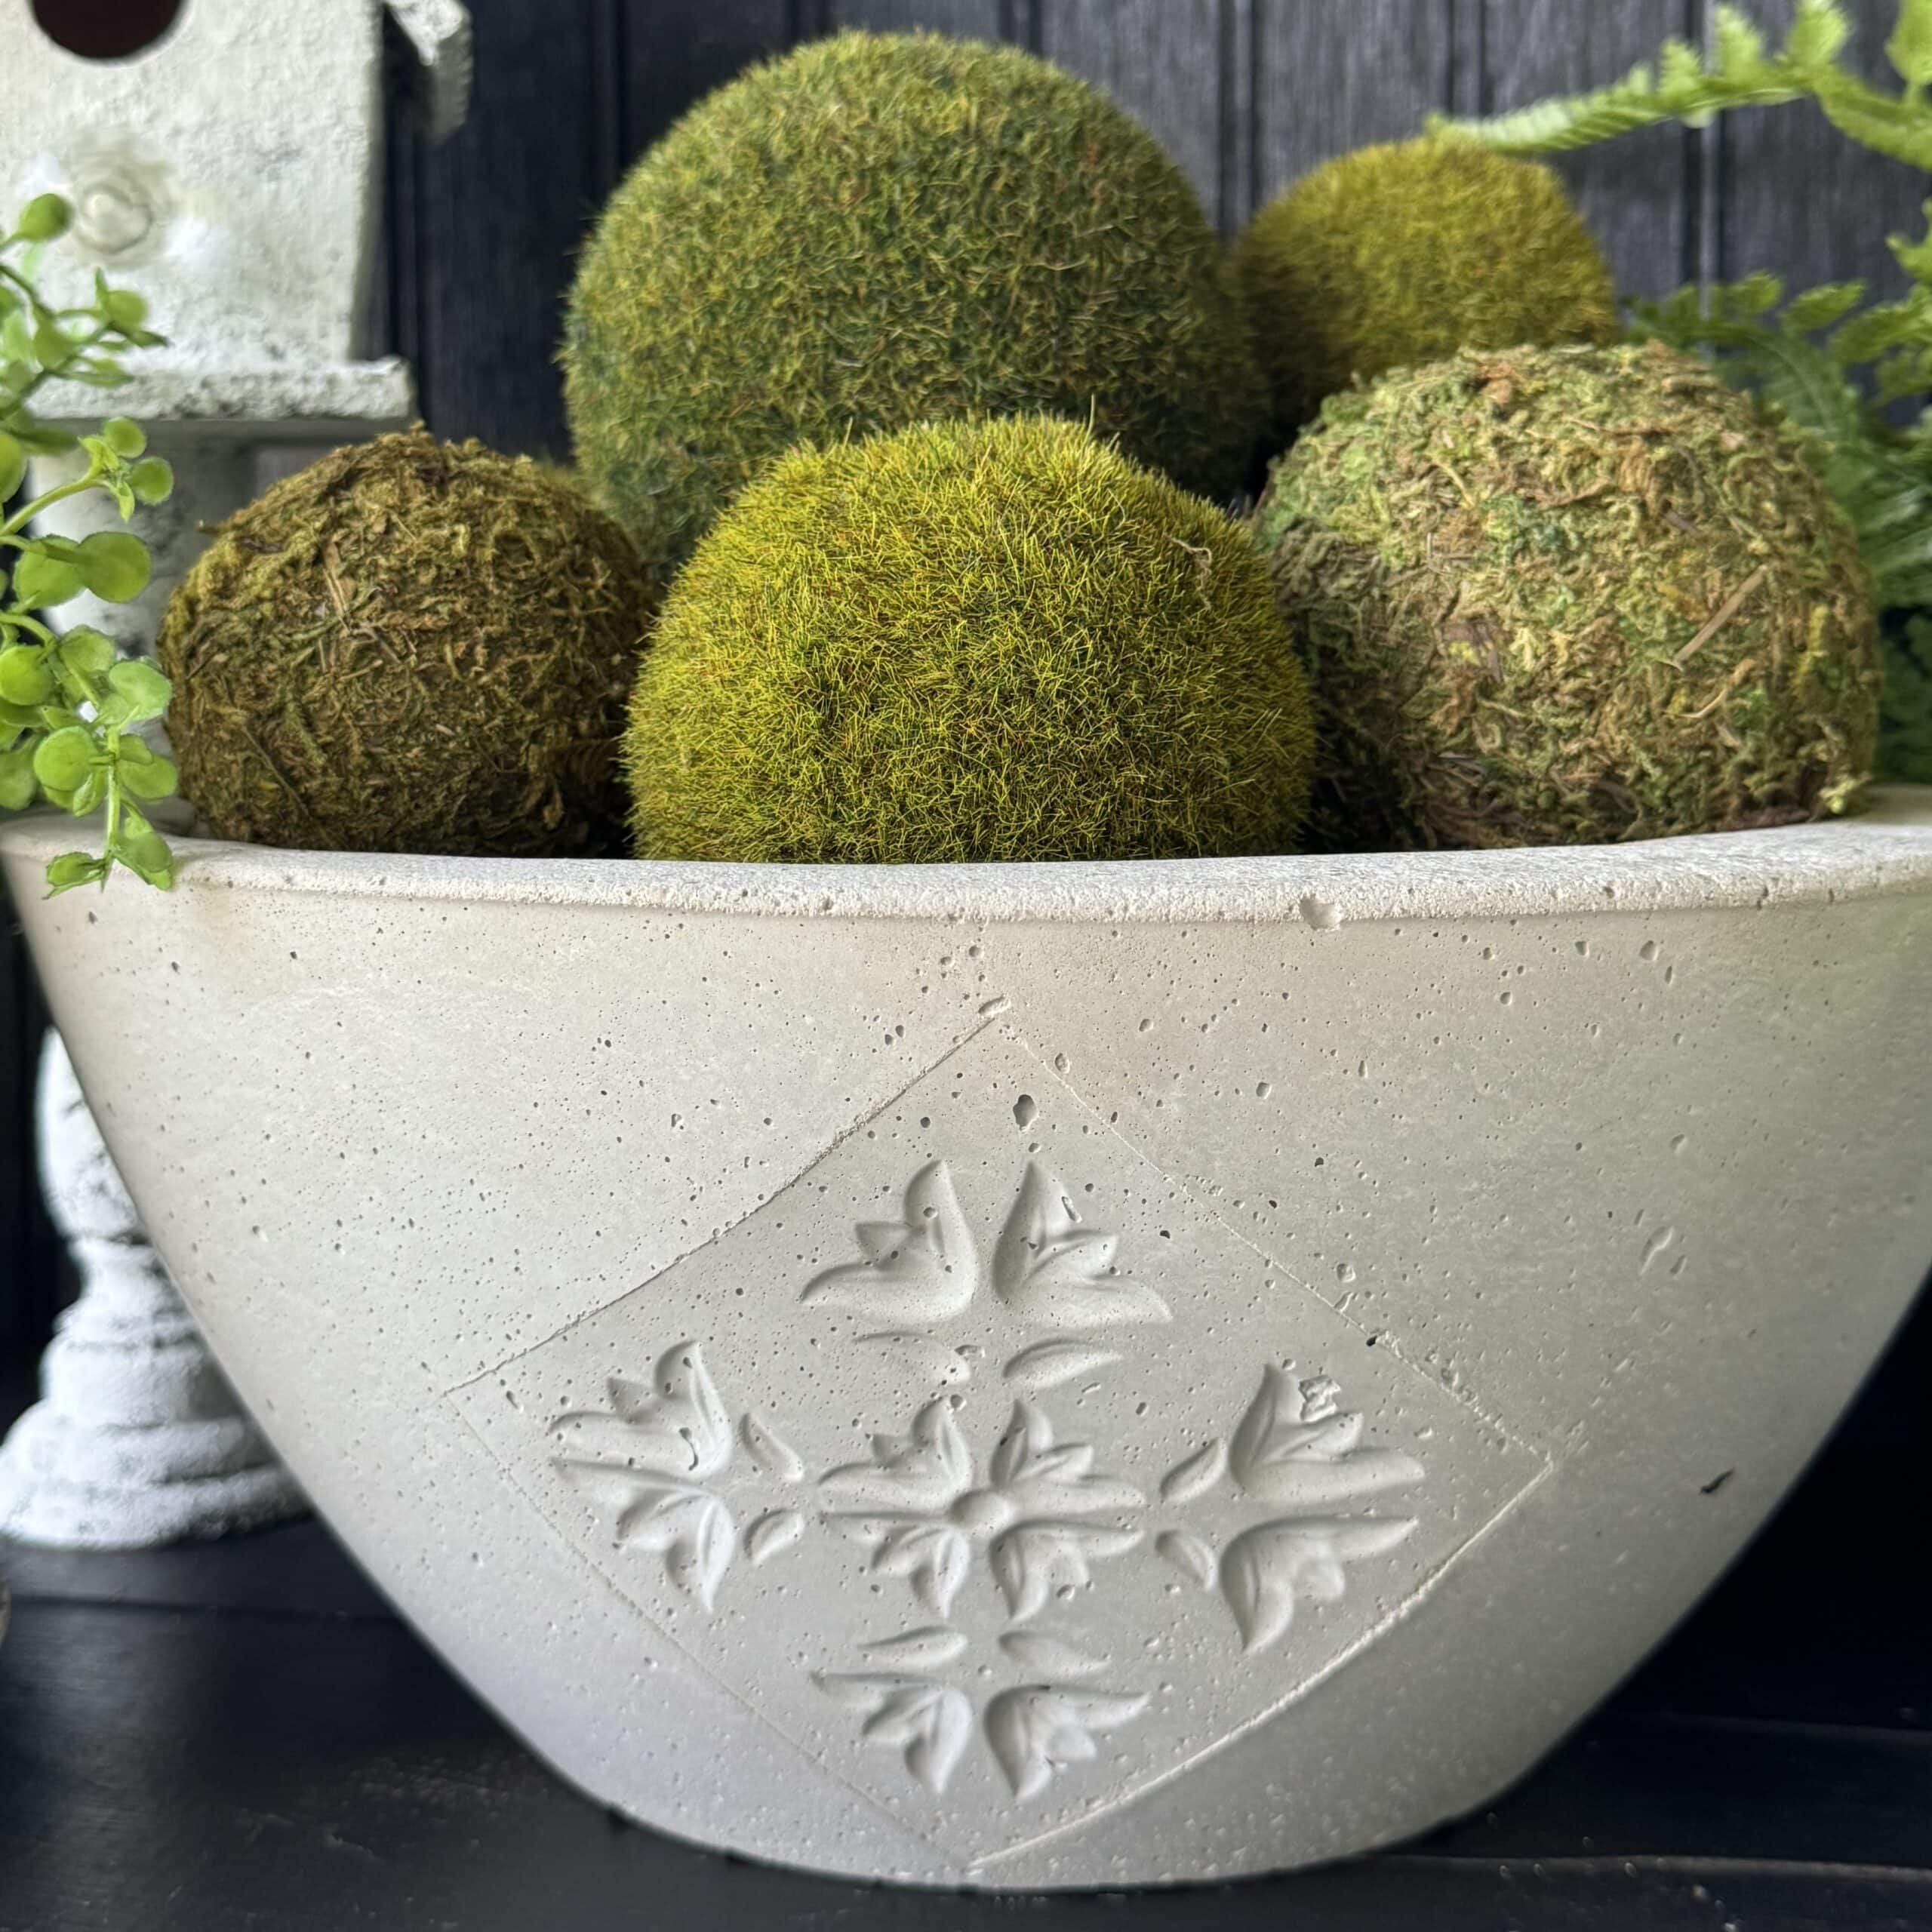
- Decorative moss
- Quikrete
Selecting Your Molds
Choosing the right bowls to serve as molds for your cement planter is an important step in this project.
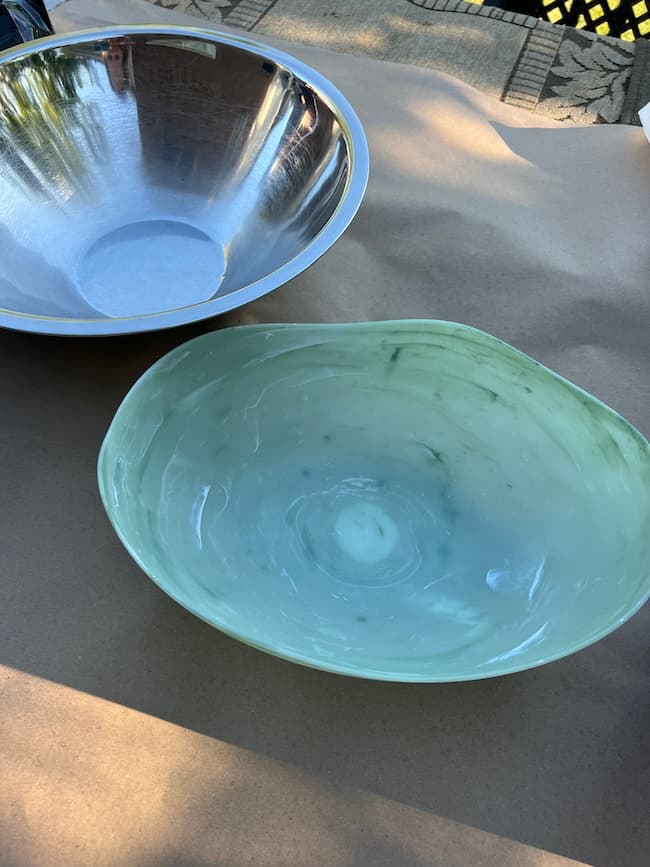
I used a couple of bowls I had on hand: a large metal mixing bowl for the larger planter, and an inexpensive oval-shaped plastic bowl for the smaller one. If you prep well for this project, the bowls should not be damaged by the cement. However, I recommend not using bowls that are your prized possessions, just in case.
Preparing Your Molds
To begin, I lined each bowl with a plastic garbage bag. This step is essential as it makes it easier to remove the cement bowls once they harden, and it allows you to reuse the bowls for their intended purposes.
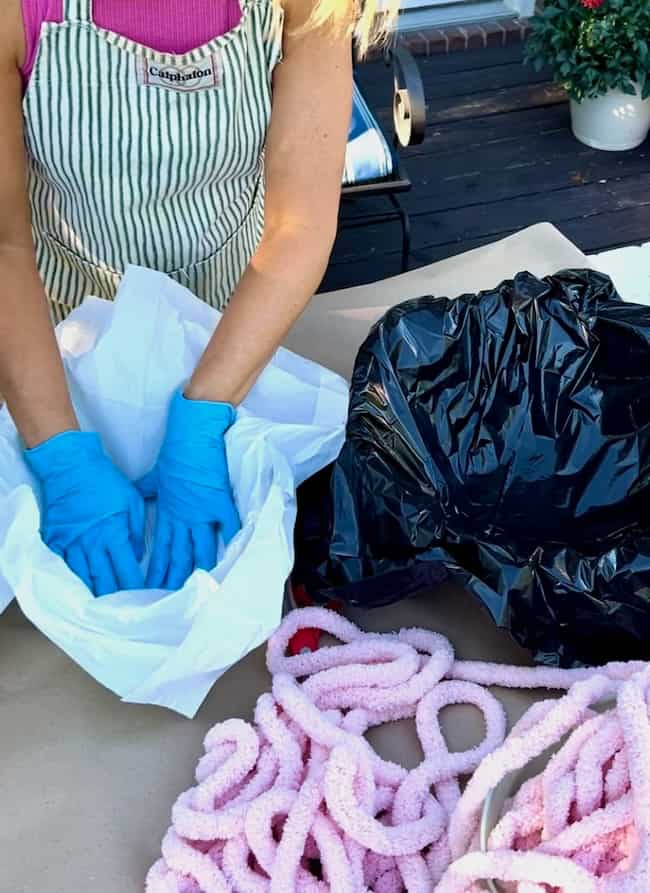
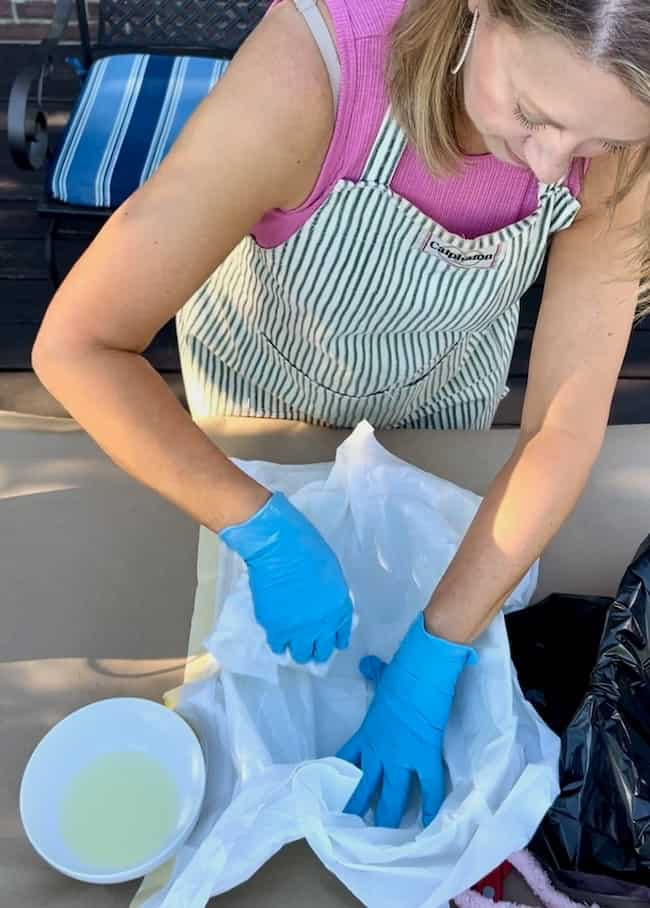
After lining the bowls, I used a paper towel and applied a thin coating of vegetable oil all over the plastic. This step is crucial for easily releasing the cement bowl once it sets.
Mixing the Cement for Your DIY Cement Planter Bowl
In a 5-gallon bucket, I combined the quick-dry cement product with water. I followed the instructions on the cement packaging but also used a trial and error method to achieve the right consistency.
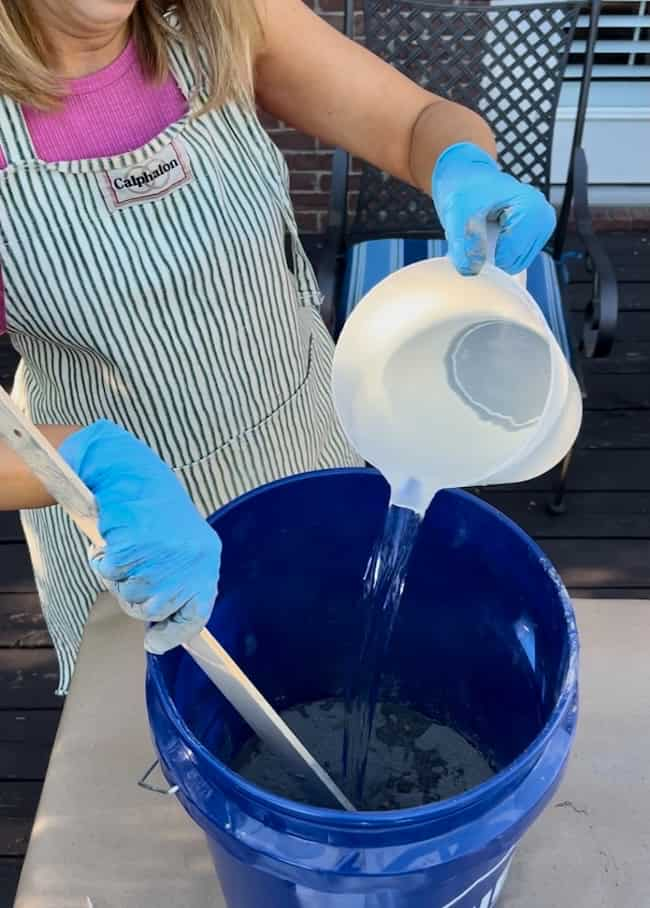
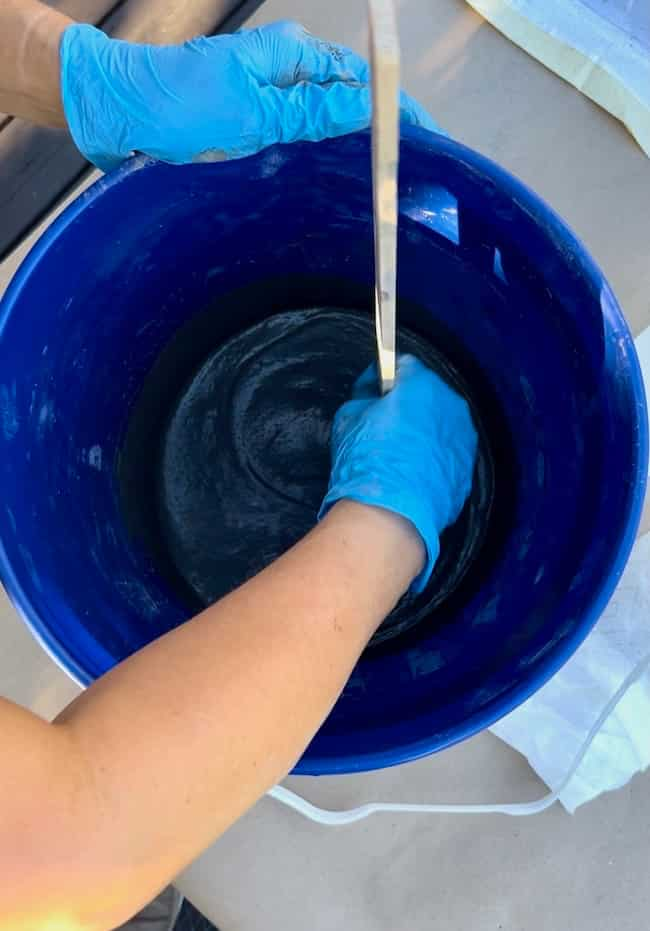
I needed the mixture to be wet enough for the yarn to soak thoroughly. I used gloved hands, along with a stirring stick, to mix the cement. By using my hands, I could feel the texture of the cement mixture and work with the yarn to see if it was the right consistency to completely coat the yarn.
Since it’s quick-dry cement, you will need to work quickly once you’ve added the water so it doesn’t dry up too fast before you have your yarn thoroughly coated and ready to use in the bowl. You might need to add more water to get it just right.
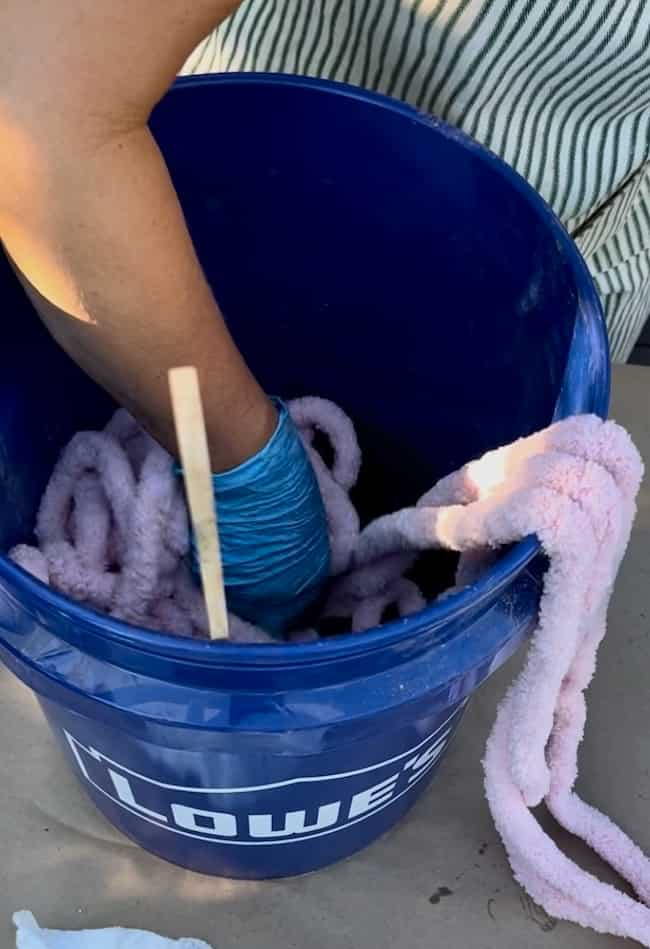
Shaping the Yarn into the Planter Bowl
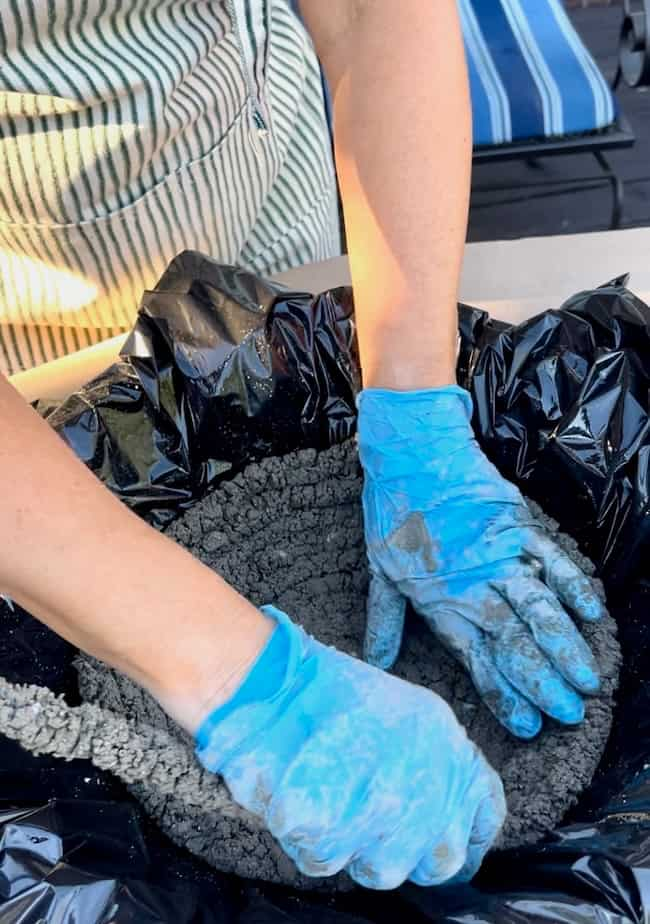
Next, I dipped the yarn into the cement mixture to completely coat it in the wet cement.
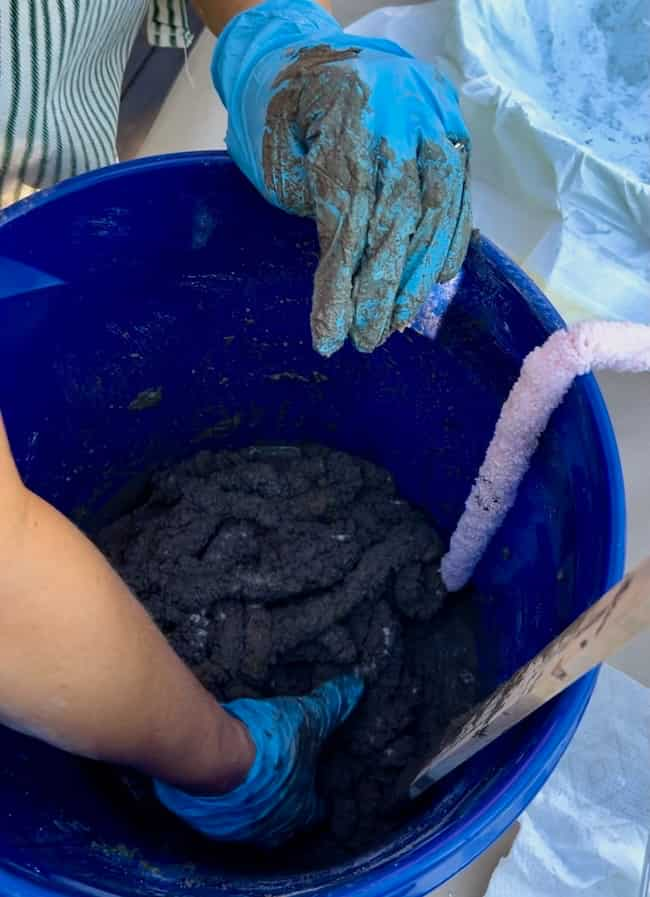
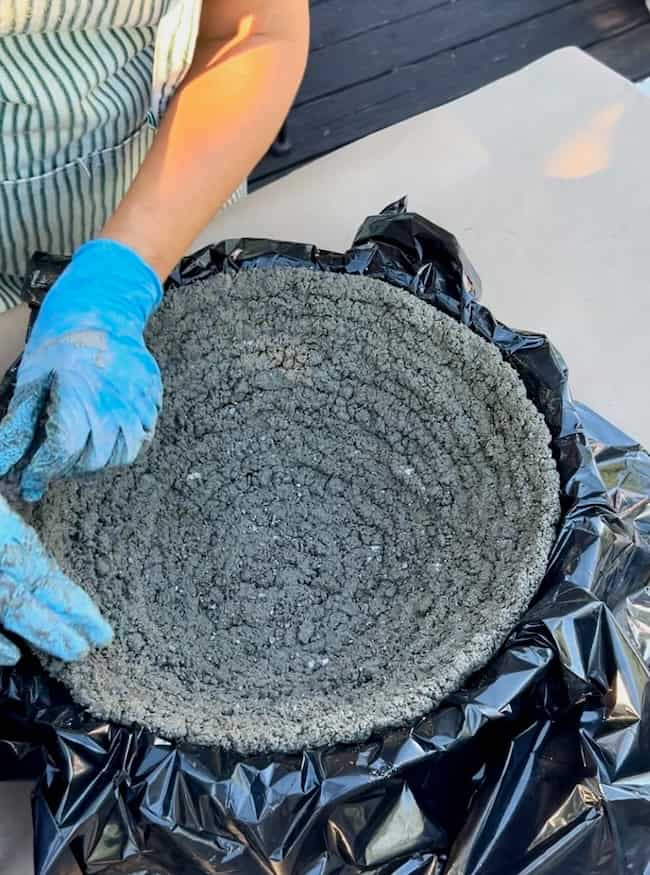
I began arranging the cement-coated yarn inside the lined bowl in a circular coil pattern, starting in the center of the bottom of the bowl and coiling the yarn up and around to the top to create the sides of the planter.
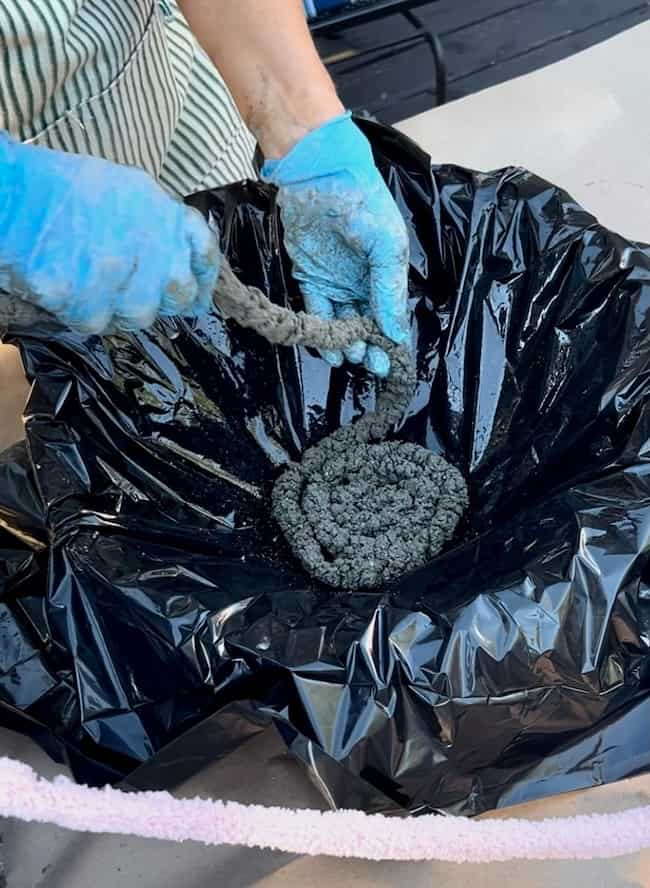
TIP: If you want to use this as a planter with drainage holes, be sure to leave a few spaces at the bottom of the bowl between the pieces of yarn to remain open, so you have holes in your planter once the yarn dries.
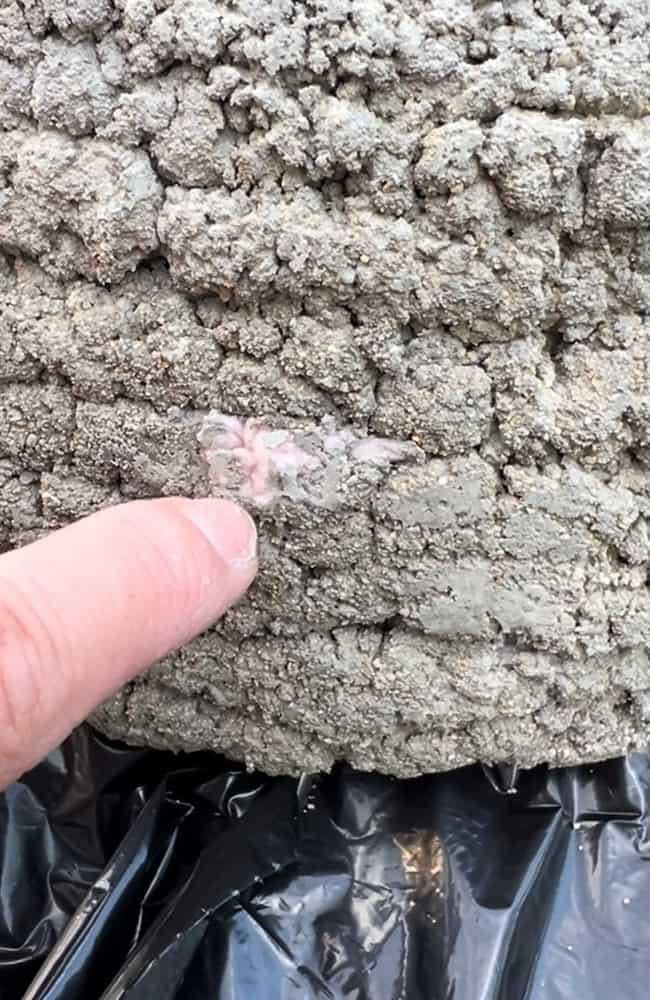
I had a few places along the surface of the bowl where the pink yarn wasn’t completely coated with the cement mixer. I added a little bit of the cement mixture to cover these exposed spots. If the cement has started to harden in your mixing bucket, you can add a little water and a little more mix if needed to mix enough to cover these areas.
Allow the Cement Bowl to Set
After I finished wrapping the yarn around the inside of the bowl to reach the top, I cut the piece of yarn and tucked it in. I allowed the cement to set for an hour or two until it hardened enough to be removed from the mold.
Release the Bowl from the Mold
The quick-set concrete hardens quickly enough so I was able to remove the concrete bowl from the mold and allow it to dry faster.
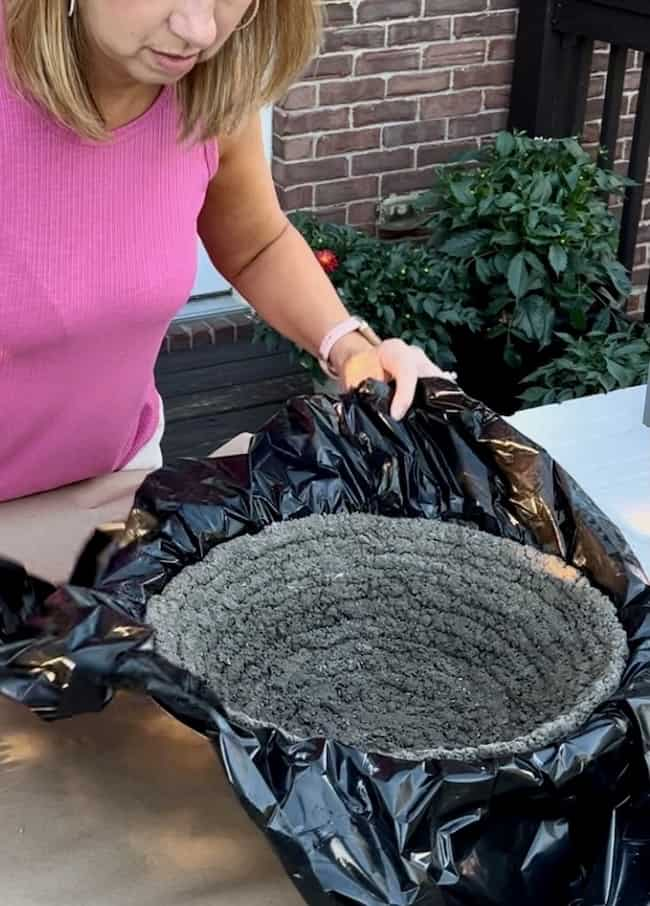
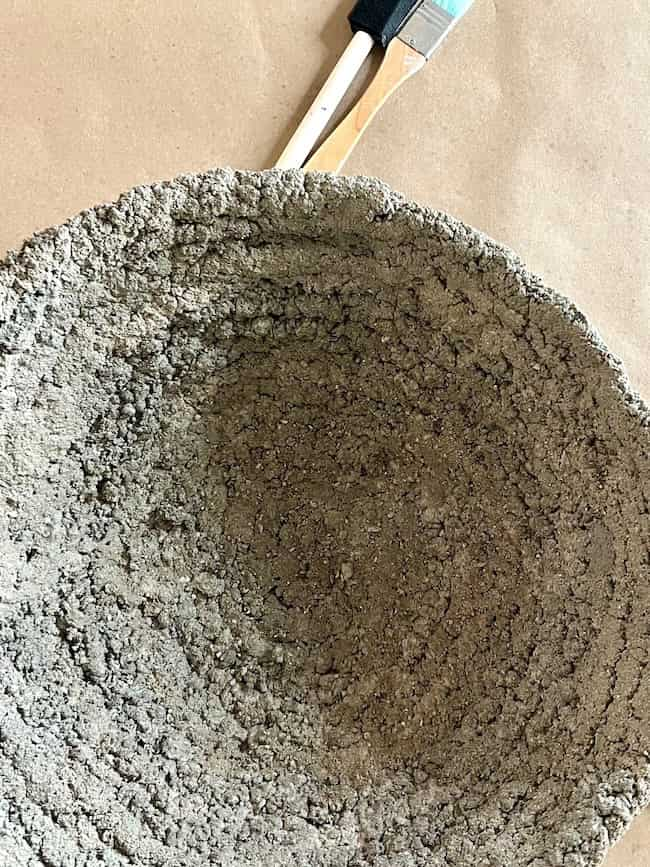
After the cement had set for a couple of hours, I gently lifted the plastic garbage bag to remove the bowl from the mold. Carefully peeling off the plastic, I discarded it and allowed the bowl to air dry for 24 hours before using it.
Painting Your DIY Cement Planter Bowl
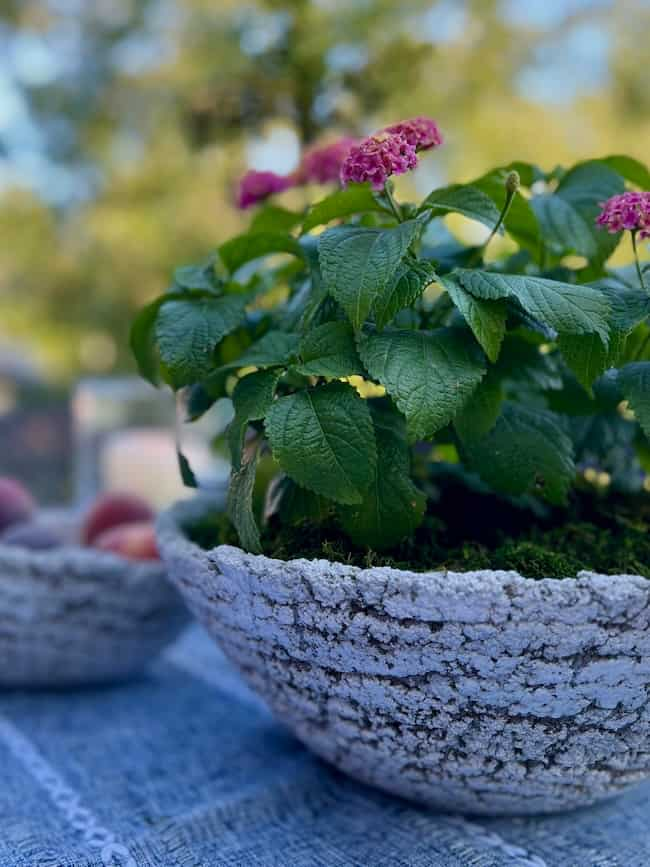
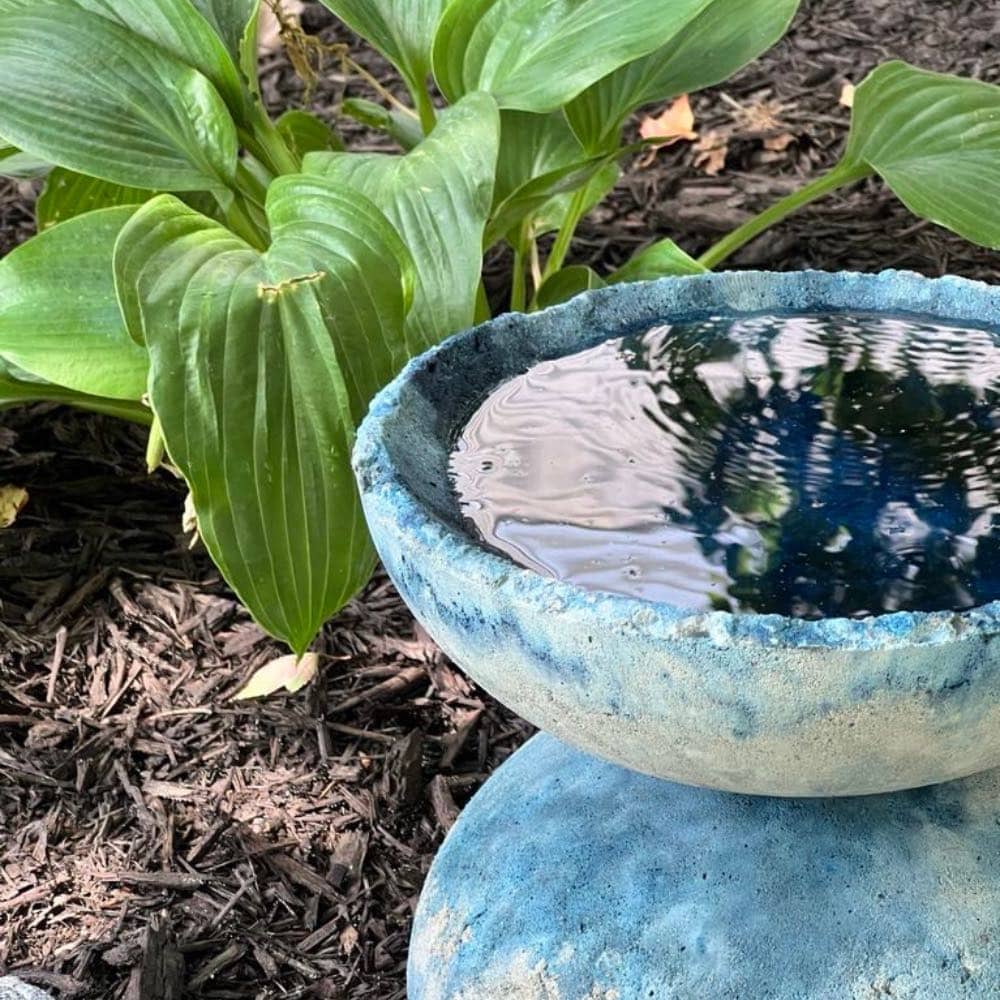
The next day, after the bowl had fully set and air-dried, I applied an easy whitewash paint technique to brighten up the look of the concrete planter and highlight the texture and pattern.
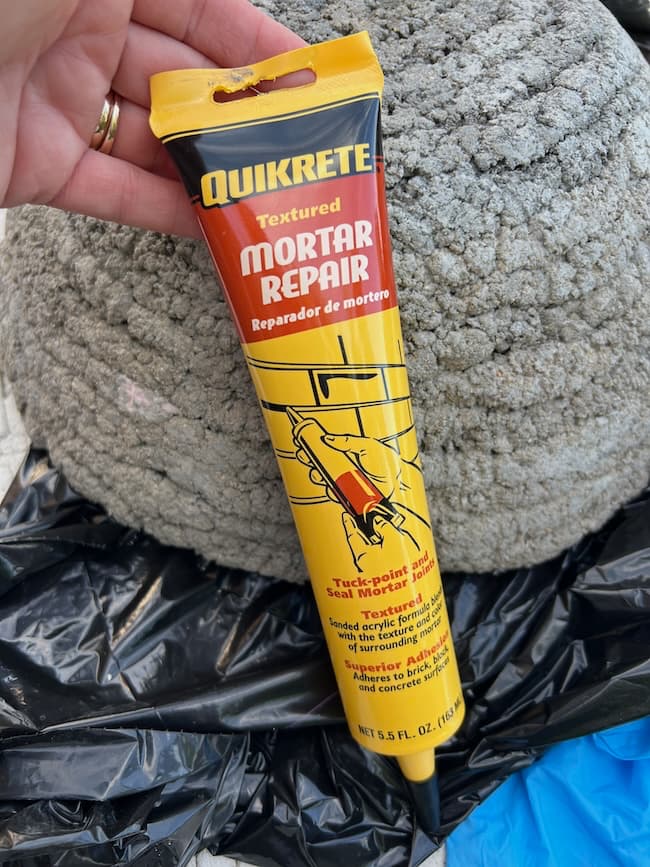
Before painting, if you notice any of the yarn peaking through the dried cement surface, you can add a little Quikrete Mortar Repair to cover these exposed areas. Wait for this to harden and then proceed with painting.
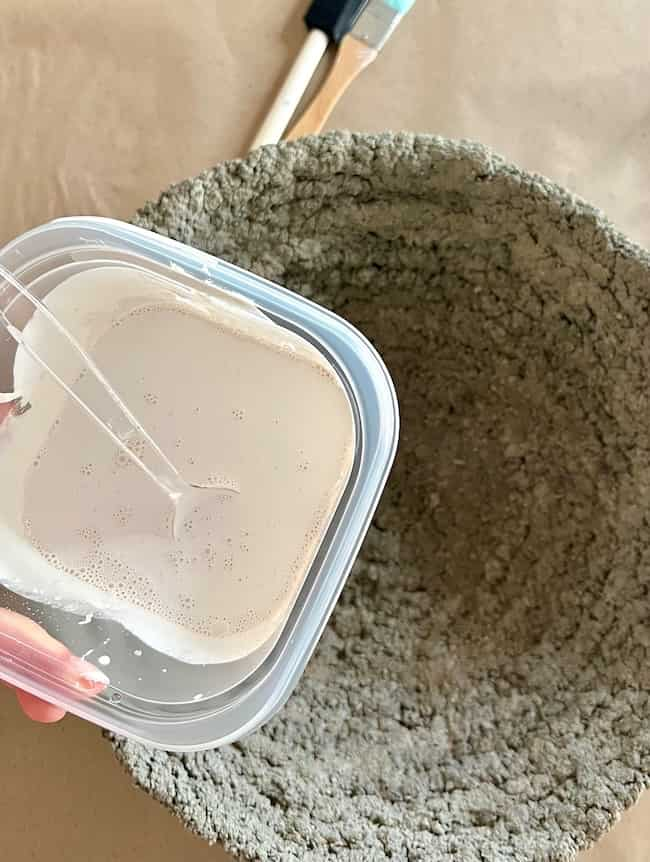
I prepared a watered-down off-white acrylic paint mixture to whitewash the bowl. I simply combined acrylic craft paint with water to create a whitewash. This should be a very watery mixture.
Using a foam craft brush, I applied the paint quickly and randomly in circular patterns around the bowl to achieve a lighter, white-washed look. I was careful not to paint into the crevices created by the yarn to highlight the rustic chunky texture of the bowl.
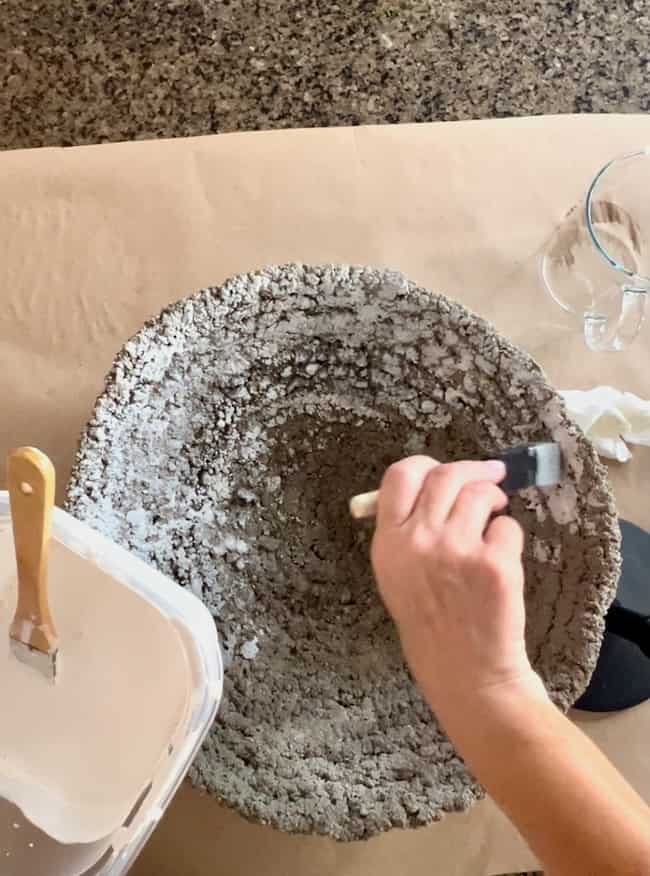
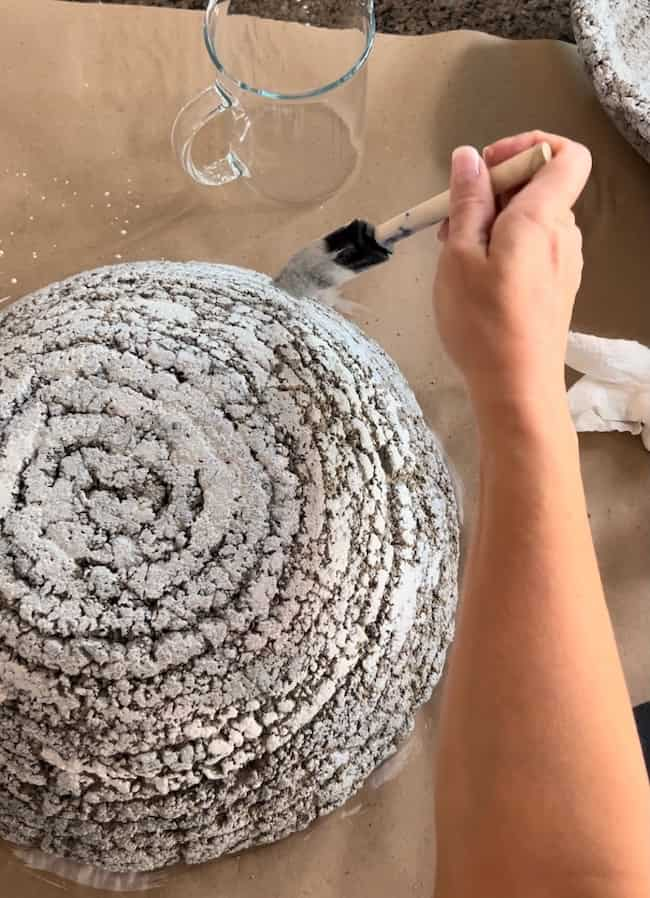
This technique brightened the bowl and highlighted its ribbed texture. The whitewash is very watery, so it’s important to cover your work areas and have paper towels on hand for any clean-up or to dab excess paint if needed.
Tips and Tricks for Making Easy Cement Planter Projects
I used a simple coiled ribbed look with the yarn in my bowl, but you can experiment with different patterns and designs with the yarn to create unique textures and designs on your cement bowl. Working from the inside of the bowl allows for greater flexibility to try different things, as the bowl itself supports whatever design you’re making with the cement-coated yarn while it dries.
Ensure the cement mixture is not too runny, as a thicker consistency helps the yarn hold its shape better.
Don’t skip the vegetable oil step; it makes releasing the hardened cement bowl much easier from the bowl mold.
Most importantly, work quickly once you’ve added water to the cement mixture because the cement will dry rapidly.
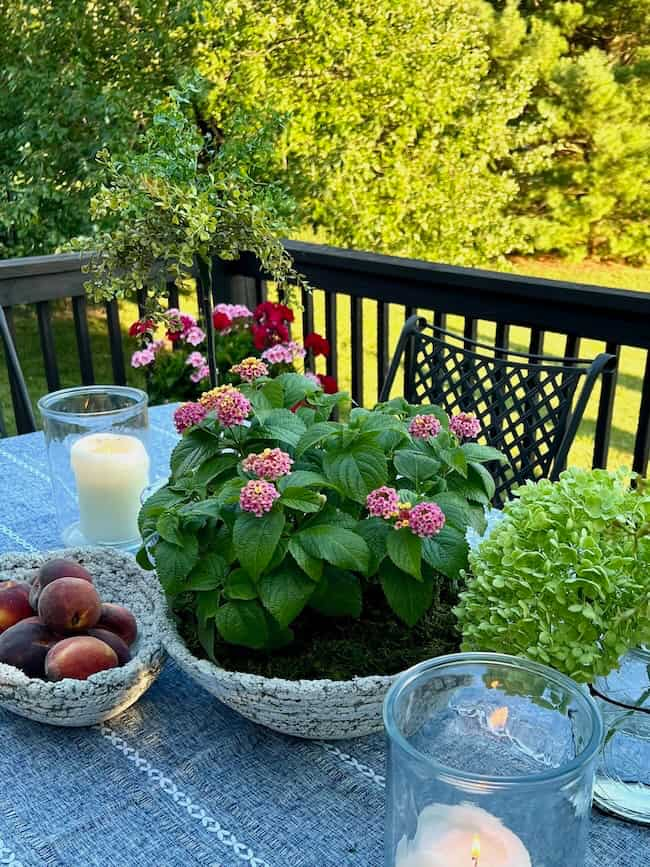
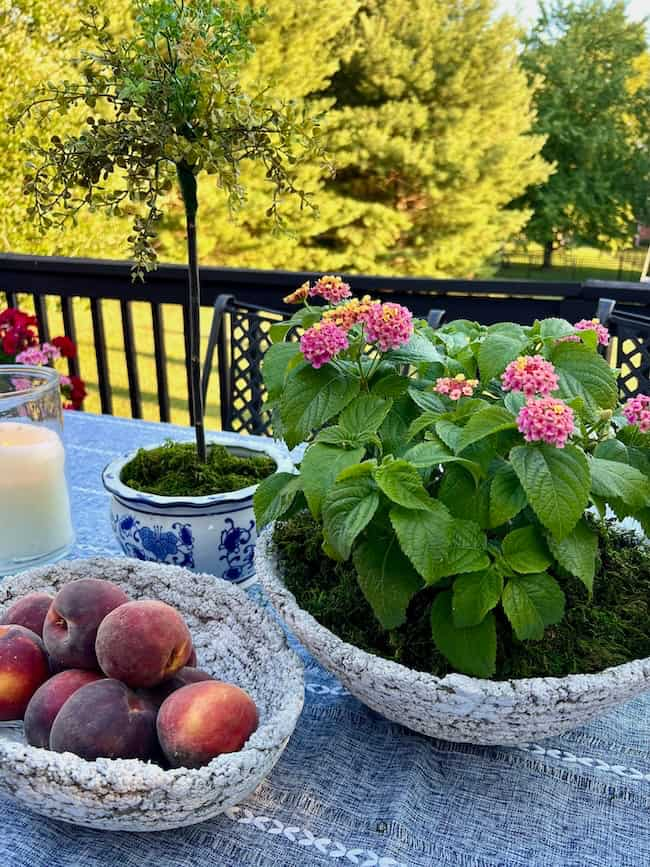
Styling Your DIY Cement Planter Bowl
There are numerous ways to style your DIY cement planter bowl to suit your home decor either indoors or outdoors.

Using the Bowl as a Planter
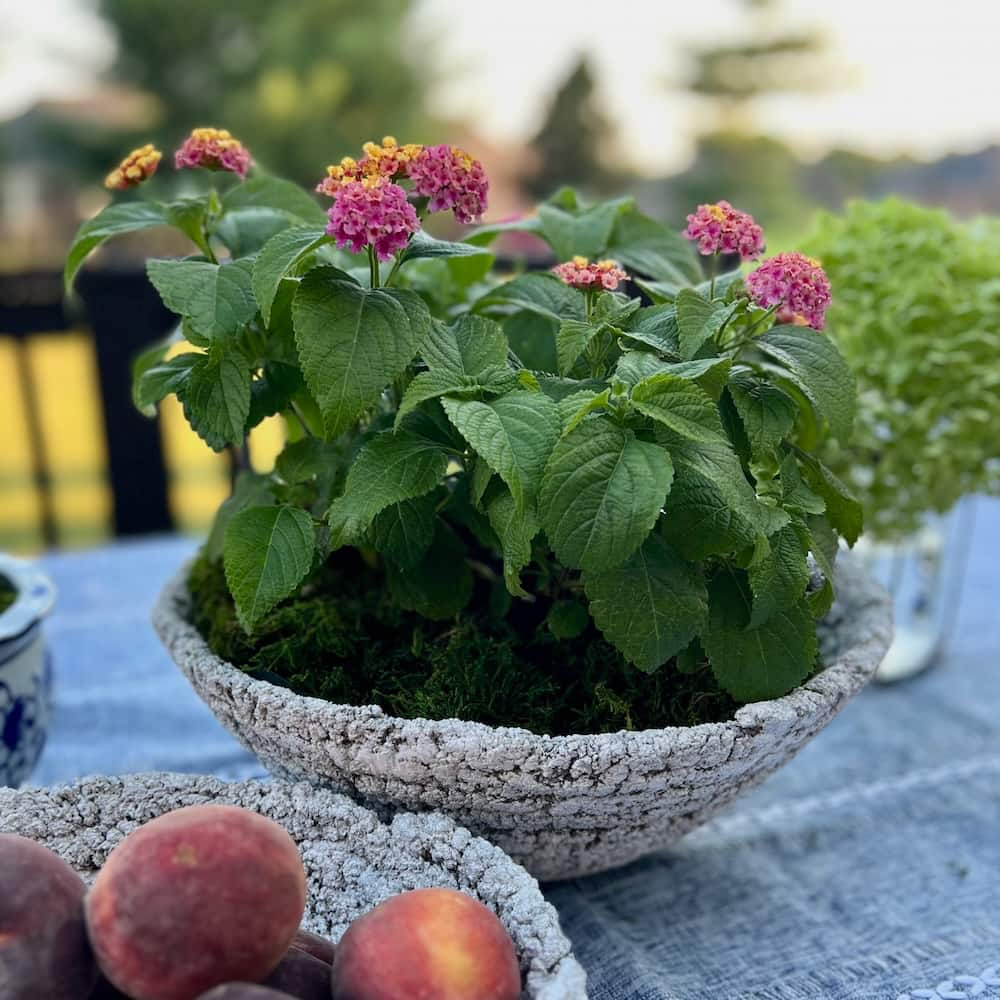
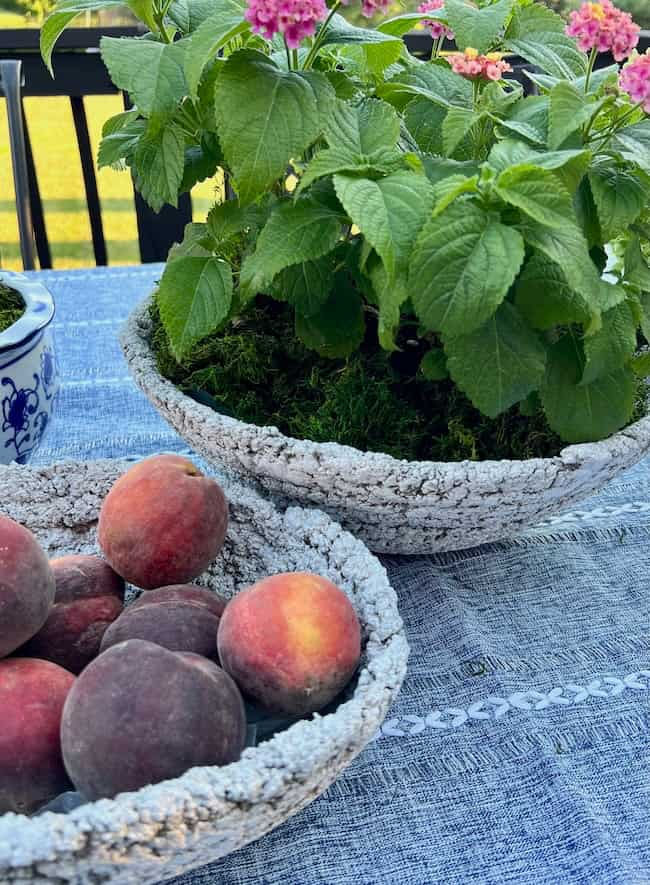
If you choose to use it as a planter, you can add drainage holes to the bottom of the bowl and pot your plant as you would with any other planter. I did not add drainage holes to my planter because I am using it more as a centerpiece acting as a cachepot to hold a potted container plant.
Decorative Uses for Your Cement Planter
One elegant option is to use the bowl to display a collection of small orchids. Arrange the plants in their plastic pots within the cement bowl and cover the pots with a layer of decorative moss to hide the plastic and add a natural, finished look. If you love orchids, this post contains lots of ideas for styling your home with orchids.
Alternatively, you could fill the bowl with a variety of seasonal fruits for a fresh look.
During the summer months, you could display a collection of seashells or other beach treasures, bringing a bit of coastal charm indoors. Decorative balls, whether made of wood, glass, or woven materials, can also make for an eye-catching arrangement.
This DIY cement planter bowl was a lot of fun to make using the yarn to add pattern and texture! Even though I was a bit nervous about this project, I’m so glad I was inspired to create it as part of our concrete-themed blog hop!
I hope it inspires you to give it a try! Thanks so much for stopping by and be sure to visit my creative blogging friends below!!
Happy Crafting!


By the way, do you follow me on all the socials? If not, check out my Pinterest, Instagram, and Facebook and be sure to follow along so you don’t miss out on any of my decorating and DIY ideas.
Now be sure to check out all of the amazing concrete projects from my fellow bloggers in this month’s Handcrafted Society hop below!


Oh my goodness Kim!!! That is so cool using the heavy, thick yarn. I love how much texture your bowls have and they look so great together!!!
I’ve seen various textiles coated with cement, but I don’t think I ever would have thought of the thick yarn. So creative!
Oh, thank you so much for your sweet words, Diane! I had high hopes that the yarn would work, and I’m so pleased with the results!
Kim, these bowls turned out so cute! You are so creative, I would have never thought about dipping yarn in concrete! That’s genius! Pinning now!
Thank you, Donna! You are so sweet!!
This looks like a piece I might find at an expensive home decor boutique. It is beautiful! I love your creativity and how you developed the process. Pinned!
You’re so sweet, Missy! I’ve wanted to do something fun with this yarn, and this project was the perfect opportunity! Thanks of your sweet words!
Kim you certainly came up with a very clever way to make a cement planter. I’m loving the texture!! Pinning!
Thank you so much, Michelle!
Kim – Such a good idea to use chunky yarn to make these concrete bowls! They look like something from Pottery Barn. Thanks for the step by step instructions and for the tips. Your project turned out great!
Wow, thank you so much, Anna! That’s so sweet!
I never, in a million years, would’ve thought of using chunky yarn. It’s brilliant and adds amazing texture. It’s such a unique planter. Thanks for the inspiration.
Thank you so much, Kelly!! You’re so sweet!