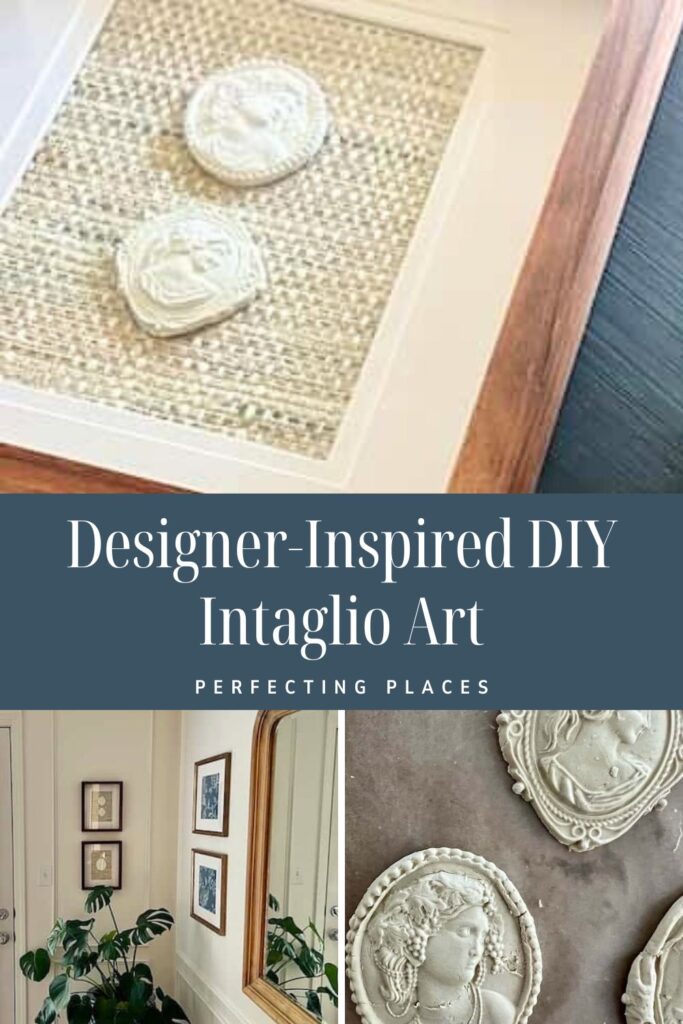
DIY Intaglios: Create Elegant Framed Art Inspired by Ballard Designs
Looking for a simple way to add a touch of classic style to your walls? I love the framed intaglio art at Ballard Designs, but not so much the price, so I decided to make my own. This DIY turned out to be both easy and budget-friendly, and now I have framed art that looks high-end for a fraction of the cost.
(This post contains affiliate links, so I may earn a small commission when you make a purchase through links on my site at no additional cost to you. As an Amazon Associate I earn from qualifying purchases.)
I love when I can make something that looks high-end for a fraction of the cost of the real thing! Over the years I’ve made my own window treatments, throw pillows, centerpieces, and other decor pieces for our home, and I really enjoy trying my hand at DIY art, too.
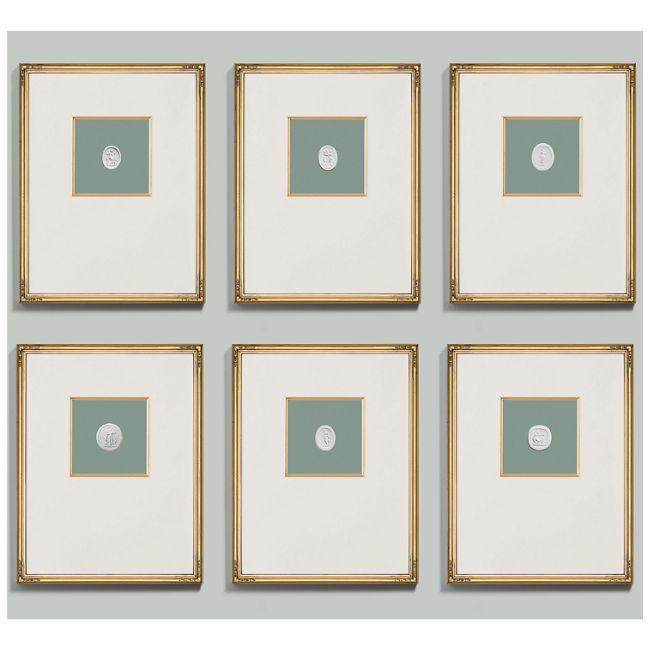
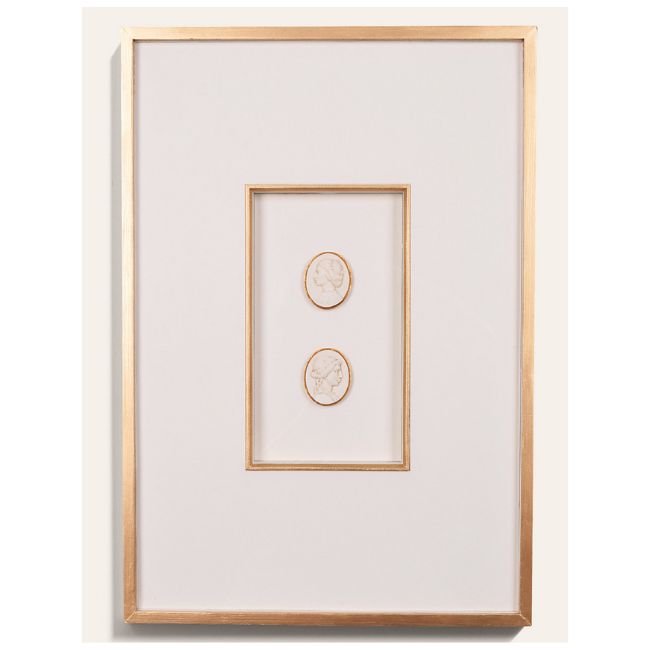
The framed intaglio art from Ballard Designs has such a classic look, but the price is definitely steep. I thought it would be fun to create my own version that captures the same timeless style.
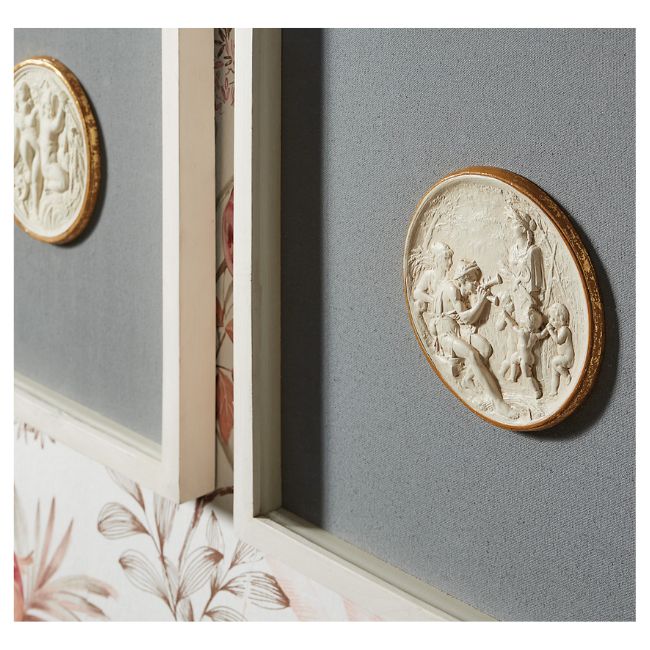
Intaglio is an Italian word that means “engrave”, and it refers to small designs carved or pressed into small stones or plaster that have been used for both decorative and practical purposes for centuries. They actually became collectible souvenirs for European travelers in the 18th and 19th centuries.
What You’ll Need to Make DIY Framed Intaglios
Here are the supplies I used to create my DIY intaglios.
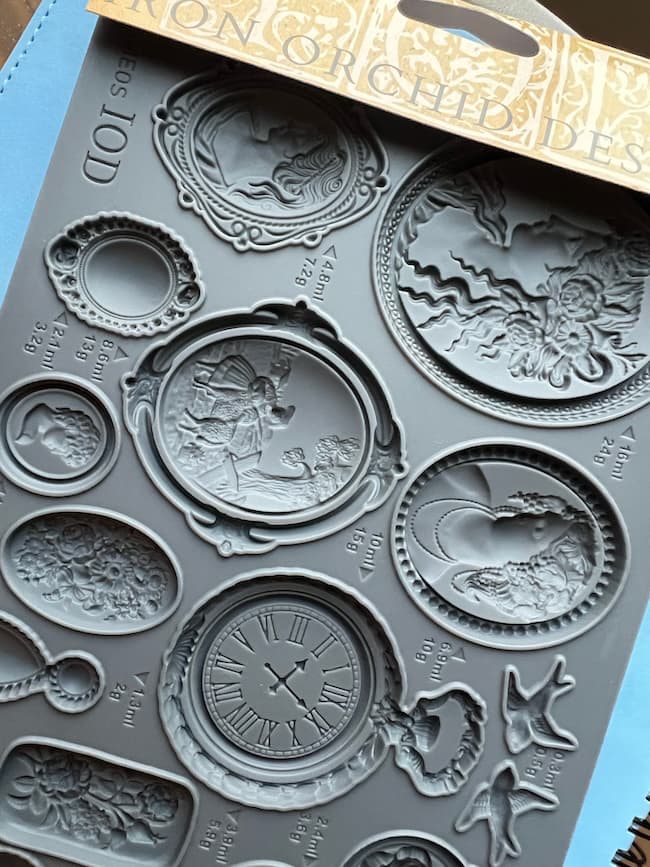
- Iron Orchid Designs Cameo Molds (or any small decorative molds)
- Air dry clay
- Cornstarch (to keep the clay from sticking to the mold)
- Acrylic roller (or rolling pin)
- Putty knife or scraper (to remove excess clay)
- Wax paper (to place the clay on to dry)
- White or off-white paint
- Small paintbrush
- Fabric pieces (to back your intaglios)
- Spray adhesive (to attach fabric to the mat)
- Hot glue gun and glue sticks
- Hot glue finger protectors
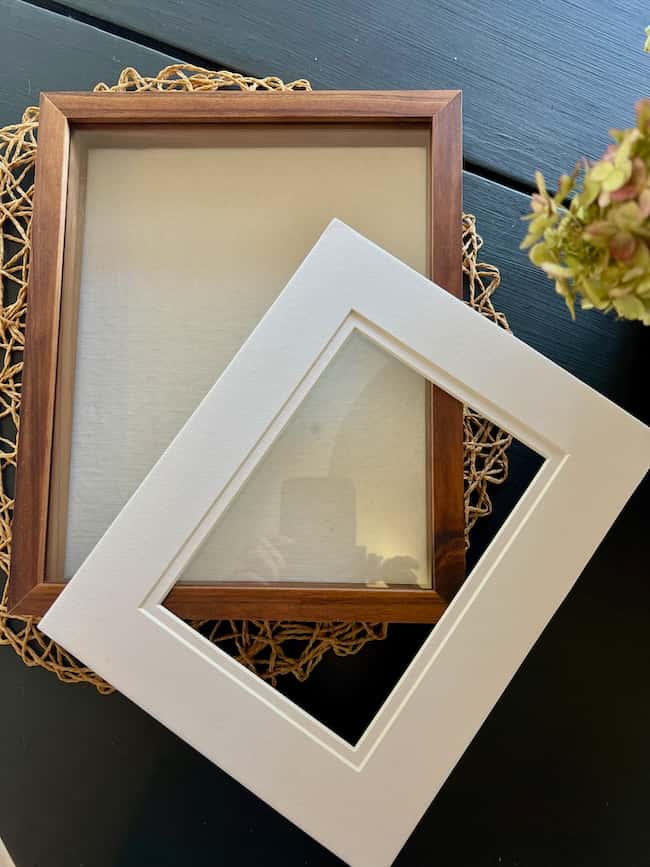
- Shadow box or frame
- Photo mats (cut to fit your frame)
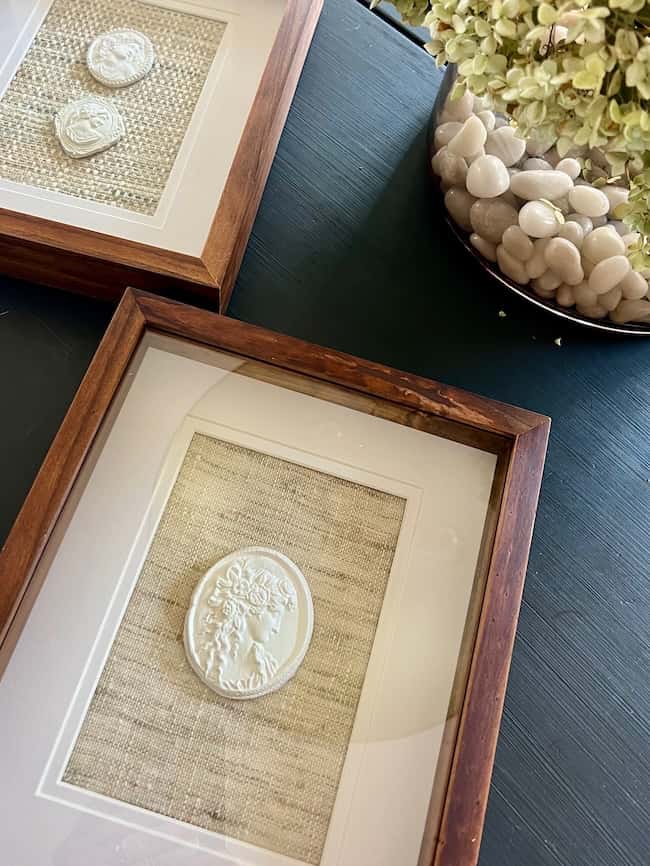
I found my shadow boxes and photo mats at my local Hobby Lobby, but you can purchase them anywhere. For my artwork, I used an 8×10 shadow box with double mats with 5×7 openings.
How to Make DIY Framed Intaglios
Step 1: Prep the molds
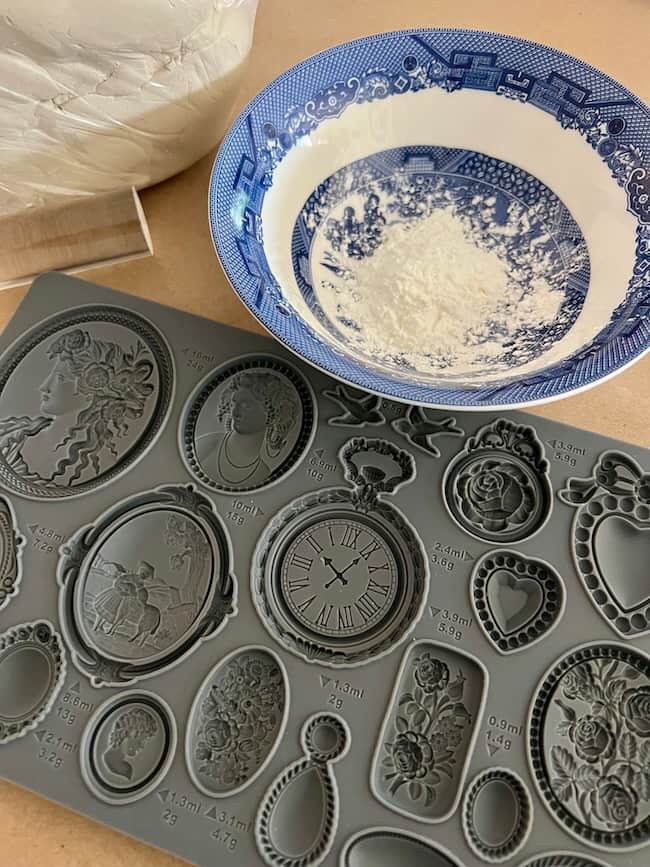
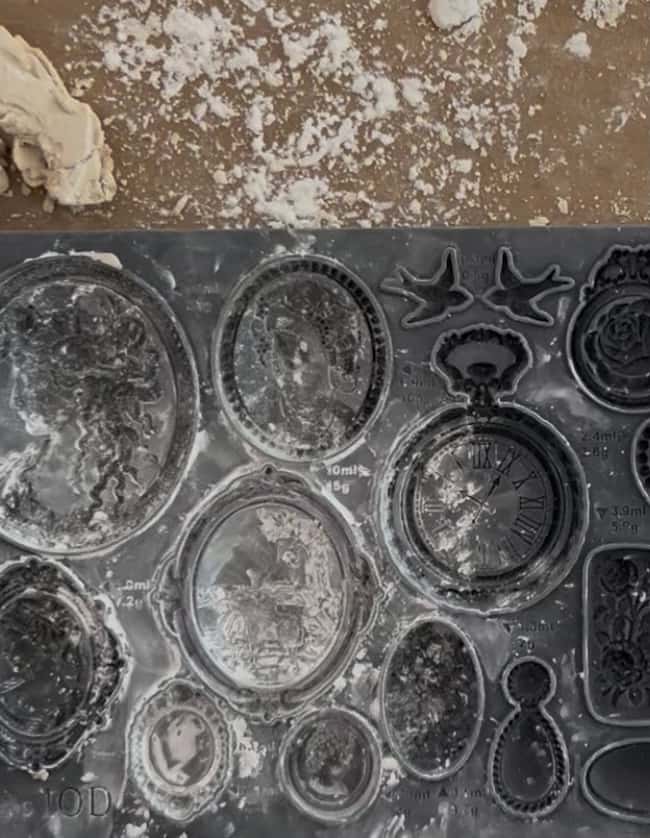
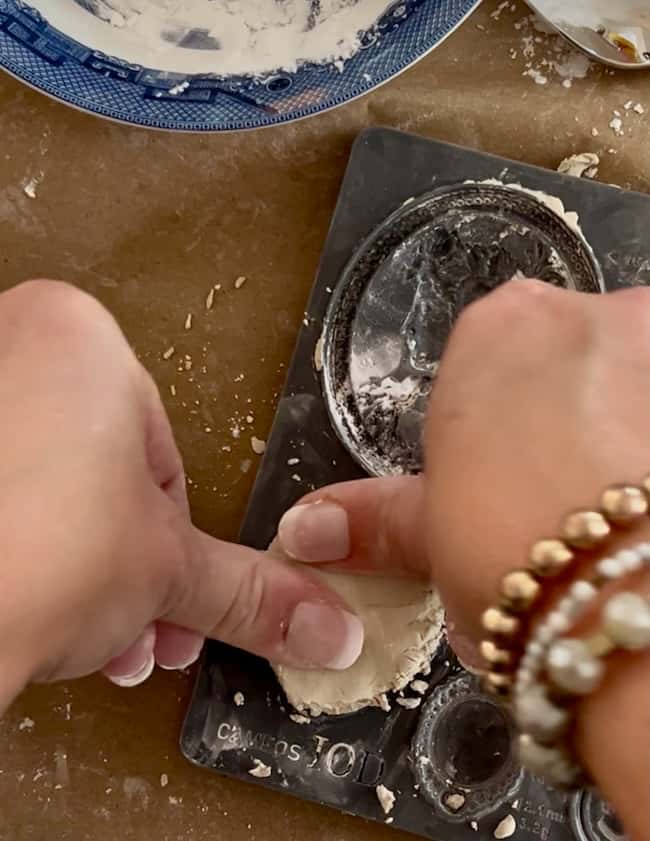
For this project I used the Iron Orchid Designs Cameo molds because the shapes reminded me so much of the framed intaglios I love. The first thing I did was dust the molds with cornstarch. I’ll tell you, it took more than I expected! At first, I tried just a light dusting, and the clay stuck. Once I added a little more and shook out the extra, the clay popped right out.
Step 2: Make the intaglios.
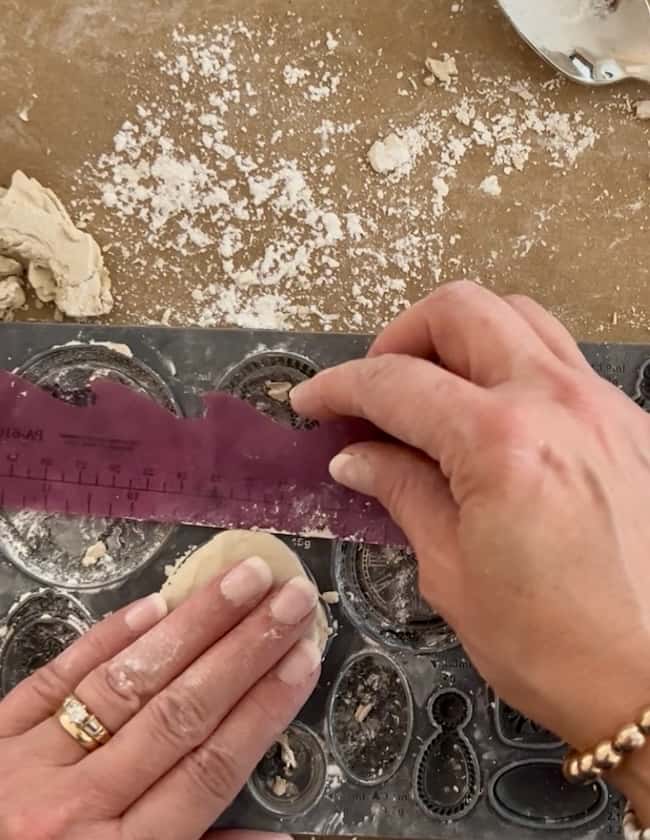
I found it really helped to use a generous amount of air-dry clay. On my first try, I scraped the back a little too close and it made the piece feel flimsy. The next time I left the clay a little thicker, and it gave the cameo more support and kept it from cracking as it dried.
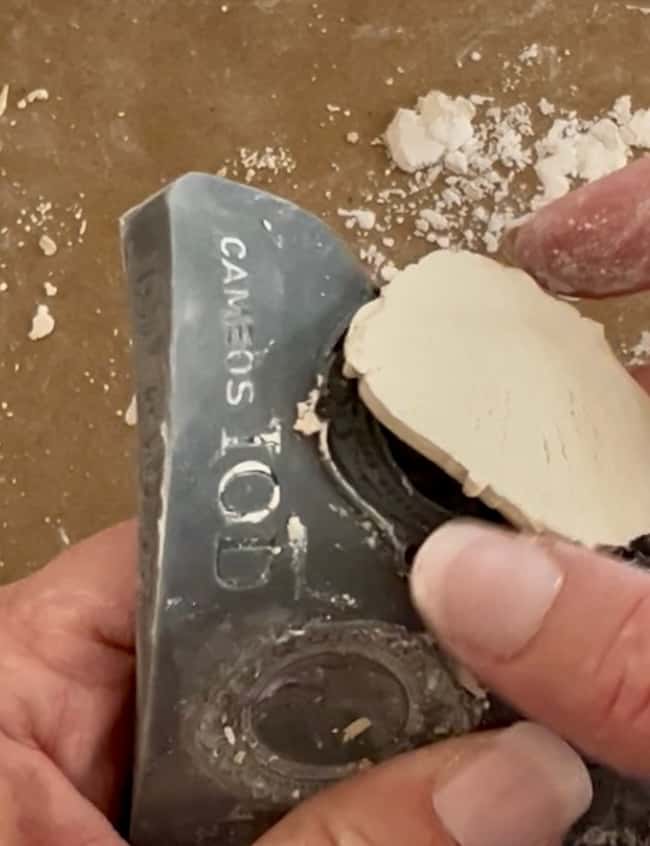
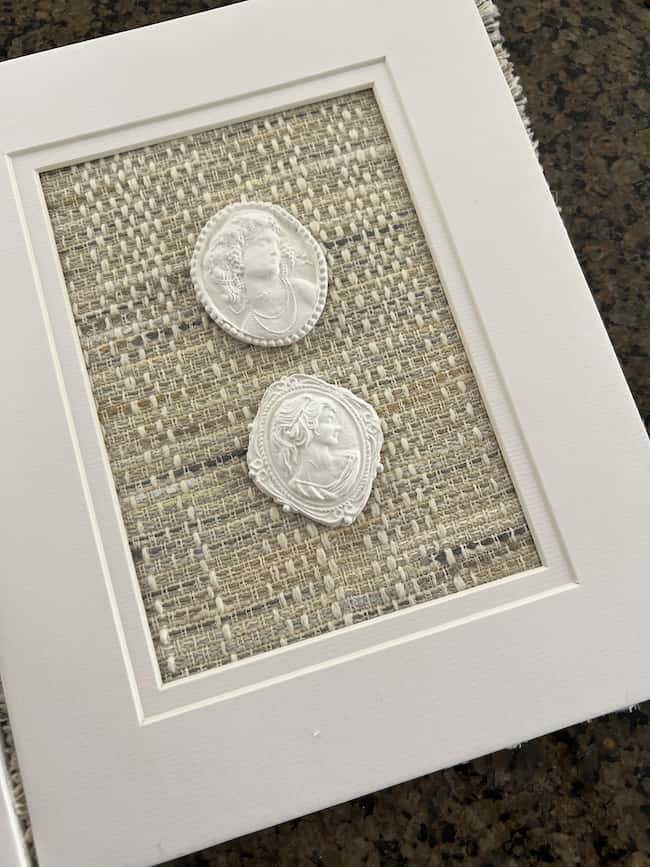
When you press the clay into the mold, make sure to press down firmly all the way around so it gets into all the details. I used different shapes and sizes from the mold — one large cameo for one frame and two smaller ones for the other. After I released them from the molds, I set them aside to dry overnight.
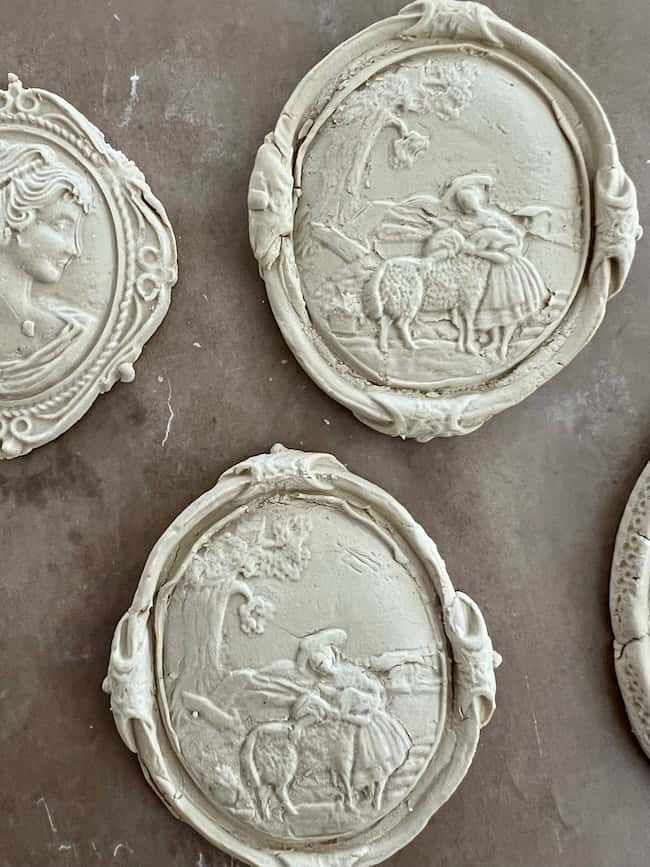
NOTE: I found this particular cameo design in the mold a little fragile. The frame with the scroll edge design was just too flimsy and broke off as the clay dries. It’s probably because I used Crayola brand air dry clay for this project because it’s what I has on hand and is very soft and pliable; however, it isn’t quite as durable as other air hardening artist clays such as this one.
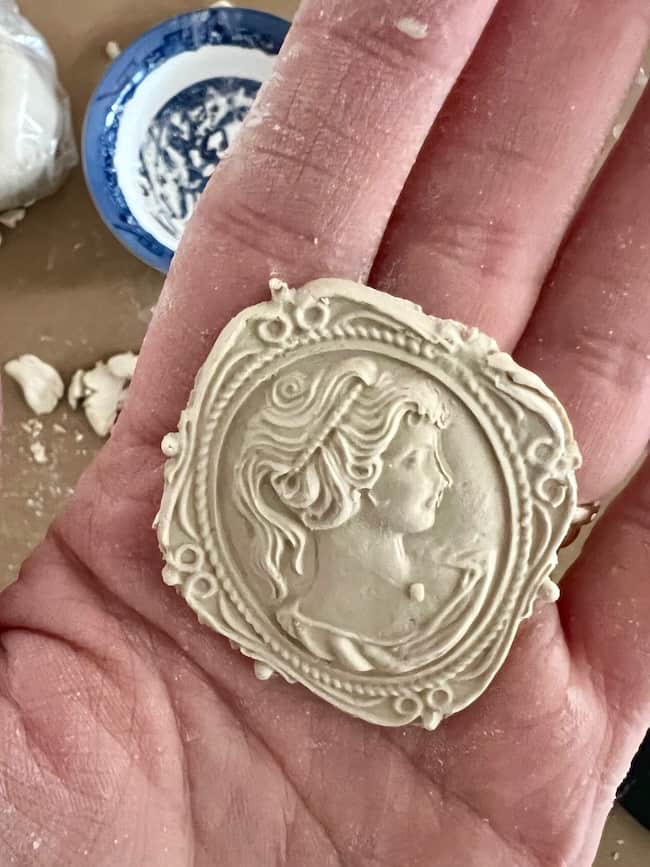
Step 3: Paint the intaglios.
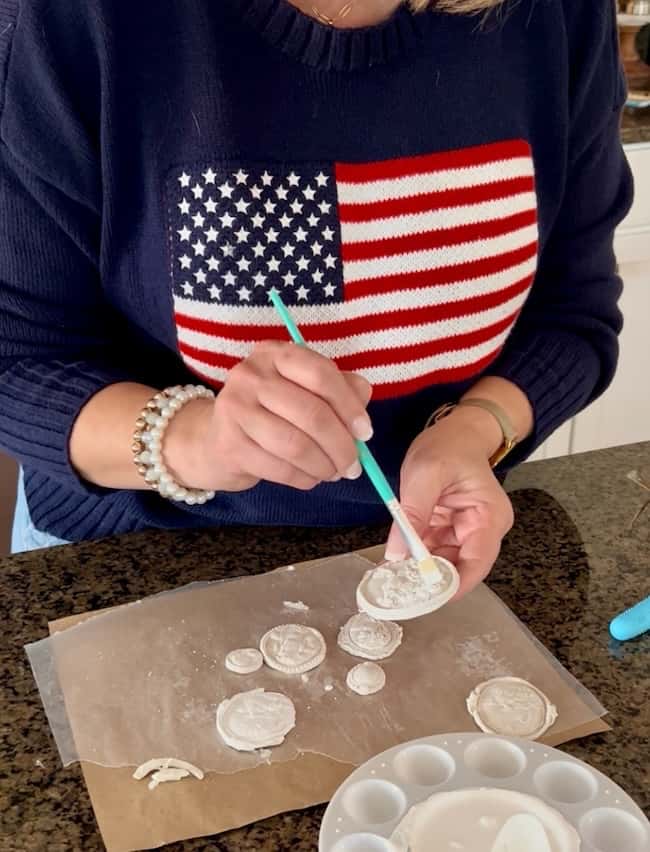
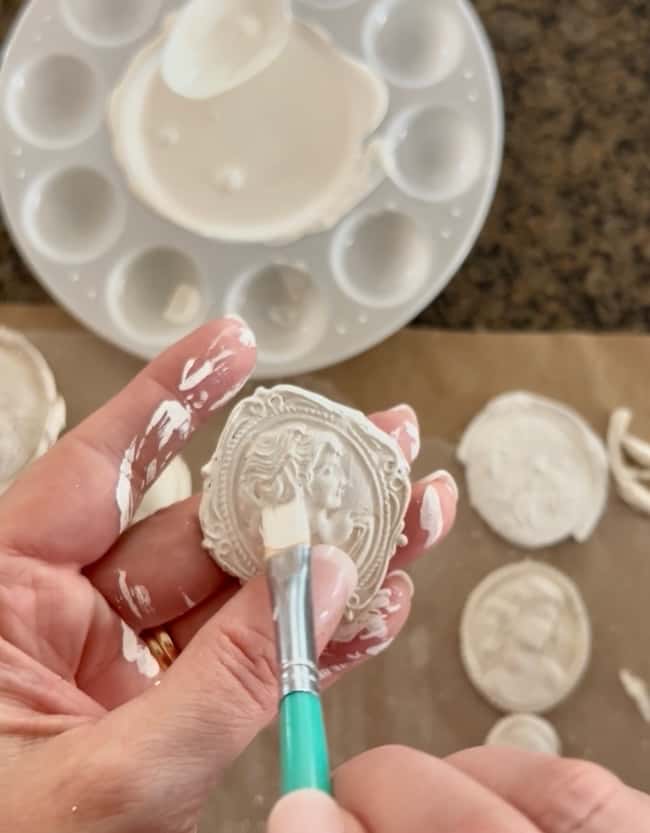
Once they were dry, I gave them a coat of creamy off-white acrylic paint. I used a small paintbrush that was firm enough to work into all the little details, but still soft enough to have some give. These molds are really detailed, so you’ll want to take your time getting the paint into all the crevices. One coat was all mine needed, and they dried quickly.
Step 4: Prepare the backing.
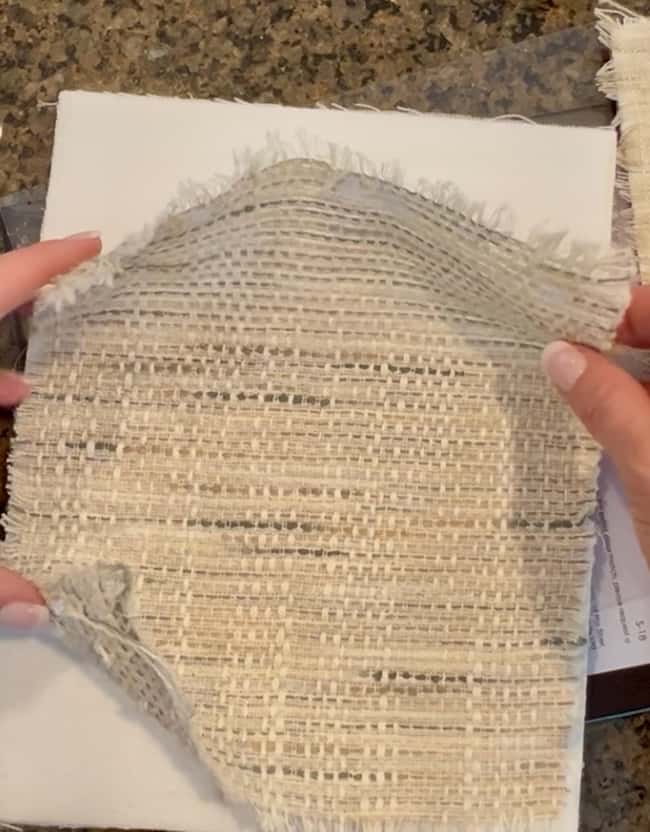
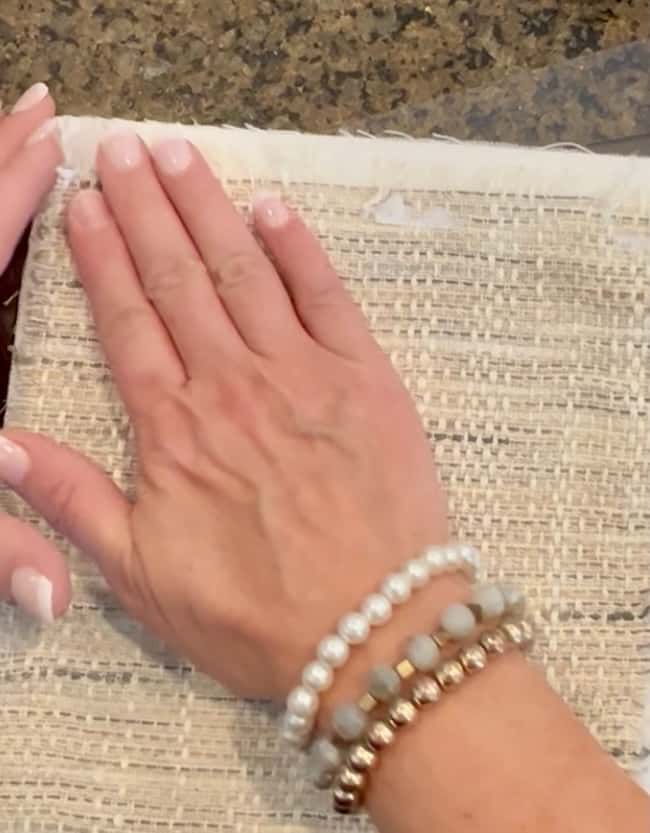
I have a lot of old fabric This part of the project was inspired by all the fabric samples I’ve saved from old fabric books. I’ve been sorting through them, and I thought they would make such a pretty backdrop for my intaglios. I ended up picking two different fabrics that coordinated, because I like the texture and variation. If you prefer the Ballard Designs look, you could use the same fabric for both, or even try wallpaper or cardstock.
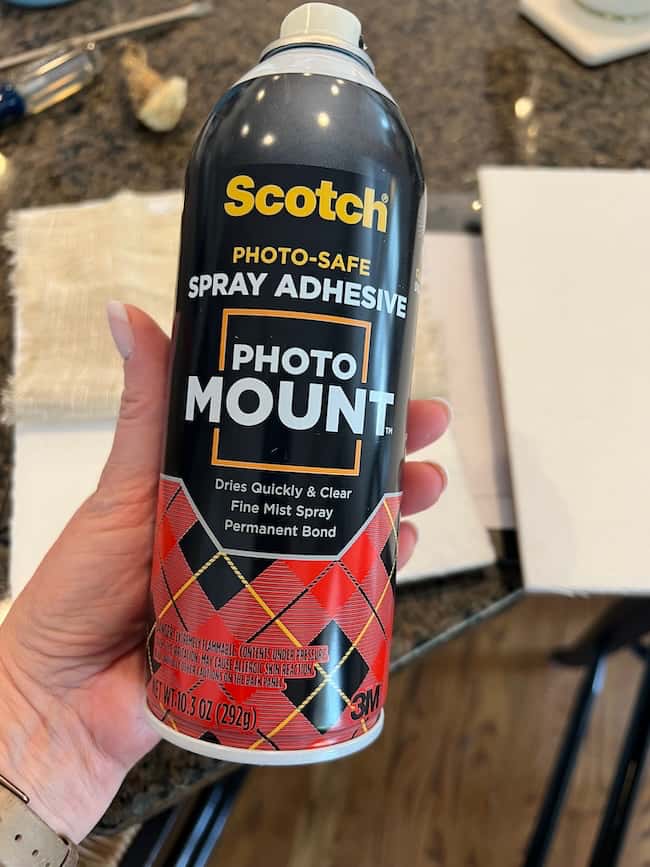
To attach the fabric, I used spray photo mounting adhesive. The trick is to spray both the back of the fabric and the shadowbox backing. That way, when you press the fabric on, it has a really secure hold for the intaglios, which do have a little weight to them. I took mine outside, gave them a quick spray, let them get tacky, and then smoothed them together.
Step 5: Add the mat.
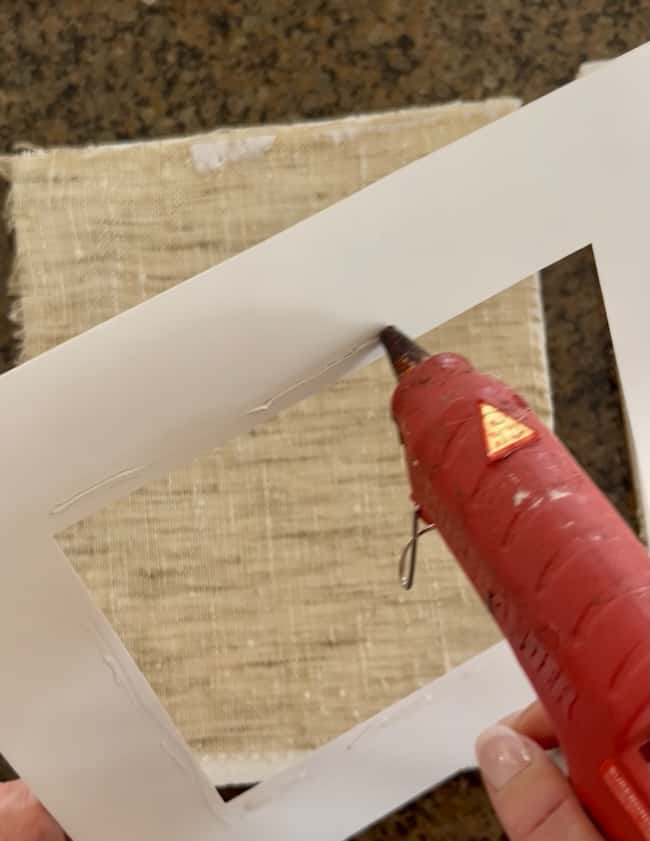
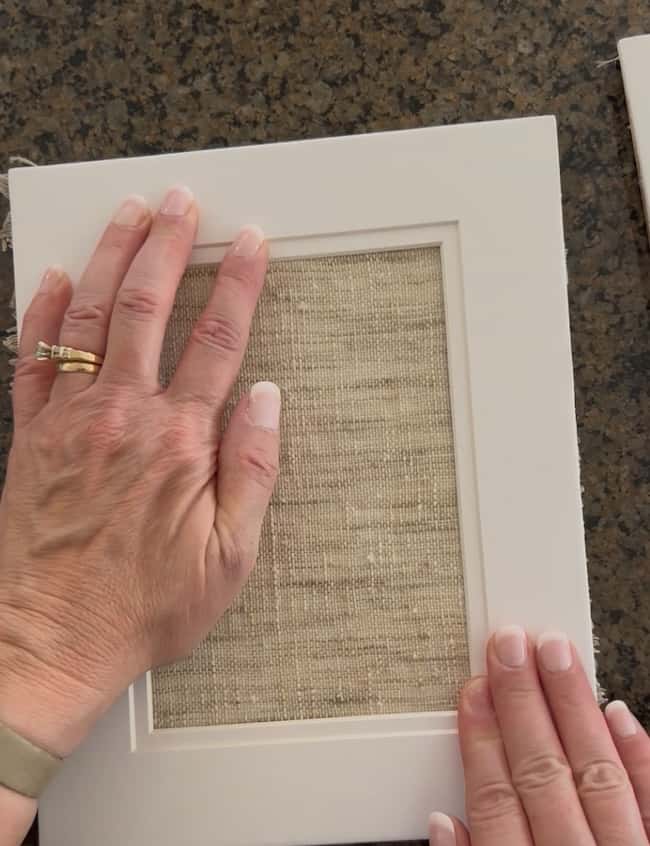
Next came the photo mat. I ran a thin bead of hot glue just inside the mat opening. You don’t want to go too close to the cut edge, or the glue might ooze out. Once the mat was in place, it really started to look like a finished piece of artwork.
Step 6: Attach the intaglios.
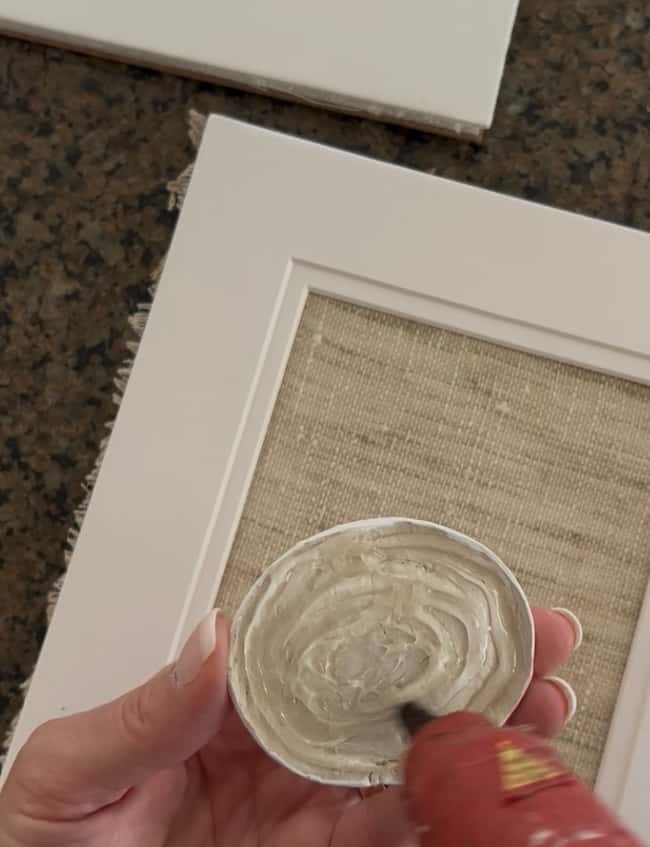
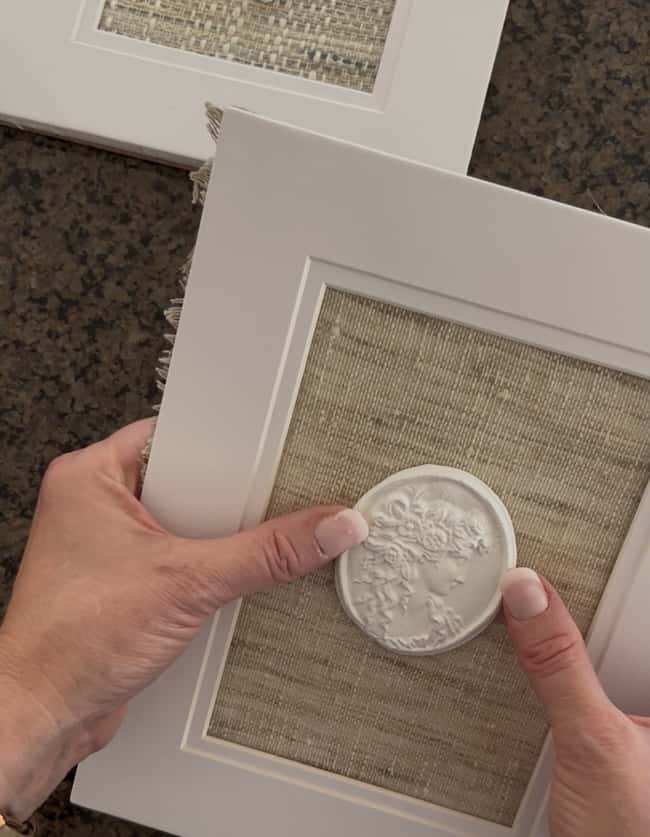
Now for the fun part! I added a generous amount of hot glue to the back of each intaglio and pressed it gently but firmly onto the fabric backing. Be careful not to press too hard — the clay is sturdy, but you don’t want to risk cracking it.
Step 7: Frame and finish your artwork.
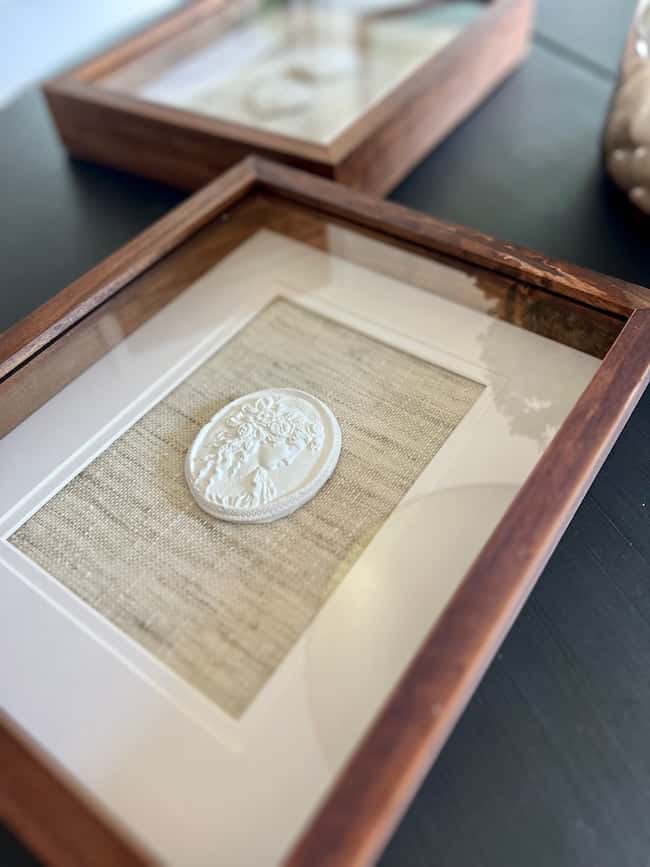
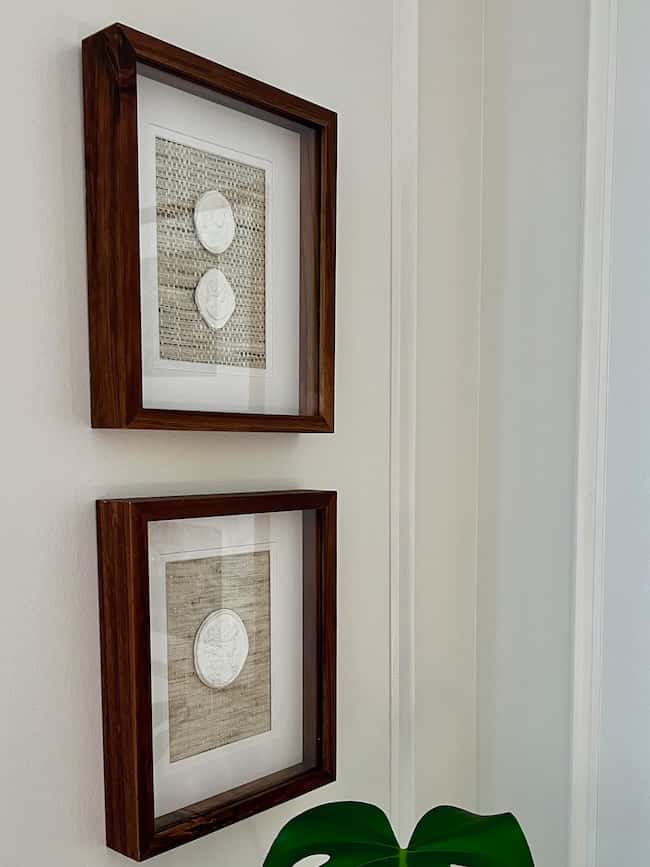
Finally, I placed everything back into the shadowbox and secured the back. That’s it! I love how they turned out — two completely different but coordinating pieces that have that timeless Ballard Designs look, without the steep price tag.
Tips for Styling Your DIY Intaglios
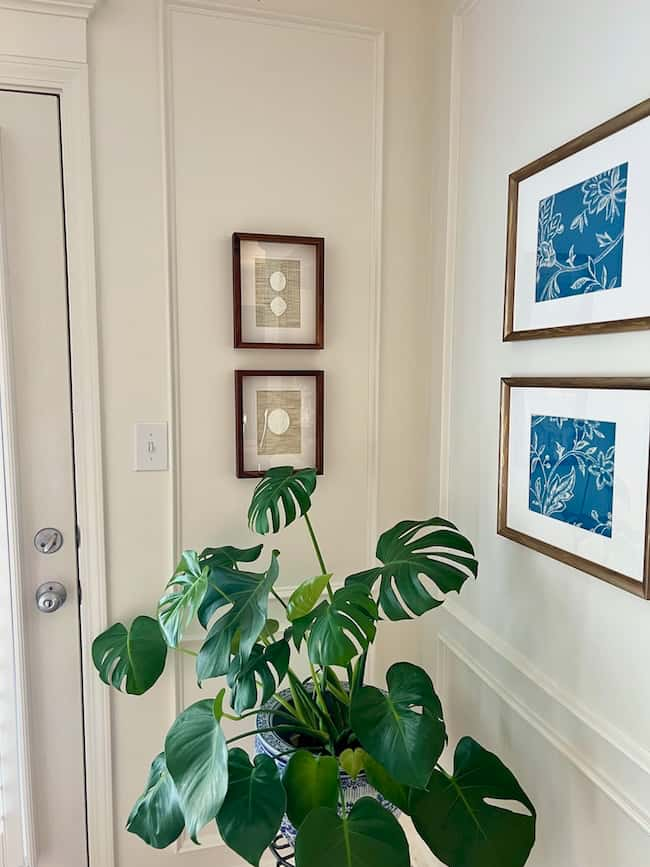
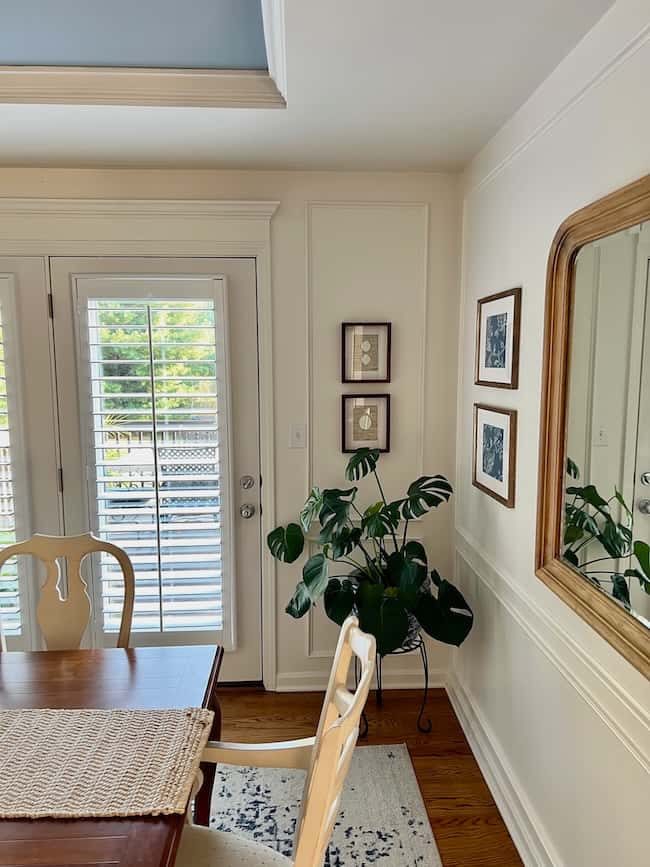
- Hang them as a pair: Small artwork looks especially pretty when hung together. Try stacking two vertically in a narrow spot, like beside a doorway or a window.
- Layer on a mantel or shelf: Lean your framed intaglios against the wall and layer them with other art or decor for a collected look.
- Use them in a gallery wall: Mix your intaglios in with larger prints, mirrors, or photographs to add variety and texture.
- Style them on a console table: Smaller framed pieces can be propped up on a console or sideboard and styled with lamps, books, or vases.
- Add them in a bedroom or bathroom: Their classic, serene look makes them perfect for more intimate spaces where you might want smaller-scale artwork.
I love how these DIY intaglios turned out, and it makes me so happy to have created a designer-inspired look on a budget. If you’ve been eyeing the Ballard Designs intaglios, I hope this project inspires you to try making your own. It’s such a fun and creative way to add a touch of timeless style to your home.
Be sure to let me know if you try it!
Happy Decorating!

Great idea and I love your version of intaglios!
A hint is after putting your air dry clay in the cornstarch dusted molds, stick them in the freezer for about 15 minutes. They clay should pop right out.
What a great tip! I will definitely give that a try. Thank you so much for sharing and for being here!