The Best Tips for How to Stencil Walls in Your Bathroom – ORC Week 6
The wall stenciling in the bathroom is almost complete, and today I’m sharing my best tips I’ve learned for how to stencil walls in your bathroom.
Thanks so much for stopping by to check out this week’s update for my One Room Challenge bathroom makeover! Wow! The time is going by so fast! I can’t believe it’s Week 6!
Progress was delayed a few days last week after my ladder “incident”. My shoulder needed a little time to recover after my fun little fall. I’m so pleased to report that nothing was broken or torn, and I’ve regained full range of motion. So, this week I’ve been back at the stenciling process, and it’s almost finished!
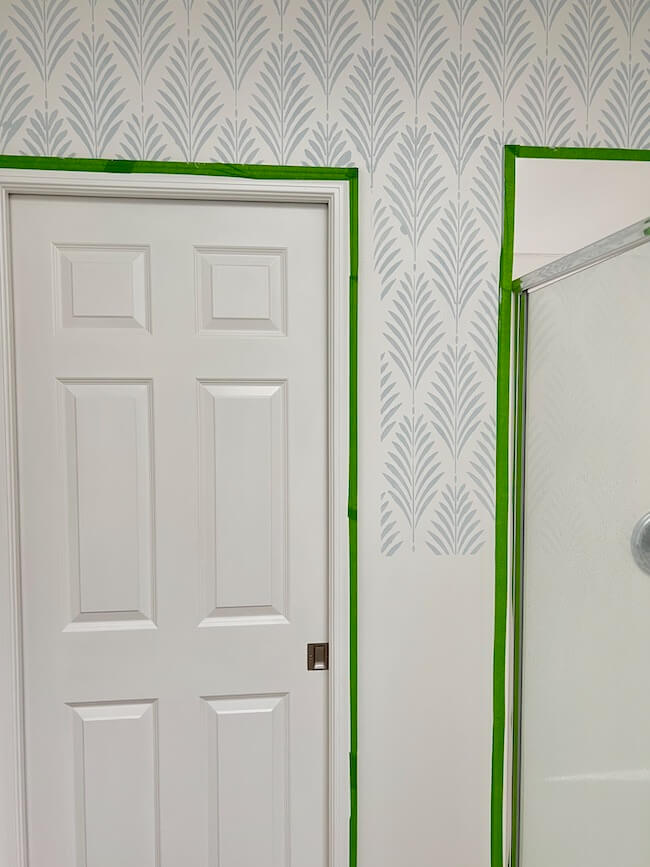
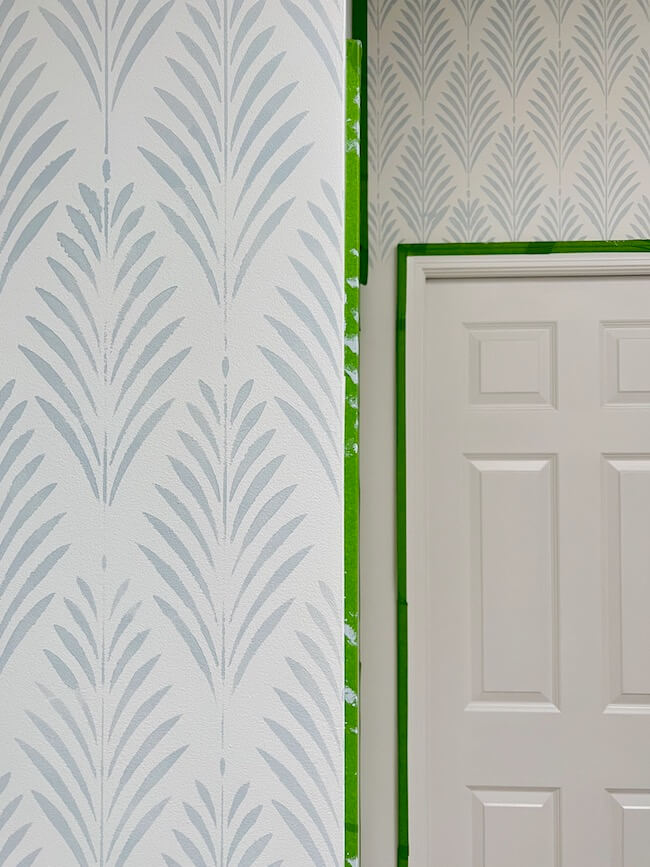
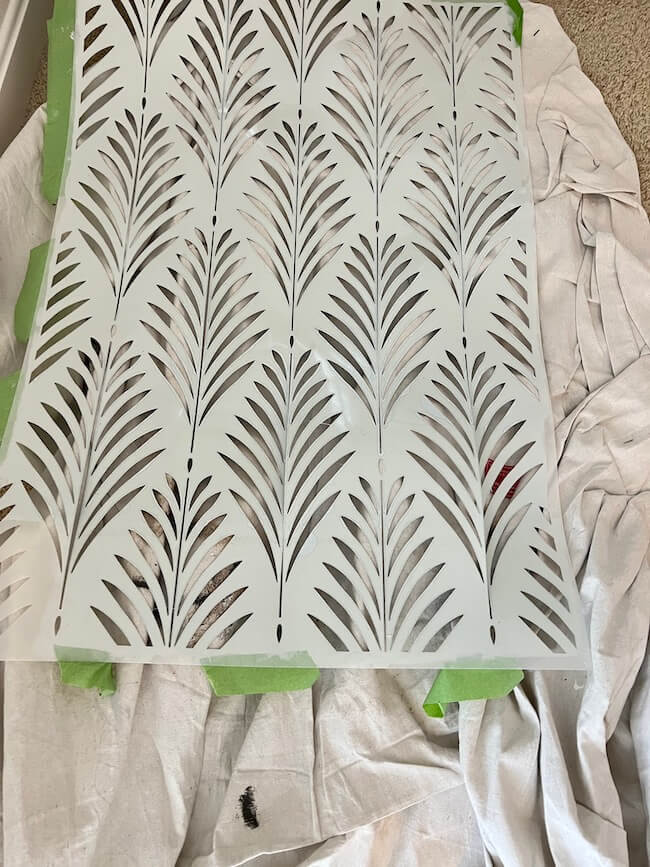
I wish I could report that I’ve made progress beyond the walls, but if you’ve ever stenciled walls then you know it’s a very slow process that requires plenty of patience. Tackling a bathroom is especially slow-going because of all the corners and edges you have to work around. I’ve certainly learned several things about how to stencil walls through this process!! You can read all about the steps in this wall stenciling process along with sources for the products I used in my Week 4 ORC update!
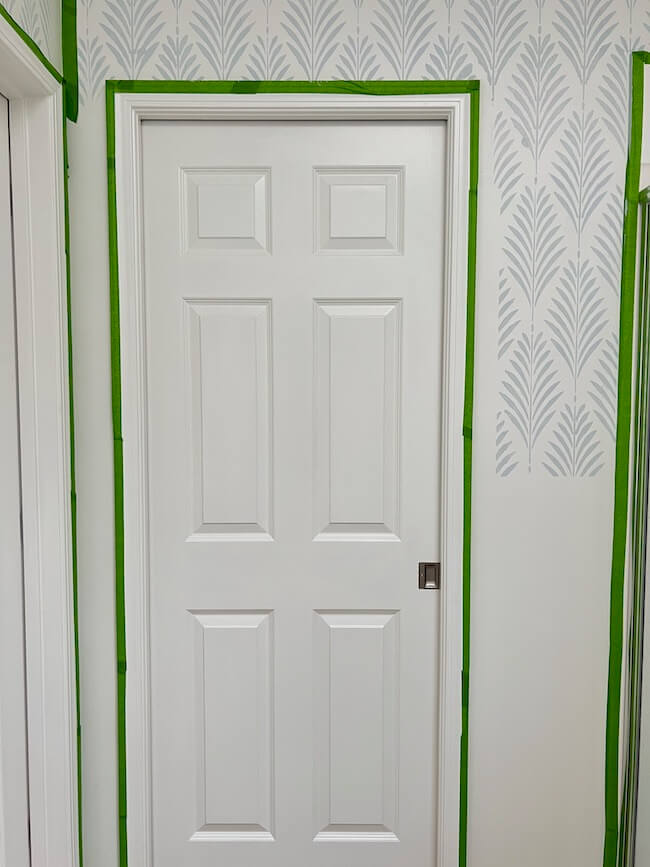
But, I’m really pleased with the end result, and I know I’m going to enjoy it once it’s finished. When I rounded the corner toward the mirror wall I really got a sense of how pretty it’s going to be.
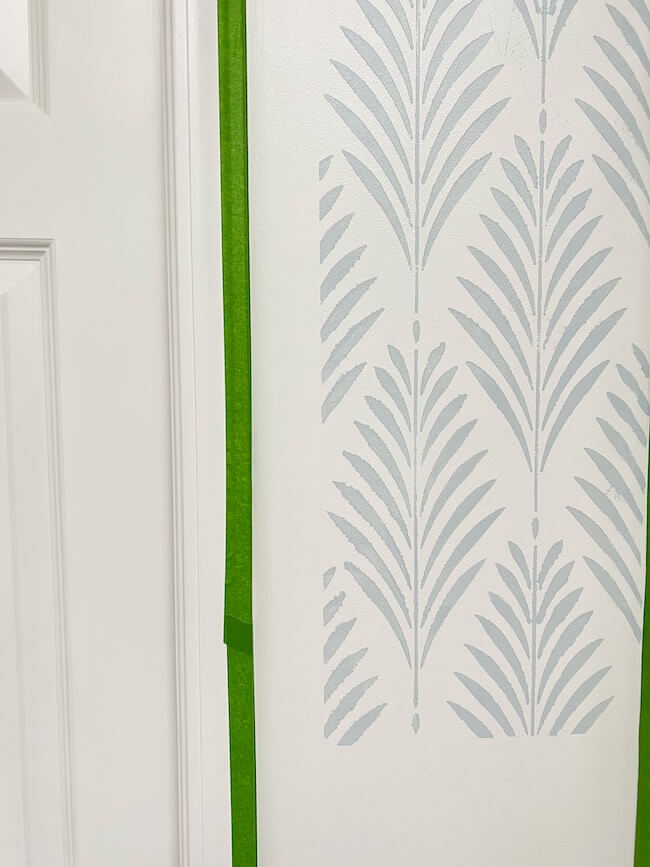
I still need to stencil in some of the corner sections and along some edges. I wanted to complete all of the large areas using the large stencil before finishing these tedious sections which will require cutting the stencil into more manageable sizes.
I also need to do some touch-ups where the paint bled a little under the stencil.
Here are some handy tips I’ve learned throughout this process for how to stencil walls in a bathroom:
1. Be patient. It’s a tedious process working around all those corners. Take your time and enjoy the process.
2. Give yourself grace! This is not the time for perfectionism. Embrace the beauty of some less-than-perfect corner sections or paint mishaps. It’s just paint, and can be easily painted over and touched up again. The overall effect is beautiful and you won’t notice those small imperfections.
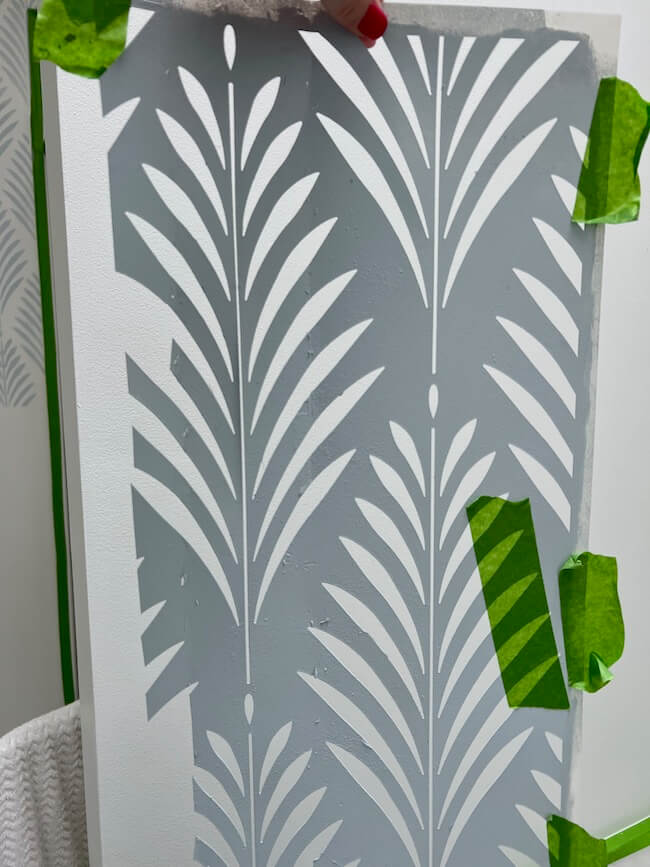
3. Buy an extra stencil (or two). The second stencil can be used to cut apart into smaller sections to stencil hard to reach areas and tricky corner connections.
4. Start in a central location and work around the room in both directions from this starting point, alternating sides as you go. This allows the paint to dry between each stencil application. While the paint is drying on one side, you can complete the other side.
5. Use stencil adhesive spray!! This is a must! It’s repositionable and works wonders.
6. Wear gloves to cut down on the hand and fingernail cleanup.
7. Use a small level to square up your stencils. This is particularly important at the beginning and as you round corners.
8. If using a ladder, be VERY careful!! Trust me!
9. A broad knife and spackling tool are critical for getting the stencil into corners and along edges.
10. Use a paint roller for the large areas, but switch to a small stencil brush along tricky corners and edges.
11. Stay strong. Stay focused. Stay the course. You’ve got this! You can do it! You’re amazing for taking on this project!!
On to the next thing …
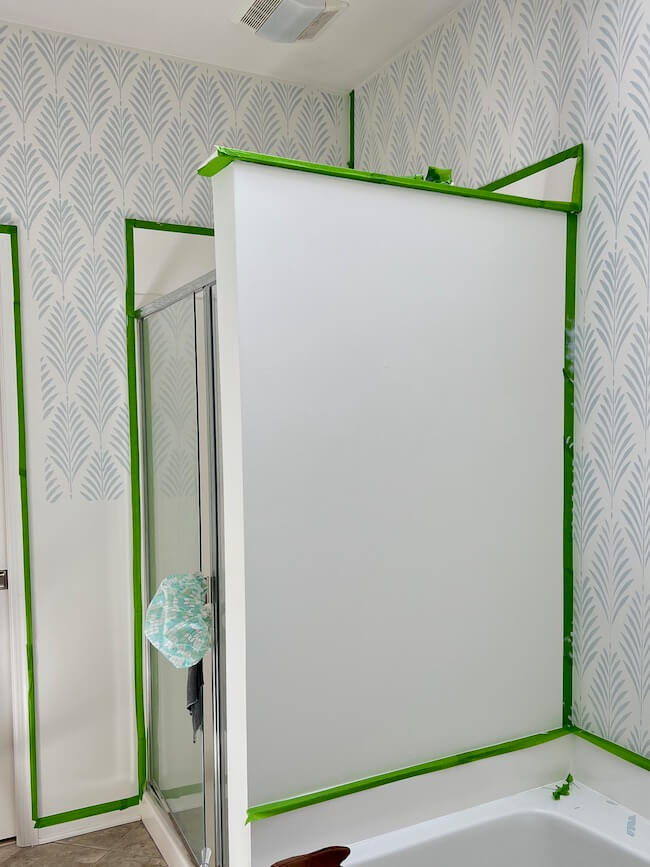
We’ve decided to trim out the shower wall above the tub. It just seems like a little too much pattern to wrap the stencil pattern there. I think the millwork will be a really pretty touch to the room. Jeff will help me with the trim project this weekend. We’re leaning toward doing a boxed molding look for that small wall.
We also will add a small crown piece around the ceiling to cover the gap in pattern at the top of each wall.
Plans for the Floors:
The rest of this week I’ll shift my focus to the floors and start the process of painting the checkerboard pattern once Jeff finishes with the trim work. There are no ladders involved in the process of painting the floor (and I will remain with feet planted firmly on the ground), so I have high hopes that I will remain all in one piece with all body parts in working order! Wish me luck!!
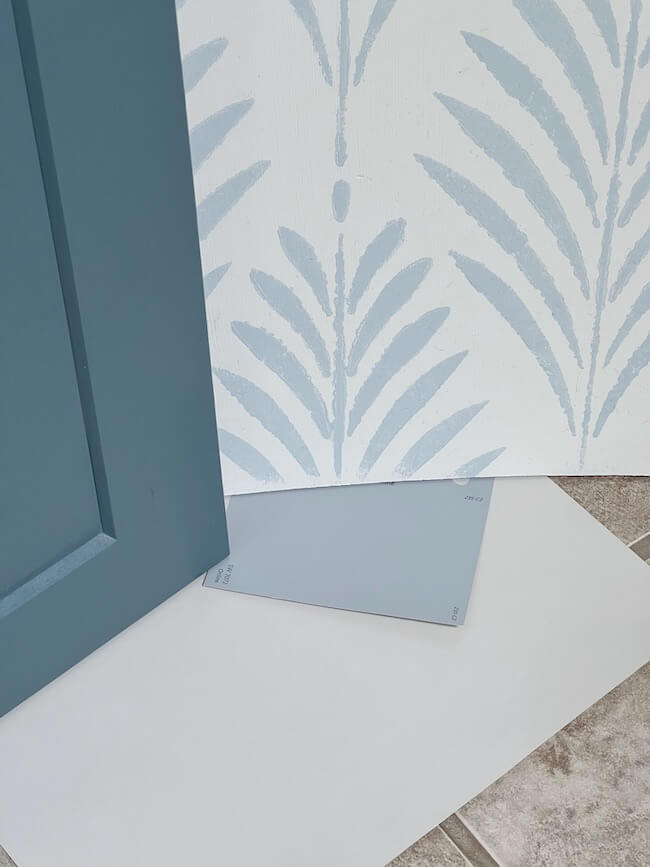
I’ve decided on the paint colors for the floor. I debated about keeping it neutral or leaning toward a little blue. I don’t want to just duplicate the paint colors that I’m using on the wall, but rather create a look of carefully selected tile to coordinate. I’m using Sherwin-Williams Online (SW 7072) and Agreeable Gray (SW 7029).
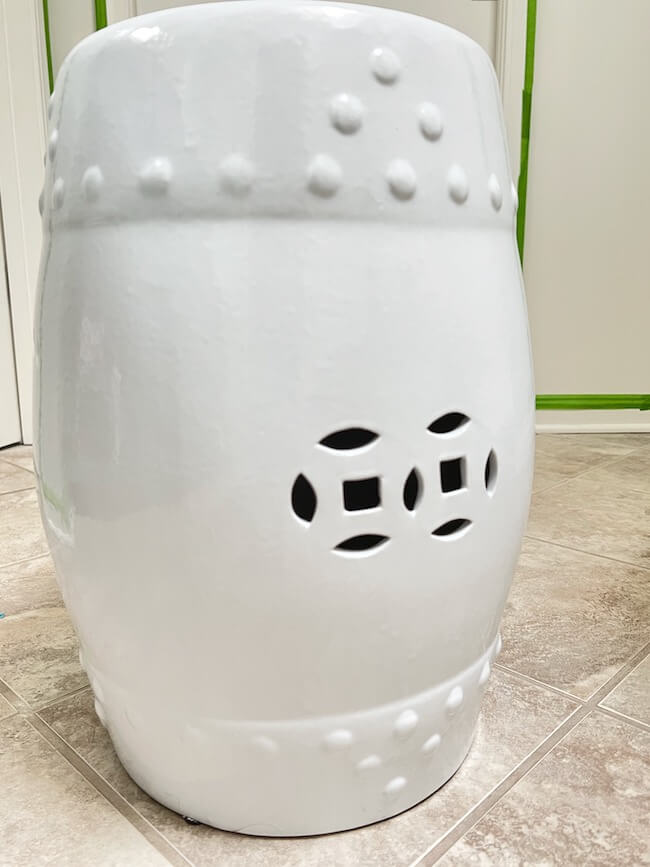
I did receive a beautiful Mother’s Day gift that I plan to incorporate in the bathroom design. This pretty garden stool will be the perfect addition to the little corner between the tub and shower stall.
So, that’s it for this week’s update. Hopefully, next week I will have lots of wonderful progress to report!!
Thanks so much for stopping by this week to check on our progress with the One Room Challenge! Be sure to check out the other participants’ ORC Week 6 updates at the link below!!

Be sure to check out my previous One Room Challenge updates!

Hi! What is the blue paint color you’re using for the stencil? And what was your base paint color. Thanks!
Hi Victoria! The blue paint color is Sherwin-Williams Lullaby (SW 9136), and the base color is Sherwin-Williams Alabaster (SW 7008).
Love the stenciled bathroom. could you please tell me where you got the stencil and the beautiful floor runner as well? Thanks sooooo much!
Great stenciling job!